
Manual

INSTALLATION INSTRUCTIONS
for Custom and Premium Pocket Windows (JII022)
GLOSSARY
Backer Rod (backing material)
A material (e.g. foam rod), placed into a joint primarily to control the
depth of the sealant.
Butt Joint
The joint of two square edges united without overlapping.
Check Rail
In a double-hung window, the bottom rail of the upper sash (upper
checkrail) and the upper rail of the lower sash, where the lock is
mounted (lower checkrail).
Clad
Pre-painted formed metal covering the exterior surface(s) of some
wood windows.
Double-Hung Window Balance System
A system of ropes and pulleys (older) or springs (newer) used to
counter-balance the weight of a sash.
Miter Joint
Joint made by joining two parts with 45° angles, to form a corner at a 90° angle.
Pilot Hole
A drilled hole that is no larger than the body of the screw (minus the
threads).
Sash
An assembly comprised of stiles (vertical pieces), rails (horizontal pieces)
and the window’s glass.
Transom
Typically a xed/picture window mounted above another window or door.
Read these installation instructions thoroughly before beginning. They
are designed to work in most existing applications. However, existing
conditions may require changes to these instructions. If changes are
needed, they are made at the installer’s risk. For installations other than
indicated in these instructions, contact a building professional.
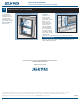
Thank you for selecting JELD-WEN products. Attached are
JELD-WEN’s recommended installation instructions for pocket
(replacement) double-hung, casement, awning, picture or transom
windows, designed to be installed into an existing window frame.
Pocket windows may be installed from either the exterior or
interior. Exterior detail work is needed in both installation types.
Not all windows can be installed into every wall condition in all areas.
Consult your local building department for applicable building codes
and regulations (particularly regarding minimum egress requirements).
Local building code requirements supersede recommended installation
instructions.
The installation of a pocket window will not eliminate installation or
maintenance problems with an existing window. Problems such as wood
decay and water leaks around the existing frame must be investigated
and xed prior to installing a pocket window.
Please Note! Installation such that the window sill is higher than 35
feet above ground level or any window installation into a condition
not specically addressed in these instructions must be designed by an
architect or structural engineer.
Failure to install into a square, level and plumb condition could result in
denial of warranty claims for operational or performance problems.
Note to Installer: Provide a copy of these instructions to the building
owner.
By installing this product, you acknowledge the terms and conditions of
the limited product warranty as part of the terms of the sale.
The exterior trim (casing) around the existing window opening may
be painted a color of your choice. However, optional color matched
cladding to cover this trim is available for purchase and professional
installation. Discuss with your dealer.
IMPORTANT INFORMATION AND GLOSSARY
SAFETY
• Read and fully understand ALL manufacturers’ instructions before
beginning.
• Do not work alone. Two or more people are required. Use safe lifting
techniques.
• Use caution when handling glass. Broken or cracked glass can cause
serious injury.
• Wear protective gear (e.g. safety glasses, gloves, ear protection, etc.).
• Operate hand/power tools safely and follow manufacturer’s operating
instructions.
• Use caution when working at elevated heights.
SAFETY AND HANDLING
• Windows in older homes may be painted with lead-based paint. Take
precautions to minimize exposure to lead-based paints if removal
of existing sashes disturbs the paint. Your regional EPA (www.epa.
gov/lead) or Consumer Product Safety Commission ofces provide
information regarding regulations and lead protection.
IF INJURY OCCURS, IMMEDIATELY SEEK MEDICAL ATTENTION!
WINDOW HANDLING
• Handle in vertical position; do not carry at or drag on oor.
• Store window in dry, well-ventilated area in vertical, leaning position;
do not stack horizontally.
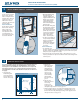
Estimated Install
Time for New
Construction
First Time: 4.0 hr.
Experienced: 2.5 hr.
Professional: 1.5 hr.
12
6
1
11
2
10
3
9
8 4
7 5