
Operating Guide


PRODUCT GUIDE
Vinyl Horizontal Sliding/Rolling Windows (JPG007)
3
LOCK REPLACEMENT & ADJUSTMENT
Different lock styles were used during different periods of manufacture.
Each window will have either a cam lock, WEN-Lock
TM
, or MAG-Lock
TM
.
Replacethelockifitisbroken;adjustthekeeperifapplicable.A
camlockandaWEN-Lockwithasmoothtopdonothaveadjustable
keepers. A Wen-Lock with visible screws on the top does have an
adjustablekeeper.
There is a metal stiffener in each sash. To avoid disturbing the location
of the stiffener, the sash must be removed and the lock stile kept
horizontal before and during lock removal and installation.
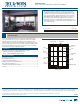
CAM LOCK
REPLACEMENT
1.Unscrewand
remove old lock and
keeper.
2. Install new lock and
keeper in the same
place.
WEN-Lock
REPLACEMENT
1.Ifscrewsarenot
visible, grip top of
lock and snap it
off to expose the
screws holding the
lock on the unit.
2. Unscrew and
remove.
3.Installnewlockin
the same place.
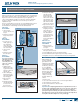
MAG-Lock
REPLACEMENT
Note! Any sash that is
taller than 56 3/4" will
have the MAG-Lock
screwed in place. For
sashes 32" or shorter,
skip to step 6.
1.Slightlyliftthe
handle and create
a gap between the
left side of the lock
and the sash.
2. Slide a thin putty
knife into this gap
and rotate until the
clip disengages.
3.Repeatforthe
other side.
4. Pull the faceplate
out and then down
to release it from
the lower clips.
5.Removethescrews.
HARDWARE REPLACEMENT & ADJUSTMENT
Cam Lock
WEN-Lock
MAG-Lock
6.Pulluponthehandle
and slide a putty
knife into the gap
between the sash
and lock on one side.
The putty knife will
depressaprojecting
tab on the lock and
allow it to be slid out.
7. Repeat for the other
side and remove lock.
8.Installnewlockby
snapping it into the
sash in the same
position as the old
lock. Reinstall the
screws if they were
previously removed.
Install the new
keeperandadjustas
necessary.
WEN-Lock and
MAG-Lock KEEPER
ADJUSTMENT
1.Removesashfor
unobstructed access
to keeper.
2. Loosen both screws
in keeper (do not remove).
3.FortheWEN-Lock,raisekeeperandinsertshim.
4. For the MAG-Lock, the keeper may be moved up or down.
5.Retightenscrews,closeandlockwindowandtestnewalignment.
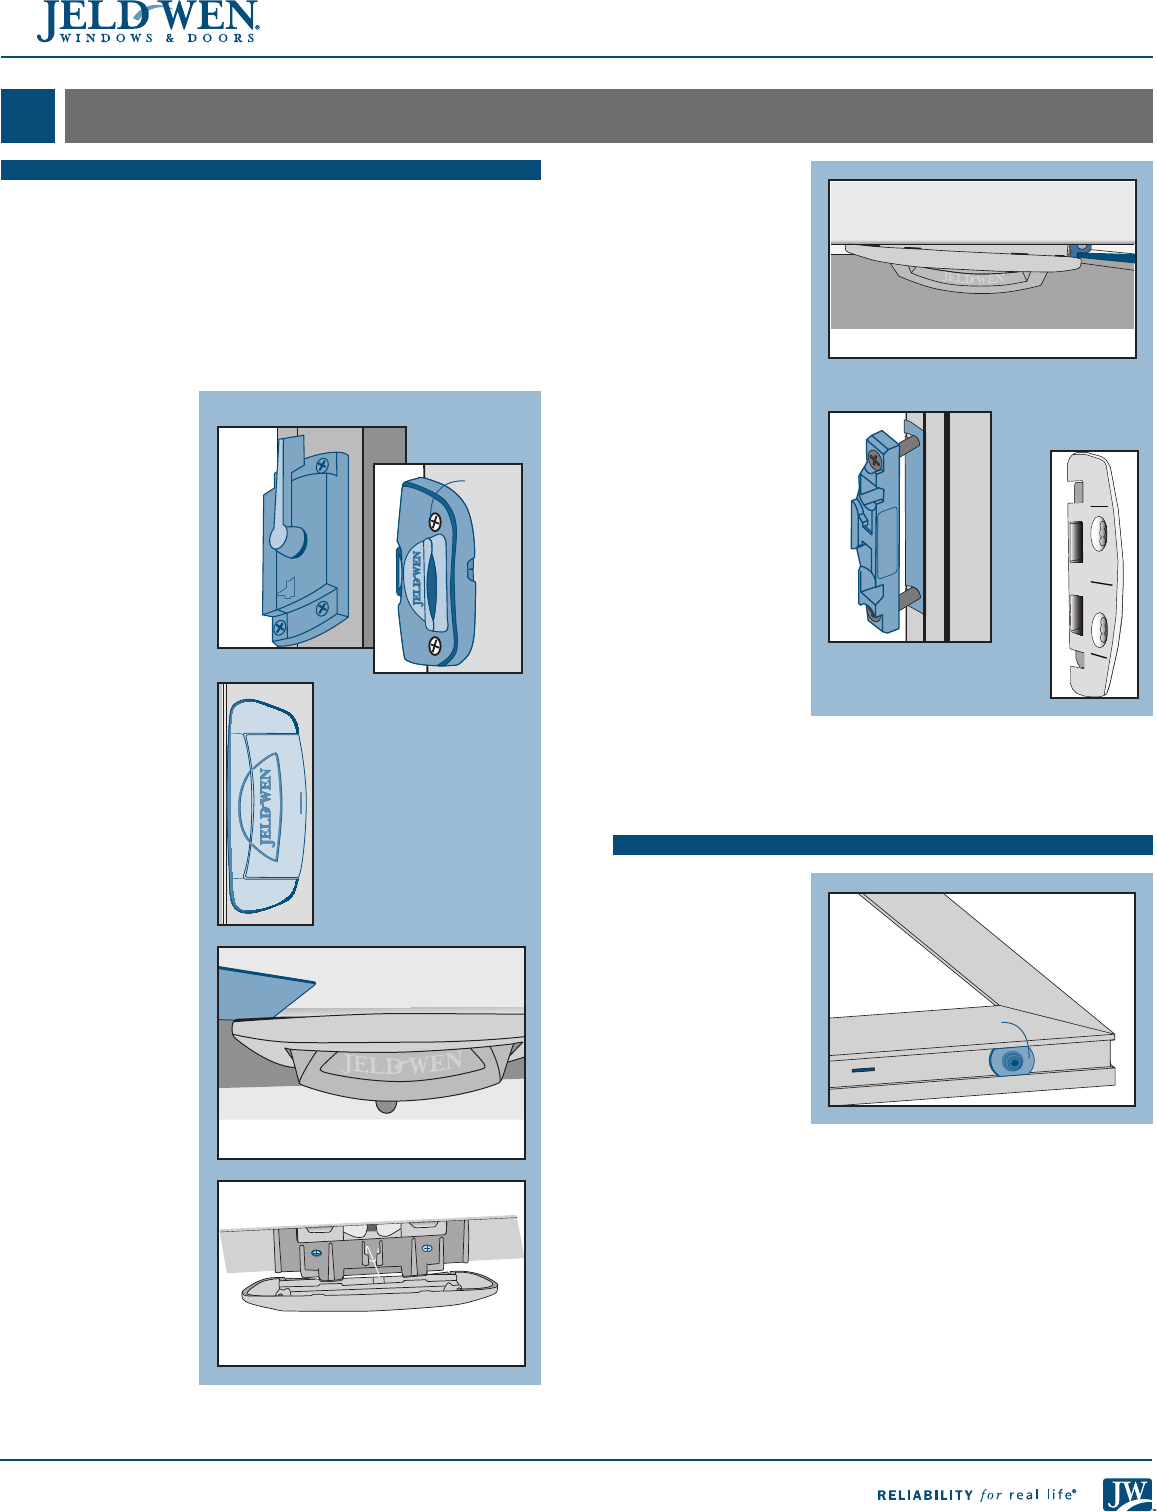
GLIDE BUTTON ADJUSTMENT
Many windows do
nothaveadjustable
glide buttons. This
adjustmentonlyapplies
to glide buttons with
an Allen key, all others
arenotadjustable
(some windows use
rollers instead of glide
buttons; these rollers
arenotadjustable).
Adjustthesashby
raising or lowering
the glide buttons as
follows.
1.Removesash.
2.Usea5/32"Allenwrenchtoraiseorlowertheglidebutton.
3.Turnclockwisetolowerthesash.
4. Turn counterclockwise to raise the sash.
5.Replacesash.
Important Note! Adjusting glide buttons too high will increase risk of
air/water leaks. Adjusting the buttons too low can cause sash to drag
on lower track. Ideal adjustment for sash is as low as possible but
just high enough to avoid drag. Keep the stiles parallel to frame. One
glide button may need to be raised and one lowered. Check by almost
closing the sash and looking for an even, parallel gap.
Glide button
Visible
screw
WEN-Lock Keeper
and Shim
MAG-Lock Keeper