
Instructions / Assembly
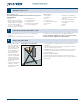
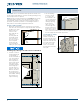
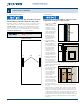
Table Of Contents

1
Installation Instructions
for Interior Door Slabs (JII110)
IMPORTANT INFORMATION
|
TABLE OF CONTENTS
|
GLOSSARY
Consult your local building code ofcial for applicable building
codes and regulations. Local building code requirements supersede
recommended installation instructions.
NOTE TO INSTALLER: Provide a copy of these instructions to the
building owner. By installing this product, you acknowledge the
terms and conditions of the limited warranty as part of the terms
of the sale.
Glossary
Head Jamb
The horizontal jamb across the top of the opening.
Hinge
Metal component that attaches the slab to the jamb and allows the slab to
swing open and closed.
Hinge Jamb
The side jamb the hinges are mounted in.
Hinge Leaves
The at parts of the hinge that mount to the jamb and slab.
Hinge Pin
Pin that holds the hinge leaves together and allows them to pivot.
Hinge Route
Mortise in the jamb and slab the same prole as the corresponding hingeleaf.
Frame
A frame consists of a hinge jamb, head jamb and strike jamb. Once
installed the door slab is hung inside the frame.
Panel
Component of the slab lling the spaces between the stiles and rails.
Pilot Hole
A drilled hole that is no larger than the body of the screw (minus
thethreads).
Rail
Horizontal members of the door slab.
Slab
The operating part of the door assembly that swings open and closed
inside a frame.
Stile
Vertical members of the door slab.
Stop
Component xed to the inside the jamb that the slab closes against.
Strike Jamb
The side jamb that contains the latch strike to hold the slab closed.
Please allow sufcient time to properly prepare the opening, install
theslab, and ensure its proper operation.
Thank you for selecting JELD-WEN products. Attached are JELD-WEN’s
recommended installation instructions for all types of Wood Interior
Door Slabs including Molded, Flush, Premium Composite and Stile
and Rail. Read these instructions thoroughly before beginning. They
are designed to work in most existing applications; however, existing
conditions may require changes to these instructions. If changes
are needed, they are made at the installer’s risk. For installations
other than those indicated in these instructions, contact a building
professional.
Table of Contents
Safety | Storage and Handling | Finishing ....................2
Materials and Tools .......................................3
Remove Packaging and Inspect Slab ..........................3
Inspect Existing Jamb ......................................3
Install Slab ...............................................4
Complete Installation ......................................6