
Instructions / Assembly
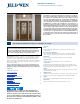


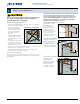
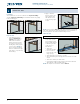

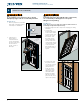


Table Of Contents

Installation Instructions
for Pre-Hung Exterior Entry Doors (JII106)
©2023 JELD-WEN, Inc. This publication and its contents are owned by or licensed to JELD-WEN, Inc. or its afliates or third parties, and are protected by copyright, trademark, and other laws. Unauthorized use
or duplication is prohibited. JELD-WEN reserves the right to change product specications without notice. Please visit our website at jeld-wen.com for current information.
All rights reserved.
Please visit jeld-wen.com for warranty
and care and maintenance information.
Thank you for choosing
7
REMOVE PROTECTIVE FILM
If applicable, remove any protective lm immediately
from all surfaces of the frame/panel and within six
months from any glass.
Protective
lm
After Installation
• Ensure weep holes/channels are clear of debris for proper water
drainage. DO NOT seal weep holes/channels.
• Leave an expansion/contraction gap of approximately 3/8" between the
patio door frame and the nal exterior wall surface (siding, stucco, etc.).
• If sealant is applied above the drip cap, ensure the sealant bead is
discontinuous to allow for drainage.
• Protect recently installed units from damage from plaster, paint, etc.
• Fill any nail/screw holes and sand smooth.
• Finish all six sides of the door slab as well as the frame.
• Install lock set hardware per supplied instructions.
For additional re door information, please scan the
QR code or reference Installation Instructions for
Fire-Rated Doors (JII-90081) at www.jeld-wen.com.
JII106 8/23