J E N N - A I R S I D E - B Y- S I D E R E F R I G E R AT O R U S E & C AR E G U I DE TA B L E OF CONTENTS Important Safety Instructions ........................................1-2 Installation.............................................................................3-9 Temperature Controls...................................................10-12 Fresh Food Features .....................................................13-15 Freezer Features .............................................................
I MPORTANT SAFETY I NSTRUCTIONS DANGER Installer: Please leave this guide with this appliance. Consumer: Please read and keep this Use & Care Guide for future reference. This guide provides proper use and maintenance information. Keep sales receipt and/or cancelled check as proof of purchase. Call: 1-800-JENNAIR (1-800-536-6247) U.S.A. and Canada Have complete model and serial number identification of your refrigerator.
I MPORTANT SAFETY I NSTRUCTIONS WARNING To reduce risk of fire, electric shock, serious injury or death when using your refrigerator, follow these basic precautions, including the following: 13. Always disconnect refrigerator from electrical supply before attempting any service. Disconnect power cord by grasping the plug, not the cord. 1. Read all instructions before using the refrigerator. 14. Install refrigerator according to Installation Instructions.
I NSTALLATION Location • Do not install refrigerator near oven, radiator or other heat source. If not possible, shield refrigerator with cabinet material. • Do not install where temperature falls below 55° F (13° C) or rises above 110° F (43° C). Malfunction may occur at this temperature. • Protect outside finish of refrigerator during transport by wrapping cabinet in blankets or inserting padding between the refrigerator and dolly. • Refrigerator is designed for indoor household application only.
I NSTALLATION Door and Hinge Removal To Disconnect the Water Line: Some installations require door removal to get refrigerator to final location. • Push in white collar (A) and hold. WARNING • Pull the door-side tube from the connector (B). To Reconnect the Water Line: To avoid severe personal injury or death, observe the following: • Firmly push tube 5⁄8” into the connector. Use lines on the tube as a guide for full insertion. • Disconnect power to refrigerator before removing doors.
I NSTALLATION Connecting the Water Supply Materials Needed (select models) • 1⁄4” outer diameter flexible copper tubing • Shut-off valve (requires a 1⁄4” hole to be drilled into water supply line before valve attachment) • Adjustable wrench • 1⁄4” hex nut driver WARNING To reduce risk of injury or death, follow basic precautions, including the following: • Read all instructions before installing ice maker.
I NSTALLATION Handle Installation If not installed, the handle is located in the interior or attached to the back of your refrigerator. Remove and discard handle packaging and tape. Handle design varies from refrigerator to refrigerator. Please reference the appropriate instructions for your model. Front Mount Handle Materials Needed • Gloves to protect hands • Phillips screwdriver • Plastic door removal card (or 1⁄32” thick plastic card), retain the card for future use. To Install: 1.
I NSTALLATION Handle Extensions (select models) To Install: • Align and clip handle extension into position on the handle. Press the extension over the door retainers. To Remove: • Slide the extension down and unclip from door retainer. To Remove: 1. Release top door trim (select models) by removing Phillips screws from top of fresh food door and retain screws for later use. 2. Grasp handle firmly with both hands. Slide handle upward approximately 3⁄4” to release. 3.
I NSTALLATION Installing Front-Mounted Handles for Stainless Steel Removing Front-Mounted Handles for Stainless Steel 1. Loosen lower door clip on door with 1 ⁄4" hex nut driver. 1. Remove plastic button plug at base of handle with a very small flat-blade screwdriver. • Insert 1⁄4" hex nut driver into predrilled hole to remove screw. 2. Locate predrilled hole at base of handle, and fit hollow end of handle over lower door clip. 2. Slide handle down and remove from bottom door clip. 3.
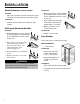
I NSTALLATION Leveling CAUTION AB BA To protect personal property and refrigerator from damage, observe the following: • Protect vinyl or other flooring with cardboard, rugs, or other protective material. • Do not use power tools when performing leveling procedure. To enhance the appearance and maintain performance, the refrigerator should be level. Note • Complete any required door reversal, panel installation and/or a water supply connection, before leveling.
TEMPERATURE CONTROLS Touch Temperature Controls Adjusting the Controls The controls are located at the top front of the refrigerator compartment. • 24 hours after adding food, you may decide that one or both compartments should be colder or warmer. If so, adjust the control(s) as indicated in the Temperature Control Guide table below. See page 23 for instructions on checking compartment temperature.
TEMPERATURE CONTROLS Triple Cool Climate Control Speed Ice (select models) When activated, Speed Ice reduces the freezer temperature to the optimum setting for 24 hours in order to produce more ice. Note: When the Speed Ice feature is in operation, the ▲ and ▼ pads for the freezer control will not operate. The control is located at the top front of the fresh food compartment.
TEMPERATURE CONTROLS Press the Temp Alarm pad once to stop the audible alarm. The Temp Alarm light will continue to flash and the temperatures will alternate until the temperatures have stabilized. To turn off Temp Alarm, press and hold the Temp Alarm pad for three seconds. The indicator light will go off. Door Alarm The Door Alarm will alert you when one of the doors has been left open for five continuous minutes.
FRESH FOOD FEATURES Shelves To Slide Out Elevator™ Shelf: CAUTION To avoid personal injury or property damage, observe the following: • Never attempt to adjust a shelf that is loaded with food, except in the case of the ElevatorTM Shelf. • Confirm shelf is secure before placing items on shelf. • Handle tempered glass shelves carefully. Shelves may break suddenly if nicked, scratched, or exposed to sudden temperature change. Your refrigerator has either Spill-Catcher™ or nonsealed shelves.
FRESH FOOD FEATURES Door Storage Dairy Center ChillKeeper™ The Dairy Center provides convenient door storage for spreadable items such as butter and margarine. On select models, this compartment can be moved to several different locations to accommodate storage needs. (select models) The ChillKeeper™ keeps beverages and other items colder than the rest of the fresh food compartment. An air inlet directs air from the freezer into the chiller. Controls To Remove: • Slide dairy center up and pull out.
FRESH FOOD FEATURES Storage Drawers Humidity-Controlled Crisper Drawers The Crisper Drawers provide a higher humidity environment for fresh fruit and vegetable storage. Controls The crisper controls regulate the amount of humidity in the crisper drawer. Slide control toward the Fruit setting for produce with outer skins. Slide control toward the Vegetables setting for leafy produce. Temperature-Controlled Drawer This drawer can be used for storage of meats, deli or other miscellaneous items.
FREEZER FEATURES Shelves and Baskets To Install: Fixed Freezer Shelf • Slide bin into railing below ice maker until bin locks into place. Drop ice maker arm to activate ice maker. To Remove Clip-mounted Shelves: • Lift shelf from the right side wall mounting clips and pull left side of shelf out of wall mounting holes. IMPORTANT: Ice bin must be locked in place for proper ice dispensing. Turn auger driver behind bin counterclockwise (as shown) to properly align ice bin with auger driver.
ICE AND WATER Automatic Ice Maker (select models) Note • Energy rating guides that are posted on the refrigerator at the time of purchase do not include optional ice maker energy usage. Some models are automatic ice maker ready. The number of the appropriate ice maker kit is IC10S. The kit contains installation instructions and water connection instructions. Other models have a factory installed ice maker. Connect the ice maker to the water supply as instructed on page 5.
ICE AND WATER Dispenser Features Water Dispenser Operation (select models) CAUTION To avoid personal injury or property damage, observe the following: • Do not put fingers, hands or any foreign object into dispenser opening. • Do not use sharp objects to break ice. • Do not dispense ice directly into thin glass, fine china or delicate crystal. Note Dispenser Light (select models) A light activates within the dispenser area at full power when dispensing ice or water with the main dispenser pad.
ICE AND WATER Dispenser Control (select models) Auto Light (select models) (control features vary by model) Ice Dispenser Operation The Auto Light function activates the dispenser light at half-power when the Light Sensor detects that the light levels in room are low. To Dispense Ice and Water: To Activate Auto Light: • Select Water, Crush or Cube mode by pushing button on dispenser control panel. A green light above button indicates mode selection. • Press Auto Light button.
WATER FILTER Water Filter Removal and Installation (select models) WARNING To avoid serious illness or death, do not use refrigerator where water is unsafe or of unknown quality without adequate disinfection before or after use of filter. CAUTION After installing a new water filter, always dispense water for two minutes before removing the filter for any reason. Air trapped in system may cause water and cartridge to eject. Use caution when removing. • The bypass cap does not filter water.
WATER FILTER System Specification and Performance Data Sheet Refrigerator Water Filter Cartridge Model UKF8001AXX Specifications Service Flow Rate (Maximum).............................................0.78 GPM (2.9 L/min) Rated Service Life UKF8001AXX-750 (Maximum) ......750 gallons/2838 liters Maximum Operating Temperature .....................................100° F / 38° C Minimum Pressure Requirement........................................35 psi /241 kPA Minimum Operating Temperature ....................
WATER FILTER State of California Department of Health Services Water Treatment Device Certificate Number 03 - 1583 Date Issued: September 16, 2003 Date Revised: April 22, 2004 Trademark /Model Designation UKF8001AXX750 469006-750 67003523-750 Replacement Elements UKF8001AXX 46 9006 67003523 Manufacturer: PentaPure Inc.
FOOD STORAGE TIPS Fresh Food Storage Frozen Food Storage • The fresh food compartment of a refrigerator should be kept between 34°- 40° F (1°- 4° C) with an optimum temperature of 37° F (3° C). To check the temperature, place an appliance thermometer in a glass of water and place in the center of the refrigerator. Check after 24 hours. If the temperature is above 40° F (4° C) adjust the control as explained on pages 10, 11 and 12.
FOOD STORAGE TIPS Food Storage Chart Storage times are approximate and may vary depending on type of packaging, storage temperature, and the quality of the food when purchased. FOODS REFRIGERATOR FREEZER STORAGE TIPS DAIRY PRODUCTS Butter 1 month 6 to 9 months Wrap tightly or cover. Milk and cream 1 week Not recommended Check carton date. Close tightly. Don’t return unused portions to original container. Don’t freeze cream unless whipped.
FOOD STORAGE TIPS FOODS REFRIGERATOR FREEZER STORAGE TIPS VEGETABLES Asparagus 1 to 2 days 8 to 10 months Do not wash before refrigerating. Store in crisper. Brussels sprouts, broccoli, cauliflower, green peas, lima beans, onions, peppers 3 to 5 days 8 to 10 months Wrap odorous foods. Leave peas in pods. Cabbage, celery 1 to 2 weeks Not recommended Wrap odorous foods and refrigerate in crisper. Carrots, parsnips, beets and turnips 7 to 10 days 8 to 10 months Remove tops.
CARE AND CLEANING CAUTION WARNING To avoid electrical shock which can cause severe personal injury or death, disconnect power to refrigerator before cleaning. After cleaning, reconnect power. Refrigerator Cleaning Chart PART To avoid personal injury or property damage, observe the following: • Read and follow manufacturer’s directions for all cleaning products. • Do not place buckets, shelves or accessories in dishwasher. Cracking or warping of accessories may result.
CARE AND CLEANING Removing Odors From Refrigerator WARNING To avoid electrical shock which can cause severe personal injury or death, disconnect power to refrigerator before cleaning. After cleaning, reconnect power. 1. Remove all food and turn the refrigerator OFF. 2. Disconnect power to the refrigerator. 3. Clean the walls, floor, ceiling of cabinet interior, drawers, shelves and gaskets according to the instructions (see page 26). 4.
CARE AND CLEANING Replacing Light Bulbs WARNING To avoid electrical shock which can cause severe personal injury or death, disconnect power to refrigerator before replacing light bulb. After replacing light bulb, reconnect power. CAUTION Lower Freezer Section 1. Pinch both sides of light cover to remove. 2. Remove light bulb. Replace with appliance bulb no greater than 40 watts. 3. Pinch both sides of the light cover to snap into place.
CARE AND CLEANING Preparing for Vacation CAUTION If your refrigerator has a dispenser and there is any possibility that the temperature can drop below freezing where the refrigerator is located, the water supply system (including the water tank and the water valve) must be drained by a qualified servicer.
OPERATING SOUNDS Improvements in refrigeration design may produce sounds in your new refrigerator that are different or were not present in an older model. These improvements were made to create a refrigerator that is better at preserving food, is more energy efficient, and is quieter overall. Because new units run quieter, sounds may be detected that were present in older units, but were masked by higher sound levels. Many of these sounds are normal.
TROUBLESHOOTING PROBLEM POSSIBLE CAUSES WHAT TO DO Freezer control and lights are on, but compressor is not operating Refrigerator is in defrost mode. Normal operation. Wait 40 minutes to see if refrigerator restarts. Temperaturecontrolled drawers are too warm Control settings are too low. Freezer controls are set too low. Drawer is improperly positioned. Refrigerator is not plugged in. Touch temperature controls are set to “–”. Fuse is blown, or circuit breaker needs to be reset.
TROUBLESHOOTING PROBLEM POSSIBLE CAUSES WHAT TO DO Water droplets form on outside of refrigerator Door gaskets are not sealing properly. Humidity levels are high. Controls require adjustment. Humidity levels are high or door has been been opened frequently. Clean according to the chart on page 26. Normal during times of high humidity. See pages 10,11 and 12 to adjust controls. Reduce time door is open. Organize food items efficiently to assure door is open for as short a time as possible.
TROUBLESHOOTING Ice and Water PROBLEM No indicator lights are lit on dispenser control Ice or water are not dispensed when pads are pressed POSSIBLE CAUSES Freezer door is not closed. Refrigerator is not plugged in. Fuse is blown, or circuit breaker needs to be reset. Power outage has occurred. Refrigerator is in Sabbath Mode (select models). Freezer door is not closed. Controls are in lock mode (select models). Water tank is filling. Ice bin not installed properly.
TROUBLESHOOTING Ice and Water PROBLEM POSSIBLE CAUSES Ice maker is not producing ice Ice maker arm is up. Household water supply is not reaching water valve. Copper tubing has kinks. Water pressure is too low. Check freezer temperature. Ice bin is not installed properly. Improper water valve was installed. Water filter indicator light is red Water filter needs to be replaced. Ice forms in inlet tube to ice maker Water pressure is too low. Filter indicator sensor needs to be reset.
TROUBLESHOOTING PROBLEM POSSIBLE CAUSES Water flow is slower than normal Water pressure is too low. Saddle valve not open completely. Improper saddle valve was installed. Copper tubing has kinks. Water filter is clogged or needs to be changed. Water valve not opened completely. Dispenser water is not cold Water appears cloudy Particles in water and/or ice cubes. Refrigerator has been recently installed. Water supply in holding tank has been depleted. Air or air bubbles in water.
NOTES 36
WARRANTY & SERVICE Warranty Full One Year Warranty One (1) year - From the date of original retail purchase, any part that fails in normal home use will be repaired or replaced free of charge. Ice Maker - When purchased with the refrigerator and installed by the dealer the ice maker will be considered part of the refrigerator for warranty purposes.