JENN-AIR _ DUAL-FUEL MODULAR DOWNDRAFT SLIDE-IN RANGE TABLE OF CONTENTS Important Safety Instructions ..................................... 1-4 Ducting Information ........................................................... 5 Care & Cleaning .............................................................. 5-8 Maintenance ......................................................................... 9 Troubleshooting ......................................................... 10-11 Surface Cooking ..........
technician. Do not attempt to adjust, repair, service, or replace any part of your appliance unless it is specifically recommended in this guide. All other servicing should be referred to a qualified servicer. Always disconnect power to appliance before servicing. M PORTANT SAFETY INSTRU Warning and important Safety instructions appearing in this guide are not meant to cover all possible conditions and situations that may occur.
levelinglegsis properlyengagedin the bracketslot.The anti-tipdevicesecuresthe rearlevelinglegto the floor whenproperlyengaged.Youshouldcheckthis anythne the rangehasbeenmoved. Child Safety To Prevent Fire or Smoke Damage Be sure all packing materials are removed from the appliance before operating it. Keep area around appliance clear and free from combustible materials. Flammable materials should not be stored in an oven. Many plastics are vulnerable to heat.
Do not touch a hot oven light bulb with a damp cloth as the bulb could break. Should the bulb break, disconnect power to the appliance electrical shock. Clothing may ignite or catch utensil handles. Always place oven racks in the desired positions while oven is cool. Slide oven rack out to add or remove food, before removing bulb to avoid using dry, sturdy potholders. Always avoid reaching into the oven to add or remove food.
This appliance has been tested for safe performance using conventional cookware. Do not use any devices or accessories that are not specifically recommended in this guide. Do not use element covers for the surface units, stovetop grills, or add-on oven convection systems. The use of devices or accessories that are not expressly recommended in this guide can create serious safety hazards, result in performance problems, and reduce the life of the components of the appliance. Do not clean door gasket.
Jenn-Air's ventilation system is designed to capture both cooking fumes and smoke from the cooktop surface. If the system does not, here are some ducting installation situations to check: • 6" diameter round or 3 1/4" x 10" rectangular should be used for duct lengths 10'-60'. ducting Important: 5" diameter round ducting may be used if the duct length is 10' or less. • No more than three 90 ° elbows should be used. Distance between elbows should be at least 18".
3. Select CONTINUE using the Quickset pad. The Cuickset pads are located on either side of the control panel dsplay. 6. After door locks, press the More Options pad. 7. Select DELAY using the Quickset pad. 4. Set LIGHT soil level by entering 200 using the number pads for two hours of cleaning time. Press the Enter pad. 8. Select the number of hours you want to delay the start of the self-clean cycle. OR 9. The delay time and cleaning time will be displayed.
Cleaning Procedures * Brand names are registered trademarks of the respective manufacturers. ** To order call 1-800-JENNAIR (1-800-536-6247]. I I Access Panel The access panel is easily removed. To open panel, grasp sides and pull upward, lifting out. To c ose pane a gn catches w th the studs on the range Press the access pane STUDS forward onto the studs and drop downward to engage. CA'tONES _L "_" , Wash with soap and water, a glass cleaner, or mild liquid sprays.
Grill Parts: Basin and Basin Pan Porcelain The basin pan and basin are located under the grill element and/or cartridges. Clean after each use of the grill. • To remove light soil, clean with soapy water or spray with cleansers such as Fantastik* or Formula 409". For easier cleanup: a) spray with a household cleanser; b) cover with paper towels; c) add small amount of hot water to keep the paper towels moist; d) cover and wait 15 minutes; and e) wipe clean.
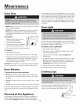
A|NTENANCE Oven Door for cleaning or to relocate. If this appliance has to be moved and/or removed for servicing, follow the procedure described in the installation instructions. For information, contact JennAir Customer Service at 1-800-JENNAIR (1-800-536-6247:). To prevent range from accidentally tipping, range must be secured to the floor by sliding rear leveling leg into the antitip bracket.
TRt UBLE H!!!! i ; ! NG i!i i ! i !!i!!i!!i!! !ii!ii!ii!ii!ii!ii!ii!ii!ii!i ! ! !i !i !i i ! i ii i i i i i ii For most concerns, try these first. • • • • Check Check Check Check if oven controls have been properly set. to be sure plug is securely inserted into receptacle. or re-set circuit breaker. Check or replace fuse. power supply. Part or ail of appliance not work. • • • • • Check Check Check Check Check if surface and/or oven controls have been properly set. See pgs. 12 & 19.
i Oven will not self=clean. • • • • Oven did not clean properly. ° Longer cleaning time may be needed. ° Excessive spillovers, especially sugary and/or acidic foods, were not removed prior to the self-clean cycle. Oven door will not unlock after self=clean cycle. • Oven interior is still hot. Allow about one hour for the oven to cool after the completion of a self-clean cycle. The door can be opened when the LOCK indicator word is not displayed. ° The control and door may be locked. See pg. 18.
SURFACE COOKING High: Use to bring liquid to a boil, or reach pressure in a pressure cooker. Always reduce setting to a lower heat when liquids begin to boil or foods begin to cook. Low: Use to simmer foods, keep foods warm and melt chocolate or butter. Some cooking may take place on the Low setting if the pan is covered. It is possible to reduce the heat by rotating the knob toward OFF. Be sure flame is stable. Surface An intermediate flame size is used to continue cooking.
Burner Cooktop To prevent the cooktop or staining: Grates The grates must be properly positioned before cooking. When installingthe grates, place the tab ends toward the center, matching the straight bars. from discoloring • Clean cooktop after each use. Improper installation of the grates may result in chipping of the cooktop. • Wipe acidic or sugary spills as soon as the cooktop has cooled as these spills may discolor the porcelain. Do not operate the burners without a pan on the grate.
3. Place the grill grates on top of the rangetop. Sealed Burner Cartridge Installation To install Sealed Burner Cartridge: 1. Be sure control knobs are turned OFF. 2. If the grill burner and grill grates are in place, remove before installing a burner cartridge. Clean basin of any grease accumulation. (See page 8 for cleaning recommendations.) Important: Before using the grill for the first time, heat the grill burner to remove the protective shipping coating.
Ventilation Notes: System The bulk-in ventilation system removes cooking vapors, odors and smoke from foods prepared on your cooktop and grill. • Do not use aluminum foil inside the grill area, or cover grates with aluminum foil. ° To operate the ventilation system manually, push the Vent Fan pad located on the electronic control. Push once • Do not use charcoal or wood chips in the grill area. ° Do not allow grill basin pan to become overloaded with grease. Clean frequently.
Grill Guide Preheat grill on High 5 minutes for best flavor. High High High 14 to 24 minutes 18 to 30 minutes 24 to 34 minutes Turn after 7 to 12 minutes. Turn after 9 to 15 minutes. Turn after 12 to 17 minutes. 9 20 to 25 minutes Turn after half the time. 9 25 to 45 minutes Turn occasionally. Ham Slices (V2"thick] High 15 to 20 minutes Turn once.
OVENCOOK=NG Control Panel AB CD E H G _"""1 On/Off TIMER 1 On TIMER2 On/Off / Off &etup On/Off "Favorites C!!_ Clean Rapid -- Preheat More J KL M Oven Light N 0 DEF 4 5 JKL 6 MNO 7 8 9 POR$ TUV WXYZ 0 Enter l CANCEL 3 ABC GHI Back Vent Fan i_s_ 2 Sp_ce _ack I P The control panel isdesigned for ease in programming. The display window shows options for each function and moves from step to step through the programming process. Control panel features vary by model.
Activating and canceling of week display: the dock/day Canceling 1. Press Setup pad. On/Off/ ................... 2. Select CLOCK. the Timer: ....... /TIMERi", If both Timers are active: .... " °n/C)ff / If the desired Timer is already in the foreground, press once for edit mode and twice to cancel the Timer. If the desired Timer is not in the foreground, follow the steps below. 3. Press the arrow to scroll until DISABLE is displayed. 4. Select DISABLE. 1. Press the desired TIMER pad once.
Baking To set Bake: 1. Press the Bake pad. Bake Options Cook & Hold and Delay options are available when baking. When using the Cook & Hold option, the oven begins to heat immediately after the control has been set. Then, the oven cooks for a specified length of time. When that time has elapsed, the oven will automatically reduce temperature to 170° F and keep the food warm for up to an hour and then automatically turn off. Bake y 2. Select the oven temperature using the Quickset pads.
3. Select the oven temperature using the Quickset pads Cor|vect Convection uses a fan to circulate hot air evenly over, under and around the food. As a result, foods are evenly cooked and browned, often in shorter times, at lower temperatures and with the flexibility of using more than one rack at a time. OR Notes: Enter the desired temperature using the number pads. Press Enter pad to set. • The oven control comes from the factory set for Auto Convect Conversion.
Convect Roast Convect Pastry To set Convect Roast: Convect Pastry is designed to bake pastry items such as frozen pies, turnovers, cream puffs and puff pastry. Use one, two or three racks while using this feature. // ..... 1. Place food in the oven. 2. Press the Convect pad. 3. Select CNMT ROAST using the Quickset pads. f .............. 1. Press the Convect pad. Convect Convect ) 2. Select CNMT PASTRY using the Quickset pads. 4. Select the oven temperature using the Quickset pads. 3.
Broil 5. Place food in the oven and close the door to the broil stop position. For optimal results, preheat for five minutes with the door closed and use a pan designed for broiling. Oven door should be open to the broil stop position (about 4 inches:) when broiling. 6. Press the CANCEL pad when broiling is done. (CANCEL To set Broih Notes: 1. Place the oven rack in the proper rack position (see Broiling Chart). • See Broiling Chart for foods and broiling times. 2. Press the Broil pad. ( Broil 3.
Oven Fan Rack Positions A convection fan is used to circulate hot air in the oven when the convection feature is selected. RACK 5 (highest positionD: -- 5 Fiat Used for two-rack cooking and broiling. Important: The convection fan will automatically stop when the oven door is opened. --4 -- 3 Fiat RACK 4: Oven Vent --2 Used for two-rack baking and broiling. The oven vent is incorporated into the downdraft ventilation system on the cooking surface.
OPT| More Options Cook & Hold 1. Press the More Options pad. 2. Select COOK/HOLD. 5. The display will show CONVECT DELAY, the selected function the preset temperature and the delay time countdown. When the delay time has expired, the cook time will be displayed and the oven will begin to preheat. /MorP',, Options To set Delay Clean: 1. Follow "Delay" steps 1-4 (see below left:). 2. REMOVE RACKS will show in the display. Remove the racks from the oven and select CONTINUE. 3.
Keep Warm Meat The Keep Warm feature is used to safely keep hot foods warm or for warming breads and plates. Using the probe supplied with your oven assures excellent roasting results every time. 1. Press More Options pad. 1. Insert the probe into the food item. For meats, the probe tip should be located in the center of the thickest part of the meat and not into the fat or touching a bone. 2. Insert the probe plug into the receptacle located on the top right of the oven.
9. When the selected internal temperature of the food has been reached, the oven will shut off and a beep will sound. ° Gently close the door until the spacer magnet makes contact with the oven door. The magnet will hold the spacer in the proper position during the drying process and allows the door to be opened at any time during drying without losing proper positioning. 10. Remove the probe from the oven receptacle. The probe will be hot.
Drying Guide Apples* Firm varieties: Graven Stein, Granny Smith, Jonathan, Winesap, Rome Beauty, Newton. Wash, peel if desired, core and slice into 1/8" slices, 4-8 hours Pliable to crisp. Dried apples store best when they are slightly crisp. Apricots* Blenheim/Royal most common. Tilton also good. Wash, halve, and remove pits. 18-24 hours Soft, pliable. Bananas* Firm varieties Peel and cut into 1/4" slices. 17-24 hours Pliable to crisp. Cherries Lambert, Royal Ann, Napoleon, Van or Bing.
Thaw and Serve Use Thaw and Serve to thaw frozen foods that require thawing, but not cooking, before serving. To set Thaw=Serve: 6. THAW-SERVE, COOK TIME and the cook time countdown will be displayed. 1. Place food in the oven on rack 2. Convect 2. Press Convect pad. ) 7. If thawing is complete before time elapses, press the CANCEL pad and remove food from the oven. When the time has elapsed, the oven will turn off and beep. 3. Press the arrow to scroll. 4. Select THAW-SERVE 5.
FAVORITES Favorites • After each desired letter wait three seconds until an underline appears in the next space or press Enter pad before moving on the next letter. Favorites stores the oven mode, cook time and temperature for up to 10 of your favorite recipes. Convection ovens come with five preprogrammed recipes. • Up to 14 letters including spaces can be used. 5, To select a recipe from the preset Recipe List: 1. Press Favorites pad. Select ENTER to save name. 6.
jr SetUp ........... " Setup 1. Press the Setup pad. Notes: On / Off / ,' , When using Convect Bake and Convect Pastry with the Auto Convect Conversion option turned off, reduce the set temperature by 25° F. 2. Use the arrow to scroll through the Setup options. 3. Select the desired option by pressing the Quickset pads. • If Convect Roasting with the Auto Convect Conversion option turned off, you will not be required to program a cooking time. Check food at 750/0of the conventional time.
Sabbath Mode To cancel Tile oven is set to shut off after 12 hours if you accidentally leave it on. The Sabbath Mode overrides the 12-hour shut-off and can either be set to come on automatically or can be set manually as desired. Press and hold the Setup pad for five seconds. The Bake mode may be cancelled by pressing the CANCEL pad during Sabbath. Sabbath Setup " 2. Press the arrow to scroll. On / Off / Setup On/Off/ \ .............
Tones (beeps) 12 H R Shutoff The number of beeps heard at the end of cooking and at the end of timer operation and their volume can be adjusted, The oven will automatically turn off at the end of 12 hours if you accidentally leave it on. To adjust To turn off this feature: the beeps: /, 1. Press Setup pad. 2. Use the arrow to scroll. ...... Setup , On/Off _ /, 1. Press Setup pad. " Setup on/off: 2. Use the arrow to scroll. 3. Select TONES. 3. Select 12HR SHUTOFF. To change 3.
CARTRiD ACC Accessories GrilJ Cover - Electric Griddle - Nlodel JGA820OADX Attractive grill cover protects grill when not in use. Textured steel in black or white with molded handles. Self-draining griddle makes many favorite foods easier to fix. Family-sized surface lets you cook several pancakes, hamburgers, or grilled sandwiches at a time. Has a black, non-stick finish.
34
WARRANTY & SERVICE What is Not Covered By These Warranties 1. Conditions and damages resulting from any of the following: a. Improper installation, delivery, or maintenance. b. Any repair, modification, alteration, or adjustment not authorized by the manufacturer or an authorized servicer. c. Misuse, abuse, accidents, unreasonable use, or acts of God. d. Incorrect electric current, voltage, or supply. e. Improper setting of any control. 2.
CUISINIERE ENCASTRABLE, MODULAIRE ,_ DEUX €:NERGIES, A €:VACUATION DESCENDANTE TABLE DES MATIERES Instructions Informations de s6curite importantes ..................37-40 sur les conduits ....................................... 41 Entretien et nettoyage .............................................. 41-45 Entretien ........................................................................ 45-46 D@annage ................................................................... 46-48 Cuisson sur la surface .
Pour assurer une utilisation appropri_e et en route s_eurit_ : Seul un technicien qualifie devrait installer I'appareil et le mettre la terre. Ne tentez pas de rdgler, reparer ou remplacer un composant de I'appareil, _ moins que cela ne soit specifiquement recommande dans ce guide. Toute autre reparation dolt etre effectuee par un technicien qualifie. Debranchez toujours I'appareil avant d'en faire I'entretien.
Utilisez une lampe torche pour determiner si la bride antibasculement est convenablement installee sous la • NE saisissez ou d_plaeez JAMAIS un ustensile de cuisine enfiamme. cuisiniere. L'un des pieds de mise 8 niveau arriere doit etre convenablement engage dans la fente de la bride. Lorsque la cuisiniere est convenablement calee, la bride antibasculement • Four : Fermezla porte du four pour etouffer les fiammes. Ne jetez pas d'eau sur un feu de graisse.
Evitez de toucher la region entourant I'event du four Iorsque le four est utilise et plusieurs minutes apres I'arret du four. Certains composants de I'event et la zone voisine peuvent devenir suffisamment chauds pour provoquer des brOlures. Apres I'arret du four, ne teuchez pas I'eventdu four ou la zone voisine avant que ces composants aient pu se refroidir suffisamment. Utilisez des maniques robustes et seches. Des maniques humides peuvent provoquer la formation de vapeur brQlante.
que la taille de I'ustensile est suffisante pour qu'il puisse recevoir les produits alimentaires _ cuire et absorber I'augmentation de volume suscit6e par I'e,bullition de la graisse. composants avant de [es toucher ou d'entreprendre [e nettoyage. Travaiiiez prudemment afin d'e,viter les brOiures par [a vapeur si vous utiiisez un chiffon ou une e,ponge humide pour nettoyer les renversements sur une surface chaude.
J LES Le systeme de ventilation de Jenn-Air est con(_u pour capter les vapeurs et fumees de cuisson emanant de la surface de cuisson. Si le systeme ne fonctionne pas, veuillez vous assurer que rinstallation comporte les elements suivants : • Un conduit rond de 15,24 cm (6 po) de diametre ou rectangulaire de 8,26 cm (3 %po) x 25,4 cm (10 po) dolt etre utilise pour des canalisations mesurant de 10 pi _ 3 _ 18 m (60 pi) de Iongueur.
6. Essuyezles r6sidussucrc!set acides,comme lespatatesdouces, la tomato ou los sauces_ basede hit. L'c!mailvitrifi_ poss_de une r6sistancelimit_e aux compos6sacides. II peut se d6colorer si los r6sidusacides ou sucrc!sne sont pas enlev6savantle cycle d'autonettoyage. 5. Laporte se verrouillera.NETfOYAGE,TIME,VERROUILLAGE et le compte a reboursde la durc!ede nettoyageseront affich6s. 6. Apr_s le verrouillagede la porte, appuyezsur la touche More Options (Autresoptions). 7. S61ectionnez DEM/\RR DIFFERE_ I'ai
Techniques de nettoyage * Leanomsde marque sont des marquesd@os6esdes diff6rents fabricants. **Pourcommanderdirectement,composezle 1-800-JENNAIR (1-800-536-6247). Le panneaud'acc_speut6treenlev6facilement.Pourouvrirle panneau,tenezlescOt6set tirezvers le haut en le soulevantversvous.Pourformerle panneaualignezlesIoquetsavecleagoujonsde la Gowoas_ cuisini_re.Pressezle panneaud'acc_ssur lesgoujonset poussezversle haspour I'enclencher. LOeUETS ,.
Hublot et porte - Verre , Evitezd'utilisertrop d'eau,carelle risqueraitde s'infiltrersousou derriere le verre,causantainsidestachessur le hublot. • Laveza I'eauet au savon.Rinceza I'eauclaireet s6chez. Un nettoyantpour verrepeut 6tre utilisc!si vousle pulv6risez d'abord sur un chiffon. . N'utilisez pus de produitsabrasifscommelestampons_ rdcurer,la laine d'acierou lesnettoyantsen poudre qui peuvent rayerle verre. Int_rieur du four • Suivezlesinstructionspr6sentc!esauxpages41-42pour rautonettoyagedu four.
Garnitureet Poign_ede porte = peintesemail • Unefois lospi_ces_froidies,lavez-lesa I'eausavonneuse tilde, rinceze,tsc!chez. N'essuyezjamais une surfacetilde ou la chaude avecun linge humide,carcolapourraitabimerla surfaceet provoquerdesbrQlurespar la vapeur. • Pourlostachestenaces,utilisezdesagentsde nettoyageI_g_rementabrasifscommela p_teau bicarbonatede soudeou BonAmi*.N'utilisezpusde nettoyantsabrasifscommelostamponsen lained'acierou los nettoyantspourfour.
Pieds de raise & niveau 4. Pour 6viter d'endommagerI'ampouleneuveou de diminuer sa dur6e,Be la touchez pas ) mains nues.Tenez-laavecun lingo sec ou de I'essuie-tout.Enfonceztout droit les broches de I'ampouledarts los petits trous du socle en c6ramique. 5. Remettezle couvre-ampouleen I'enclenchanten place. 6. Rebranchezla cuisini_re.RemettezI'horlogea I'heure. D placement d'un appareil Assurez-vousque la cuisini_re est d'aplomb une fois installc!e.
Lesaliments ne grillent pas correctement ou d_gagent beaucoup de fum_e. • V6rifiez la position des grilles. Losalimentssont peut-6tre trop prochesdu brOleur. • Le papier d'aluminium a €!t6mal utilisc!.Ne garnissez jamais la grille de la 18chefriteavec du papier d'aluminium. • EnlevezI'exc_sde graissesur la piece de viande avantla cuisson au gril. • UneI_chefrite salea _t6 utilis6e. • Pr6chauffezle four pendant2 a 3 minutesavant de placerle plat darts le four.
Codesd'anomalie • Lefour pout d_celerune anomalieIors de la programmationou du fonctionnement.En cas d'anomalie,le messageDEFAUTDETECTE - APPUYEZENTERPOURREESSAYER peuvent apparaitre.Suivrelosindicationsde I'affichage.Si I'anomalier6apparaitou ne s'effacepus, appeler un r@arateuragr66ou composerle num6rosansfrais de I'afficheur. • Si la m6meop@ationest essay6eavantque le four ne soit r@arc!,le messageCARACTERISTIQUE NON DISPONIBLE - APPUYEZAIDE paraitra.
Si un brOleurde la table de cuissonne s'allumepas,ddterminezsi I'allumeurest bris& sail ou mouill6. Boutons de commando gaz standard,la surface de cuisson de cette cuisini_re n'est pas amovibleou relevable. Ne tentez pas de relever la surface de cuissen, Aquelle la diff6rence qu'en suit d'une la cuisini_re raison. dot6ede br01eurs de la surface de cuisson Utilisezces boutons pour commanderI'allumagedes brOleursde surface.
TravaillezprudemmentIorsqu'ilfaut remuerdes alimentsdans un ustensileplac6sur la grille de brQleur.Losgrilles comportent un fini lissequi facilite le nettoyage.Losmarmites/casserolesglisserontsi ellesne sont pus maintenues.Ceci pout entrainerun renversement de nourritureschaudeset donc causer des brQlures.
Utilisation du gril Conseils Avant le premieremploi, lavezvos nouvellesgrilles a raide d'eau savonneusechaude,rincez et sCchez.Ensuite,huilez leur surface en applicant une mince couche d'huile de cuisson. Retirez I'exc_sd'huile a raide d'un papier essuie-tout. de caisson sur le gril • Assurez-vousde suivre les instructionsd'utilisation du gril. Les durc!esde cuissonet les rc!glagessugg6r6s (voyezla page 52) sent approximatifset varient selon les alimentsou la tension c!lectrique.
IFntretien et nettoyage syst me de ventilation IMPORTANT: HEFAITESPASFONCflONNERLE VENT/MTEUR SANSLEFILTREPlaceztoujours le filtre en position inclin@. Lorsquevous _tes en face de la cuisini_re,le haut du filtre dolt se trouver centre la gauche de I'@ent.Le hasdu filtre dolt se trouver centre la droite de la chambre d'extraction,darts la partie inf6rieure.Important: Sile filtre est _ plat centre la paroi du ventilateur, I'efficacit# de I'extractien est r#duite.
CU|SSON AU FOUR Tableau de commande AB F CD 7 On/Off TIMER1 On/Off TIMER2 On/ off &etup On/Off - Favorites r! Clean -- Preheat Ra id Vent Fan tel J H G KL Oven Light M CANCEL I 0 3 DEF 4 5 6 GHI JKL MNO 7 8 9 PQRS TUV _/XYZ Back O L space lock t N 2 ABC Enter J P Letableaudecommandeest con_upour faciliterla programmation.La consoleaffiche lesoptionsde chaquefonction etvous guidepasa pasdurant la programmation.
Pour activer I'horioge/jour et annuler l'affichage de la semaine : 3. Appuyezsur lestouches numdriquespour entrer la nouvelle dur@ voulue. de Setup" 1. Appuyez sur la touche Setup (R6glage]. 4. Appuyezsur la touche Enter. , On/Off, '............. " 2. SdlectionnezHORLOGE. Pour 3. Appuyez sur la fl_che pour afficher le mot DESACTIVER. Si los deu× miuuteries 5. S6lectionnezHEURE. 7. Sdlectionnez OFF pour annuler I'affichage du jour de la semaine.
Cuisson au four Lorsquecette durCeest 6couk!e, le four rc!duitautomatiquementla tempc!raturea 75° C 070 ° F) et garde la nourritureau chaud pendantune heure au maximum,puis s'Cteintautomatiquement. / .................... Programmation de la cuisson au four : 1. Appuyezsur la touche Bake (Cuissonau four)..... Bake 2. S61ectionnez la temp6rature du four _ I'aide des touches rapides. OU Entrezla tempCraturedCsirCe_ I'aidedes touches numCriques.
Convection 3. S61ectionnezla tempc!rature_ I'aidedes touches rapides La convectionutilise un ventilateurpour faire circuler Fairchaud tout autour des aliments. Cettemc!thodecuit et brunit les alimentsde fa£on plus uniforme,souventen mois de temps eta des temperaturesplus basses,en plus de permettreI'utilisationde plusieurs grilles a la fois. OU : Remarqaes Entrezla tempc!ratured_sirc!ea I'aidedes touchesnum6riques. Validezle r6glage en appuyantsur la touche Enter (Entrer).
Convect (R6tissage Roast Convect a convection) Programrnation (P tisserie dn rStissage _ convection : a convection) La caract6ristiqueConvect Pastryest con_uepour effectuer la cuisson de p_tisseriecommeles tartessurgeldes,los chaussons,los choux a la cr_me et los p_tisseriesde p_te feuillet6e.Cette caractdristiqueest utilis6e avec une, deuxou trois grilles. 1. Placezla nourriture dans le four. 2. Appuyezsur la touche Oenvect (Convection). Pastry ( Convect 3.
Cuisson au gril 4. Prc!chauffezle four pendant cinq minutes. Pourobtenir des r6sultatsoptimaux, pr6chauffezle four pendant5 minutesla porte fermde et utilisez une I_chefrite conguepour la cuissonau gril. La porte du four dolt 6tre ouvertejusqu'a la butde de la cuissonau gril [environ 10 cm/4 pouces] durant la cuissonau gril. 5. Placezles alimentsdans le four et poussezla portejusqu'_ la but6e de la cuissonau gril. Programmation 6. Appuyez sur la touche CANCEl.
Ventilateur du four Positions des grilles Unventilateur de convection permet de faire circuler Fairchaud darts le four Iorsque la caract6ristiquede convectionest s61ectionn6e. POSITION 5 (position la plus haute) : Utilisez cette position pour la cuisson sur deux grilles et la cuisson au gril. Important : Le ventilateurde convections'arr6te automatiquement Iorsquevous ouvrez la porte. f POSITION 4 : Event du four Utilisez cette position pour la cuisson sur deux grilles et la cuisson au gril.
OPT| Autres options Program[nation de la cuisson _ convection diff6ree : 1. Suivezlos c!tapes1 _ 4 du _ dc!marragediff6r_ _ (voir_ gauche). Cuisson et maintien 1. Appuyezsur la touche More Options (Autres options). 2. S61ectionnezCUISS/CHAUD. 2. S_lectionnezCUISS CONVECT,ROTISSCONVECT ou PATISS CONVECT. 3. S_lectionnezla temperatureparmicellos affich_es ou utilisezles touchesnum_!riquespour entrer la temperaturede votre choix. Options 4.
Reilrlarques : ReiTiarques : • Pour la p_te qui n_cessiteune seule lev(!e,losdeux m6thodes (normaleou rapide) peuvent 6tre utilis6es. ° Lesaliments doivent 6tre chauds Iorsqu'ilssont placc!sduns le four. ° Si vous utilisezde la p_te a pain surgel_e,choisissezla FERMENTATIONRAPIDE.II n'est pus n6cessairede d6congelerla p_teavant la fermentation. • Pour conserverla qualit6 optimale desaliments, ne losgardez pus au chaud pendant plusd'une heure.
• Apr_s 10 secondes,I'afficheur indique la tempc!ratureactuelle du four et la tempc!ratureactuelle de la sonde. important : Si I'entreb_illeurn'est pas correctementpositionnc!,le ventilateurde convectionne fonctionnerapas. /, 9, LorsqueI'alimentatteint la temp6ratureinterne choisie,le four s'6teint et un signal sonoreretentit. 2. Appuyezsur la touche Convect (Convection). /4.Sc!lectionnezDESHYDRATION. 5.
Guide de deshydration Poraraes* Varidt6sfermes: Graven Stein,GrannySmith, Jonathan,Winesap, RomeBeauty,Newton. Lavez,pelezsi d6sirc!,_videzet coupez destranchesde 0,3cm 0/8 po). 4 _ 8 heures Souple_ croustillante.Les pommesd6shydratdesse conserventmieux Iorsqu'ellessont Idg_rement croustillantes. Abricots* Blenheim/Royal sont courantes. Tilton est aussi une bonne vari6td. Lavez,coupezen deux et retirez les noyaux. 18 a 24 heures Souples et flexibles.
Dbcongeler et servir UtilisezD6congeleret sen/Jrpour pr@arer des alimentssurgelc!squi nc!cessitentseulementune d6cong61ationavant d'6tresen/is. Programmation de la fonction D_congeler et servir : 6. DECONG-SERVIR, COOKTIME (Durc!ede cuisson)et le d6comptes'affichent. 1. Placezla nourrituresur la grille _ la position 2. 2. Appuyezsur la touche Convect [Convection). 7. Si la d6cong61ationest completeavant la fin du .,.................................
f EGLAGE R glage FAVOR| favori Pour creer uue recette nouvelle recette favorite : /, ......... ], Lafonction Rdglagefavori vous permet de garder en mdmoirele mode,dur6e de cuissonet la tempdraturede cuissonde 10de vos recettesprddrdes. Lesfours _ convectionsont livrdsavec 5 recettes pr@rogramm6es. Pour s_lectiouuer pr_tablie : uae 2. Appuyezsur la fl_che pour faire ti!!filer los choix. On / Off 3. S61ectionnez CREERNOUVEAU_ I'aidede la touche _ gauche. 4. Entrez le nom _ I'aide des touches.
Pour supprirner une recette favorite : 5. LerCgulateurvous demandera_ nouveausi vous dCsirez supprimer cette recette. SClectionnezOUI ou NON. 1. Appuyezsur la touche Favorites (RCglagefavori). / ........... 2. Appuyez sur la fl_che pour faire ddiler I'_cran. 3. SClectionnezEFFACREOETTE. ..... / Favorites , On/Off 6. Appuyez sur la touche Favorites pour quitter le menudes recettesfavorites. ji En tout temps, vous pouvezquitter le menudes rc!glagesfavorisen appuyant sur la touche Favorites. 4.
C/F 3. SelectionnezSABBAT. L'egchelle de tempc!raturepeut 6tre indiqu_een Fahrenheitou en Celsius. 4. S_lectionnezAUTO OUMANUEL. Pour modifier I'echelle de temperature 1. Appuyezsur la touche Setup. 2. Utilisezla fl_che pour passer_ I'_cransuivant. , La fonction AUTOvous demandeautomatiquementd'entrer une temperaturede cuisson pour vendredi) 14 het demeure en modesabbat pendant33 heures.La mention SABBATet MODE SABBAACT apparait_ I'afficheurpendant 90 minutes.
2. 3. 4. 5. 6. Appuyez surlafl_che pourfaireddiler1'6cran. S61ectionnez 288/240V. S61ectionnez 288Vou24eV_I'aide destouches rapides. Appuyez surlatouche Enterpourvalider lechangement. Appuyez surlatouche Setuppourquitter lemenu. S61ectionnez MOYEN pour un volume moyen. OU S61ectionnez BAS pour le volume le plus bas. 5. Appuyezsur la touche Setup pour quitter le menu. Arr_t Signaux sonores automatique 12 heures Le four s'arr6te automatiquementapr_s 12 heuress'il est accidentellementlaissc!en marche.
U ET Accessoires Couverclede gril - ModUle A341 Plaque _ frire _lectrique - Modble JGA82O0ADX Lecouverclede gril attrayantprotege le grill Iorsqu'il n'est pasen fonction. Acier texture,en blancou noir avec poign6esmoul@s. La plaque a drainage automatiquefacilite la pr@aration de vos metsprd6r_s. Lasurface de format familial vous permet de cuisiner plusieurs cr@es,hambourgeoisou sandwichs grillc!sen m6metemps. Elleposs_deun fini anti-adhc!sif noir.
_EMARQUES 7O
GARANTiE ET ERViCE Ne sont pas couverts par ces garanties : 1. Lesdommagesou d6rangementsdus _ ce qui suit : a. Installation,livraisonou entretien effectu6sincorrectement. b. Toute r@aration,modification,alt6ration et tout r6glagenon autoris6spar le fabricant ou par un prestatairede serviceapr_s-venteagr_6. c. Mauvaisemploi, emploi abusif,accidents,usagenon raisonnable,ou catastrophe naturelle. d. Alimentation _lectrique [tension, intensit6)incorrecte. e. R6glageinappropri6de toute commande. 2.
ESTUFADESLIZANTE MODULAR DE COMBUSTIBLE Y CORRIENTE DESCENDENTE JENN-AIR TABLA Instrucciones Informaci0n DE CONTENIDO importantes sobre seguridad .... 73-77 sobre los conductos ............................... 77 Cuidado y limpieza .................................................... 78-81 Mantenimiento Localizaci0n ........................................................... 81-82 y soluci0n de averias ......................83-84 Cocci0n en la cubierta ............................................
Lea y siga lodas las instrucciones antes de usar este electrodorn_stico para evitar el riesgo potencial de incendio, choque el6ctrico, lesiones personales o da_o al electrodom6stico como resultado de su uso inapropiado. UtiNce este electrodom6stico solamente para el prop6sito para el cual ha sido destinado seg_n se describe en esta gufa. Para asegurar el funcionarniento correcto y seguro del electrodorn_stico: El electrodom6stico debe ser instalado debidamente y puesto a tierra por un t6cnico calificado.
Instrucciones generales Para eliminar el riesgo de pasar sobre los quemadores superiores calientes, no se deben guardar artfculos en los armarios que est_in directamente sobre la estufa. Si existen armarios sobre la cubierta, los mismos s61odeben contener artfculos que no se usen frecuentemente y que est6n seguros en un _rea en la que estar_in expuestos al calor de un electrodom6stico.
Informaci6n sobre su electrodom stico Informaci6n de seguridad sobre la cocci6n Siempre coloque el utensilio sobre el quemador superior antes de encendeflo. Aseg_rese de saber cu_il perilla corresponde al quemador superior que va a utilizar. AsegQrese de haber activado el quemador correcto y de que el mismo se haya encendido. Una vez que haya terminado la cocci6n, apague el quemador antes de retirar el utensilio para evitar exponerse a la llama.
No use cubiertas para los elementos superiores, parrillas para Tenga cuidado cuando abra la puerta del horno. Permita que el aire o vapor caliente escape antes de mover o colocar el alimento. cubiertas o sistemas adicionales de convecci6n para hornos. El uso de dispositivos o accesorios que no sean expresamente recomendados en esta gu[a puede crear peligros graves de seguridad, afectar el rendimiento y reducir la vida 0til de los componentes de este electrodomestico.
Aviso y adverntencia irnportantes de seguridad exposici6n a estas sustancias puede set minimizada ventilando el homo adecuadamente al exterior durante el ciclo de autolimpieza abriendo las ventanas y/o la puerta de la habitaci6n donde se encuentra el electrodomestico.
CU|DAD Y L|MP|EZA Homo autolimpiante porcelanase puede decolorarsi los derrames4cidoso azucaradosno se limpian antesde un ciclo de autolimpieza. Para programar la autolimpieza: 1. Optima la tecla "Clean" (Limpieza). 2. RETPARRILLASse desplegar_.Retire lasparrillas. 3. SeleccioneCONTINUARusando la tecla r_pida.Lasteclas r_ipidasest_n ubicadas a cada lado de la pantalladel panel de control.
7. SeleccioneDIFERIRusando la tecla r_pida. Puede aparecer una decoloraciOn blanca despu6s de la autolimpieza si no se limpiaron los derrames _cidos o azucarados antes de iniciar el ciclo de autolimpieza. Esto es normal y NO afectar_ el rendimiento. 8. Seleccionela cantidad de boresque deseadiferir el inicio del ciclo de autolimpieza. 9. Eltiempo diferidoy el tiempo de limpiezaaparecer_nen la pantalla.
Rejillas de los quemadores = Porcelanasobre hierrofundido Lavecon aguacalienteyjabonosay conuna esponjapl_isticade restregarno abrasiva.Paralasmanchasdificiles,limpie con una esponjajabonosano abrasivao conla cremade limpiezaparacubiertas'CooktopCleaningCreme'*y unaesponja. Si quedaalgunasuciedad,vuelvaa aplicarla crema,cubracon unatoallade papelhOmeday remojedurante30 minutos. Vuelvaa restregar,enjuaguey seque. No limpieen el lavavajillas oen el homoautolimpiante.
Aecesorios de Ja parriJJa: Base y bandeja de la basePorcelana La basey su bandejaest_inubicadasdebajodel elementode la parrillay/o de loscartuchos. LimpiedespuOsde cadause de la parrilla. • Pararemoversucio leve,limpie con aguajabonosao rode con limpiadorescome Fantastik*o Formula409*.Paralimpiar m_sf4cilmentela porcelana:a} rode con un limpiador;b} cubra contoallas de papel;c} a_adauna peque_acantidadde agua calientepara mantenerlastoallasde papel hOmedas;d} cubray espere15minutes;y e} limpiecon un pa_o.
Ventanilla del homo Para proteger del homo: la ventana Tornillos niveladores de la puerta 1. Ne useagentesde limpieza abrasivostales como las esponjasde restregarde lana de acero o limpiadoresen polvoya que los mismos pueden rayarel vidrio. 2. Ne golpeeel vidrio con utensilios,sartenes,muebles,juguetes u otros objetos. Aseg0resede que la estufaest_ niveladacuando 3. Ne cierrela puerta del homo hasta que las parrillasestc!nen su lugar. est6 instalada.
f Y f N DE AVERiA Para la mayoria de las situaciones, siga las siguientes soluciones. • Verifiquesi los controlesdel homo fueron programadoscorrectamente. • Verifiqueque el enchufe est6 bien conectadoen el tomacorriente. • Verifiqueo restablezcael disyuntor. Verifiqueo reemplaceel fusible. Verifiqueel suministro el_ctrico. Una parte o la totalidad deJ eJeetrodom_sticono funciona. • Verifique si los controles superiores y/o los del homo fueron programados correctamente. Vea las p_ginas 85-86 y 92.
El homo no se autolimpia. , , , , AsegOresede que no hayaprogramadoun ciclo de autolimpiezadiferido. Vea la pdgina 78. Verifique que la puertaest6 cerrada. Verifique que el homo no est6 en modosab_itico.Vea la p%ina 104. El homo puede estarsobre los 204° C [400° F). La temperaturadebe ser menor de 204° C [400° F) para poder programarun ciclo de autolimpieza. El homo no se limpi6 adeeuadamente. Esposibleque se requiera un ciclo de autolimpiezam_islargo.
COCC|ON EN LA BIERTA 'Low' (Bajo):Useeste ajuste para cocinar alimentosa fuego lento, manteneralimentos calientesy para derretir chocolateo mantequilla. Partede la cocciOnpuede realizarseen el ajuste "Low" si el utensilio est,1cubierto. Esposible reducir el calor girando la perilla hacia la posici6n "OFF" (Apagado).AsegOresede que la llamasea estable. Controles "High" (Alto): Use este ajuste para hacer hervir un I[quidoo para alcanzarla presiOnde cocciOn en una olla a presi6n.
Cubierta Rejillas de los quemadores Para evitar que la cubierta se decolore o manche: Lasrejillas deben estar en la posici6n correctaantesde la cocci6n. Cuandoinstale las rejillas,coloque los extremoscon lengOetashaciael centro de maneraque concuerdencon las barras rectas. * Limpiela cubierta despu_sde cada uso. * Limpie los derrames_icidoso azucaradostan pronto como se haya La instalaciOninadecuadade lasrejillas puede causarpicaduras en la cubierta. pueden decolorarla porcelana.
InstalaciOn del cartucho de quemador sellado 3. Coloquelas rejillas de la parrilla en la superficiede la estufa. Para instalar el cartucho de quernador seUado: 1. Aseg0resede que lasperillas de control estOnapagadas. 2. Si el quemadorde la parrilla y lasrejillas de la parrilla est_inen su lugar,retirelas antes de instalar un cartuchode quemador. Limpiecualquier acumulaci6nde grasade la basede la parrilla. (Veala p%ina 81 para las recomendacionesde limpieza.
Si el e×cesode grasa causa llamaradas constantes: Sistema de ventilaci6n 1. Enciendaelventilador manuahnente. 2. APAGLIEinmediatamentelos controles. 3. Retirela came de la parrilla. El sistemade ventilaci6nintegrado remuevelosvaporesde la cocci6n, los oloresy el humo producido per los alimentos preparadosen la cubierta yen la parrilla. 8_o ,_.......
Guia de asado a la parrilla Precalientela parrilla en el ajuste "High" (Alto) durante 5 minutospara obtener el mejor sabot. m Filete de res: [2,5 a 3,2 cm o Semicrudo I a 1Vd'): Intermedio Bien cocido Alto Alto Alto 14 a 24 minutos 18 a 30 minutos 24 a 34 minutos Voltee despuc!s de 7 a 12 minutos. Voltee despuc!s de 9 a 15 minutos. Voltee despuc!s de 12 a 17 minutos. 9 20 a 25 minutos Voltee despuc!s de la mitad del tiempo. 9 25 a 45 minutos Voltee ocasionalmente.
f EN EL HOP, NO Panel de Control AB CD H G 2 •Favorites on / off TIMER I TIMER2 On / off On / Off _etup Oil / Off Clean More 4 5 6 JKL MNO 7 8 9 PQRS [UV WXYZ 0 Enter Oven On/Off KL 3 DEF GHI Back Fan J ASC Light IVl [ CANCEL I t N 0 Space Ioc_ J P El panel de control est,1disefiado para una programaci0nsencilla. La pantalla muestralasopciones para cadafunciOny va indicando los pasos del procesodeprogramaciOn.
Activaci6n y anulaci6n dia de la semana: del despliegue del reloj/ 3. Optima lasteclas numdricaspara programarel tiempo nuevo deseado. 1. Oprimala tecla "Setup" (Ajuste). Setup 2. SeleccioneRELOJ. On / Off/ ......................4. Oprimala tecla "Enter". 3. Optima la flecha para navegarentre las opciones hastaque se muestreel DESACTIVAR. Anulaci6n Si ambos temporizadores 5. SeleccioneHORA. 6.
Horneado Para homear: / ............... Bake 1. Oprimala tecla "Bake" (Horneado). k 2. Seleccionela temperaturadel homo usandolasteclas rdpidas. espec[ficode tiempo. Cuandoesetiempo seacabe, el homo reducirdla temperaturaautomdticamentea 77° C [170° F), mantendrdel alimento caliente duranteuna hora y luego se apagar_ autom_ticamente. Cuandose usa la funci6n "Delay",el homo comienzaa cocinar rods tarde en el dfa.
"Convect" (Convecci6n) Programela temperaturadeseadausando lasteclas num_ricas. Optima la tecla "Enter" (Acepta0 para guardar el ajuste. La cocci6n per convecci6nusa un ventilador para circular aire caliente uniformementesobre,debajo y alrededordel alimento. Come resultado,los alimentosse cocinan y doran uniformemente,a menudoen tiempos m_s cortes,a temperaturasrodsbajasy con la flexibilidad de usar mds de una parrilla al mismotiempo. .
"Convect Roast" "Convect Pastry" (Asado por convecci6n) (Pasteleria Para asar per convecci6n: La opciOn"ConvectPastry"est_ diserada para hornearart[culos de pasteler[atales come pays congelados,empanadasdulces,pastelitos de crema y pastelitosde hojaldre.Use una, doso tres parrillas cuando utilice esta caracter[stica. 1. Coloqueel alimentoen el horno. /H ................ 2. Oprimala tecla "Conveet" (ConvecciOn). ( Convect 3. SeleccioneASAR POR CONV usando las teclas rdpidas. por convecci6n) 1.
"Broil" (Asar) 5. Coloqueel alimento en el homo y cierre la puerta hasta el tope de asar. Paraobtenerlos mejoresresultados,precalienteel homo durante cinco minutos con la puerta cerraday useuna bandejadise_ada para asar.La puertadel homo debe estar abierta en el tope de asar [aprox.5 cm o 4") cuando asealimentos. 6. Oprima la tecla "CANCEL" [Anula0 cuando termine de asar. ( CANCEL Para asar a la parrilla: Notas: 1. Coloquela parrilla del horno en la posiciOnapropiada.(Veala Tablade asar).
Ventilador del homo Posiciones de las parrillas El ventiladorde convecci6n (modelosselectos)se usapara hacer circular aire caliente en el homo cuandose seleccionala funci6n de convecci6n. PARRILLAS (posici6nm_isalta): Se usapara hornear con dos parrillasy para asar. importante: Elventilador de convecci6nse detendr_i automaticamentecuandose abra la puerta del homo. PARRILLA4: --4 -- 3 - plana Se usapara hornear con dos parrillasy para asar.
OPC|ONES opciones Para programar un homeado pot convecci6n diferido: 1. Sign los pasos 1 a 4 de la funci6n "Delay" (veaabajo a la izquierda). "Cook & Hold" (Cocinar y mantener caliente) 2. Seleccionela funci6n HORNEADO,ASAR o PASTE[.ES. 1. Oprimala tecla "More Options" [M_s opeiones). /" More 2. SeleccioneCOCCION/CA[.ENT. 3. Elija una de Ins temperaturasdesplegadaso use Insteclas num6ricaspara programarla temperatura. Options \ / 4.
• No coloque los plates calientessobre superficiesfr[as puesel cambio r_pido de temperaturapuede hacerque se rompano causar fisuras. Notas: • Paracualquier masaque requiera levantarseuna vez,se puede usarel espajamientonormal o r_pido. Notas: • Cuandouse masade pan congelada,elija la opciOnde ESPONJ RAPIDA. No es necesariodescongelarla masa antes de fermentarla. , Losalimentosdeben estar calientescuandose colocan en el homo.
• La pantallamostrar4brevementela temperaturaseleccionada para el homo y para la sonda. espaciadoren la posiciOncorrecta durante el procesode secado y permite que la puerta seaabierta en cualquier memento durante el secadosin que pierda su posiciOncorrecta. , Despuc!sde 10segundos,la pantalla mostrar4la temperatura real del homo y la temperaturareal de la sonda.
Guia de secado MaRzaRas _' Duraznos* Variedadesfirmes:"Graven" "Stein","GrannySmith", "Jonathan","Winesap", "RomeBeauty","Newton". Lave,pele si desea,elimineel coraz6ny corte en rebanadasde 32 mm (1/8"). 4 a 8 horas Flexiblesa crujientes.Las manzanas secasse preservanmejorcuando est_inun pococrujientes. "Blenheim/Royal"rods comunes.Los"Tilton" tambi6nson buenos. Lave,corte por la mitad,eliminelas semillas. 18 a 24 horas Suaves, flexibles.
"Thaw and Serve" (Deseongelar y servir) Useesta funciOnpara alimentoscongeladosque necesitanser descongeladospete no cocinadosantes de servir. Para programar la funeiOn descongelar y servir: 1. Coloqueel alimento en el horno en la parrilla 2. 2. Oprima la tecla "Conveet" (ConvecciOn). _.............. 6. DESCONG-SERVlR, el tiempo de cocci0ny el conteo regresivo del tiempo de cocci0n aparecerdnen pantalla. , 3. Oprima la flecha para navegarentre lasopciones,t Convect ........... F/ 4.
FAVOR|TO "FavoFites" (Favoritos) Para crear aria nueva receta favorita: 1. Oprima la tecla "Favorites". La opci6n "Favorites"(favoritos)guarda la flJnei6ndel homo, tiempo de cocci@ y la temperaturahasta para 10 de sus recetasfavoritas. Los hornosde eonvecci6nvienencon cinco reeetas preprogramadas. Para seleccionar aria receta de la lista de recetas preprogramadas: 1. Oprimala tecla "Favorites". 2. Seleccionela opci6n LISTARECETAS. / .............. , ( Favorites 2.
Para borrar una receta favorita: _..................... Favorites' 1. Oprimala tecla "Favorites" [Favoritos_. On / Off .............................. 5. El control le preguntar_si est_ segurode que deseaborrar esa receta. SeleccioneSIo NO. 6. Optima la tecla "Favorites" para salir del menL_ de recetas favoritas. / 2. Oprimala flecha para navegarentre las opciones. 3. Seleccionela opci6n BORRARRECETA. Parasalir del men_de recetasfavoritas en cualquier memento, optima la tecla "Favorites". 4.
C/F Notas: La escalade temperaturadesplegadapuede ser cambiadade Fahrenheita Celsius. Para cambiar la escala: 1. Oprimala tecla "Setup" (Ajuste]. JSetup; 'i On / Off / 2. Use la flecha para pasara la pantallasiguiente. 4. Seleccionela escalade temperaturadeseada. Todos los avisos,mensajesy sefialessonorasestar_n desactivadoscuandoel modesab_ticoest6 activado. 5. Optima la tecla "Setup" para salir del men0 de configuraci6n.
208/240 V 3. SeleccioneVOLUMEN. Paramejoresresultadoscuando usa la funci6n "Bake" (Hornear],el homo puede ser cambiadode 240 V a 208V si su hogar usa 208 V. Para programar el homo a 208 V: 4. SeleccioneALTO para el volumen m4salto. O _.......... . SeleccioneMEDIANO para un nivel de volumen intermedio. 1. Oprima la tecla "Setup" [Ajuste]. " Setup ...... On / off/ 2. Oprima la flecha para navegarentre lasopciones. ............... 3. Seleccione 208/240 O SeleccionesBAJO para el volumen m_s bajo. V.
CARTUCHOS Y | Accesorios Cubierta de parrilla - Modelo A341 Laatractivacubierta parala parrillala protegecuando no estden uso.Deacerocontexturaen blancoo negro y con manijasmoldeadas. Plancha el_ctrica - Modelo JGA8200ADX La planchacon autodrenajefacilita la preparaci6nde muchosalimentosfavoritos. La superficiepara alimentosde tamafio familiar le permite cocinar varios panqueques, hamburguesaso emparedadosa la plancha a la vez. Cuentacon un acabadoantiadherente negro.
f ARANTiA Y SERViCi Lo que no cubren estas garantias 1. Situacionesy dafios resultantesde cualquierade lassiguienteseventualidades: a. Instalaci0n,entregao mantenimientoinapropiados. b. Cualquierreparaci0n,modificaci0n,alteraci0no ajuste no autorizado per el fabricanteo por un tOcnicode servicioautorizado. c. Mal uso, abuso,accidentes,uso irrazonableo hechosfotuitos. d. CorrienteelOctrica,voltaje o suministro incorrectos. e. Programaci0nincorrectade cualquierade los controles. 2.