Models JGR8855, JGR8850, JGR8750 For Future Safety Assistance Instructions Controls .............................. ............................... at a Glance i 1-4 ............................ 5-7 Surface Cooking .................................. Surface Controls .............................. 8-I0 8-9 Cooktop ............................................ Panel Light ........................................ Oven Operation Oven Controls ................................ .........................
For Future • • • • • Congratulations Your complete • • _" €" Assistance O • • • • • • • • • • • • • • • _" • • • • • • 4. • • • • IMPORTANT SAFETY INSTRUCTIONS on your choice of a Jenn-Air gas range. satisfaction is very important to us, Read this user's guide carefully. It is intended operate and maintain your new range. • to help you In addition, you will find a booklet entitled "Caoking Made Simple.
Important e • • e • • General • • • • • • • • • • • • • • • • Safety • • • • • • • • • • • • • • • • • ALL RANGES CAN TIP AND CAUSE INJURIES TO PERSONS • INSTALL ANTI-TIP DEVICE PACKED WITH RANGE • FOLLOW ALL INSTALLATION INSTRUCTIONS "Ib eliminate the hazard of reaching over hot surface burners, cabinet storage should not be provided directly above a unit.
Safety • • • About • Instructions • • • • • • • • • • • • • • • Your Appliance the flow of combustion and ventilation air by blocking the oven vent or air intakes. Restriction of air flow to the burner prevents proper performance and increases carbon monoxide emission to unsafe levels. Avoid touching oven vent area while oven is on and for several minutes after oven is turned off. Some parts of the vent and surrounding area become hot enough to cause burns.
Safety Be sure utensil is large enough to properly contain food and avoid boilovers. Pan size is particularly important in deep fat frying. Be sure pan will accommodate the volume of food that is to be added as well as the bubble action of fat. To minimize burns, ignition of flammable materials and spillage due to unintentional contact with the utensil, do not extend handles over adjacent surface burners.
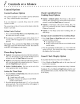
Controls at a Glance The control panel is designed for ease in programming. The display window on the electronic and oven functions. Indicator words flash to prompt your programming steps. 0 1 5 6 Preset Convect Bake Bake Broil Clean Cook Time Stop Time Drying control shows time of day, timer 7 Stop Clear Timer 3 4 8 9 Clock mBmJENN-AIR NOTE: Styling and features bake and drying functions. Function may differ slightly depending Pads temperature.
Controls Stop Time/Cook Use to program Time Setting the oven to start and stop automatically. 1. Press Bake or Convect Bake pad. Press the appropriate number pads for desired temperature. 2. Press Cook Time pad. Press the appropriate number pads to enter cooking time in hours and minutes. 3. To delay the start of cooking, press Stop Time pad. Press the appropriate oven to stop. number pads to enter the time you want the the Timer Use to set and then signal the completion to 99 hours and 59 minutes.
Controls Control at a Glance Options Control Lockout Clock Controlled Oven Cooking Beep Options Option The control touchpads can be locked to prevent use. They will not function when locked. If an oven function canno! be locked. is currently being used, unwanted the controls 0 Option 1 (default option): Four beeps at the end of cooking, then, one beep every 30 seconds for the next five minutes or until the Stop/Clear pad is pressed.
Surface Automatic Surface Controls Pilotless Ignition Cooking 8 Oven Turn Off Option The oven will automatically turn off after 12 hours, if you accidentally leave it on. You can deactivate this feature, if desired. To Eliminate 12 Hour Turn Off 1. Press the Clock pad and hold for three seconds or until "12" appears in the display. The indicator word TIME will flash in the display. 2. Press any number pad until 8888 appears in the display.
9 Surface Setting Cooking the Controls 1. Place a pan on the burner grate. The burner flame may lift off or appear separated the port if a pan is not placed on the grate. 2. Push in and turn ttle knob counterclockwise from to the Lite setting. I_ A clicking (spark) sound will be heard and the burner will light. (All four ignitors will spark when any surface burner knob is turned to the Lite position.) 3. After the burner lights, turn the knob to the desired flame size.
Surface Cooking Cooktop Sealed To prevent the cooktop Clean cooktop from discoloring after each use. Fhe sealed burners of your range are secured to the cooktop and are not designed to be removed. Since the burners are 0 Wipe acid or sugar spills as soon as the cooktop has cooled as these spills may discolor or etch the porcelain. The cooktop is designed with two contoured wells _-...z. _ _ withremovableporcelain ff_") covereddrippanstocontain spills. (See page 20 for cleaning directions.
Oven Setting Roasting the Controls for Baking, and Convection • and Roasting" * Convection Operation Baking _ cooking available on select models 1. Place oven racks on proper rack positions. 2. Press Bake or Convect only. (See page 13.) Bake pad. • The indicator word BAKE will flash. • 000 and the oven icon _-] 4. At the end of cooking, turn the oven off by pressing the Stop/Clear pad. Remove food from oven. The oven will continue operating until the Stop/Clear pad is pressed. will appear.
Oven • Convection Convenience • • Baking Cooking of Foods (select models) • • € Preheating the oven is not necessary. • Follow package recommendations for oven temperature, foil covering and the use of cookie sheets. Cooking times will be similar. (See chart below" for some exceptions.) • Most foods are cooked with convection, • • • • • • /2 • • • • • Chart 3 325 ° 20-25 350° 28-33 2 350 ° 28-40 375° 30-42 3 on rack position #3.
] Oven Operation MULTIPLE RACK COOKING: Two rack (conventional or convection baking, sclcct models): Use rack positions 2 and 4, or 1 and 4. Three rack (convection baking, select models): Use rack positions 1, 3 and 5. (See illustration left column.) The oven racks are designed with a lock-stop edge. Convection models have three racks. Conventional bake models have two racks.
Oven • € !_ € • It, € € • • 4, € € • € !_ • • • • • • • • € Operation € • € € € € • € € € • € Broiling Broil in the oven cavity. For best results, for broiling. For additional broiling Simple" booklet. Setting use a pan designed tips, refer to the "Cooking the Controls Made for Broiling 1. Place the oven rack on the proper rack position. following chart.) Close the oven door.
Oven • • • Clock • • • Operation • • • • Controlled • • • • • • • • • • • • The clock must be functioning and set at the correct time of day for this feature to operate correctly. • • • • 4, Press appropriate minutes. Example: If cooking and 30 minutes, • elapse _Ween , / p_ing a • • • • • • • • time selected hours and for baking is 2 hours If the program is not cancelled, there will be one beep eve y 30 seconds for five minutes.
Oven Operation ]6 Ii. 7. At the end of the delayed period the DE1,AY indicator word will go off and the oven will begin to heat. . At the end of the clock control led Cook Time, the oven will shut off automatically, "End" will appear in the display and a beep will be heard four times. Press the Stop/Clear pad. • When the door is opened, the spacer will rotate downward and rest flush against the range side panel, Reset the spacer if you need to continue the drying process. 4.
Oven Operation Fruits Firm Varieties: Apples* Stein, Granny Jonathan, Graven Smith, Wash, peel if desired, core and slice into 1/8" slices. 4-8 hours apples store best when they Winesap, Rome Beauty, Pliable to crisp. Dried are slightly crisp. Newton. i Apricots* Blenheim/Royal most Wash, halve, and remove pits. 18-24 hours Soft, pliable. common. Tilton also good. Bananas* Firm Varieties Peel and cut into I/4" slices. 17-24 hours. Pliable to crisp.
Care • • • • • 4' Self-Clean • • • and Cleaning • Oven Wipe up excess grease to prevent excessive the clean cycle. or spillovers smoking, from the oven bottom flare-ups or flaming during Wipe up sugary and acid spillovers such as sweet potatoes, tomato or milk-based sauces. Porcelain enamel is acid resistant, not acid proof. The porcelain finish may discolor acid spills' are not wiped up prior to a self-clean cycle. Setting the Controls for a Self-Clean if Cycle 1.
[9 Care and Cleaning After Self-Cleaning About one hour after the end of the clean cycle, the lock will disengage and the LOCK indicator word will turn off. At this point, the door can be opened. Some soil may leave a light gray, powdery ash which can be removed with a damp cloth. If soil remains, it indicates that the clean cycle was not long enough. The soil will be removed during the next clean cycle.
Care and Cleaning 20 CAUTIONS: • Be sure appliance is off _ Parts all parts are cool before: Pan Never cover insert with aluminum and Insert • • • Burner the fat from draining m warm soapy water. Use soap filled scouring OBroiler • foil as this prevents • • o • • o,. Caps • • • • • • • • • • • • • • • • • burner to cool.
I Care and Cleaning • • _ _ 4, • • • • • • • _ _ • • Porcelain may discolor • • • • • • • • or craze if overheated. • • • • • _ €. _ • • _ • • • • This is normal and will not affect cooking performance. OWhen cool, wash after each use, rinse and dry to prevent washed in the dishwasher. staining or discoloration. 4,To clean heavy soil, soak in hot sudsy water, then use mild abrasive and a plastic scouring
Care • DO NOT USE ANY CLEANING • ALWAYS • Daily Cleaning/Light solution, PRODUCT WIPE WITH THE GRAIN Formula Soil _ and Cleaning CONTAINING WHEN CHLORINE wipe with one of the following 409 Glass and Surface Cleaner • Moderate/Heavy BLEACH. CLEANING. - soapy water, white vinegar/water or a similar nmlti-surface sponge or soft cloth. Rinse and dry. To polish and help prevent fingerprints, Steel Magic Spray (Jenn-Air 22 cleaner - using a tbllow with Stainless Model A912, Part No.
Maintenance Maintenance Oven Light Oven Door To replace oven light bulb: 1. When oven is cool, hold bulb cover in place, then slide wire retainer off cover. _L_COvzR NOTE: Bulb cover will fall To remove: 1. When cool, open the oven door to the first stop position (opened about four inches). 2. Grasp door at each side. Do not use the door handle to lift door. 3. Lift up evenly until door clears hinge arms. To replace: 1. Grasp door at each side. 2.
Maintenance Leveling The three-prong grounding plug offers protection against shock hazards. DO NOT CUT OR REMOVE THE THIRD GROUNDING PRONG FROM TIlE POWER CORD PLUG. Legs If an ungrounded, two-hole or other type electrical outlet is encountered, it is the personal responsibility of the appliance owner to have the outlet replaced with a properly grounded three-hole electrical outlet. The range should be leveled when installed. If Ijl _---_1 the range is not level, turn the plastic leveling _!_..
Before You Call For Service Check the I_llowing list to be sure a service call is necessary. Part or all of the appliance does not work. Baking results OCheck to be sure plug is securely inserted into receptacle. OCheck or re-set Check or replace fuse. 0Check circuit breaker. if oven door is unlocked See pages I_Check the oven temperature selected, Make sure oven is preheated when recipe or directions recommend preheat. • Check rack positions. power supply.
Before Oven will not self-clean. I_ Check to make sure controls are set properly. • Check to make sure the cycle is not set for a delayed start. • Check if door is closed. Oven did not clean properly. • Longer cleaning time may be needed. • Excessive spillovers, especially sugary and or acid foods, were not removed prior to the self-clean cycle. Oven door will not open after self-clean • Oven interior is still hot. cycle.
Warranty Full One Year Warranty - Parts and Labor For one (1) year from the original retail purchase date, any part which fails in normal home use will be repaired or replaced free of charge. Limited Warranties - Parts Only Second Year - After the first year from the original purchase date, parts which fail in normal home use will be repaired or replaced free of charge for the part itself, with the owner paying all other costs, including labor, mileage and transportation.