
Installation Guide


INTRODUCTION 7
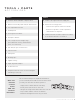
TOOLS + PARTS
NOT PROVIDED
TOOLS
Cordless drill and drill bits or impact driver
Drill bit set including 3/32" and 1/8" diameter bits
Two adjustable wrenches
#2 Phillips bit
1/4" magnetic nut driver
#2 square-drive bit
48" or longer level or straight edge
(Can substitute a factory-installed trim
piece, once removed.)
3/8" and 1/2" open-end wrenches
Tape measure
Utility knife
Masking tape
Appliance dolly
Right angle drill adapter
6" drill extension
#8 pan head wood screws of assorted lengths
including 1", 1-1/4", 1-1/2"
PARTS
Flexible code-approved water supply line
Custom door overlay panels
• Stainless steel panels: order from JennAir
• Custom wood panels: consult a qualified
cabinetmaker or carpenter
Additional fasteners will be required according
to the kitchen furniture construction
WHY USE
ROTTER
SYSTEM
SHIMS
AND THE
BADASS
BRACKET?
9/32"
1/4"
3/16" 1/8"
1/16"
This recommended process might be unfamiliar to
you as an installer, but it adds enormous value to both
you and your client. Use the Rotter system to:
• Help position column without scratching
• Create precise 1/8" reveals on each side
• Always have ready-made shims tailored to each site
• Keep column stable in cutout over lifetime
• Eliminate misalignment issues for your client