USE AND CARE GUIDE AND INSTALLATION INSTRUCTIONS DOUBLE REFRIGERATOR DRAWERS/REFRIGERATOR/ FREEZER DRAWERS GUIDE D’UTILISATION ET D’ENTRETIEN ET INSTRUCTIONS D’INSTALLATION TIROIRS RÉFRIGÉRANTS DOUBLES/RÉFRIGÉRATEUR/ TIROIRS DE CONGÉLATION For questions about features, operation/performance, parts, accessories, or service, call: 1-800-JENNAIR (1-800-536-6247) or visit our website at www.jennair.com. In Canada, call: 1-800-JENNAIR (1-800-536-6247), or visit our website at www.jennair.ca.
TABLE OF CONTENTS TABLE DES MATIÈRES INTRODUCTION INTRODUCTION Safety.....................................................................................................................3 Proper Disposal of your old Refrigerator..............................................................................................4 Design configuration.................................................................................4 Features.........................................................................
INTRODUCTION SAFETY Your safety and the safety of others are very important. We have provided many important safety messages in this manual and on your appliance. Always read and obey all safety messages. This is the safety alert symbol. This symbol alerts you to potential hazards that can kill or hurt you and others. All safety messages will follow the safety alert symbol and either the word “DANGER” or “WARNING.
PROPER DISPOSAL OF YOUR OLD REFRIGERATOR Before You Throw Away Your Old Refrigerator: Remove the door or drawer(s). WARNING Suffocation Hazard Remove door or drawer(s) from your old refrigerated appliance. Failure to do so can result in death or brain damage. IMPORTANT: Child entrapment and suffocation are not problems of the past. Junked or abandoned refrigerators are still dangerous – even if they will sit for “just a few days.
FEATURES 6. RISE™ Design Expression 1. 12. 11. 2. 3. 10. 9. 4. 5. 6,7,8. Embrace an era of striking proportions. A stainless steel suite of armor gleams with spectacular light. This is strength—inextricable from beauty. Forged in the fires of progress, the RISE™ design expression towers over stagnant, uninspired designs that have inherited undeserved standing. 7. NOIR™ Design Expression Lose yourself in a world that’s yours alone.
INSTALLATION REQUIREMENTS TOOLS AND PARTS Gather the required tools and parts before starting installation. Read and follow the instructions provided with any tools listed here.
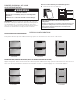
PRODUCT DIMENSIONS DRAWER WIDTH DIMENSIONS DRAWER HEIGHT DIMENSIONS RISETM/NOIRTM (TOP VIEW) Height dimensions are shown with the leveling legs extended to 1/4" (6 mm) below the refrigerator drawers. When leveling legs are fully extended to 1" (25 mm) below the refrigerator drawers, add 3/4" (19 mm) to the height dimensions. The power cord is 60" (1.52 m) long.
CUSTOM OVERLAY DRAWER PANELS For the installation of the customer panel, you will need the following parts: 16 screws (SS Flat M4x12 tapping 1) If you plan to install custom wood panels, you will need to create the panels yourself or consult a qualified cabinetmaker or carpenter. See dimension drawings for panel specifications. 4 Self-tap wood screws 4 Drawer overlay hook plate right (SPHC T=2.3) IMPORTANT: 4 Drawer overlay hook plate left (SPHC T=2.
ELECTRICAL REQUIREMENTS WARNING TOOLS NEEDED: Flat-blade screwdriver, 7/16" and 1/2" open-end wrenches or two adjustable wrenches, 1/4" nut driver and drill bit, cordless drill. NOTE: Your refrigerator dealer has a kit available with a 1/4" (6 mm) saddle-type shutoff valve, a union, and copper tubing. Before purchasing, make sure a saddle-type valve complies with your local plumbing codes. Do not use a piercing-type or 3/16" (4.76 mm) saddle valve which reduces water flow and clogs more easily.
INSTALLATION INSTRUCTIONS UNPACK THE REFRIGERATOR DRAWERS 5. WARNING Using a cordless drill, drill a 1/4" hole in the cold water pipe you have selected. A Excessive Weight Hazard B G Use two or more people to move and install refrigerator drawer(s). C Failure to do so can result in back or other injury. F REMOVE THE PACKAGING Remove tape and glue residue from surfaces before turning on the refrigerator drawers. Rub a small amount of liquid dish soap over the glue residue with your fingers.
4. 5. The ice maker is equipped with a built-in water strainer. If your water conditions require a second water strainer, install it in the 1/4" (6 mm) water line at either tube connection. Obtain a water strainer from your nearest appliance dealer. Plug in refrigerator drawers or reconnect power. MOVE THE REFRIGERATOR DRAWERS TO FINAL LOCATION 1. Place top of cardboard carton or plywood under the 2. appliance. Remove dolly. Do not remove film or cover.
6. 7. Push straight down on the overlay panel to secure the overlay hooks to the drawer. Using the self-tap wood screws (two per drawer; one in each corner of the drawers), attach the panel to the drawer. NOTE: Do not put the screws removed in step 4 back on the door. 8. 3. 4. Once the overlay is securely attached to the drawer with the two screws, put the gasket back in its place by pressing it against the door until the gasket is even and firmly secured. Remove the level and close the top drawer.
REFRIGERATOR DRAWERS USE IMPORTANT: CONTROLS Wait 24 hours after you turn on the refrigerator drawers before you put food into the drawers. If you add food before the drawers have cooled completely, your food may spoil. NOTE: Adjusting the controls to a lower (colder) setting in one or both drawers will not cool them any faster. The control panels for both double drawer models are located in the upper drawer. To view and set the Upper and Lower control panel, pull out the upper drawer.
2. Max Cool The Max Cool feature assists with periods of heavy usage, full grocery loads or temporarily warm room temperatures. For your convenience, each drawer also has controls that are preset to recommended storage temperatures for specific products. Max Cool will reset the temperature for the refrigerator drawer to 32°F (0°C) and -3°F (-19°C) for the freezer drawer for a 24-hour period.
7. Sabbath Mode Sabbath Mode is designed for the traveler or for those whose religious observances require turning off the lights. By selecting this feature, the temperature set points remain unchanged, but the control panel lights, interior lights, and control audio turn off. For most efficient refrigerator drawers operation, it is recommended to exit the Sabbath Mode when it is no longer required. Press and hold SABBATH for 3 seconds to turn on the feature.
CARE AND CLEANING CHANGING THE WATER FILTER CLEANING WARNING The water filter is located through the base grille. You do not have to remove the base grille in order to change the water filter. 1. Explosion Hazard Use nonflammable cleaner. Failure to do so can result in death, explosion, or fire. The drawers defrost automatically. However, clean both drawers about once a month to avoid buildup of odors. Wipe up spills immediately. Locate the water filter cap in the front base grille.
2. VACATION CARE IF YOU CHOOSE TO TURN THE REFRIGERATOR DRAWERS OFF BEFORE YOU LEAVE: 1. Remove all food/beverages/ice from the refrigerator drawers. 3. 4. Turn Off the Control Panel for the Upper and the Lower drawers. See “Controls.” Clean refrigerator drawers, wipe and dry them well. Tape rubber or wood blocks to the tops of both drawers to prop them open far enough for air to get in. This stops odor and mold from building up.
THERE IS INTERIOR MOISTURE BUILDUP DRAWERS Are the air vents blocked in the refrigerator drawers? Remove any objects from in front of the air vents. See “Ensuring Proper Air Circulation” for the location of air vents. Are the drawers opened often? Avoid humidity buildup by getting all items out at one time, keeping food organized, and closing the drawer as soon as possible. Is the room humid? It is normal for moisture to build up inside the refrigerator drawers when the room air is humid.
IF YOU NEED SERVICE ASSISTANCE IN CANADA Before calling for assistance or service, please check “Troubleshooting.” It may save you the cost of a service call. If you still need help, follow the instructions below. Call the JennAir Canada Customer eXperience Centre toll free: 1-800-JENNAIR (1-800-536-6247). When calling, please know the purchase date and the complete model and serial number of your appliance. This information will help us to better respond to your request.
PRODUCT DATA SHEETS BASE GRILLE WATER FILTRATION SYSTEM MODEL WF-L200V CAPACITY 200 GALLONS (757 LITERS) MODEL WF-NL120V CAPACITY 120 GALLONS (454 LITERS) Tested and certified by NSF International against ANSI/NSF Standard 42 for the reduction of Chlorine, Taste and Odor, Particulate Class lll*; and against ANSI/NSF Standard 53 for the reduction of Lead, Mercury, Benzene, and p-dichlorobenzene. This system has been tested according to ANSI/NSF 42/53 for the reduction of the substances listed below.
JENNAIR® REFRIGERATION LIMITED WARRANTY ATTACH YOUR RECEIPT HERE. PROOF OF PURCHASE IS REQUIRED TO OBTAIN WARRANTY SERVICE. Please have the following information available when you call the Customer eXperience Center: QQ Name, address, and telephone number QQ Model number and serial number QQ A clear, detailed description of the problem QQ Proof of purchase including dealer or retailer name and address IF YOU NEED SERVICE: 1.
DISCLAIMER OF IMPLIED WARRANTIES IMPLIED WARRANTIES, INCLUDING ANY IMPLIED WARRANTY OF MERCHANTABILITY OR IMPLIED WARRANTY OF FITNESS FOR A PARTICULAR PURPOSE, ARE LIMITED TO ONE YEAR OR THE SHORTEST PERIOD ALLOWED BY LAW. Some states and provinces do not allow limitations on the duration of implied warranties of merchantability or fitness, so this limitation may not apply to you.
INTRODUCTION SÉCURITÉ Votre sécurité et celle des autres est très importante. Nous donnons de nombreux messages de sécurité importants dans ce manuel et sur votre appareil ménager. Assurez-vous de toujours lire tous les messages de sécurité et de vous y conformer. Voici le symbole d’alerte de sécurité. Ce symbole d’alerte de sécurité vous signale les dangers potentiels de décès et de blessures graves à vous et à d’autres.
MISE AU REBUT DU VIEUX RÉFRIGÉRATEUR Avant de jeter votre vieux réfrigérateur : Retirer la porte ou les tiroirs. AVERTISSEMENT Risque de suffoquer Enlever la porte ou le(s) tiroir(s) de votre vieil appareil réfrigéré. Le non-respect de cette instruction peut causer un décès ou des lésions cérébrales. IMPORTANT : Le risque qu’un enfant puisse se retrouver coincé et suffoquer n’est pas chose du passé.
CARACTÉRISTIQUES 6. Expression esthétique RISE™ 1. 12. 2. 11. 3. 10. 9. 4. 5. 6,7,8. Adoptez une ère de proportions qui attirent l’œil. Une armure en acier inoxydable brille d’effets lumineux spectaculaires. C’est la force – inextricable de la beauté. Forgée par le feu du progrès, l’expression esthétique RISE™ domine les conceptions stagnantes et sans inspiration qui ont hérité d’un statut non mérité. 7. Expression esthétique NOIR™ Perdez-vous dans un monde qui est à vous seul.
EXIGENCES D’INSTALLATION OUTILS ET PIÈCES Rassembler les outils et pièces nécessaires avant d’entreprendre l’installation. Lire et observer les instructions fournies avec chacun des outils de la liste ci-dessous.
DIMENSIONS DU PRODUIT DIMENSIONS DE LARGEUR DU TIROIR DIMENSIONS DE HAUTEUR DU TIROIR RISETM/NOIRTM (VUE DE DESSUS) Les dimensions de hauteur sont illustrées avec les pieds de nivellement déployés à la hauteur de 1/4 po (6 mm) sous le tiroir réfrigérant. Lorsque les pieds de nivellement sont totalement déployés de 1 po (25 mm) au-dessous du tiroir de réfrigération, ajouter 3/4 po (19 mm) à la hauteur totale. La longueur du cordon d’alimentation est de 60 po (1.52 m).
PANNEAUX DÉCORATIFS DE TIROIRS PERSONNALISÉS Les pièces suivantes seront requises pour l’installation d’un panneau personnalisé : 16 vis (autotaraudeuses en acier inoxydable à tête plate M4 x 12) Si vous prévoyez installer des panneaux personnalisés en bois, vous devrez les créer vous-même ou consulter un ébéniste ou menuisier qualifié. Voir le dessin des dimensions pour les spécifications du panneau.
SPÉCIFICATIONS ÉLECTRIQUES AVERTISSEMENT Risque de choc électrique Brancher sur une prise à 3 alvéoles reliée à la terre. Ne pas enlever la broche de liaison à la terre. Ne pas utiliser un adaptateur. Ne pas utiliser un câble de rallonge. Le non-respect de ces instructions peut causer un décès, un incendie ou un choc électrique. Avant de placer le tiroir réfrigérant à son emplacement final, il est important de s’assurer d’avoir la connexion électrique appropriée.
INSTRUCTIONS D’INSTALLATION DÉBALLAGE DU TIROIR DE RÉFRIGÉRATION On peut aussi utiliser une canalisation horizontale; dans ce cas, on devra percer sur la face supérieure du tuyau et non pas au-dessous. Ceci permet de tenir la perceuse à l’écart de l’eau et d’empêcher les sédiments qu’on trouve normalement dans l’eau de s’accumuler dans le robinet d’arrêt. AVERTISSEMENT Risque du poids excessif Utiliser deux ou plus de personnes pour déplacer et installer le(s) tiroir(s) réfrigéré(s). 4.
3. Vérifier qu’il n’y a pas de fuites. Serrer tous les raccords (y compris les raccords du robinet) ou les écrous qui présentent des fuites. A B C INSTALLATION DU PANNEAU DÉCORATIF PERSONNALISÉ IMPORTANT : Pour les modèles standards en acier inoxydable, passer ces instructions et commencer directement à la section « MISE AU NIVEAU DU TIROIR DE RÉFRIGÉRATION ». Réaliser le panneau décoratif personnalisé selon les spécifications de la section « Panneau décoratif personnalisé pour tiroirs ».
6. 7. Pousser le panneau vers le bas pour sécuriser les crochets au tiroir. À l’aide de vis à bois autotaraudeuses (deux par tiroir, une dans chaque coin des tiroirs), fixer le panneau au tiroir. REMARQUE : Ne pas remettre les vis enlevées à l’étape 4 sur le tiroir. 8. 3. Une fois le panneau bien fixé au tiroir avec les deux vis, remettre le joint en place en le pressant contre la porte jusqu’à ce qu’il soit égal et qu’il tienne fermement en place. 4. Enlever le niveau et fermer le tiroir supérieur.
UTILISATION DES TIROIRS DE RÉFRIGÉRATION IMPORTANT : COMMANDES Attendre 24 heures après avoir mis en marche les tiroirs de réfrigération avant d’y ajouter des aliments. Si on ajoute des aliments avant que les tiroirs aient complètement refroidi, les aliments risquent de se gâter. REMARQUE : La modification des commandes à un réglage inférieur (plus froid) dans l’un des tiroirs ou dans les deux ne les refroidira pas plus rapidement.
2. Max Cool (refroidissement maximal) La fonction de refroidissement maximum est utile lors de périodes d’utilisation intensive, d’ajout d’un grand nombre d’aliments ou de l’élévation temporaire de la température de la pièce. Pour votre commodité, chaque tiroir est également équipé de commandes préréglées à des températures d’entreposage recommandées pour des produits spécifiques.
7. Mode Sabbath (Sabbat) Le mode Sabbat est conçu pour les personnes qui partent en voyage ou pour les celles dont les pratiques religieuses requièrent l’extinction des lumières. En sélectionnant cette caractéristique, les points de réglage de température restent inchangés, mais les lumières du panneau de commande, les lampes d’intérieur et les signaux sonores du panneau de commande sont désactivés.
ENTRETIEN ET NETTOYAGE Veiller à ce que le nettoyant et poli pour acier inoxydable n’entre pas en contact avec les pièces de plastique comme les garnitures, couvercles de distributeurs ou joints de tiroir. En cas de contact accidentel, nettoyer la pièce de plastique avec une éponge et un détergent doux et de l’eau tiède. Sécher soigneusement avec un chiffon doux. NETTOYAGE AVERTISSEMENT REMPLACEMENT DU FILTRE À EAU Utiliser un produit de nettoyage ininflammable.
PANNES DE COURANT ENTRETIEN AVANT LES VACANCES Si l’alimentation électrique doit être interrompue pendant 24 heures ou moins, garder les tiroirs de réfrigération et de congélation fermés pour aider les aliments à demeurer froids.
Les commandes sont-elles correctement réglées pour les conditions environnantes? Voir la section « commandes ». Les tiroirs de réfrigération ne refroidissent pas? Les éteindre, puis les remettre en marche pour réinitialiser. Voir la section « commandes ». Si cela ne résout pas le problème, faire un appel de service. IL Y A ACCUMULATION D’HUMIDITÉ À L’INTÉRIEUR Les ouvertures d’aération sont-elles bloquées dans le tiroir de réfrigération? Enlever tous objets placés devant les ouvertures d’aération.
SI VOUS AVEZ BESOIN DE SERVICE ASSISTANCE AU CANADA Avant de faire un appel pour assistance ou dépannage, vérifier la section « Dépannage ». Cette vérification peut vous faire économiser le coût d’une intervention de dépannage. Pour de l’aide supplémentaire, suivre les instructions ci-dessous. Appelez sans frais le Centre pour l’eXpérience de la clientèle canadienne de JennAir au : 1 800 JENNAIR (1 800 536-6247).
FICHES DE DONNÉES DE PRODUITS SYSTÈME DE FILTRATION D’EAU DE LA GRILLE DE LA BASE MODÈLE WF-L200V CAPACITÉ 200 GALLONS (757 LITRES) MODÈLE WF-NL120V CAPACITÉ 120 GALLONS (454 LITRES) Produit testé et certifié par NSF International en vertu de la norme ANSI/NSF 42 (réduction du goût et de l'odeur du chlore, et particules (classe III*); et en vertu de la norme ANSI/NSF 53 (réduction de plomb, mercure, benzène, et p-dichlorobenzène).
GARANTIE LIMITÉE DES APPAREILS DE RÉFRIGÉRATION JENNAIR® ATTACHEZ ICI VOTRE REÇU DE VENTE. UNE PREUVE D’ACHAT EST OBLIGATOIRE POUR OBTENIR L'APPLICATION DE LA GARANTIE.
CLAUSE D'EXONÉRATION DE RESPONSABILITÉ AU TITRE DES GARANTIES IMPLICITES LES GARANTIES IMPLICITES, Y COMPRIS LES GARANTIES APPLICABLES DE QUALITÉ MARCHANDE OU D'APTITUDE À UN USAGE PARTICULIER, SONT LIMITÉES À UN AN OU À LA PLUS COURTE PÉRIODE AUTORISÉE PAR LA LOI. Certains États et provinces ne permettent pas de limitation sur la durée des garanties implicites de qualité marchande ou d'aptitude à un usage particulier, de sorte que la limitation ci-dessus peut ne pas être applicable dans votre cas.
NOTES: 43
/™ ©2019 All rights reserved. Used under license in Canada. Tous droits réservés. Utilisé sous licence au Canada.