MP1516 Mobile Audio System Owner’s Manual 160 watts peak 40W x 4
Thank you for choosing a Jensen product. We hope you will find the instructions in this owner’s manual clear and easy to follow. If you take a few minutes to look through it, you’ll learn how to use all the features of your new Jensen MP1516 Mobile Audio System for maximum enjoyment. “Made for iPod” and “Made for iPhone” means that an electronic accessory has been designed to connect specifically to iPod or iPhone, respectively, and has been certified by the developers to meet Apple performance standards.
MP1516 CONTENTS FEATURES �������������������������������������������������������������������������������������������������������������� 4 WARNINGS BEFORE INSTALLATION �������������������������������������������������������������������� 5 INSTALLATION TOOLS ������������������������������������������������������������������������������������������ 7 BEFORE YOU INSTALL ������������������������������������������������������������������������������������������� 7 Remove the Old Unit from the Dashboard ����������
CD/MP3/WMA OPERATION ���������������������������������������������������������������������������������28 Loading a Disc ��������������������������������������������������������������������������������������������������28 Ejecting a Disc ��������������������������������������������������������������������������������������������������28 Selecting a Track ����������������������������������������������������������������������������������������������28 Pausing or Resuming Playback ������������������������������
MP1516 WARNINGS BEFORE INSTALLATION Important Warnings to Take Note of BEFORE Commencing Installation Damage Caused By Incorrect Installation or Usage is NOT Covered By Warranty. PLEASE Take The Time To Read The Installation Notes Carefully. To Validate The Warranty Please Ensure That The Unit Is Installed By A Professional, VAT Registered Car Audio Installation Company. • To avoid shorts in your vehicle’s electrical system, be sure to disconnect the battery cable before beginning installation.
• If this unit is installed in a vehicle that does not have an ACC (accessory) position on the ignition switch, the red lead of the unit should be connected to a terminal coupled with ignition switch ON/Off operations. If this is not done, the vehicle battery may be drained when you are away from the vehicle for several hours. • Secure the wiring with cable clamps or adhesive tape. To protect the wiring, wrap adhesive tape around them where they lie against metal parts.
MP1516 • If noise is still experienced when the motor of the vehicle accelerates, a choke should be placed in line with the power to the unit. The installation company will know what is required. • When replacing the fuse(s) the replacement must be of the same amperage as shown on the fuse holder. Never replace a fuse with another fuse of a different value. If the fuse blows again please contact your installation company.
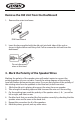
Remove the Old Unit from the Dashboard 1. Remove the outer trim frame. DIN Front Mount 2. I nsert the keys supplied with the old unit into both sides of the unit as shown in figure below until they click. Pull to remove the old unit from the dashboard. Do not disconnect wires at this time! 3. Mark the Polarity of the Speaker Wires Marking the polarity of the speaker wires will make it easier to connect the existing speakers to your car radio.
MP1516 INSTALLATION It’s a good idea to read all of the instructions before beginning the installation. We recommend having your Jensen MP1516 Mobile Audio System installed by a reputable installation shop. WARNING! Disconnect the negative battery terminal from the battery before starting installation. Consult the vehicle’s owner’s manual for proper instructions. NOTE: Mark the polarity of the existing speaker wires before disconnecting battery.
Remove the Transport Screws Before Installation Remove the two transport screws from the top of the unit before installing the unit. Remove screws before installation. DIN Front Mount (Method A) Installation Opening This unit can be installed in any dashboard having an opening as shown below: Installing the Unit Be sure you test all connections first, and then follow these steps to install the unit 1. After removing the old radio and mounting sleeve, insert the supplied mounting sleeve into opening.
MP1516 2. B end the tabs on the mounting sleeve to keep the mounting sleeve firmly in place. 3. A ttach the wires from the unit to existing wires. See the wiring connections diagram. Insert the radio into the dashboard. Then apply the trim frame to the outside of radio. 4. S upport the radio using the supplied rear mounting bolt and steel bar. See the parts list.
1. Remove the hooks on both sides. 2. Align the screw holes of the mounting bracket supplied with the car and the screw holes of the main unit. Tighten the two screws on each side of the unit. Then fasten the brackets to the car. 3. A ttach the wires of the unit to the existing speaker wires. See the wiring diagram. USING THE DETACHABLE FACEPLATE Removing the Faceplate 1. Press the 12 (release) button on the faceplate and pull off the faceplate.
MP1516 Release Button Faceplate 2. Keep the faceplate in the protective case. Protective Case Faceplate Installing the Faceplate To install the faceplate, insert the faceplate into the housing and make sure it is properly installed. Otherwise, the display may appear to be abnormal or some buttons will not function properly.
Handling Precautions 1. Do not drop the faceplate. 2. Do not put pressure on the display or control buttons when detaching or reinstalling the faceplate. 3. Do not touch the contacts on the faceplate or on the main unit body. It may result in poor electrical contact. 4. If any dirt or foreign substances adhere to the contacts, they can be removed with a clean and dry cloth. 5. Do not expose the faceplate to high temperatures or direct sunlight. 6. Keep away any volatile agents (e.g.
MP1516 Black Ground Connect the Black Ground wire to the vehicle body/chassis. Make sure that you have a good chassis ground. Good ground connections will eliminate most electrical noise from the motor and alternator. A good chassis ground requires a tight connection to the vehicle’s metal chassis. The area around the ground connection should be clean, bare metal without rust, paint, plastic, dust or dirt for a good electrical connection.
CONTROLS AND INDICATORS 1 2 3 4 25 24 23 22 27 5 6 7 21 20 19 8 18 17 9 16 15 14 10 13 12 11 26 1. (Next Track / Fast Forward) Button During disc play, this button is used to quickly select the end of a particular the button, the next higher track in the forward direction. With each press of TRACK number will be selected as shown on the display panel. Press and hold the button to advance rapidly in the forward direction as indicated by the elapsed time display. 2.
MP1516 6. S T (Stereo) Button In FM radio mode, press this button to switch between stereo and mono mode of reception. 7. Disc Slot With the label surface facing up, fully insert a compact disc into the slot until the load mechanism engages. Note: T his unit is designed for play of standard 5” (12 cm) Compact Discs ONLY. Do not attempt to use 3” (8 cm) CD-Singles in this unit, either with or without an adapter, as damage to the player and/or disc can occur.
19. 2 / INTRO (Introduction) Button Press this button to play the first 10 seconds of each track. Press this button again to resume playback. 20. 1 / (Play/Pause) Button Press this button to pause playback. Press this button again to resume playback. 21. Mute Button Press this button to mute the audio. Press this button again to unmute the audio. 22. SCN (Scan) Button In radio mode, pressing this button will enter the scan mode.
MP1516 REMOTE CONTROL OPERATION This unit comes with a full remote control system. A CR-2025 Lithium battery is included with the remote control. Battery Installation In case you have to replace the batteries: 1. Remove the cover from the back of the remote control. 2. Install one CR-2025 Lithium battery. Note: Make sure that the proper polarity (+ or -) is observed. 3. Fix the cover to the back of the remote control. Using the Remote Control 1.
Remote Control Functions 1 21 Mode 2 Band 20 CH 19 18 APS Clock Mute 3 4 17 TA AF PTY 5 16 15 14 13 12 11 6 1 4 RDM 2 3 INT RPT 8 5 6 9 SEL 7 10 1. B and Button Press this button to select or change the radio band (FM1, FM2, FM3, AM1 or AM2). 2. (Stations Tune/ Seek Up / Track Up) Button In radio mode, press the button briefly to activate the automatic seek function and tune to next strong station. In MP3/WMA mode, press the button to move to the following track.
MP1516 6. P TY (Program Type) Button Press this button once to show the music type program. Press this button twice to show the speech type program. 7. SEL (Sound Select) Button Press this button select the audio function (bass, treble, balance, fade or loudness) to be adjusted. 8. 3 / RPT (Repeat) Button Press this button to repeat the current track. Press this button again to cancel the repeat function. 9. (Decrease Volume) Button Press this button to decrease the volume. 10.
BASIC OPERATION Turning the Unit On or Off Press the (Power On/Off ) button, or press and hold any button to turn the unit on. The display panel will show the message “JENSEN” to indicate the unit is ready for use. When the unit is on, press the (Power On/Off ) button to turn the unit off. The display panel will show the message “GOODBYE”. Selecting an Audio Source Press the SRC button on the faceplate or the MODE button on the remote control to select radio, auxiliary device or disc play.
MP1516 Balance 1. Press the SEL button repeatedly until "BAL" appears on the display panel. 2. Rotate the volume knob to adjust the balance between the left and right speakers. Fader 1. Press the SEL button repeatedly until "FAD" appears on the display panel. 2. Rotate the volume knob to adjust the balance between the front and rear speakers. Setting the Clock The time clock can be set anytime when the power is on. 1.
RADIO OPERATION Selecting a Radio Band Press the SRC button on the faceplate or the MODE button on the remote control to select radio mode. The radio frequency appears in the display panel together with the frequency memory band (FM1, FM2, FM3, AM1 or AM2). The unit has five preset memory bands - three FM Bands (FM1, FM2, and FM3) and two AM Bands (AM1, and AM2) selects. Each of the five bands can store up to six preset stations, for a total of 30 preset memory stations.
MP1516 Save Your Preset Stations There are six numbered preset buttons which can store and recall stations for each band. While listening to a radio station you would like to save as a pre-set, press and hold one of the buttons numbered 1-6 until you hear a beep. The button you pressed is now the pre-set button for that station. Automatic Scan and Store While listening to the FM radio, press and hold the F/PS button. The receiver will automatically scan and save stations of the 3 FM bands.
TA - Traffic Announcement Press the TA button to turn Traffic Announcement function on or off. In TA mode traffic programs will be automatically searched, until the program is received. When a traffic announcement is received the unit will temporarily switch to the tuner mode (regardless of the current mode) and begin broadcasting the announcement. After the traffic announcement is over, it will return to the previous mode and volume level.
MP1516 When PTY is selected, the radio starts to search corresponding PTY information, and stops if the corresponding PTY information is detected. If no buttons are pressed within several seconds, the previously selected PTY is searched. During one loop, if desired the PTY is not found, the unit will return to the previous mode. Press the CLK/PTY button on the faceplate or PTY button on the remote control for a third time to switch the PTY function off.
CD/MP3/WMA OPERATION Loading a Disc Insert a disc into CD slot with label side up. The disc will be automatically loaded into the unit, even when it is off or in radio mode. The word “LOAD” will blink on the display panel and the CD will play automatically. Ejecting a Disc Press the (Eject) button to eject the disc from the slot. If the disc is not removed from the slot within 5 seconds, it will automatically be loaded into the slot again.
MP1516 MP3/WMA Playback While you are playing a disc with MP3 or WMA files, the first file in the root folder will be played. As the file is playing “MP3” or “WMA” will be displayed first, then if there is any ID3 information that will be displayed as the file is playing. Displaying ID3 Tag Information While you are playing an MP3 file which has ID3 Tag information, press the BAND/ ID3 button repeatedly to show the ID3 Tag information on the display panel.
Multi-Session CD Reading This unit can read multi-session CDs. The multi-session reading will be activated automatically if the player detects a file that is written in multi-session format. Electronic Skip Protection The unit is equipped with Electronic Skip Protection (ESP) circuits. Electronic Skip Protection is for driving on rough roads. The CD will play for 10 seconds on rough roads without skipping. If driving on a rough road for more than 10 seconds, the CD may skip.
MP1516 Disc Notes Notes on discs: • This unit will only play the following discs: Type of Disc CD, MP3, WMA Label on the disc Recorded Material Size of Disc Audio only 12 cm • This unit only reads 12 cm discs. • Do not use irregularly shaped discs such as heart or star-shaped discs as they may cause the unit to malfunction. Be sure to use round shape CD discs only for this unit. • Do not stick paper or tape, etc, onto the label side or the recording side of any discs, as it may cause a malfunction.
Cleaning and Handling Discs To enjoy the best sound quality, handle discs as indicated below: • Clean the discs with a cleaning cloth. Clean each disc from the center to the outside edge. • Don’t use CDs with blobs of glue or ink on its surface. • Don’t use CDs with labels or stickers on its surface. If the labels start to rub away, any remainder of glue can interfere with the good performance of the unit. • Hold and handle discs by the edges to keep the disc clean.
MP1516 USB OPERATION The unit contains a USB interface. The USB interface is located on the faceplate beneath the protective cover. You can connect an USB memory device using this interface. 1. Locate the USB Input Cover on the faceplate. USB Input Cover 2. Lift the USB Input Cover to reveal the USB connector. 3. Insert the USB device into the USB connector. The unit will read the audio files on the USB device automatically. “USB PLAY” will appear on the display panel. 4.
MEMORY CARD OPERATION There is an SD Memory Card Slot on the housing of the unit. The housing is accessed by removing the faceplate. 1. Press the release button on the faceplate. Release Button Release Button Faceplate 2. Pull off the faceplate to reveal the Memory Card slot. Faceplate 3. Insert an SD card into the Memory Card slot. Memory Card Slot 4. I nstall the faceplate. The unit will search the MP3 files in the card and start to play MP3 files automatically.
MP1516 MP3/WMA Playback To play MP3/WMA files from a SD card, remove the faceplate and insert a SD card into the SD Memory Card Slot on the housing. The unit will start playing MP3/ WMA files on the SD card memory automatically when the faceplate is installed. If the MP3/WMA files are stored in folders on the SD card, the unit will start by playing the first song in the first folder.
SPECIFICATIONS CEA Power Ratings Power output: 13 watts RMS X 4 channels into 4-ohms @ < 1% THD+N Signal to noise ratio: 70dBA below reference. (Reference: 1 watt, 4-ohms) Frequency response: 20Hz to 20kHz (-3dB), Auxiliary input used as source reference Reference supply voltage: 14.4VDC CD Player Signal-to-noise ratio: >90dBA Frequency response: 20Hz-20kHz, -3dB Channel separation: >55dB @ 1kHz D/A converter: 1 Bit/CH FM Tuner Tuning range (USA): 87.5MHz - 108.00MHz Tuning range (Europe): 87.50MHz-108.
MP1516 TROUBLESHOOTING Before going through the checklist, the check wiring connections. If any of the problems persist after checking the list, contact your nearest service dealer. Problem Cause Solution No power. • The car ignition switch is not on. • If the power supply is connected to the car accessory circuits, but the engine is not running, switch the ignition key to “ACC”. • Replace the fuse. Make sure the amperage matches the specified value. • The fuse is blown.
Problem Cause Solution The operation keys do not work. • The built-in microcomputer is not operating properly due to noise. • Press the RESET button. • The faceplate is not properly installed. The radio does not work. • The antenna cable is not connected. • Insert the antenna cable firmly. The radio station automatic selection does not work. • The signals are too weak. • Select a station manually.
MP1516 CARE AND MAINTENANCE 1. U se only a clean silicon cloth and neutral detergent to clean the front panel. A rough cloth and non-neutral detergent (such as alcohol) may result in scratching or discoloration. 2. Do not get water or cleaning fluids on the unit. 3. Do not use petroleum distillates to clean this unit. 4. Insert only 5” (12 cm) compact discs into the player. The mechanism can be damaged by foreign objects. 5.
Audiovox Electronics Corporation Hauppauge, NY 11788 Technical Assistance: 1-800-323-4815 www.mobile.jensen.
MP1516 Sistema de audio móvil Mobile Audio System Manual usuario Owner’sdel Manual 160 vatios como watts peak máximo 40W x 4
Gracias por elegir un producto Jensen. Esperamos que las instrucciones de este manual del usuario le parezcan claras y fáciles de seguir. Si dedica unos minutos a estudiarlas, aprenderá a usar todas las funciones de su nuevo Sistema de audio móvil Jensen MP1516 para disfrutarlo al máximo.
MP1516 CONTENIDO FUNCIONES ����������������������������������������������������������������������������������������������������������� 4 ADVERTENCIAS ANTES DE LA INSTALACIÓN ������������������������������������������������������ 5 HERRAMIENTAS DE INSTALACIÓN ����������������������������������������������������������������������� 7 ANTES DE LA INSTALACIÓN ��������������������������������������������������������������������������������� 7 Quite la unidad vieja de la consola de instrumentos �������������������
FUNCIONAMIENTO DE CD/MP3/WMA ���������������������������������������������������������������28 Carga de un disco ���������������������������������������������������������������������������������������������28 Expulsión de un disco ��������������������������������������������������������������������������������������28 Selección de una pista �������������������������������������������������������������������������������������28 Pausa o reanudación de la reproducción ������������������������������������������
MP1516 ADVERTENCIAS ANTES DE LA INSTALACIÓN Advertencias importantes que se deben tener en cuenta ANTES de comenzar la instalación Los daños provocados por la instalación o el uso incorrectos NO están cubiertos por la garantía. POR FAVOR, dedique el tiempo necesario para leer las notas sobre instalación detenidamente. Para validar la garantía, asegúrese de que la unidad sea instalada por una empresa de instalación de autoestéreos profesional inscripta en IVA.
• Si esta unidad se instala en un vehículo que no tiene una posición ACC (accesorio) en el interruptor de encendido, el conductor rojo de la unidad debe conectarse a un terminal combinado con funciones de Encendido/apagado del interruptor de encendido. Si no se realiza esto, la batería puede descargarse cuando usted se encuentra lejos del vehículo por varias horas. • Fije el cableado con abrazaderas de cables o cinta adhesiva.
MP1516 • Si se sigue percibiendo ruido cuando el motor del vehículo acelera, se debe colocar un estrangulador en la línea con la alimentación a la unidad. La empresa de instalación sabrá lo que se requiera. • Al reemplazar el(los) fusible(s), el repuesto debe ser del mismo amperaje que el que se muestra en el portafusibles. Nunca reemplace un fusible por otro de un valor diferente. Si el fusible se vuelve a quemar, comuníquese con la empresa que realizó la instalación.
Quite la unidad vieja de la consola de instrumentos 1. Quite el marco decorativo exterior. Instalación del DIN desde el frente 2. I ntroduzca las llaves suministradas con la unidad vieja en ambos lados de la unidad, como se muestra en la figura a continuación hasta que suene un clic. Tire para quitar la unidad vieja de la consola de instrumentos. ¡No desconecte los cables en este momento! 3.
MP1516 INSTALACIÓN Es una buena idea leer todas las instrucciones antes de comenzar la instalación. Recomendamos hacer instalar su Sistema de audio móvil Jensen MP1516 por un taller de instalación de buena reputación. ¡ADVERTENCIA! Desconecte el terminal negativo de la batería del borne de la batería antes de comenzar la instalación. Consulte el manual del propietario del vehículo para obtener las instrucciones adecuadas.
Quite los tornillos de transporte antes de la instalación Quite los dos tornillos de transporte de la parte superior de la unidad antes de instalarla. Quite los tornillos antes de la instalación.
MP1516 2. D oble las lengüetas sobre la manga de montaje para mantener la manga de montaje firmemente en su lugar. 3. U na los cables provenientes de la unidad con los cables existentes. Vea el diagrama de conexiones del cableado. Inserte la radio en la consola de instrumentos. Luego coloque el marco embellecedor en el exterior de la radio. 4. S ostenga la radio usando la barra de acero y el perno de montaje trasero suministrados. Consulte la lista de piezas.
1. Quite los ganchos de ambos lados. 2. Alinee los orificios de tornillos del soporte de montaje suministrado con el automóvil y los orificios de tornillos de la unidad principal. Ajuste los dos tornillos en cada lado de la unidad. Luego fije los soportes al automóvil. Soporte suministrado a su automóvil ho nc Ga Tablero o consola 3. C onecte los cables de la unidad a los cables de los altavoces existentes. Consulte el diagrama de cableado.
MP1516 Botón Liberar Frente de la unidad 2. Mantenga el frente de la unidad en el estuche protector. Estuche protector Frente de la unidad Cómo colocar el frente de la unidad Para instalar el frente, insértelo en el alojamiento y asegúrese de que esté correctamente instalado. De otro modo, la pantalla puede mostrarse de manera incorrecta o algunos botones no funcionarán correctamente.
Precauciones de manipulación 1. No permita que el frente de la unidad se caiga al suelo. 2. No presione la pantalla o los botones de control al extraer o reinstalar el frente. 3. No toque los contactos en el frente desmontable de la unidad o en el cuerpo de la unidad principal. Puede tener como resultado un mal contacto eléctrico. 4. Si se adhiere suciedad o sustancias extrañas a los contactos, pueden eliminarse con un paño limpio y seco. 5.
MP1516 Conexión a tierra negro Conecte el cable negro de conexión a tierra al cuerpo del vehículo/chasis. Asegúrese de tener una buena masa en el chasis. Las buenas conexiones a tierra eliminarán la mayoría de los ruidos eléctricos del motor y el alternador. Una buena masa del chasis requiere una buena conexión al chasis de metal del vehículo.
CONTROLES E INDICADORES 1 2 3 4 25 24 23 22 27 5 6 7 21 20 19 8 18 17 9 16 15 14 10 13 12 11 26 1. B otón (Siguiente pista / Avance rápido) Durante la reproducción de un disco, este botón se usa para seleccionar rápidamente el final de una pista en particular en la dirección de avance. Con cada presión de este botón , se selecciona el siguiente número de PISTA ascendente, como se muestra en el panel de la pantalla.
MP1516 6. B otón ST (Estéreo) En el modo radio FM, presione este botón para intercambiar entre el modo de recepción estéreo y monoaural. 7. Ranura del disco Con la superficie de la etiqueta hacia arriba, introduzca completamente un disco compacto en la ranura hasta que el mecanismo de carga se active. Nota: Esta unidad está diseñada para la reproducción de discos compactos estándares de 12 cm (5”) ÚNICAMENTE.
19. 2 / Botón INTRO (Introducción) Presione este botón para reproducir los primeros 10 segundos de cada pista. Presione este botón de nuevo para continuar la reproducción. 20. Botón 1 / (Reproducir/Pausa) Presione este botón para poner en pausa la reproducción. Presione este botón de nuevo para continuar la reproducción. 21. Botón Mute (Silenciar) Presione este botón para silenciar el audio. Presione este botón de nuevo para desactivar la función silenciar audio. 22.
MP1516 FUNCIONAMIENTO DEL CONTROL REMOTO Esta unidad viene con un sistema de control remoto completo. Se incluye una batería de litio CR-2025 con el control remoto. Instalación de la batería En caso de que tenga que reemplazar las baterías: 1. Quite la tapa de la parte posterior del control remoto. 2. Instale una batería de litio CR-2025. Nota: Asegúrese de respetar la polaridad correcta (+ o -). 3. Fije la tapa a la parte posterior del control remoto. Uso del control remoto 1.
Funciones del control remoto 1 21 Mode 2 Band 20 CH 19 18 APS Clock Mute 3 4 17 TA AF PTY 5 16 15 14 13 12 11 6 1 4 RDM 2 3 INT RPT 8 5 6 9 SEL 7 10 1. B otón Band (Banda) Presione este botón para seleccionar o cambiar la banda de la radio (FM1, FM2, FM3, AM1 o AM2). 2.
MP1516 6. B otón PTY (tipo de programa) Presione este botón una vez para mostrar el programa del tipo de música. Presione este botón dos veces para mostrar el programa del tipo de charla. 7. Botón SEL (selección de sonido) Presione este botón para seleccionar la función de audio (bass [graves], treble [agudos], balance, fade [atenuar] o loudness [sonoridad]) que se ajustará. 8. 3 / Botón RPT (Repetir) Presione este botón para repetir la pista actual.
FUNCIONAMIENTO BÁSICO Encendido o apagado de la unidad Presione el botón (encendido/apagado) o presione y mantenga presionado cualquier botón para encender la unidad. El panel de la pantalla mostrará el mensaje “JENSEN” para indicar que la unidad está lista para usarse. Cuando la unidad esté encendida, presione el botón (encendido/ apagado) para apagar la unidad. El panel de la pantalla mostrará el mensaje “GOODBYE” (HASTA LUEGO).
MP1516 Balance 1. Presione el botón SEL varias veces hasta que aparezca "BAL" en la pantalla. 2. Gire la perilla de volumen para ajustar el balance entre los altavoces izquierdo y derecho. Atenuador 1. Presione el botón SEL varias veces hasta que aparezca "FAD" en la pantalla. 2. Gire la perilla de volumen para ajustar el balance entre entre los altavoces delanteros y traseros.
FUNCIONAMIENTO DE LA RADIO Cómo seleccionar una banda de radio Presione el botón SRC en el frente de la unidad o el botón MODE (MODO) en el control remoto para seleccionar el modo radio. La frecuencia de radio aparece en el panel de la pantalla con la banda de la memoria de frecuencia (FM1, FM2, FM3, AM1 o AM2). La unidad tiene cinco bandas de memoria predeterminadas: tres selecciones de bandas FM (FM1, FM2 y FM3) y dos bandas AM (AM1 y AM2).
MP1516 Cómo guardar sus emisoras preseleccionadas Hay seis botones numerados preseleccionados que pueden almacenar y recuperar emisoras para cada banda. Si mientras escucha una radio desea guardar la emisora como una emisora preseleccionada, presione y mantenga presionado uno de los botones 1-6 hasta que oiga un pitido. El botón que presionó ahora es el botón predeterminado para esa emisora. Búsqueda y almacenamiento automáticos Mientras escucha una radio FM, presione y mantenga presionado el botón F/PS.
TA - Anuncio de tráfico Presione el botón TA para encender o apagar la función Anuncio de tráfico. En el modo TA, se buscarán automáticamente programas sobre tráfico hasta que el programa se reciba. Cuando se recibe un anuncio de tráfico, la unidad pasará temporariamente al modo radio (sin importar cuál sea el modo actual) y comenzará a transmitir el anuncio. Después de la finalización del anuncio de tráfico, regresará al modo y al nivel de volumen anterior.
MP1516 Cuando se selecciona PTY, la radio comienza a buscar la información PTY correspondiente y se detiene si se detecta tal información PTY. Si no se presionan botones durante varios segundos, se busca el PTY seleccionado anteriormente. Durante un ciclo de búsqueda, si el PTY no se encuentra, la unidad regresará al modo anterior. Presione el botón CLK/PTY en el frente de la unidad o el botón PTY en el control remoto una tercera vez para apagar la función PTY.
FUNCIONAMIENTO DE CD/MP3/WMA Carga de un disco Inserte un disco en la ranura de CD con el lado de la etiqueta hacia arriba. El disco se cargará automáticamente en la unidad, aun cuando esté apagada o en el modo radio. La palabra “LOAD” (CARGA) parpadeará en la pantalla y el CD comenzará a reproducirse automáticamente. Expulsión de un disco Presione el botón (expulsar) para expulsar el disco de la ranura.
MP1516 Reproducción de MP3/WMA Mientras reproduce un disco con archivos MP3 o WMA, se reproducirá el primer archivo en el directorio raíz. Mientras el archivo se esté reproduciendo aparecerá “MP3” o “WMA” primero y luego, si hay información ID3, esta se mostrará mientras el archivo se esté reproduciendo.
Lectura de un CD multisesión Esta unidad puede leer CD multisesión. La lectura multisesión se activará automáticamente si el reproductor detecta un archivo que esté escrito en un formato multisesión. Protección electrónica contra saltos La unidad está equipada con circuitos de Protección electrónica contra saltos (ESP). La protección electrónica contra saltos es para conducir en caminos irregulares. El CD seguirá reproduciéndose por 10 segundos en caminos irregulares sin saltar.
MP1516 Notas sobre los discos Notas sobre los discos: • Esta unidad solo reproduce los siguientes discos: Tipo de disco CD, MP3, WMA Etiqueta en el disco Material grabado Solo audio Tamaño del disco 12 cm • Esta unidad solo lee discos de 12 cm. • No use discos con formas irregulares como por ejemplo, discos con formas de corazón o estrella, ya que pueden provocar una avería en la unidad. Asegúrese de usar solamente discos CD de forma circular en esta unidad. • No coloque papel o cinta, etc.
Limpieza y manipulación de los discos Para disfrutar de la mejor calidad de sonido, manipule los discos como se indica a continuación: • Limpie los discos con un paño de limpieza. Limpie cada disco desde el centro al borde exterior. • No use CD que tengan manchas de pegamento o tinta en la superficie. • No use CD con etiquetas o calcomanías en sus superficies. Si la etiqueta comienza a desgastarse, cualquier remanente de pegamento puede interferir con el buen funcionamiento de la unidad.
MP1516 FUNCIONAMIENTO USB La unidad incluye una interfaz USB. La interfaz USB está ubicada en el frente de la unidad, debajo de la tapa protectora. Puede conectar un dispositivo de memoria USB usando esta interfaz. 1. Encuentre la tapa de entrada de USB en el frente de la unidad. Tapa de la entrada USB Input Cover USB 2. Levante la tapa de entrada USB para descubrir el conector USB. 3. Inserte el dispositivo USB en el conector USB.
FUNCIONAMIENTO DE LA TARJETA DE MEMORIA Hay una ranura para tarjeta de memoria SD en el alojamiento de la unidad. Se puede acceder al alojamiento extrayendo el frente de la unidad. 1. Presione el botón de liberación en el frente de la unidad. Botón de liberación 2. Saque el frente de la unidad para descubrir la ranura para tarjeta de memoria. Frente de la unidad 3. Inserte una tarjeta SD en la ranura para tarjeta de memoria. Ranura para tarjeta Memory Card Slot de memoria 4.
MP1516 Reproducción de MP3/WMA Para reproducir archivos MP3/WMA desde una tarjeta SD, extraiga el frente de la unidad e introduzca una tarjeta SD en la ranura para tarjeta de memoria SD en el alojamiento. La unidad comenzará a reproducir automáticamente los archivos MP3/WMA en la memoria de la tarjeta SD cuando se instale el frente de la unidad. Si los archivos MP3/WMA están almacenados en carpetas en la tarjeta SD, la unidad comenzará a reproducir la primera canción de la primera carpeta.
ESPECIFICACIONES Clasificaciones de potencia CEA Salida de potencia: 13 vatios RMS X 4 canales a 4-ohmios @ < 1% THD+N Relación señal-ruido: 70 dBA por debajo de la referencia. (Referencia: 1 vatio, 4-ohmios) Respuesta de frecuencia: 20 Hz a 20 kHz (-3 dB), Entrada auxiliar usada como referencia de fuente Voltaje de suministro de referencia: 14.
MP1516 SOLUCIÓN DE PROBLEMAS Antes de leer la lista de comprobación, verifique las conexiones de los cables. Si persiste cualquier problema después de verificar la lista, comuníquese con su distribuidor de servicio más cercano. Problema No hay corriente. Causa • El interruptor de encendido del automóvil no está en contacto. • El disco no puede cargarse o expulsarse. • El disco no se reproduce. • • • • • • • • No hay sonido. • • El sonido salta.
Problema Causa Las teclas de • La microcomputadora incorporada no funciona operación no correctamente debido funcionan. al ruido. La radio no funciona. • El cable de la antena no está conectado. Solución • Presione el botón RESET (REINICIO). • El frente de la unidad no está instalado correctamente. • Introduzca firmemente el cable de la antena. La selección automática de emisora de radio no funciona. • Las señales son demasiado débiles. • Seleccione una emisora manualmente.
MP1516 CUIDADO Y MANTENIMIENTO 1. U se solo un paño de silicona y un detergente neutro para limpiar el panel del frente. Un paño áspero y un detergente no neutro (como por ejemplo, alcohol) puede resultar en rayones o decoloración. 2. No permita que entren líquidos de limpieza o agua en la unidad. 3. No use destilados de petróleo para limpiar esta unidad. 4. I nserte solamente discos compactos de 12 cm (5”) en el reproductor. Los objetos extraños pueden dañar el mecanismo. 5.
Audiovox Electronics Corporation Hauppauge, NY 11788 Asistencia técnica: 1-800-323-4815 www.mobile.jensen.
MP1516 Système audioSystem mobile Mobile Audio Guide deManual l'utilisateur Owner’s 160 watts peak watts-crête 40W x 4
Merci d'avoir choisi un produit Jensen. Nous espérons que les instructions dans ce guide de l'utilisateur seront claires et faciles à suivre. Si vous prenez quelques minutes pour le feuilleter, vous apprendrez comment utiliser toutes les fonctions de votre nouveau Système audio mobile Jensen MP1516 pour votre plus grande satisfaction.
MP1516 CONTENU FONCTIONS ����������������������������������������������������������������������������������������������������������� 4 AVERTISSEMENTS AVANT L'INSTALLATION �������������������������������������������������������� 5 OUTILS D'INSTALLATION �������������������������������������������������������������������������������������� 7 AVANT DE PROCÉDER À L'INSTALLATION ����������������������������������������������������������� 7 Retirer l'ancien appareil du tableau de bord �����������������������������
FONCTIONNEMENT DU CD/MP3/WMA ��������������������������������������������������������������28 Chargement d’un disque ���������������������������������������������������������������������������������28 Éjecter un disque ����������������������������������������������������������������������������������������������28 Sélectionner une piste �������������������������������������������������������������������������������������28 Suspendre ou reprendre la lecture ���������������������������������������������������
MP1516 AVERTISSEMENTS AVANT L'INSTALLATION Avertissements importants à prendre en considération AVANT de commencer l'installation Les dommages causés par une installation incorrecte NE sont PAS couverts par la garantie. PRIÈRE de prendre le temps de lire les notes sur l'installation avec soins. Pour assurer que la garantie est valide, veiller à ce que l'appareil soit installé par une entreprise d'installation de systèmes audio de véhicule professionnelle inscrite au registre de la TVA.
• Si cet appareil est installé dans un véhicule qui n'est pas doté de la position ACC (accessoire) sur la clé de contact, il est recommandé de brancher la borne rouge de l'appareil à une borne associée au fonctionnement ON/OFF (marche/ arrêt) de la clé de contact. Autrement, la batterie du véhicule pourrait être mise à plat lorsque le véhicule est laissé en arrêt pendant plusieurs heures. • Fixer le filage avec des pinces à câble ou du ruban adhésif.
MP1516 • S'il y a encore du bruit électrique lors de l'accélération du véhicule, il pourrait être nécessaire de placer une bobine de choc en ligne avec l'alimentation de l'appareil. L'entreprise d'installation saura ce qui est approprié. • Tout fusible de remplacement doit être de la même intensité en ampères que ce qui est indiqué sur le support de fusible. Ne jamais remplacer un fusible avec un autre d'une valeur différente.
Retirer l'ancien appareil du tableau de bord 1. Retirer le cadre de garniture extérieur. Montage frontal avec prise DIN 2. I nsérer les clés fournis avec l'ancien appareil de chaque côté de celui-ci, comme montré dans la figure ci-dessous, ce jusqu'à ce qu'elles émettent un clic. Tirer pour retirer l'ancien appareil du tableau de bord. Ne pas débrancher les fils pour le moment! 3.
MP1516 INSTALLATION Il est préférable de lire toutes les directives avant d'entreprendre l'installation. Nous recommandons que votre système audio mobile Jensen MP1516 soit installé dans un atelier d'installation de renom. AVERTISSEMENT! Débrancher la borne négative de la batterie avant de commencer l'installation. Consulter le guide du propriétaire pour obtenir les bonnes directives. PRENDRE NOTE : C onsulter le diagramme de filage des hauts-parleurs déjà en place avant de déconnecter la batterie.
Retirer les vis de transport avant de procéder à l'installation Retirer les deux vis de transport qui se trouvent sur le dessus de l'appareil avant de l'installer. Enlever les vis avant l'installation.
MP1516 2. R eplier les onglets qui se trouvent sur le manchon de montage pour assurer que le manchon demeure fermement en place. 3. F ixer les câbles de l'appareil sur ceux déjà en place. Voir le diagramme de connexion des câbles. Insérer la radio dans le tableau de bord. Apposer ensuite le cadre de garniture à l'extérieur de la radio. 4. S outenir la radio à l'aide du boulon de montage arrière et de la barre d'acier fournis; voir la liste des pièces.
1. Retirer les crochets se trouvant des deux côtés. 2. Aligner les trous de vis du support de montage fourni avec le véhicule avec les trous de vis qui se trouvent dans l'unité principale. Resserrer les deux vis qui se trouvent de chaque côté de l'appareil. Fixer ensuite les supports sur le véhicule. Support fourni pour votre voiture et och Cr Tableau de bord ou console 3. F ixer les câbles de l'appareil sur les câbles de hauts-parleurs déjà en place. Voir le diagramme de câblage.
MP1516 Bouton de liberation Facade 2. Conserver la façade dans le boîtier protecteur. Boitier de protection Facade Installer la façade Pour installer la façade, l'insérer dans le compartiment en s'assurant qu'elle y est correctement installée. Sinon, l'affichage pourrait paraître anormal ou certaines touches pourraient ne pas fonctionner correctement.
Manipuler avec précautions 1. Ne pas échapper la façade. 2. Ne pas mettre de pression sur l'affichage ou les boutons de commande au moment de détacher ou de remettre la façade en place. 3. Ne pas toucher les contacts de la façade ni le caisson de l'unité principale. Cela pourrait nuire au contact électrique. 4. Si de la saleté ou des corps étrangers adhèrent aux contacts, il est possible d'utiliser un chiffon propre et sec pour les enlever. 5.
MP1516 Noir, mise à la terre Brancher le câble noir de mise à la terre à la carrosserie/châssis du véhicule. S'assurer que la mise à la terre vers le châssis est bien établie. Les connexions de mise à la terre, si bien faites, élimineront la majorité des bruits électriques provenant du moteur et de l'alternateur. Une bonne mise à la terre vers le châssis exige qu'une connexion étroite soit établie contre le châssis de métal du véhicule.
COMMANDES ET INDICATEURS 1 2 3 4 25 24 23 22 27 5 6 7 21 20 19 8 18 17 9 16 15 14 10 13 12 11 26 1. Touche (piste suivante/avance rapide) Pendant la lecture d'un disque, cette touche permet de sélectionner rapidement la fin d'une piste particulière en lecture. Avec chaque pression de la touche , le prochain numéro de PISTE plus élevé sera sélectionné comme montré sur l'affichage.
MP1516 6. T ouche ST (stéréo) Lorsque l'appareil est en mode FM, appuyer sur cette touche pour basculer entre les modes de réception stéréo et mono. 7. Fente de disque Insérer un disque avec la surface étiquetée dirigée vers le haut jusqu'à ce que le disque s'engage dans le mécanisme de chargement de l'appareil. Remarque : C et appareil est conçu pour lire des disques compact standard 12 cm (5 po) SEULEMENT.
19. Touche 2 / INTRO (Introduction) Appuyer sur cette touche pour faire jouer les 10 premières secondes de chaque piste. Appuyer sur cette touche à nouveau pour reprendre la lecture normale. 20. Touche 1 / (lecture/pause) Appuyer sur cette touche pour suspendre la lecture. Appuyer sur cette touche à nouveau pour reprendre la lecture normale. 21. Touche Mute (sourdine) Appuyer sur cette touche pour mettre le système audio en sourdine.
MP1516 FONCTIONNEMENT DE LA TÉLÉCOMMANDE Une télécommande complète est fournie avec cet appareil. Une pile CR-2025 au Lithium est incluse avec la télécommande. Installation de la pile Si la pile doit être remplacée : 1. Retirer le couvercle se trouvant à l'arrière de la télécommande. 2. Installer une pile CR-2025 au Lithium. Prendre note : s'assurer de respecter la polarité de la pile (+ ou -). 3. Remettre le couvercle à l'arrière de la télécommande. Utiliser la télécommande 1.
Fonctions de la télécommande 1 21 Mode 2 Band 20 CH 19 18 APS Clock Mute 3 4 17 TA AF PTY 5 16 15 14 13 12 11 6 1 4 RDM 2 3 INT RPT 8 5 6 9 SEL 7 10 1. T ouche Band (bande) Appuyer sur cette touche pour sélectionner ou changer la bande de radio (FM1, FM2, FM3, AM1 ou AM2). 2.
MP1516 6. T ouche PTY (type de programme) Appuyer une fois sur cette touche pour montrer le programme de type de musique. Appuyer deux fois sur cette touche pour montrer le programme de type de discours. 7. Touche SEL (sélection du son) Appuyer sur cette touche pour sélectionner la fonction audio, soit bass (basse), treble (aigus), balance, fade (fondu) ou loudness (sonance) à régler. 8. Touche 3 / RPT (pour Repeat, répéter) Appuyer sur cette touche pour répéter la piste en cours de lecture.
FONCTIONNEMENT DE BASE Mettre l'appareil en marche ou l'éteindre Appuyer sur la touche (marche/arrêt) ou tenir enfoncer n'importe quelle touche pour allumer l'appareil. L'affichage indiquera “ JENSEN ” (bienvenue dans le système audio du véhicule) pour indiquer que l'appareil est prêt à être utilisé. Lorsque l'appareil est en marche, appuyer la touche (marche/arrêt) pour éteindre l'appareil. L'affichage montre alors le message “ GOODBYE ” (au revoir).
MP1516 Balance 1. A ppuyer sur la touche SEL jusqu'à ce que les lettres “ BAL ” apparaissent sur l'affichage. 2. Faire tourner la molette de volume pour régler la balance entre les hautsparleurs de gauche et de droite. Fondu 1. A ppuyer sur la touche SEL jusqu'à ce que les lettres “ FAD ” (fader, pour fondu) apparaissent sur l'affichage. 2. Faire tourner la molette de volume pour régler la balance entre les hautsparleurs avant et arrière.
FONCTIONNEMENT DE LA RADIO Sélectionner une bande radio Appuyer sur la touche SRC se trouvant sur la façade ou sur la touche MODE de la télécommande pour sélectionner le mode de lecture Radio. La fréquence radio apparaît sur l'affichage accompagnée de la bande de mémoire de fréquence (FM1, FM2, FM3, AM1 ou AM2). L'appareil est doté de cinq bandes de mémoire préréglées - trois bandes FM (FM1, FM2 et FM3) et deux bandes AM (AM1 et AM2).
MP1516 Enregistrer vos stations préréglées Il y a six touches de préréglages portant un nombre pouvant mettre en mémoire et se souvenir de stations pour chaque bande. Alors que l'appareil effectue la lecture d'une station que vous souhaitez mettre en mémoire, appuyer sur l'une des touches chiffrées 1 à 6 jusqu'à ce que vous entendiez un signal sonore. Cette touche est maintenant la touche préréglée pour cette station.
TA - Annonce de trafic Appuyer sur la touche TA (annonce de trafic) pour couper ou mettre en marche la fonction d'annonce de trafic. Les programmes de trafic du mode TA seront automatiquement balayés jusqu'à ce que le programme soit reçu. Lorsqu'une annonce de trafic est reçue, l'appareil se met automatique en mode de syntonisation (sans égards au mode actuel) et commence à diffuser l'annonce. Une fois que l'annonce de trafic est terminée, l'appareil revient au mode et au niveau sonore antérieurs.
MP1516 Lorsque le mode PTY est sélectionné, la radio commence à rechercher des informations relatives au PTY et arrête dès que des informations pertinentes sont trouvées. Si aucune touche n'est pressée dans les secondes qui suivent, le PTY antérieurement sélectionné est recherché. Pendant une boucle, si le PTY désiré n'est pas trouvé, l'unité reviendra au mode antérieur.
FONCTIONNEMENT DU CD/MP3/WMA Chargement d'un disque Insérer un disque CD dans la fente. S'assurer que l'étiquette est dirigée vers le haut. Le disque sera automatiquement chargé dans l'appareil, même si ce dernier est éteint ou en mode radio. Le mot “ LOAD ” (chargement) sera affiché en clignotant sur l'affichage et le CD commencera à jouer automatiquement. Éjecter un disque Appuyer sur la touche (éjection) pour éjecter le disque qui est chargé.
MP1516 Lecture des fichiers MP3/WMA Si un disque contenant des fichiers MP3 ou WMA est en lecture, le premier fichier du répertoire racine sera joué. Alors que le fichier est en cours de lecture, “ MP3 ” ou “ WMA ” sera d'abord affiché; si des informations ID3 sont disponibles, elles seront affichées alors que le fichier est en cours de lecture.
Lecture de CD multi-sessions Cet appareil est en mesure d'effectuer la lecture de CD multi-sessions. La lecture en multi-session est activée automatiquement si le lecteur détecte un fichier ayant été écrit en format de sessions multiples. Protection électronique de saut Cet appareil est doté d'un circuit de protection électronique de saut (ESP). Le circuit ESP est conçu pour permettre la lecture de fichiers sur une route cahoteuse. Le CD jouera pendant 10 secondes sur une route cahoteuse sans sauter.
MP1516 Remarques concernant les disques Remarques sur les disques : • Cet appareil ne peut lire que les disques suivants : Type de disque CD, MP3, WMA Étiquette sur le disque Matériel enregistré Taille du disque Audio seulement 12 cm • Cet appareil ne lit que les disques de 12 cm. • Ne pas utiliser de disques à forme irrégulière come un cœur ou une étoile car cela peut provoquer un dysfonctionnement de l'unité. S'assurer de n'utiliser que des CD biens ronds dans cet appareil.
Nettoyer et manipuler des disques Pour jouir de la meilleure qualité sonore possible, manipuler les disques de la manière indiquée ci-dessous : • Nettoyer les disques à l'aide d'un chiffon de nettoyage. Nettoyer chaque disque en partant du centre vers le bord extérieur. • Ne pas utiliser de CD sur lequel il y a des bulles de colle ou de l'encre. • Ne pas utiliser de CD sur lequel il y a des étiquettes ou des auto-collants.
MP1516 FONCTIONNEMENT USB L'appareil est doté d'une interface USB. Cette interface se trouve sur la façade, sous le couvercle de protection. Il est possible de connecter un dispositif de mémoire USB à l'aide de cette interface. 1. Localiser le couvercle de la prise USB se trouvant sur la façade. Couvercle de la prise USB 2. Soulever le couvercle de la prise USB pour révéler la prise. 3. Insérer le dispositif USB dans le connecteur USB.
FONCTIONNEMENT DE LA CARTE MÉMOIRE L'appareil est doté d'un lecteur de carte mémoire SD sur son boîtier. Le lecteur est accessible en retirant la façade. 1. Appuyer sur le bouton de libération se trouvant sur la façade pour la retirer. Bouton de libération 2. Retirer la façade pour révéler l'emplacement du lecteur de carte mémoire. Façade 3. Insérer une carte SC dans le lecteur de carte mémoire. Lecteur de carte mémoire 4. R emettre la façade en place.
MP1516 Lecture des fichiers MP3/WMA Pour parvenir à faire jouer des fichier MP3/WMA se trouvant sur une carte SD, retirer la façade de l'appareil puis insérer une carte SD dans le lecteur destiné à cet effet qui se trouve sur le boîtier. L'appareil lira automatiquement les fichiers audio MP3/WMA se trouvant sur la carte de mémoire SD dès que la façade est remise en place.
CARACTÉRISTIQUES Puissance nominale CEA Sortie puissance : 13 watts RMS X 4 canaux dans 4-ohms à < 1 % THD+N Rapport signal au bruit : 70 dBA sous la référence. (Référence : 1 watt, 4-ohms) Bande passante : 20Hz à 20kHz (-3dB). Entrée auxiliaire utilisée comme référence de source Tension d'alimentation référence : 14,4 V CC Lecteur CD Rapport signal au bruit : >90dBA Bande passante : 20Hz à 20kHz, -3dB.
MP1516 DÉPANNAGE Vérifier les connexions avant de passer à travers la liste de contrôle. Si l'un ou l'autre des problèmes persiste après vérification de la liste, contactez le représentant de service le plus près. Trouble Cause Solution Pas d'alimentation. • L'interrupteur d'allumage de l'auto n'est pas en fonction. • Si l'alimentation est connectée aux circuits d'accessoires de l'auto, mais que le moteur ne fonctionne pas, mettre la clé de contact à “ ACC ” (accessoires). • Remplacer le fusible.
Trouble Cause Solution Sauts sonores. • Ajuster l'angle d'installation à • L'angle d'installation est moins de 30 degrés. de plus de 30 degrés. • Le disque est extrêmement sale. • Nettoyer le disque compact. • Le disque est défectueux. • Mettre un nouveau disque compact en lecture. Les touches de • Le microordinateur intégré ne • Appuyer sur le bouton RESET fonctionnement ne fonctionne pas correctement (réinitialisation). fonctionnent pas. à cause du bruit. • La radio ne fonctionne pas.
MP1516 SOINS ET ENTRETIEN 1. N 'utiliser qu'un chiffon de silicone et un détergeant naturel pour effectuer le nettoyage du panneau avant. Un chiffon rugueux associé à un détergeant non neutre (comme de l'alcool) pourrait causer des éraflures ou une décoloration. 2. Ne pas laisser de l'eau ou des liquides nettoyants entrer dans l'appareil. 3. Ne pas utiliser de distillats de pétrole pour nettoyer cet appareil. 4. N'insérer que des disques compacts de 12 cm (5 po) dans ce lecteur.
Audiovox Electronics Corporation Hauppauge, NY 11788 Assistance technique : 1-800-323-4815 www.mobile.jensen.