
7315 Manual Italian User Manual


48
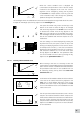
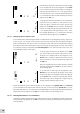
9.2.1.8 Selecting a Wavelength
To adjust the wavelength press the key adjacent to the
wavelength icon. This will open the number entry
screen. Use the keys at the bottom of the screen to select
the digit to be changed and the keys adjacent to the
arrow icons to increase or decrease the number. Once
the required wavelength has been entered press the key
adjacent to the tick icon to save the changes and return
to the settings menu screen.
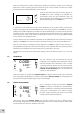
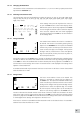
9.2.1.9 Setting the Kinetics Measurement Time
This function enables the measurement time for the
kinetics scan to be set. To access this function press the
key below the time displayed on the far right of the x-axis;
this will open a number entry screen. Use the keys at the
bottom of the screen to select the digit to be changed
and use the keys adjacent to the arrow icons to increase
or decrease the number. Once the required measurement
time in seconds has been entered press the key adjacent
to the tick icon to save and return to the settings menu.
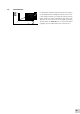
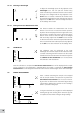
9.3 CALIBRATION
The calibration must be performed at the same
wavelength at which the sample will be measured. Insert
a cuvette containing the blank solution into the sample
chamber and close the instrument lid. Press the key below
the calibrate to zero absorbance icon. The instrument
will calibrate to 0.00 absorbance.
Once the calibration is complete the start kinetics measurement icon will be displayed and a sample
can be measured. If the wavelength is adjusted before the sample is measured the start kinetics
measurements icon will disappear and the instrument must be calibrated again at the new wavelength.
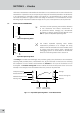
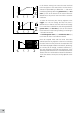
9.4 SAMPLE MEASUREMENT
Insert a cuvette containing the sample to be analysed
into the sample chamber and press the key below the
start kinetics measurements icon. If a start on level or
lag time has not been set the instrument begins taking
a photometric reading every second. As each reading is
taken it is plotted on the graph.
If a lag time has been set a progress bar will be displayed
showing the lag time counting down. Once the lag time
is complete the instrument will begin taking readings.
4 00 0
0 20 0
3.000
ABS
-5.000
0.00 10.005.0 s
09 :02
3.000
ABS
-5.000
0.00 10.005.0 s
09 :02
09 :02
2.500
ABS
-0.500
1.000
350 550450nm
0 100