Operation Manual XG-37 Glasswasher Rev.
Index Topic Page Introduction...................................................................................................... 1 Utility Requirements and Connections............................................................ 2 Uncrating and Assembly Instructions.............................................................. 2 XG-37 Parts Identification............................................................................... 3 Start-Up Instructions................................................
Introduction This manual describes the operational features of the XG-37 model glasswasher. Please review this information before attempting installation and operation. Long term, troublefree operation will follow if good housekeeping and maintenance procedures are followed. Thank you for selecting Jet-Tech products. Note the Simplicity: Function Design Wash Hot water and a preset portion of detergent join in the tank.
Utility Requirements and Connections 1. General Plumbing (Hot and cold water required) a. b. c. d. e. Use 1/2" OD (or larger) copper to 3/8" FMPT adapter provided. Minimum water pressure - 25 PSI. Maximum water pressure - 100 PSI. Install water pressure regulator if line pressure is over 100 PSI. Water valve on unit has built-in strainer and flow control to provide consistent volume between 25 and 100 PSI. Install separate water shut-off valve for each connection.
XG-37 Part Identification* Digital temperature gauge 2. Drainboard insert 3. Drainboard pan 5. Inner cover Control Panel 4. Sliding cover Chemical feed lines 1. Main section Chemical pumps 12. Scrap tray Slide-out holder for chemicals Top View 6. Conveyor 7. Spray box 8. Spray box gasket Drain hole for drainboard pan drain tube Front Panel Removed Water inlet lines Optional empty chemical switches Drainstopper cam and linkage arm 9. Tank screen 10. Drain stopper Circuit Board 11.
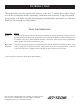
Start-Up Instructions WARNING: The chemicals used in commercial glass washing are very harsh. Exposure to human skin can cause severe burns. Chemical containers should be stored in a manner and/or location that prevents them from spilling or splashing. Chemical containers must be secured. Please consult your chemical vendor to ensure proper storage or call the Jet-Tech factory to purchase an accessory chemical storage drawer, part number 01001500. 1.
Start-Up Instructions 5. Rinse Temperature Adjustment: With the sliding cover closed, initiate a cycle by pressing Cycle Start to check rinse water temperature (Rin Temp knob is set fully open at the factory and may require adjustment at installation location). Machine will perform wash cycle and proceed to rinse cycle. NOTE: Wash cycle water temperature must register between 120°F (49°C) and 150°F (66°C). Adjust hot water supply source if necessary.
Control Panel - Wash Cycle Control Panel Operation Cycle Start Wash Cycle Description: 1. Load the conveyor with glassware. To aid in loading the conveyor, rotate the conveyor 1/2 turn by pressing the Conveyor Advance button on the control panel. 2. Close the sliding cover. 3. Cycle is initiated by pressing the Cycle Start button on the control panel. Once in cycle, the red In Use light will illuminate. 4.
XG-37 Wiring Diagram R/W San pump R Det pump O/W Coveyor Advance O Rinse pump Y Bl O Bl/W 2 4 6 8 10 R R Bl 1 1 3 5 7 9 Br/W 2 4 6 8 10 Y+ YW/R Door Switch C P B/W R 5 3 1 6 4 2 Y OR Control Box MC3003463FS NO NC C NO NC NO NC C Br Br/W Br/W Bl MC4003491TS 4 2 R/W Br/W NO NC C 24Vac Transformer P 1 2 3 4 5 6 1 3 5 7 9 O Det Prime Cycle Start De-Lime Y San / Rin Prime Bl P 5 3 Conveyor 6 Soft Start HOT B Conveyor Moptor O 120 Vac W Neutral B BARE Temp
Cleaning Instructions Regular maintenance of your Jet-Tech glasswasher will extend its useful life and lower the service costs. The following parts are removable for daily cleaning: 1. 2. 3. 4. Drainboard insert Drainboard pan Sliding cover Inner cover 5. 6. 7. 8. Conveyor Spray box Spray box gasket Tank screen 9. Pump inlet screen 10. Drain stopper 11. Scrap tray The daily cleaning procedures consist of the following steps: 1. Remove drainboard insert, drainboard pan, sliding cover, and inner cover.
Cleaning Instructions 4. Remove the scrap tray and empty out any debris that may have passed through the tank screen. 5. Use a damp cloth to wipe down the entire wash tank. For more stubborn stains, use a nylon brush or a Scotch-Brite Stainless Steel Cleaner® pad. Never use steel wool to clean stainless steel. Steel wool will cause the stainless steel to rust. 6. Re-assemble the glasswasher. Scrap tray Wash tank 7. Check Detergent, Sanitizer, and Rinse Aid containers. Refill or replace if empty. 8.
Useful Information About Water, Detergent, & Sanitizer Water Conditions Your water supply fits one of the following descriptions. Greater detergent consumption is required with “hard” water. Grains Parts Description Per Gallon Per Million Soft Slightly Hard Moderately Hard Hard Very Hard Less than 1.0 1.0 to 3.5 3.5 to 7.0 7.0 to 10.5 10.5 and over Less than 17.1 17.
Important Information About Chemicals The XG-37 glasswasher has chemical pumps that automatically dispense chemicals into the machine. The detergent and sanitizer chemicals are supplied by a chemical vendor. Since the type of chemicals and the condition of water varies by region, the chemical pumps are not pre-set at the factory. The chemical pumps must be adjusted at start-up to achieve the proper titration levels or the machine may not produce good wash results.
Trouble Shooting Guide Trouble or Situation Cause Remedy A. Unit does not run 1. Sliding cover open 1. Close sliding cover 2. Out of chemicals 2. Replace and prime empty chemicals 3. No power (Power light “off”) 3. Check power source 4. Defective switch panel 4. Replace switch panel 5. Wire connections poor, loose, or broken 5. Re-crimp and/or replace wire connection 1. Incoming water does not reach minimum operating temperature 1. Check temperature of water source C.
Warranty Statement MANUFACTURERS LIMITED WARRANTY MVP GROUP Corporation (MVP) hereby warrants all new warewashers bearing the name “JET-TECH” and installed within the United States of America and Canada to be free from defects in material and workmanship, under normal and regular usage and operation, for a period of one (1) year for parts and labor. Labor shall be paid to replace any part found to be defective within this same period.