
Product Manual


17
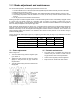
16.0 Inspection schedules
The VOLT series Hoist should be given an initial inspection upon installation and prior to use (see also Pre-
Operation Inspection in this manual). Following that, it must be inspected by a designated person at the time
interval noted below. Dated inspection and repair reports must be maintained. Copies of all reports must be
available to service personnel.
Visual inspections are divided into two general classifications based upon frequency, then further categorized
by type of service, as shown below.
More detailed information may be found in ANSI/ASME B30.16 standards publication.
FREQUENT Inspection Schedule
Service Interval:
Normal Service: Monthly
Heavy Service: Weekly
Severe Service: Daily
1. Check oil level in gearbox.
2. Check braking system for slippage.
3. Check that pushbutton controls and variable
speed dial operate properly.
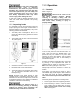
4. Check that limit switches function properly.
Without load, operate UP button control while
observing limit spring. If limit spring becomes
compressed and motor does not stop, STOP
operation immediately. Limit switch is not
operating properly. Repeat test with DOWN
button control.
5. Check top hook and load hook for deformation,
chemical damage, and cracks.
6. Check hook latch operation.
7. Check that load chain is clean and lightly
lubricated, free of excessive wear or
deformation at the contact points between
links and link and hook (see section 17.2 in
this manual). This hoist uses special alloy
hoisting chain and does not interchange with
any other manufacturer. All replacement chain
must be purchased from your JET distributor
or from JET directly by calling 800-274-6848.
8. Check that the chain passes smoothly through
all sprockets while under load.
9. Check entire hoist system for signs of damage
and loss of integrity. Listen for any abnormal
sounds.
PERIODIC Inspection Schedule
Service Interval:
Normal Service: Yearly
Heavy Service: Semi-Annually
Severe Service: Quarterly
1. Perform all of the Frequent Inspection items.
2. Drain and refill gearbox. (See section 10.2.1
for details and capacities.)
3. Check entire unit for loose screws, bolts, nuts,
rivets and pins.
4. Check for evidence of excessive wear,
corrosion, cracks, or distortion in the following
parts: hook parts, chain attachments,
suspension bolts and shafts, housings, gears,
bearings, pins, rollers, and locking and
clamping devices.
5. Check for evidence of damage to hook parts
including hook retaining nuts and collars and
pins, and hook holding frame and parts used
to secure the frame.
6. Check for evidence of damage or excessive
wear of load gear, sheave and sprocket wheel.
If the pockets are too deep, the chain may jam
with corresponding failure of engagement
between chain and sprocket or sheave.
7. Check for evidence of excessive load brake
wear. Inspect clearance between brake
components, and adjust if needed.
8. Check for evidence of pitting or other
deterioration of visible controller contacts.
9. Check for evidence of deterioration of
supporting structures and trolleys.
10. Check for visible deformation of limit switch
coil springs.
11. Check that all warning labels are present and
legible.
Note: In addition to the above inspections of the hoist, it is recommended that the inverter be inspected by a
qualified person at appropriate intervals as designated by the inverter manufacturer, including an insulation
resistance (Megger) test approximately every two years.