
User's Manual


Jetlun Corporation
Jetlun Gateway User Guide rev 0.3 DRAFT
9
!
!
!
RD75606
!
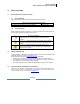
3.0 INSTALLING THE JETLUN GATEWAY
Follow these quick steps to install your Jetlun Gateway.
3.1 Connecting the Jetlun Gateway to your Router
STEP 1: Connect the supplied Ethernet cable to an available port on your router
and connect the other end of the Ethernet cable to one of the four ports
on the back of the Gateway.
STEP 2: Turn off your PC or laptop. Then, using an Ethernet cable, connect your
PC or laptop to one of the three other available ports on the back of the
Gateway.
STEP 3: Connect the Gateway Universal Power Supply to the Power port on the
back of the Gateway and plug in to a nearby power outlet. Wait about 30
seconds for the lights to stop blinking.
IMPORTANT: Plug the Jetlun Gateway directly into an electrical
outlet. Do not plug the Gateway into a UPS, power strip, or other
similar device with surge protection. The Gateway has its own
power filter for protection against surges.
STEP 4: Now, you can turn on your PC or laptop.
STEP 5: Locate the Gateway IP address from your Router Local Area Network
(LAN) client list.
STEP 6: To access the Gatewayʼs web-based utility, launch the web browser on
your computer, and enter the assigned IP address of the Gateway from
your router in the Address field. Then, press Enter.
3.2 Connecting to the Jetlun Gateway in absence of a Router
STEP 1: Turn off your PC or laptop. Then, using an Ethernet cable, connect your
PC or laptop to one of the three other available ports on the back of the
Gateway.
STEP 2: Connect the Gateway Universal Power Supply to the Power port on the
back of the Gateway and plug in to a nearby power outlet. Wait about 30
seconds for the lights to stop blinking.
IMPORTANT: Plug the Jetlun Gateway directly into an electrical
outlet. Do not plug the Gateway into a UPS, power strip, or other
similar device with surge protection. The Gateway has its own