This is the user manual for the Magi 30 Printer, We recommend that you read this user manual thoroughly and understand the information, prior to ingratiating the Magic 30 Printer { “Printer”) The user manual contains Important instructions and information about how to use the printer In a safe and skilled manner, Note: Alphonse brake sure that this manual is always reliable near the printer! Failure to follow the information contained in this manual may lead to personal Injury, inferior results or damage to
Do not use any other power cable, other than the one supplied, Use a grounded proves outlet Do not keep the nozzle or bed working continuously more than 38 hours st high temperature, Ensure 1-3 hours break between use, £8 Clean off filament from the nozzle tp with the provided pliers before the nozzle cools. Do not touch the nozzle directly. This can cause personal injury. £3 Clean the Printer frequently.
= Accessories ant sensor 1 B: Bags of screws: 4 including M5 Catboat: 1 pals 1 Crews, MS 2S screws, MSE sore M38 screws) @: Spa tuts 1 BSB ake 1 Sample Haman § Quick start guide 1 & 155 card and reader 1 Cn JG MAKER has improved the overall assembly process for you. The mal components have been assembled at the factory, In order fo simplify the user assembly experience. * Z-axis unit mounted Haunt the two 2040 aluminum profiles to sah Iota: Do not fu bosom, leave a mrt.
Hot rt the X-axis bly wait io the 2 axis |S il unt, ensuring that ofl rbd ier earn and ave able to glide and down smoothly, ud putting the folded Foch 3 or the: bed to let the hot Le Note: We recon packing rater end rust an i wrong No ten you f properly 3 vi the threaded rod throw, ale ad then tighten up with screw MEQ and subbranch, Note: Fleas nose the upp Kamchatka for read 10 sup the sore to ¢ screw on tie inserted and re normal Make sure i tightened fare hr muses ros is complacently brain.
Count tha lament sensor module to the Hews right pi Re the Z-axis, I sor to the Taxis 4 holder to the base a3 spot holder can lase ve dons wi
[lad Nuke: Please refer to video Tutorials or contact us directly for any problems In cable connection,
= Function introduction Hove WE axis Move i: Nozzle moves along the X ads. Xb means away from the ZERO point wi He means the opposite. Move Y: Nozzle moves along the ¥ mds, Ye means sway fr ar thee ZERO point while Vo means the apposite, Move Z: Nozzle moves along the £ axis. Z+ means sway the ERG pi ile 2 means the opposite, Extrude; Manual ly load or unsold Lament. Move 1071/0. 0mm: Rotate the control knob to set tha units for site move. Auto home: Both node and het bed go back ko ZERO point.
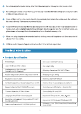
= Overall Procedure Software installing > Chalk input voltage Compatible with local power supply Power on Leveling Love ling check with AA paper, slight resistance but remains intact Load Filament Filament comes out smoothly Slice and save file In $I card insert $0 card and choose Goode fle Printing Printing finished and model achieved
= Compatible power supply a he input collage Press to toggle between 18 and 280Y = Leveling the bed Crass the Comte! knob on the display, then less Lute-home: The needle moves to the Zane point of XYZ wis. Alter coming, select...
* Loading Filament wat tha nozzle: Press/Rotate the Control bawl to Prepare »Protest PLA »Preheat PLA END to heat according ta the temperature range of the Lament you are going fo use, [Exuberance Tempera: ou F000, ARG ZA) = SOSes their nis @: Push the Lament into extrude through the small smoothly, cores out of the nozzle = printing Test We bight endeavor users Ie have 4 priding test ale loading Mamet.
&: Crass the button {Wait for filament load}, and loading computes up Continue to fins ding. comes out of nozzle. Select 5): Select Purge mere If Lament fills 10 come out of no gale.
* Open Thereat and add a new printer Brandie click Morse to start and select Settings Printer Add printer to add sur Magnolia 30 printer.
ek Customs. SABER el Hod ee Sms Save the G-Code Save the G-ode fi irs 80 card and make sure is un root directory.
BE Cn = Possible allure mode bent croaks a Ha Reading port of ratifier Co Yr: Replace the 4 Keep tes © Loan the tube, bent.
CET Ta * Returns & Exchanges Mount the two 2040 aluminum profiles fo aut 0 with the MESS resows, using the Allen wrench. Marks sure that the stepper motor faces the back of the Printer, 5 = Refunds (if specifiable) vat wa have re vel, sensed, and 8 credit will semantically be applied to your a cerium amount of days, want, without damage, cracks, deformation, sie; ing 4H parts, wos, rigging box, snd fun padding be the samey.
= Not included in warranty coverage be difficult to provide an effective warranty service 1 you can not provide 2 correct sel he whop crashing snd components eed the warranty peak {hare or damage caused by untruths a} modification of @ Equipment allure or damage due to incorrect install quipster falls or den sage caused by use in a nen recommended working environment specified by sad (installs, dusty, mo laurel; ra oy damage dus to Improper ise (beyond workingman, ste) ar main tens :Equipment & =3 fathers o