
Use and Care Guide

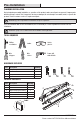
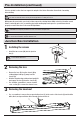
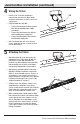
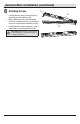
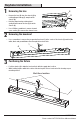
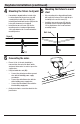
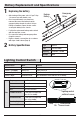
Table Of Contents
- WHAT IS COVERED
- Table of Contents
- Safety Information
- Warranty
- Pre-Installation
- Pre-Installation (continued)
- Junction Box Installation
- Junction Box Installation (continued)
- Keyhole Installation
- Keyhole Installation (continued)
- Keyhole Installation (continued)
- Battery Replacement and Specifications
- Lighting Control Switch
- Test Switch
- Care and Cleaning
- Troubleshooting

7 HOMEDEPOT.com
Please contact 1-877-527-0313 for further assistance.
Keyhole Installation
1
Removing the lens
□ Remove the lens (B) from the chassis (A) by
rotating hinged endcap (C) away from the
chassis (A).
□ Hold the hinged endcap outboard and
gently lift and remove the lens (B) from the
chassis(A).
□ Use a Phillips screwdriver to remove channel
cover screws (E) to remove the channel cover.
B
E
D
C
A
2
Removing the knockout
□ Use a screwdriver to remove the pre-punched knockout (1) at the center of the chassis (A) and feed the
white, black and ground xture wires through the knockout hole.
A
1
3
Positioning the fixture
□ Position chassis (A) to align the knockout hole with the supply wire location.
□ While holding in place mark the location of the two keyhole slots at each end of the housing on your
mounting surface.
Mark these locations
(mounting surface)