JLBILIC02 Built-in fridge Instruction manual John Lewis Partnership 171 Victoria Street London SW1E 5NN www.johnlewis.
Important Safety Information It is most important that this instruction book should be retained with the appliance for future reference. Should the appliance be sold or transferred to another owner, or should you move house and leave the appliance, always ensure that the book is supplied with the appliance in order that the new owner can get to know the functioning of the appliance and the relevant warnings. These warnings have been provided in the interest of safety.
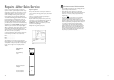
Repairs - After Sales Service Under no circumstances should you attempt to repair the machine yourself. Repairs carried out by inexperienced persons may cause injury or serious malfunctioning. Refer to your local Service Force Centre and always insist on genuine spare parts. Spare parts If your appliance is not performing satisfactorily; consult the fault finding guide within this instruction book (Something not working).
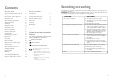
Something not working Contents For the User For the Installer Important Safety Information 2 Installation 6 Description of the appliance 5 Technical Specification 6 Control panel 12 Electrical Connection 6 When the Fridge is first installed 12 Shelf holders 7 Activation of functions 12 Positioning 7 Switching off 12 Building In 8 If the appliance is not working correctly, please carry out the following checks, before contacting your local Service Force repair agent.
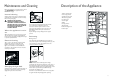
Maintenance and Cleaning Description of the Appliance Before any maintenance or cleaning work is carried out, DISCONNECT the appliance from the ELECTRICITY supply. 5 Internal cleaning Clean the inside and accessories with warm water and bicarbonate of soda (5ml to 0.5 litre of water). Rinse and dry thoroughly. NEVER USE DETERGENTS, ABRASIVE POWDERS, HIGHLY PERFUMED CLEANING PRODUCTS OR WAX POLISHES,TO CLEAN THE INTERIOR AS THESE WILL DAMAGE THE SURFACE AND LEAVE A STRONG ODOUR.
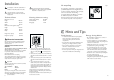
Installation Fig. 1 Air recycling SWITCH It is dangerous to alter the specifications or attempt to modify this product in any way. Any electrical work required to install this appliance should be carried out by a qualified electrician or competent person. Care must be taken to ensure that the appliance does not stand on the electrical supply cable. It is suggested that the fan (D.A.C.) be used when the ambient temperature exceeds 25°C .
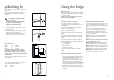
Shelf holders A Your appliance is equipped with shelf retainers that make it possible to secure the shelves during transportation. Movable shelves The walls of the refrigerator have runners so that the shelves can be positioned as desired . For better use of space, the front half-shelves can lie over the rear ones. B To remove them proceed as follows: Move the shelf holders in the direction of the arrow, raise the shelf from the rear and push it forward until it is freed and remove the retainers.
Building In Using the fridge Before carrying out any work, remove the plug from the power socket. Before use Please ensure that when the appliance is installed it is easily accessible for the engineer in the event of a breakdown. Remove all securing tapes.Wash inside the appliance with lukewarm water and bicarbonate of soda (5 ml to 0.5 litre of water). Do not use soap or detergent as the smell may linger. Dry thoroughly. The appliance is supplied with the right door opening.
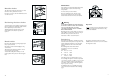
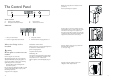
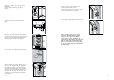
Drill the unit using a Ø 2.5 mm drill (10 mm max. penetration); The Control Panel Mode On / Off 1 2 5 3 4 B A Ø 2,5 Fix the square fitting to the appliance. C 13mm D Push button A- Appliance button ON/OFF C- Function button B- Temperature and function indicator D- Thermostat control knob D740 DISPLAY 1 1. 2. 2 Door open alarm indicator Positive or negative Temperature indicator When the Fridge is first installed Warning Allow the appliance to stand for 2 hours after installation.
Apply covers (C-D) on joint cover lugs and into hinge holes. Snap vent grille (B) and hinge cover (E) into position. Should the lining up of the furniture door be necessary, use the clearance of slots. D C At the end of operations, it is necessary to check if the door of the furniture closes properly. E Hb B PR168 Fix cover (Hd) on guide (Hb) until it clips into place. Separate parts Ha, Hb, Hc, Hd as shown in the figure.