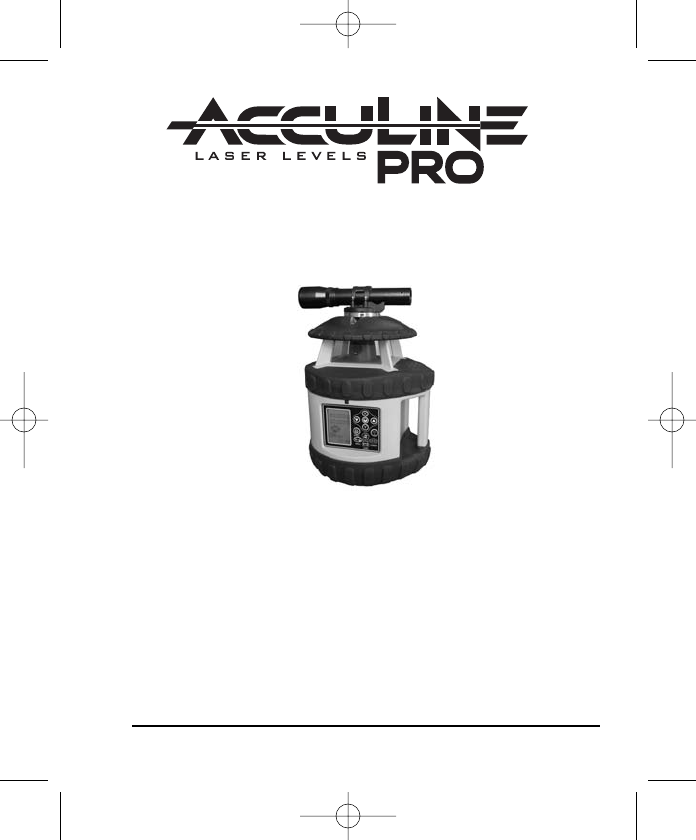
2406H 5/28/09 9:04 AM Page 1 ® Electronic Self-Leveling Dual Grade Horizontal Rotary Laser Level Model No. 40-6580 Instruction Manual Congratulations on your choice of this Electronic Self-Leveling Dual Grade Horizontal Rotary Laser Level. We suggest you read this instruction manual thoroughly before using the instrument. Save this instruction manual for future use. This is a Class IIIa laser tool and is manufactured to comply with CFR 21, parts 1040 .10 and 1040 .
406H 5/28/09 9:04 AM Page 2 Table of Contents 1. Kit Contents 2. Features and Functions 3. Safety Instructions 4. Location/Content of Warning Labels 5. Location of Parts/Components 6. Operating Instructions 7. Using the Product 8. Accuracy Self-Check 9. Technical Specifications 10. Application Demonstrations 11. Care and Handling 12. Product Warranty 13. Product Registration 14. Accessories 1. Kit Contents Description Model No. 40-6580 Qty.
2406H 5/28/09 9:04 AM Page 3 3. Safety Instructions Please read and understand all of the following instructions, prior to using this tool. Failure to do so, may result in bodily injury. DANGER! Class IIIa Laser Product Max. Power Output: ≤ 5mW Wavelength: 625-645nm THIS TOOL EMITS LASER RADIATION. DO NOT STARE INTO BEAM. AVOID DIRECT EYE EXPOSURE. ATTENTION IMPORTANT • Read all instructions prior to operating this laser tool. Do not remove any labels from tool.
2406H 5/28/09 9:04 AM Page 4 4.
2406H 5/28/09 9:04 AM Page 5 5.
2406H 5/28/09 9:04 AM Page 6 6. Operating Instructions IMPORTANT: It is the responsibility of the user to verify the calibration of the instrument before each use. LCD Display Power On/Off: Press the key Operating Pad to power on/off the instrument. X-direction slope display Y-direction slope display Beam Shield section display Rotate speed display Auto-leveling status display Battery capacity display The instrument is in Auto-leveling status when powered on.
2406H 5/28/09 9:04 AM Page 7 When powering on the instrument it will enter into the Auto-leveling mode. 30 seconds after the instrument begins to rotate, the instrument will enter into the TILT mode and the LCD will show the following. Pressing the tilt keypad prior to the Tilt display will result in no response. Tilt mode Adjust Rotation Speed Switch rotation speed by pressing the key the corresponding rotation speeds. .
2406H 5/28/09 Press the key 9:04 AM Page 8 to add or remove the shield quadrant. Press the key and the shield quadrant display is this quadrant will shield the laser beam. meaning Press the key and the shield quadrant display is quadrant will not shield the laser beam. meaning Press the key to activate the established shield display. Note: 1. One, two or three quadrants can be shielded from the laser beam simultaneously. 2.
2406H 5/28/09 9:04 AM Page 9 If the instrument is bumped in the “TILT” mode, the instrument will stop rotating, the laser will flash and the LCD sign “TILT” will begin blinking. Press the key to have the instrument auto-leveling. Manual Mode Press the key to enter or exit manual mode. The LCD shows the sign “MAN” when in manual mode. When entering the “MAN” status, the instrument will not auto-level. If the Tilt key is pressed in “MAN” mode, the instrument will re-enter auto-leveling mode.
2406H 5/28/09 9:04 AM Page 10 X-direction SLOPE setting Press the key once to make the first position in X-direction flash. This position is the positive/negative slope position. Press the key for positive slope indicated by a “O” sign. Press the key for negative slope indicated by a “-” sign. Press the key a second time to make the second position in Xdirection flash. Press the key of 7. , the digit in this position increases to a maximum Press the key of 0.
2406H 5/28/09 9:04 AM Page 11 Press the key of 9. , the digit in this position increases to a maximum Press the key of 0. , the digit in this position decreases to a minimum Press the key a sixth time to repeat setting steps. When all the digits are determined, press the key to enter the X-direction grade setting. Y-direction SLOPE Setting Press the key to switch digital positions, the operation is the same as the X-direction “SLOPE” setting.
2406H 5/28/09 9:04 AM Page 12 Sleep Mode Pressing the power key on the remote control will make the instrument enter or exit the Sleep mode. When the instrument is in Sleep mode, the LCD is shown as the following figure. Power Key Sleep mode When the instrument is in Sleep mode, except for the power key, all the other keys are disabled. Note: In the Sleep mode, the instrument will keep the current setting value.
2406H 5/28/09 9:04 AM Page 13 Note: The instrument will automatically power off if it is beyond its self-leveling range for three minutes. Application Methods Install Ni-MH battery pack or alkaline batteries into the instrument, or connect the instrument to the 9V DC charger. Put the instrument on a 5/8 x 11 tripod. Connected to a 5/8 x 11 tripod Connect the Sighting Scope Note: If the instrument is tilted to exceed the auto-leveling range, it will give a sound alarm. Readjust the instrument.
2406H 5/28/09 9:04 AM Page 14 Detector Usage Two-Sided Laser Detector with Clamp Model No. 40-6715 The 40-6715 laser detector is an indispensable accessory when using rotary laser levels. The main function of the detector is to detect the position of the laser signals that are transmitted by rotary lasers. This detection quickly and precisely provides the user with the horizontal reference.
2406H 5/28/09 9:04 AM Page 15 2. Components (a) Exterior Instruction 1) Horizontal vial 2) Front display window 3) Front on grade mark 4) Vertical vial 5) LED key 6) Power key 7) Beeper 8) Reception window 9) Fine/Coarse accuracy key 10) Beeper key 11) Back display window 12) Back on grade mark 13) Bracket screw thread 14) Battery cover screw 15) Battery cover (b) Display 1. Power on symbol 2. Low battery indicator 3. Fine/Coarse symbol 4. Beeper symbol 5.
2406H 5/28/09 9:04 AM Page 16 3. Operation Guide (a) Battery Installation • Open the battery cover door by turning the battery cover screw counter-clockwise. Put the battery into the battery case noting the polarity shown in the battery compartment. • Put the battery cover door back, and tighten the screw. Note: 1) Remove the battery when the unit is being stored for a long time. 2) When the low battery indicator is displayed, change the battery soon. 4.
2406H 5/28/09 9:04 AM Page 17 Fine/Coarse accuracy key Power on and press the fine/coarse accuracy key, the unit will cycle between three accuracy options: fine, coarse 1, coarse 2. The accuracy symbol displayed on the LCD will change. Volume Key Power on and press the volume key, the unit will cycle between a high sound, low sound and mute. The sound symbol displayed on the LCD will change accordingly. Note: There will be two beeps when turning the unit on and off.
2406H 5/28/09 9:04 AM Page 18 When the laser signal is near the on-grade mark, the displayed up and down arrows will decrease as the distance to the on-grade mark decreases. Laser signal Laser signal Laser signal Laser signal 1. When detecting a horizontal laser signal, it is important to have the bubble vial centered, as the deflection of the receiver will influence its receiving accuracy. 2.
2406H 5/28/09 9:04 AM Page 19 Rod Clamp Connecting to the rod clamp. Connecting to the grade rod. 5. Detector Maintenance • Keep the unit, particularly the reception window, clean. If it does get dirty, use a cloth to wipe it clean.
2406H 5/28/09 9:04 AM Page 20 7. Using the Product Ni-MH Battery The 40-6580 is equipped with a large-capacity battery compartment available for both Ni-MH batteries and 4 “D” alkaline batteries. Battery Plug Rechargeable Batteries Install the battery pack and insert the battery plug. Screw the battery cover loose and open the battery cover Replace the battery cover and tighten the battery cover screw.
2406H 5/28/09 9:04 AM Page 21 9V Adapter Charging Port Plug Unplug the charging port plug and insert the 9V adapter to supply power to the instrument. If there are rechargeable batteries in the battery compartment, they will be charged by the 9V adapter. In the course of charging, the charging LED displays red, after charging for about eight hours, the LED will turn green, this means the batteries have been fully charged.
2406H 5/28/09 9:04 AM Page 22 8. Self-Check and Calibration IMPORTANT: It is the responsibility of the user to verify the calibration of the instrument before each use. Accuracy Check 50’ 1. Put the laser on a tripod 50’ away from the wall. Put the laser on the tripod with X+ axis towards wall. 2. Power on and after self-leveling, using the detector, make a mark “A” on the wall where the detector indicates on grade with the laser beam. 3.
2406H 5/28/09 9:04 AM Page 23 Re-calibration Referencing the results of the self-check and using the “h” mark (the mid-point between the highest and the lowest point among A, B, C, D). 1. Enter self-calibration mode a. Power off the instrument and face the X-axis towards the wall. b. Press button and button simultaneously. Then release the power button while still pressing the manual button. Release the manual button after 10 seconds.
06H 5/28/09 9:04 AM Page 24 3. Y-axis calibration a. Turn off the instrument and turn the instrument 90º and make the Y-axis face the wall. b. Repeat steps 2a-2d of the X-axis. The LCD will show as the following figure when the Y-direction self-calibration is selected. c. Press the button to make the laser beam line move up and downwards until it coincides with the “h” mark. d. Press the button to confirm the Y-direction calibration value.
2406H 5/28/09 9:04 AM Page 25 9. Technical Specifications Laser Wavelength 635nm±10nm Laser Classification Class IIIa Maximum Power Output ≤5mW Accuracy ±1/16"/100 ft. (±1.5mm/30m) Exterior Range Up to 2000 ft. (600m) diameter Remote Range Up to 200 ft. (60m) diameter with remote Auto-Leveling Range ±5° Grade Setting Single axis +7.999% to 7.999% Double axis X + Y = 12.
2406H 5/28/09 9:04 AM Page 26 10.
2406H 5/28/09 9:04 AM Page 27 11. Care and Handling • This laser unit is a precision tool that must be handled with care. exposing unit to shock vibrations and extreme temperatures. • Before moving or transporting the unit, make sure that the unit is turned off. • Remove the batteries when storing the unit for an extended time (more than three months) to avoid damage to the unit should the batteries deteriorate. • Always store the unit in its case when not in use. • Avoid getting the unit wet.
2406H 5/28/09 9:04 AM Page 28 12. Product Warranty Johnson Level & Tool offers a one year limited warranty on each its products. You can obtain a copy of the limited warranty for a Johnson Level & Tool product by contacting Johnson Level & Tool's Customer Service Department as provided below or by visiting us online at www.johnsonlevel.com. The limited warranty for each product contains various limitations and exclusions. Do not return this product to the store/retailer or place of purchase.
2406H 5/28/09 9:04 AM Page 29 13. Product Registration Enclosed with this instruction manual you will find a warranty card to be completed for product warranty registration. Product warranty registration can also be completed online at our web site www.johnsonlevel.com. You will need to locate the serial number for your product that is located on the bottom of the unit.
2406H 30 5/28/09 9:04 AM Page 30 ©2009 Johnson Level & Tool