Mobile DVR Instructions 1
Contents Mobile DVR ............................................................................................................................ 1 Contents................................................................................................................................... 2 1 Specification.......................................................................................................................... 3 2.Feature .........................................................................
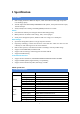
1 Specification FEATURES: Built-in high performance Hisilicon chipsets, coded with H.
Recording & Playback Firmware upgrading Interface Function extention Image display Single/QUAD display optional Audio Compression G.
Power Input 8—36V DC+8V~+36V,if lower than 8V,or higher than 36V,the MDVR will be shutdown, into protect status Power Output 12V Output :12V(+/-0.2V) ,max 2A。 ≤4V Key off。 ≥5V Key on。 75Ω 2Vp-p 75Ω/CH。 One 2Vp-p CVBS One 75Ω 0—4V Low voltage alarm >4V High voltage alarm SD Card Slot SD Card Support SD Card up to 512G, Support two SD Card Support upgrade MDVR software Temperature -40℃-80℃ -40℃-80℃ with good environment Key Signal Video Input(Ω) Video Output I/O 2.Feature 2.
2.2 MDVR interface 1、12V:For camera and voice record,2、Negative,3、AIN: For Audio;4、VIN:For Video Picture.
3. Power Picture.5 Power Make sure the volt is 8-36V before you connect with the battery , or the MDVR will be burn up Yellow cable must to connect with the ACC , or the DMVR can not be delay shut down, the video will be lose. 4 System User login After connect the power, press “Login” to login without password. (There is no password before you setup). USER account can not change settings. Only ADMIN account can change menu. Picture.
5 Main Menu Picture 7 Main Menu < SEARCH>: Search for video files stored in the hard disk/SD card and perform playback operations; :Set the audio and video parameters, working mode, etc.; :Set alarms, ptz, time, network, disk, system, etc.; :Display device serial number, version number, SIM card, GPS module, WIFI, MAC address, etc.; :Set vehicle number, switch settings, wireless settings, WIFI settings, etc.
5.1 Record Search Picture.8 Record Search Record Search: Search, playback, and backup of video files on disk 5.2 Record Setup Picture.
: You can select on/off to select whether the channel is recording; : D1 / HD1 / CIF / 720P / 1080N / 1080P resolution optional; : High / medium / low optional; : 1 to 25 (or 30)optional; : 1 to 6 optional; the smaller the value, the better the image quality;
5.3.1 Alarm Setup Picture.11 Alarm Setup : Select interface; : High and low optional; : “YES/NO”: switch or not when level is triggered; : Alarm when there is no disk or the device does not recognize the disk; : Alarm when the disk is out of memory;
5.3.2 PTZ Setup Picture.12 PTZ Setup : Support PELCO-D and PELCO-P; : 1200/2400/4800/9600 bps optional; : 5,6,7,8 optional; : Odd/Even/Mark/Spac/None optional; : 1/1.5/2 optional; : 001~255. 5.3.
Picture.13 Time Setup : Set year, month, day;
5.3.5 System Maintain Pictures.15 System Maintain : 1. Copy the files to be upgraded to the update DVR directory of the SD card. 2. Insert the SD card into the device. 3. Click the button. 5.3.
Picture.16 Network Setup : Generally not modified : Generally not modified : Set the server IP address, port Picture.17 CMS Setup : select ”IP Address” :47.106.9.69 (Configure according to your own server IP) 5.3.7 System Setup Picture.
: VGA output display resolution : “SD” stands for analog camera, ”720P” stands for AHD 720P camera, “1080N/1080P” stands for AHD 2 megapixel camera, Select the corresponding camera type to display properly : Set system language, including Chinese, English, and Traditional Chinese Note: Switch system mode, system restart 5.4 System Info Picture.
5.5 Vehicle Info Picture .20 Vehicle Info 5.5.1 Basic Setup Picture.21 Basic Setup : Set the number of the machine (3G\4G function device requires super 17
administrator setting). PLEASE DO NOT CHANGE UNLESS USE YOUR OWN SERVER. : Enter your company’s name; : Enter license number of the car; : Enter driver’s name; : Enter line number. 5.5.2 ACC Setup Picture.
5.5.3 ON/OFF Setup Pictures.23 ON/OFF Setup :Ignition Mode / Timing Mode(In the ignition mode, the MDVR will automatically turn on after the car is started, and in the timing mode, the MDVR will be turned on at the time set by the user.) :1~1440 minutes (Effective after restarting) Pictures.
5.5.4 Wireless Setup Picture.25 Wireless Setup : When the module cannot be reconnected after disconnection, the module will automatically power off and reset. APN: Please input according to the 4G SIM card you use. 5.5.5 Wi-Fi Setup Picture.
< Status>: View WiFi connection status, IP address and other information :It can configure 5 WiFi hotspots : Set to AUTO 5.5.6 GPS Setup Picture.
5.6 Display Setup Picture.28 Display Setup : Flip the video image horizontally : Flip the video image vertically 5.7 Password Setup Picture.
Only “Admin” can set “Admin Password” and “User Password” 6 I/O Interface Picture.30 IO Interface ① Alarm-2 ② Alarm-4 ③Alarm Output ④ 485B ⑤ Alarm-1 ⑥ Alarm-3 ⑦GND ⑧ 485A There is 4 alarm input,2 alarm output. Alarm input detection are voltage; can be accessed by variety of vehicles driving status, such as brakes, steering ,horn and so on. Brake testing schematic shown below, when the brake pedal is depressed, MDVR able to detect high or low voltage. Picture.
Picture.32 Alarm Schematic 7 Check Networking(Online) Status Picture.33 Check Networking(Online) Status Press the button “Info” on remote control, will be showed the online information. GPS:YES means recognize the GPS module; GPS:NO means not recognize GPS module LNG:11349.71392 E Display longitude, 0.0 means GPS not working LAT:2236.43040 N Display latitude, 0.
8 CMSV6 Installation Instruction 1.For PC download from http://47.106.9.69 Picture.34 CMSV6 download Picture.35 login interface on PC User: Mark on the device label Password: Default 000000 Server: Enter IP 47.106.9.
2. For smart phone, search “CMSV6” in the app store and download. Picture.36 login interface on phone Account (User): Mark on the device label Password: Default :000000 Server (IP): Enter IP :47.106.9.69 NOTE: The remote controller does not contain battery. Please buy the battery in local market. Battery Model: CR2025. 9 FAQ Q: Why MDVR don’t power on? A: Please make sure the SD card door is locked. B: Please make sure the YELLOW ACC wire gets power too. C: Please take out the SD or HDD out to test.
Enter OSD menu via Admin account. Operation->Display-> Check Horizontal Flip Q: How to do when system shows “HDD ERR” after insert a SD card? It needs to format the SD card when use the SD card first time. Please check the video. If it still shows “HDD ERR” after formatting the SD card, please change to use another SD card. Enter OSD menu via Admin account. Main->Basic-> Disk. Select the SD and Click “Format”.
1. APP: Please click search button, and select the mdvr, then back to Video page will show the videos, 2. Webpage: Please install flash and enable it runs on webpage. Q: How to build up my own server? A PC with a fixed IP can install the CMSV6 server. Please contact us, we will send the latest CMSV6 server software to you. Sincerely, JOINLGO Customer Service Team 10 Contact Website: www.joinlgo.com Email: service@joinlgo.