MULTIMEDIA CASE for the Raspberry Pi 4 Expert manual
1. TABLE OF CONTENTS 1. 2. Table of contents Usage with Raspberry Pi OS 2.1 IR-Receiver 2.1.1 serial interface 2.1.2 learningMode 2.2 Shutdown script 2.3 RGB-LEDs 2.3.1 Installation of Hyperion 2.4 Fan 2.5 Softwareupdates for the board 2.6 UART Control Usage with Kodi 3.1 Installation 3.2 Multimedia Case Configuration 3.3 Multimedia Case LED Configuration 3.4 HDMI CEC 3.5 IR Control Configuration Further Information Support 3. 4. 5.
2. USAGE WITH RASPBERRY PI OS The case has several functions that you can use in conjunction with the Raspberry Pi. In this chapter you will find an exemplary application of these functions in Raspberry Pi OS and a more detailed explanation of the individual functions. For this purpose we offer you suitable code examples.
Now you are asked the question Would you like a login shell to be accessible over serial? which should be declined. The next question Would you like the serial port hardware to be enabled? should be confirmed. Now you need to restart Raspberry Pi for the changes to take effect. The restart is done with the following command: sudo reboot 2.1.2 learningMode The script learningMode.py is a program that allows to set up a PowerOff button of any remote control.
Each time the button is pressed, the LEDs light up white to confirm that an infrared signal has been received. If you should press any other key, the LEDs light up red and the program resets. Then you have to press a key three times again. The LEDs will light up green when the PowerOff button has been set successfully . i The learningMode can be executed as often as desired, so the PowerOff button can be changed again.
You can use the following command to run the program in the background so that the terminal is still available. sudo python3 /home/pi/MultimediaCase/shutdown-function.py & You can also add this program to the autostart, so that Raspberry Pi always automatically calls the script at startup and remains permanently activated in the background. To do this, open the file rc.local with the following command: sudo nano /etc/rc.local Insert the following line before exit 0.
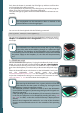
i If you want to use the jack plug, you must first switch off the LEDs, otherwise malfunctions may occur. Both PWM0 pins are required for audio output via the jack plug. 2.3.1 Installation of Hyperion Now follows a step by step installation of Hyperion in Raspberry Pi OS.
mkdir build cd build cmake -DCMAKE_BUILD_TYPE=Release .. make -j $(nproc) You have now successfully installed Hyperion on your Raspberry Pi OS. You can now start Hyperion with the following command: bin/hyperiond Now you can access Hyperion via web browser. To do so, enter your IP address of the Pi and attach a :8090. This could look like this, for example: 192.168.1.100:8090 Now the WebGUI of Hyperion is displayed. First you have to set the LEDs in the case.
There you can make the following settings: The LEDs should now all light up white to indicate that you have established a connection. In Hyperion you can apply various effects to the LEDs as well as connect and control additional LEDs. You close Hyperion again with the key combination CTRL + C within the console of the Raspberry Pi. 2.4 Fan A jumper with the inscription Fan Cntrl is attached to the back of the board of the Multimedia Case. This jumper allows to use the fan in two different modes.
It is useful to start this program in the background or add it directly to the autostart. This way you can permanently check the temperature of the Raspberry Pis and if necessary cool the Raspberry Pi. With the following command you can start the script in the background: sudo python3 /home/pi/MultimediaCase/fan.py & To run the program automatically when you start the Raspberry Pi, you must open a file with the following command: sudo nano /etc/rc.local Insert the following line before exit 0.
For flashing the program stm32flash is required. You can download and install it with the following commands. sudo apt-get update -y sudo apt-get install -y stm32flash Make sure that you are in the same directory as the .bin file . There you can enter the following command to start the flash process: sudo stm32flash /dev/serial0 -w MultimediaCase.bin -b 9600 i Please note that the name of the software may differ due to newer software versions.
3. USAGE WITH KODI This case is very suitable for using Kodi. Because it is a media player application with which movies, series and more can be watched. For this purpose we offer you an image, which you can download here. If you don't want to use our prepared image, you can follow this chapter to use the full functionality of the Multimedia Case. 3.1 Installation First you have to establish an SSH connection. We recommend MobaXterm, which you can download here. You also need to enable SSH in LibreElec.
First enter the following command to download the serial communication addon: wget https://mirrors.kodi.tv/addons/krypton/script.module.pyserial/ script.module.pyserial-3.4.0.zip Now you can install addons with the help of the Install from Zip files. To do so, go to the home folder. Where the zip file should already be displayed. If you select this, the addon should install. If you select this, the addon should be installed.
Now open the config.txt again: mount -o remount,rw /flash nano /flash/config.txt Now insert the following line at the end of the file again: dtoverlay=gpio-ir,gpio_pin=7 Now restart the Raspberry Pi with the following command: reboot www.joy-it.net Pascalstr.
Now you can download the Addons especially for the Multimedia Case. In total there are three addons, each of which has different functions. There is the Multimedia Case Configuration Addon, Multimedia Case LED Configuration and the IR Control Configuration. 3.2 Multimedia Case Configuration With this addon you can activate or modify certain functions of the Multimedia Case to personalize it. This addon contains the programs fan.py, shutdown-function.py and the learningMode. fan.
3.3 Multimedia Case LED Configuration This addon directly adjusts the LEDs of the case. You have to execute the following command to download Hyperion. wget -qO- https://git.io/JUvg7 | bash -s 2.0.0-alpha.6 Now restart the Raspberry Pi with the following command: reboot Now you can access Hyperion via web browser. To do so, enter your IP address of the Pi and attach a :8090. This could look like this, for example: 192.168.1.100:8090 Now the WebGUI of Hyperion is displayed.
There you make the following settings: In Hyperion you can also specify for example a start effect under Configuration → Effects. However, in order for the Addon to function correctly, you must deactivate under Configuration → Effects Background Effect and under Configuration → Capturing Hardware Enable platform capture. It is important that you save these settings. www.joy-it.net Pascalstr.
If you want to use the addon, you have to enter the following command so that Hyperion can be controlled by the addon alone and thus can be switched off. systemctl disable hyperion.service --now You can also undo this with the following command . systemctl enable hyperion.service --now Now you can download the addon here or download it directly to the Raspberry Pi with the following command: wget https://joy-it.net/public/script.module.MCHyperion.zip You can install this as already explained.
3.5 HDMI CEC HDMI CEC is a function where the remote control of your TV can operate the Multimedia Case via the HDMI cable. Kodi has already enabled this function by default. You can use the remote control with the Multimedia Case without further configuration. The HDMI cable used must also support this function. The HDMI0 port must also be used. HDMI CEC offers an alternative to a separate remote control. i HDMI0 Note that the TV must also have HDMI CEC enabled.
4. FURTHER INFORMATION PR Our Information and Take-back Obligations according to the German Electronic Law (ElektroG) Symbol on Electrial and Electronic Products: This crossed-out bin means that electrical and electronic products do not belong into the household waste. You must hand over your old appliance to a registration place. Before you can hand over the old appliance, you must remove used batteries and replacement batteries which are not enclosed by the device.