
User manual
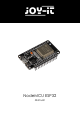


NodeMCU ESP32
Published: 26.09.2018 Copyright by Joy-IT 5
Your NodeMCU ESP32 is now ready to use. Simply connect it to your computer with a USB cable.
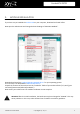
The installed library already provides many examples to allow a quick insight into the module.
You can nd the examples in your Arduino IDE under "File -> Examples -> ESP32".
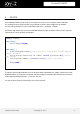
The fastest and easiest way to test your NodeMCU ESP32 is to get the device number. Either copy the
code below or use the example "GetChipID":
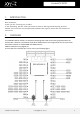
To upload, click the upload buon from the Arduino IDE and hold down the "BOOT"-buon on the SBC
NodeMCU ESP32. The upload is completed unl the wring has reached 100% and you will be asked to
reboot (hard reseng via RTS pin ...) with the "EN" key.
You can show the output of the example in the serial monitor.
4. USAGE
uint64_t chipid;
void setup() {
Serial.begin(115200);
}
void loop() {
chipid=ESP.getEfuseMac();//The chip ID is essentially its MAC address
(length: 6 bytes).
Serial.printf("ESP32 Chip ID = %04X",(uint16_t)(chipid>>32));//print
High 2 bytes
Serial.printf("%08X\n",(uint32_t)chipid);//print Low 4bytes.
delay(3000);
}