'LVKZDVKHU HQ 2SHUDWLQJ LQVWUXFWLRQV
6WDUW $ % & 5HVHW VHF
en Table of contents 8 Intended use . . . . . . . . . . . . . . ( Safety instructions . . . . . . . . . . Before you switch ON the appliance . . . . . . Delivery. . . . . . . . . . . . Installation. . . . . . . . . . In daily use . . . . . . . . . Door lock . . . . . . . . . . Damage . . . . . . . . . . . Disposal . . . . . . . . . . . . . . . . . . . . . . . . . . . . . . . . . . . . . . . . . . . . . . . . . . . . . . . . . . . . . . . . . . . . . . . . . . . . . . . . . . . . . . . . 4 4 .
en Intended use End of programme . . . . . . . . Automatic switch off / interior light. . . . . . . . . . . . . . Switching off the appliance. . Interrupting the programme . Terminating the programme . Changing the programme. . . Intensive drying. . . . . . . . . . . . . . . . . 23 . . . . . . . . . . . . . . . . . . . . . . . . . . . . . . . 24 . 24 . 25 . 25 . 25 . 25 2 Cleaning and maintenance . . . Overall condition of the machine Special salt and rinse aid . . . . . . Filters . . . . . . . . .
Safety instructions Keep children below the age of 8 years old at a safe distance from the appliance and power cable. Before you switch ON the appliance Please read the instructions for use and installation carefully. They contain important information on how to install, use and maintain the appliance. Retain all documents for later use or for the subsequent owner. You can download the instructions for use from our website free of charge.
en Safety instructions If the dishwasher is installed below or above other domestic appliances, follow the information for installation in combination with a dishwasher in the installation instructions for the particular appliances. Also follow the installation instructions for the dishwasher to ensure that all appliances are operated safely.
Safety instructions Childproof lock (door lock) * Do rlock The description of the childproof lock is at the back in the envelope. * depending on model Damage The appliance may be repaired and opened up by a technician only. To do this, disconnect the appliance from the power supply. Pull out the mains plug or switch off the fuse. Turn off the tap. If the appliance is damaged, especially the fascia (cracks, holes, broken buttons), or the door function is impaired, stop operating the appliance.
en Safety instructions m Warning Risk of scalding! Open the door carefully when the programme is still running. There is a risk of hot water spraying out of the appliance. m Warning Risks to children! If fitted, use the childproof lock. An exact description can be found in the back of the enve lope. Do not allow children to play with or operate the appliance. Keep children away from detergents and rinse aid. These may cause chemical burns in the mouth, throat and eyes or asphyxiation.
Protection of the environment 7 Protection of the * Getting to know your environment onitceotPr het of Both the packaging of new appliances and the old appliances themselves contain valuable raw materials and recyclable materials. Please dispose of the individual parts separated according to type. Please ask your dealer or inquire at your local authority about current means of disposal. Packaging All plastic parts of the appliance are identified with internationally standardised abbreviations (e.g.
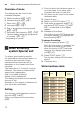
en Water softening system/Special salt Overview of menu The settings can be found in the individual chapters.
Rinse aid Using special salt Always refill with special salt immediately before switching on the appliance. This ensures that overrun special salt solution is immediately washed out and does not corrode the rinsing tank. 1. Open the screw-type cap of the compartment 1R. 2. Fill the tank with water (only required when switching on the appliance for the first time). 3. Then add dishwasher salt (not table salt or tablets). The water is displaced and runs out.
en Rinse aid 1. Open the dispenser 1j by pressing and lifting the plate on the cover. 2. Carefully pour rinse aid up to the max. mark in the filler opening. PD[ 3. Close cover until it clicks shut. 4. To prevent excessive foam formation during the next rinse cycle, remove any rinse aid which has run over with a cloth. Setting amount of rinse aid The amount of rinse aid can be set from §:‹‹ to §:‹‡. Please set rinse aid on §:‹† to obtain very good drying results (§:‹† is already set in factory).
Utensils - Utensils slinseUt Not suitable Cutlery and utensils made of wood. Delicate decorative glasses, craft and antique utensils. These decors are not dishwasher-proof. Plastic parts not resistant to heat. Copper and tin utensils. Utensils which are soiled with ash, wax, lubricating grease or ink. Aluminium and silver parts have a tendency to discolour and fade during the wash cycle. Even some types of glass (e.g. crystal glass objects) may turn cloudy after many wash cycles.
en Utensils Cups and glasses Pans Top basket 12 Bottom basket 1b Note Utensils must not be placed above the tablet collecting tray 1B. These may block the lid of the detergent dispenser and prevent it from opening fully. Tip Heavily soiled utensils (pans) should be placed in the bottom basket. The more powerful spray jet provides a better dishwashing result. Tip Other examples, such as the best way of loading your dishwasher, can be found on our homepage as a free download.
Utensils Cutlery drawer en Folding spikes * Foldingspikes Arrange the cutlery in the cutlery drawer 1* as illustrated. Separately arranged utensils are easier to remove after washing. The drawer can be taken out. * depending on model The spikes can be folded down to improve arrangement of pans, bowls and glasses. Depending on the model, you can fold down the side shelves to provide more room for taller items of cutlery. The front rows of prongs can be folded down to provide room for wider handles.
en Detergent Appliance height 81.5 cm Top basket Setting 1 max. ø Setting 2 max. ø Setting 3 max. ø 16 cm 18.5 cm 21 cm Bottom basket 30 cm 27.5 cm 25 cm Appliance height 86.5 cm Top basket Setting 1 max. ø Setting 2 max. ø Setting 3 max. ø 18 cm 20.5 cm 23 cm Bottom basket 33 cm 30.5 cm 28 cm 1. Pull out the top basket 12 out. 2. To lower the basket, press in the left and then the right lever on the outside of the basket.
Detergent Adding detergent 1. If the detergent dispenser 9" is still closed, press the lock 9* to open the detergent dispenser. Pour detergent into the dry detergent dispenser 9" only (insert tablet flat, not on its edge). Dosage: see manufacturer’s instructions on the packaging. The graduated detergent dispenser 9" helps you add the correct amount of powder or liquid detergent. Usually 20 ml–25 ml are adequate for normal soiling. If using tablets, one tablet is adequate. PO PO PO en 2.
en Detergent Combination detergent Apart from conventional detergents (Solo), a number of products are offered with additional functions. These products contain not only the detergent but also rinse-aid and salt replacement substances (3in1) and, depending on the combination (4in1, 5in1, etc.), additional components such as glass protection or stainless steel cleaner. Combination detergents function only up to a specific degree of hardness (usually 21°dH). Over this limit salt and rinse-aid must be added.
Overview of programmes en / Overview of programmes m aogrm prseofw eviO rve The max. possible number of programmes is illustrated in this overview. The corresponding programmes and their arrangement can be found on the fascia.
en Additional options Programme selection You can select a suitable programme according to the type of utensils and degree of soiling. Information for test institutes Test institutes receive the information for comparability tests (e.g. according to EN60436). These are the conditions for conducting the tests, however these are not the results or consumption values. Request by e-mail to: dishwasher@test-appliances.com The product number (E no.
Operating the appliance · Hygiene * en 1 Operating Hygien The temperature is increased during the cleaning process. This increases the hygiene status. This additional option is ideal for cleaning e.g. chopping boards and baby bottles. Ï Intensive zone * Intensive zone Perfect for a mixed load. You can wash very soiled pots and pans in the lower basket together with normally soiled utensils in the upper basket.
en Operating the appliance Switching on the appliance 1. Turn on the tap fully. 2. Open the door. 3. Switch on ON/OFF switch (. The Eco 50° programme display flashes. This programme remains selected if no other programme button 0 is pressed. The expected programme duration flashes on the digital display h. 4. Press the START button `. 5. Close the door. The programme starts running.
Operating the appliance Remaining running time display When the programme is selected, the remaining running time of the programme is indicated on the digital display h. The running time is determined during the programme by the water temperature, the number of utensils as well as the degree of soiling and may vary (depending on the selected programme). Timer programming * Timerprogram ing * depending on model You can delay the start of the programme in 1-hour steps up to 24 hours. 1. Open the door. 2.
en Operating the appliance Automatic switch off after end of programme or interior light* Automaticswitchof /interiorlight * depending on model To save energy, the dishwasher can be automatically switched off 1 min or 120 min after the programme ends. The setting can be selected from ˜:‹‹ to ˜:‹ƒ. ˜:‹‹ Appliance does not switch off automatically. The interior light 1" comes on when the door is opened irrespective of whether the ON/OFF switch ( is switched on or off.
Operating the appliance en Interrupting the programme Changing the programme 1. Open the door. 2. Switch off ON/OFF switch (. The LEDs go out. The programme is saved. If the door was opened on an appliance which has a warm water connection or is heated, first leave the door ajar for several minutes and then close. Otherwise, expansion (pressure) may cause the appliance door to spring open or water to run out of the appliance. 3. To continue the programme, switch on the ON/OFF switch ( again. 4.
en Cleaning and maintenance 2 Cleaning and maintenance ngniaeCl nda A regular inspection and maintenance of your machine will help to prevent faults. This saves time and prevents problems. Overall condition of the machine Check spray arm for grease and limescale deposits. If you find such deposits: Fill detergent dispenser with detergent. Start the appliance without utensils in the programme with the highest rinsing temperature.
Cleaning and maintenance en Filters Spray arms The filters 1Z keep large foreign objects in the rinsing water away from the pump. These foreign objects may occasionally block the filters. The filter system consists of a coarse filter, a flat fine filter and a microfilter. 1. After each washing cycle check the filters for residue. 2. Unscrew filter cylinder as illustrated and take out filter system.
en Fault, what to do? 3 Fault, what to do? ,tF ula w tha ot Experience has shown that you can rectify most faults which occur in daily operation yourself. This ensures that the machine is quickly available to you again. In the following overview you can find possible causes of malfunctions and helpful information for rectifying them. Note If the appliance stops during dishwashing or does not start for no obvious reason, first run the Abort programme function (Reset).
Fault, what to do? en Fault table Fault “Check water supply” display 8 lights up. Error code “:‹ˆ is lit. Error code “:‚ƒ is lit. Fault code “:‚… is lit. Fault code “:‚† is lit. Fault code “:‚‡ is lit. Error code “:ƒƒ is lit. Error code “:ƒ… is lit. Cause Supply hose kinked. Tap turned off. Tap jammed or calcified. Remedial action Install supply hose without kinks. Turn the tap on. Turn the tap on. Flow rate must be min. 10 l/min. when water supply is open. Filter in the water supply blocked.
en Fault, what to do? Fault Error code “:ƒ† is lit. Error code “:ƒˆ is lit. Cause Waste water pump blocked or cover on the waste water pump is not locked in position. Mains voltage too low. A different error code is indicated on the digital display. (“:‹‚ to “:„‹) A technical fault has probably occurred. Display flashes. Door not closed properly. Refill indicator for salt @ No rinse aid. and/or rinse-aid H is lit. No salt. Sensor does not detect salt tablets.
Fault, what to do? Fault Utensils not dry. Cause No or too little rinse aid in the dispenser. Programme selected without drying. Water collecting in depressions on the utensils and cutlery. en Remedial action Refill rinse aid. Select programme with drying (see “Overview of programmes”, “Programme sequence”). Arrange utensils in a sloping position, arrange affected utensils as sloping as possible.
en Fault, what to do? Fault Food remnants on the utensils. Cause Utensils placed too closely together, utensils basket overfilled. Spray arm rotation obstructed. Spray arm nozzles are blocked. Filters 1Z dirty. Filters 1Z inserted incorrectly and/or not engaged. Rinse programme too weak. Utensils precleaned too intensely; sensors therefore decide on weak programme sequence. Stubborn soiling cannot be completely removed. Tall narrow receptacles in corner areas are not rinsed adequately.
Fault, what to do? Fault Water stains on plastic parts. en Cause Droplet formation on plastic surface is physically unavoidable. After drying, water stains are visible. Remedial action Use a more intensive programme (more water changes). Arrange utensils in a sloping position. Use rinse aid. If required, increase softening setting. Change detergent brand. Washable or water-soluble Detergent substances are coatings in the container or deposited. These coatings cannot Clean appliance mechanically.
en Fault, what to do? Fault Coloured (blue, yellow, brown), difficult to remove to non-removable coatings in the appliance or on stainless steel utensils. Coloured (yellow, orange, brown), easily removable deposits inside the appliance (mainly in the floor area) Discolouration of the plastic parts inside the appliance. Plastic parts discoloured. Removable streaks on glasses, glasses with metallic appearance and cutlery. 34 Cause Film formation consisting of ingredients from vegetables (e.g.
Fault, what to do? Fault Initial or existing, irreversible clouding of glass. Cause Glasses not dishwasher-proof, only suitable for dishwasher. Rust spots on the cutlery. Cutlery not adequately rustresistant. Knife blades are frequently more severely affected. Cutlery will also rust if rusting parts are rinsed at the same time (pan handles, damaged utensil baskets, etc.). Salt content in the rinsing water too high, as salt dispenser lock not fastened firmly or salt was spilled while being refilled.
en Fault, what to do? Fault Detergent residue in the detergent dispenser or in the tablet collecting tray. Cause Spray arms blocked by utensils, therefore detergent is not rinsed out. The detergent dispenser was damp when filled. Door not closed properly. Appliance stops in the programme or programme Do not place utensils or fragrance is interrupted. dispenser in the tablet collecting tray. Top basket presses against the door and prevents door from being closed securely.
Customer service 4 Customer service om C rteus 5 Installation and connection ecv ires If you are unable to rectify the fault, please contact your customer service. We always find a suitable solution, even to avoid unnecessary visits by technicians. Contact information for your nearest customer service can be found on the back of these instructions for use or on the enclosed customer service list. When calling, please state the appliance number (ENr.
en Installation and connection Delivery Installation Your dishwasher has been checked thoroughly in the factory to ensure that it is in working order. This may cause small water stains. These will disappear after the first wash cycle. The required installation dimensions can be found in the installation instructions. Level the appliance with the aid of the height-adjustable feet. Ensure that the appliance is situated securely on the floor.
Installation and connection Water pressure: At least 0.05 MPa (0.5 bar), maximum 1 MPa (10 bar). At a higher water pressure: connect pressure-reducing valve ahead. Inlet rate: Minimum 10 litres/minute Water temperature: Cold water; hot water max. temperature 60 °C. Warm water connection * Warmwatercon ection * depending on model The dishwasher can be connected to cold or hot water up to max. 60 °C.
en Installation and connection Use only a residual current operated circuit-breaker which features the symbol ‚. Only this extension guarantees compliance with the currently valid regulations. The appliance features a water damage protection system. Please note the system will not function unless the power supply is connected. Removing the appliance Also observe the sequence of worksteps here. 1. Disconnect the appliance from the power supply. 2. Turn off the water supply. 3.
&KLOGSURRI ORFN GRRU ORFN :DUQLQJ $FWLYDWH WKH FKLOGSURRI ORFN 2SHQ WKH GRRU ZLWK DFWLYDWHG FKLOGSURRI ORFN 'HDFWLYDWH FKLOGSURRI ORFN $OZD\V FORVH WKH DSSOLDQFH GRRU FRPSOHWHO\ ZKHQ \RX OHDYH WKH DSSOLDQFH 7KLV LV WKH RQO\ ZD\ \RX FDQ SURWHFW \RXU FKLOGUHQ IURP SRWHQWLDO GDQJHUV %DNLQJ VKHHW VSUD\ KHDG /DUJH VKHHWV RU JULOOHV DQG SODWHV ZKLFK KDYH D GLDPHWHU JUHDWHU WKDQ FP JRXUPHW SODWHV SDVWD SODWHV GLQQHU SODWHV FDQ EH FOHDQHG ZLWK WKH DLG RI WKH VSUD\ KHDG 7R G
%6+ +DXVJHUlWH 9HUWULHEV *PE+ &DUO :HU\ 6WUDH 0QFKHQ '(876&+/$1' *9000996150* 9000996150 en (9605) 640MV