Montage- und Gebrauchsanweisung für den Dunstabzug Instruction on mounting and use of the cooker hood JDM 6530 1
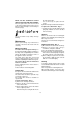
120 556 120 1 355 2 3 190 3 2 900 440 2 Fig. 1 Abb. 1 470 470 620 D E F Fig. 2 Abb. 2 E G Fig. 3 Abb. 3 Fig. 4 Abb.
4 x Ø 8 mm ➙ 4 x 3 x 4,5x13 Fig. 5 Abb. 5 2 x 5x45 54 x 4x8 N 2 x 5x45 min. 0 max. 150 Fig. 6 Abb. 6 M 3 Fig. 7 Abb.
x Ø 8 mm ➙ 4 x Fig. 8 Abb. 8 2 x 5x45 Fig. 9 Abb. 9 min. 0 max. 150 Fig. 10 Abb. 10 B Fig. 11 Abb.
for an adequate supply of air. — No food must be cooked flambé underneath the hood. The use of an unprotected flame is dangerous for the filters and could cause fires. Therefore, never use an open flame under the hood. When frying foods, never leave the pan alone because the cooking oil could flare up. — Please, keep to the provisions of official directives regarding the question of fume discharge.
flush to the wall on the exhaust part so that it matches the four guide pins in the respective holes. Hook the fastening clamps to the right and left and snap fasten upwards. Using the five 4 x 8 mm sheet metal screws provided, fasten the upper part of the hood securely to the lower part with two 5 x 45 mm screws provided, inserting them from inside the hood in the upper 8mm diameter plugs (Fig. 6). d) Mount the cabinet on the hood and fasten with three 4.5 x 13 mm screws to the lower edge of the cabinet.
Filter saturation control devices for grease filters Operation The hood has one variable speed motor. For the best performance, we recommend using the low speeds in normal conditions and the high speeds in particular cases of strong odour and vapour concentration. This hood is supplied with a device that notifies the user when the grease filter must be cleaned or the charcoal filter replaced (if installed).
G of the carbon filter. It is not necessary to replace the two screws. 4) Put the metal grease filter back into place. Reset for the saturation control devices for grease and charcoal filters Once the grease filters have been cleaned or the charcoal filter replaced, press the A button for approximately 3 seconds until you hear the (beep): O 1 2 3 F C To replace the carbon filter - Fig. 3: — To dismount, press the two buttons A and pull gently forwards to remove the filter from its housing.
ELECTROLUX HAUSGERÄTE GMBH Rennbahnstraße 72-74 60528 Frankfurt L 852 Ed.