EN User Manual Oven JH094C9
CONTENTS Safety information Safety instructions Product description Control panel Before first use Daily use Clock functions 2 3 6 6 7 7 10 Using the accessories Additional functions Hints and tips Care and cleaning Troubleshooting Installation Energy efficiency 11 12 12 24 26 28 30 Subject to change without notice. SAFETY INFORMATION Before the installation and use of the appliance, carefully read the supplied instructions.
General Safety • • • • • • • • • • • Only a qualified person must install this appliance and replace the cable. The control panel must be connected to specified heating unit with matching colours of connectors, to avoid possible hazard. WARNING: The appliance and its accessible parts become hot during use. Care should be taken to avoid touching heating elements. Always use oven gloves to remove or put in accessories or ovenware.
• Keep the minimum distance from other appliances and units. • Install the appliance in a safe and suitable place that meets installation requirements. • Parts of the appliance carry current. Close the appliance with furniture to prevent touching the dangerous parts. • The appliance is equipped with an electric cooling system. It must be operated with the electric power supply. Electrical connection WARNING! Risk of fire and electric shock.
• • • • – do not put aluminium foil directly on the bottom of cavity of the appliance. – do not put water directly into the hot appliance. – do not keep moist dishes and food in the appliance after you finish the cooking. – be careful when you remove or install the accessories. Discoloration of the enamel or stainless steel has no effect on the performance of the appliance. Use a deep pan for moist cakes. Fruit juices cause stains that can be permanent. This appliance is for cooking purposes only.
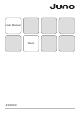
PRODUCT DESCRIPTION General overview 1 2 3 4 5 6 7 2 8 5 9 4 13 3 10 2 1 11 12 Accessories • Wire shelf For cookware, cake tins, roasts. • Combi pan 1 2 3 4 5 6 7 8 9 10 11 12 13 Control panel Knobs for the hob Power lamp / symbol Knob for the heating functions Display Control knob (for the temperature) Temperature indicator / symbol Heating element Lamp Fan Cavity embossment Shelf support, removable Shelf positions For cakes and biscuits. To bake and roast or as a pan to collect fat.
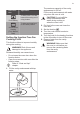
Buttons Sensor field / Button Function Description MINUS To set the time. CLOCK To set a clock function. PLUS To set the time. Display A B C A. Clock functions B. Timer C. Clock function BEFORE FIRST USE WARNING! Refer to Safety chapters. To set the Time of day refer to "Clock functions" chapter. Initial Cleaning Remove all accessories and removable shelf supports from the oven. Refer to "Care and cleaning" chapter. Clean the oven and the accessories before first use.
Setting a heating function 1. Turn the knob for the heating functions to select a heating function. 2. Turn the control knob to select the temperature. The lamp turns on when the oven operates. 3. To turn off the oven, turn the knob for the heating functions to the off position. Oven func‐ tion Moist Fan Baking Heating functions Oven func‐ tion Application The oven is off. Off position To turn on the lamp with‐ out a cooking function. Light True Fan + Steam To steam dishes.
Oven func‐ tion Pizza Setting The maximum capacity of the cavity embossment is 250 ml. Fill the cavity embossment with water only when the oven is cold. Application To bake pizza. To make intensive browning and a crispy bottom. To bake and roast food on one shelf position. Conventional Cooking (Top / Bottom Heat) Setting the function:True Fan Cooking PLUS This function allows to improve humidity during the cooking. WARNING! Risk of burns and damage to the appliance.
CLOCK FUNCTIONS Clock functions table Clock function Application TIME OF DAY To set, change or check the time of day. DURATION To set how long the appliance operates. END To set when the appliance deactivates. TIME DELAY To combine DURATION and END function. MINUTE MIND‐ ER To set countdown time. This function has no effect on the op‐ eration of the appliance. You can set the MINUTE MINDER at any time, also when the appliance is off. Setting the time.
Appliance turns on automatically later on, works for the set DURATION time and stops at the set END time. At the set time an acoustic signal sounds. 7. The appliance deactivates automatically. Press any button to stop the signal. 8. Turn the knob for the oven functions and the knob for the temperature to the off position. Setting the MINUTE MINDER 1. Press again and again until starts to flash. 2. Press or to set the necessary time. The Minute Minder starts automatically after 5 seconds. 3.
ADDITIONAL FUNCTIONS Cooling fan When the oven operates, the cooling fan turns on automatically to keep the surfaces of the oven cool. If you turn off the oven, the cooling fan can continues to operate until the oven cools down. dangerous overheating. To prevent this, the oven has a safety thermostat which interrupts the power supply. The oven turns on again automatically when the temperature drops.
Use the baking tray. Use the second shelf position. Food Water in the cavity embossment (ml) Temperature (°C) Time (min) Cookies, scones, croissants 100 150 - 180 10 - 20 Focaccia 100 200 - 210 10 - 20 Pizza 100 230 10 - 20 Bread rolls 100 200 20 - 25 Bread 100 180 35 - 40 Plum cake, apple pie, cinnamon rolls baked in a cake mould. 100 - 150 160 - 180 30 - 60 Frozen ready meals Preheat the empty oven for 10 minutes. Use the second shelf position.
Food Tempera‐ ture (°C) Time (min) Food Tempera‐ ture (°C) Time (min) Roast beef 200 50 - 60 Roast pork 180 65 - 80 Chicken 210 60 - 80 Baking and roasting Cakes Food Top / Bottom Heat True Fan Cooking Time (min) Com‐ ments Tempera‐ ture (°C) Shelf position Temper‐ ature (°C) Shelf position Whisked recipes 170 2 160 3 (2 and 4) 45 - 60 In a cake mould Short‐ bread dough 170 2 160 3 (2 and 4) 20 - 30 In a cake mould Butter‐ milk cheese‐ cake 170 1 165 2 60 - 80
Food Top / Bottom Heat True Fan Cooking Time (min) Com‐ ments Tempera‐ ture (°C) Shelf position Temper‐ ature (°C) Shelf position Small cakes one level 170 3 140 - 150 3 20 - 30 In a bak‐ ing tray Small cakes two lev‐ els - - 140 - 150 2 and 4 25 - 35 In a bak‐ ing tray Small cakes three lev‐ els - - 140 - 150 1, 3 and 5 30 - 45 In a bak‐ ing tray Biscuits / pastry stripes one level 140 3 140 - 150 3 30 - 35 In a bak‐ ing tray Biscuits / pastry stripes two lev‐ els
Food Top / Bottom Heat True Fan Cooking Time (min) Com‐ ments Tempera‐ ture (°C) Shelf position Temper‐ ature (°C) Shelf position Eclairs two lev‐ els - - 170 2 and 4 35 - 45 In a bak‐ ing tray Plate tarts 180 2 170 2 45 - 70 In a 20 cm cake mould Rich fruit cake 160 1 150 2 110 - 120 In a 24 cm cake mould Victoria sandwich 170 1 160 2 (left and right) 50 - 60 In a 20 cm cake mould Time (min) Com‐ ments 1) Preheat the oven for 10 minutes.
Flans Food Top / Bottom Heat True Fan Cooking Time (min) Com‐ ments Temper‐ ature (°C) Shelf po‐ sition Temper‐ ature (°C) Shelf po‐ sition Pasta flan 200 2 180 2 40 - 50 In a mould Vegeta‐ ble flan 200 2 175 2 45 - 60 In a mould Quich‐ 180 1 180 1 50 - 60 In a mould 180 - 190 2 180 - 190 2 25 - 40 In a mould 180 - 190 2 180 - 190 2 25 - 40 In a mould Time (min) Com‐ ments es1) La‐ sagne1) Cannello‐ ni1) 1) Preheat the oven for 10 minutes.
Food Top / Bottom Heat True Fan Cooking Time (min) Com‐ ments Temper‐ ature (°C) Shelf po‐ sition Temper‐ ature (°C) Shelf po‐ sition Shoulder of pork 180 2 170 2 120 - 150 With rind Shin of pork 180 2 160 2 100 - 120 2 pieces Lamb 190 2 175 2 110 - 130 Leg Chicken 220 2 200 2 70 - 85 Whole Turkey 180 2 160 2 210 - 240 Whole Duck 175 2 220 2 120 - 150 Whole Goose 175 2 160 1 150 - 200 Whole Rabbit 190 2 175 2 60 - 80 Cut in pieces Hare 19
Food Quantity Time (min) Pieces Quantity (kg) 1st side 2nd side Fillet steaks 4 0.8 12 - 15 12 - 14 Beef steaks 4 0.6 10 - 12 6-8 Sausages 8 - 12 - 15 10 - 12 Pork chops 4 0.6 12 - 16 12 - 14 Chicken (cut in 2) 2 1 30 - 35 25 - 30 Kebabs 4 - 10 - 15 10 - 12 Breast of chicken 4 0.4 12 - 15 12 - 14 Hamburger 6 0.6 20 - 30 - Fish fillet 4 0.
Food Tempera‐ ture (°C) Time (min) Food Tempera‐ ture (°C) Time (min) Knuckle of veal, 1.5 - 2 kg 160 - 180 120 - 150 Chicken, poulard, 1 1.5 kg 190 - 210 50 - 70 Duck, 1.5 2 kg 180 - 200 80 - 100 Goose, 3.5 - 5 kg 160 - 180 120 - 180 Turkey, 2.5 - 3.5 kg 160 - 180 120 - 150 Turkey, 4 6 kg 140 - 160 150 - 240 Food Tempera‐ ture (°C) Time (min) Whole fish, 1 - 1.5 kg 210 - 220 40 - 60 Lamb Food Tempera‐ ture (°C) Time (min) Leg of lamb, roast lamb, 1 - 1.
Food Accessories Tempera‐ ture (°C) Shelf po‐ sition Time (min) Sponge flan base flan base tin on wire shelf 180 2 35 - 45 Victoria Sand‐ wich baking dish on wire shelf 170 2 35 - 50 Poached fish, 0.3 kg baking tray or dripping pan 180 2 35 - 45 Whole fish, 0.2 kg baking tray or dripping pan 180 3 25 - 35 Fish fillet, 0.3 kg pizza pan on wire shelf 170 3 30 - 40 Pouched meat, 0.25 kg baking tray or dripping pan 180 3 35 - 45 Shashlik, 0.
Vegetables For one tray use the third shelf position. For 2 trays use the first and fourth shelf position.
Food Function Acces‐ sories Shel f po‐ si‐ tion Tem‐ pera‐ ture (°C) Time (min) Comments Apple pie Conven‐ tional Cooking Wire shelf 2 180 70 - 90 Use 2 tins (20 cm diameter), di‐ agonally shifted. Apple pie True Fan Cooking / Fan Cook‐ ing Wire shelf 2 160 70 - 90 Use 2 tins (20 cm diameter), di‐ agonally shifted. Fatless‐ ponge cake Conven‐ tional Cooking Wire shelf 2 170 40 - 50 Use a cake mould (26 cm di‐ ameter). Preheat the oven for 10 minutes.
Food Function Acces‐ sories Shel f po‐ si‐ tion Tem‐ pera‐ ture (°C) Time (min) Comments Beef burger 6 pieces, 0.6 kg Grilling Wire shelf and dripping pan 4 max. 20 - 30 Put the wire shelf on the fourth lev‐ el and the drip‐ ping pan on the third level of the oven. Turn the food halfway through the cooking time. Preheat the oven for 3 minutes. CARE AND CLEANING WARNING! Refer to Safety chapters.
Use maximum 6% vinegar without any additives. 2. Let the vinegar dissolve the residual limestone at the ambient temperature for 30 minutes. 3. Clean the cavity with warm water and a soft cloth. Cleaning the door gasket Regularly do a check of the door gasket. The door gasket is around the frame of the oven cavity. Do not use the oven if the door gasket is damaged. Contact an Authorised Service Centre. glass panel to clean it.
Do not clean the glass panels in the dishwasher. When the cleaning is completed, install the glass panel and the oven door. The screen-printing zone must face the inner side of the door. Make sure that after the installation the surface of the glass panel frame on the screen-printing zones is not rough when you touch it. When installed correctly the door trim clicks. 4. Put the door on a soft cloth on a stable surface. 5.
What to do if... Problem Possible cause Remedy The cooking zones do not operate. Refer to the operating instructions for the built-in cooking sur‐ face. You cannot activate or oper‐ ate the oven. The display shows “400” and an acoustic signal sounds. The oven is incorrectly con‐ nected to an electrical sup‐ ply. Check if the oven is correct‐ ly connected to the electrical supply (refer to the connec‐ tion diagram if available). The oven does not heat up. The oven is deactivated.
Service data If you cannot find a solution to the problem yourself, contact your dealer or an Authorised Service Centre. on the front frame of the oven cavity. Do not remove the rating plate from the oven cavity. The necessary data for the service centre is on the rating plate. The rating plate is We recommend that you write the data here: Model (MOD.) ......................................... Product number (PNC) ......................................... Serial number (S.N.) ....................
Building In 548 21 min. 550 80 60 520 114 18 20 600 589 594 min. 560 595 +-1 198 60 5 3 523 20 Securing the appliance to the cabinet A For the section of the cable refer to the total power on the rating plate. You can also refer to the table: Total power (W) Section of the ca‐ ble (mm²) B 3 phases: 5 x 2.5 maximum 10380 2 phases: 4 x 4.0 1 phase: 3 x 6.0 Connecting the terminal board Electrical installation The appliance has a six-pole terminal board.
1 2 3 5 4 230V ~ 230V ~ 230V ~ 2N ~ 1 2 3 5 4 1 2 3 5 4 356618739 3N ~ 230V ~ = earth cable If the mains voltage is different, rearrange the jumpers on the terminal board (refer to the connection diagram below). Connect the ground cable to the terminal. After you connect the supply cable to the terminal board, attach it with a junction clamp.
Keep food warm Choose the lowest possible temperature setting to use residual heat and keep a meal warm. Moist Fan Baking Function designed to save energy during cooking. ENVIRONMENTAL CONCERNS not dispose of appliances marked with the symbol with the household waste. Return the product to your local recycling facility or contact your municipal office. Recycle materials with the symbol . Put the packaging in relevant containers to recycle it.
867348005-A-262018