Kühlschrank Refrigerator JKI 4035 JKI 4056 JKI 4066 Gebrauchsanweisung Operating Instructions
Dear customer, Before placing your new refrigerator into operation please read these operating instructions carefully. They contain important information for safe use, for installation and for care of the appliance. Please keep these operating instructions for future reference. Pass them on to possible new owners of the appliance. These operating instructions are for use with several technically comparable models with varying accessories. Please observe the notes which apply to your model.
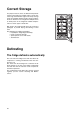
Contents Safety . . . . . . . . . . . . . . . . . . . . . . . . . . . . . . . . . . . . . . . . . . . . . . . . . . . . . . . . . . . . . . . . . . . . . . . 20 Disposal . . . . . . . . . . . . . . . . . . . . . . . . . . . . . . . . . . . . . . . . . . . . . . . . . . . . . . . . . . . . . . . . . . . . . 21 Appliance Packaging Information . . . . . . . . . . . . . . . . . . . . . . . . . . . . . . . . . . . . . . . . . . . . . . . . . . 21 Disposal of old Appliances . . . . . . . . . . . . . . . . . . . .
1 Safety The safety aspects of our refrigerators comply with accepted technical standards and the German Appliance Safety Law. Nevertheless, we consider it our obligation to make you aware of the following safety information: • Intended use • • • • The refrigerator is intended for use in the home. It is suitable for the cooling and storing of food.
Disposal Appliance Packaging Information All materials are environmentally sound! They can be dumped or burned at an incinerating plant without danger! About the materials: The plastics can be recycled and are identified as follows: >PE< for polyethylene, e.g. the outer covering and the bags in the interior. >PS< for polystyrene foam, e.g. the pads, which are all free of chlorofluorocarbon.
Installation Installation Location The appliance should be set up in a well ventilated, dry room. Energy use and efficient performance of the appliance is affected by the ambient temperature. The appliance should therefore – not be exposed to direct sunlight; – not be installed next to radiators, cookers or other sources of heat; – only be installed at a location whose ambient temperature corresponds to the climate classification, for which the appliance is designed.
Electrical connection Before initial start-up, refer to the appliance rating plate to ascertain if supply voltage and current values correspond with those of the mains at the installation location. e.g.: AC 220 ... 240 V 50 Hz or 220 ... 240 V ~50 Hz (i.e. 220 to 240 volts alternating current, 50 Hertz) The rating plate is inside the appliance on the left. A correctly installed, earthed socket is required for the electrical supply. The supply must have a fuse rating of at least 10 Amps.
Starting up - Setting the temperature The temperature regulator is in the refrigerator compartment on the upper right. It is also the ON/OFFswitch. The temperature regulator setting may therefore need to be adjusted to suit the specific conditions. Recommendet settings: Examples: 3 Position "0" = Refrigeration off Position "1" = Warmest interior temperature Position "6" = Coldest interior temperature 1. Plug the mains plug into the mains socket. 2.
Interior Accessories Storage Shelves Your appliance is equipped with glass storage shelves. 1. The glass storage shelf above the fruit and vegetable trays must always remain in this position, so that fruits and vegetable remain fresh longer. The remaining storage shelves can be adjusted to various heights: 1. Pull the storage shelf forward until it can be tipped up or down and removed. 2. To insert at a different height use the same procedure in reverse. Adjustment for tall goods: 1.
Correct Storage For physical reasons, there are different temperature regions in the fridge. The coldest region is on the lowest storage shelf. Warmer regions are the top storage shelf, the vegetable basket and the storage compartments on the door. The arrangement example shows at which places in the refrigerator suitable temperatures for various types of foods exist. Tip: Food in the fridge should always be covered or packaged, to prevent drying and tainting of other food.
Cleaning and Maintenance For hygienic reasons the appliance interior, including interior accessories, should be cleaned regularly. 1 • • • • Warning! The appliance may not be connected to the mains during cleaning. Danger of electrical shock! Before cleaning switch the appliance off and remove the plug from the mains, or switch off or turn out the circuit breaker or fuse. Never clean the appliance with a steam cleaner.
What to do if ... Correcting Malfunctions A malfunction may be caused by only a minor fault that you can rectify yourself using the following instructions. Do not perform any other work on the appliance if the following information does not provide assistance in your specific case. Malfunction Appliance does not work. Appliance cools too much. The food is too warm. 1 Warning! Repairs to refrigerators/freezers may only be performed by qualified service engineers.
Changing the light bulb Warning! There is a risk of electric shocks! Before changing the light bulb, switch off the appliance and unplug it, or pull the fuse or the circuit breaker. Light bulb data: 220-240 V, max. 15 W, fitting: E 14 1. To switch off the appliance, turn the temperature regulator to position "0". 2. Unplug the mains plug. 3. To change the light bulb, undo the cross head screw and remove the light bulb cover. 4. Change the defective light bulb. 5.
Technical Terminology • • • Refrigerant Liquids that can be used to a generate a cooling effect are known as refrigerants. They have a relatively low boiling-point, indeed so low, that the warmth from the food stored in the fridge or freezer can cause the refrigerant to boil and vaporise. Refrigerant Circuit Closed circulation system that contains the refrigerant. The refrigerant circuit comprises primarily of an evaporator, a compressor, a condenser and pipe work.
Installation Instructions Contents Installation parts supplied . . . . . . . . . . . . . . . Dimensioned drawings . . . . . . . . . . . . . . . . . Aligning the furniture housing . . . . . . . . . . . . Rehingeing the door (where necessary) . . . . Apply joint cover fillet. . . . . . . . . . . . . . . . . . . Attach the ventilation grille . . . . . . . . . . . . . . Installation parts supplied 31 31 31 32 32 32 Push appliance into place and align. . . . . . . .33 Screw appliance into place. . . . . . . .
Rehingeing the door (where necessary) models with freezer compartment only The following installation steps are illustrated only when the door is hinged on the right. If you want the door hinged on the left, please carry out the following installation steps on the opposite side as appropriate.
Push appliance into place and align Screw appliance into place m 2m Install caps Appliance door / furniture door connection a: Smooth furniture doors b: Furniture doors with frame and filling 33
2222 745 95 - 1102 Änderungen vorbehalten