
User Guide


16
3 Daily operation
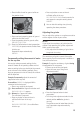
Hot water
J
CAUTION
There is a danger of scalding from hot water
splashes.
T Avoid direct contact with the skin.
Precondition:
READY is displayed.
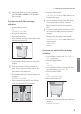
T Place a cup under the hot-water spout.
x T Press the Hot Water button.
WATER, the preset amount of water flows
into the cup.
Preparation stops automatically.
READY
3 Daily operation
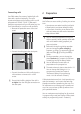
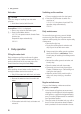
Filling the water tank
Daily maintenance of the machine and hygiene
when handling milk, coffee and water are key to a
perfect coffee result in the cup every time. You
should therefore change the water daily.
NOTICE
Milk, sparkling mineral water or other liquids can
damage the water tank or the machine.
T Only fill the water tank with fresh, cold water.
T Remove the water tank and rinse with cold
water.
T Fill the water tank with fresh, cold water and
reinsert it.
Switching on the machine
T Place a receptacle under the dual spout.
Q T Press the On/Off button to switch the
machine on.
RINSING, the system rinses itself. The
operation stops automatically.
READY
Daily maintenance
To ensure that you get many years of reliable
service out of your ENA and to guarantee the
optimum coffee quality, the machine requires daily
maintenance.
T Remove the drip tray.
T Empty the coffee grounds container and
drip tray and rinse with warm water.
E Always empty the coffee grounds container
when the machine is switched on. This is
the only way of resetting the coffee grounds
counter.
T Reinsert the coffee grounds container and
the drip tray.
T Rinse the water tank with clean water.
T Dismantle and rinse the dual spout (see
Chapter 5 ‘Maintenance – Dismantling and
rinsing the dual spout’).
T Wipe the surface of the machine with a
clean, soft, damp cloth (e.g. microfiber
cloth).
Regular maintenance
Carry out the following maintenance actions
regularly or as required:
U
In the interests of hygiene, we recommend
changing the milk pipe and interchangeable
milk spout on a regular basis (approximately
every 3 months). Replacements are available
from specialized dealers.
U
Clean the inside of the water tank, e.g. with a
brush. Further information about the water
tank is provided in these instructions for use