E6/E60 Instructions for Use
Table of contents Your E6/E60 Control elements 4 Important information 6 Proper use ...................................................................................................................................................... 6 For your safety ............................................................................................................................................... 6 1 Preparing and using for the first time 10 JURA on the Internet ...............................................
Table of contents 6 Display messages 35 7 Troubleshooting 36 8 Transport and environmentally friendly disposal 38 Transport / Emptying the system.............................................................................................................38 Disposal.........................................................................................................................................................
Control elements Control elements 9 1 10 2 11 3 4 5 12 6 13 7 8 1 2 3 4 5 6 7 8 4 14 Cover of filler funnel for cleaning tablet Filler funnel for cleaning tablet Bean container with aroma preservation cover Water tank cover Water tank Mains cable (back of the machine) Coffee grounds container Drip tray 9 10 11 12 13 14 Cover cap for grinder adjustment switch Grinder adjustment switch On/Off button Q Fine foam frother Height-adjustable coffee spout Cup grille
Control elements 1 2 3 1 2 Display Multi-function buttons (button function depends on what is shown in the display) 3 Switch for hot water and steam preparation 5
Important information Important information Proper use The machine is designed and intended for private domestic use. It should only be used for coffee preparation and to heat milk and water. Use for any other purpose will be deemed improper. JURA Elektroapparate AG cannot accept any responsibility for the consequences of improper use. Before using the machine read these instructions for use thoroughly and completely and comply with the instructions they contain.
Important information U U U U which is available directly from JURA or from authorised JURA service centres. Make sure that the JURA and the mains cable are not located close to hot surfaces. Be careful to ensure that the mains cable is not trapped and does not rub against sharp edges. Never open and repair the machine yourself. Do not modify the machine in any way that is not described in these instructions for use. The machine contains live parts.
Important information U U U U U U U U U U U U U 8 Protect the JURA from environmental influences such as rain, frost and direct sunlight. Do not immerse the JURA, mains cable or connections in water. Do not put the JURA or any individual parts in the dishwasher. Before cleaning, switch your JURA off with the On/Off button. Always wipe the JURA with a damp cloth rather than a wet one, and protect it from prolonged exposure to water splash.
Important information U Children aged 8 and over may only operate the machine without supervision if they have been instructed in how to use it safely. Children must be able to recognise and understand the potential dangers arising from incorrect use.
1 Preparing and using for the first time 1 Preparing and using for the first time JURA on the Internet Visit us on the Internet. You can download short operating instructions for your machine from the JURA website (www.jura.com). You will also find interesting and up-to-date information on your JURA and on every aspect of coffee. Setting up the machine When setting up your JURA, please note the following: Place the JURA on a horizontal surface that is not sensitive to water.
1 Preparing and using for the first time T You will then be able to read the degree of water hardness from the discolouration of the Aquadur® test strip and the description on the packaging. First-time use When using the machine for the first time, you can choose whether you want to operate JURA with or without the CLARIS Smart filter cartridge. If the water hardness is 10 °dH or more, we recommend using the filter cartridge.
1 Preparing and using for the first time E Now decide whether you want to operate your JURA with or without a CLARIS Smart filter cartridge. Operation with filter cartridge: go straight to the next section (see Chapter 1 ‘Preparing and using for the first time – First-time use with filter cartridge activation’). Operation without filter cartridge (see Chapter 1 ‘Preparing and using for the first time – First-time use without filter cartridge activation’).
1 Preparing and using for the first time T Turn the switch to the ° position. ‘Filter rinsing complete’ ‘System is filling’, the system fills up with water. ‘Empty drip tray’ T Empty the drip tray and coffee grounds container and put them back into the machine. ‘Machine is rinsing’, the system is rinsed. The rinse stops automatically. Your JURA is ready for use. E The start screen shows the products you can prepare.
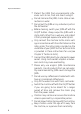
1 Preparing and using for the first time Connecting milk Your JURA creates fine, creamy, feather-light milk foam with a perfect consistency. The most important requirement for frothing milk is a milk temperature of 4–8 °C. We would therefore recommend using a milk cooler or a vacuum milk container. T Remove the protective cover from the fine foam frother. T Connect the milk pipe to the fine foam frother. T Connect the other end of the milk pipe to a milk container or immerse it in a milk carton.
2 Preparation 2 Preparation E You can stop the machine at any time while a speciality coffee, steam or hot water is being prepared. Just press any button (for a speciality coffee) or return the switch to its original position (for steam and hot water). E During the grinding operation you can select the coffee strength of single products by pressing the ‘ < ’ and ‘ > ’ buttons. E During preparation you can change the preset amount of water and milk foam by pressing the ‘ < ’ and ‘ > ’ buttons.
2 Preparation Two espressi and two coffees To prepare two speciality coffees, press the appropriate preparation button twice (within approximately 1 second). Example: Proceed as follows to prepare two espressi. Precondition: The start screen is displayed. T Place two cups under the coffee spout. T Press the ‘Espresso’ button twice (within 1 second) to start preparation. ‘2 espressi’ appears and the preset amount of water flows into the cups. Preparation stops automatically.
2 Preparation Milk foam Precondition: The start screen is displayed. T Place a cup under the fine foam frother. T Press the ‘Milk foam’ button. ‘Milk foam’ As soon as the machine has heated up, ‘Switch open’ appears. T Turn the switch to the x position. ‘Milk foam’, the milk foam is prepared. Preparation stops automatically when the preset amount of milk is reached. ‘Switch close’ T Turn the switch to the ° position. Your JURA is once more ready for use.
2 Preparation Adjusting the grinder CAUTION You can adjust the grinder on a continuous scale to suit the degree of roast of your coffee. If you adjust the consistency of grind when the grinder is not operating, the grinder adjustment switch could be damaged. T Only adjust the consistency of grind when the grinder is running. The consistency of grind is correct if the coffee flows regularly from the coffee spout. In addition a fine, thick crema forms.
3 3 Daily operation Daily operation Filling the water tank CAUTION Daily maintenance of the machine and hygiene when handling milk, coffee and water are key to a perfect coffee result in the cup every time. You should therefore change the water daily. Milk, sparkling mineral water or other liquids can damage the water tank or the machine. T Only fill the water tank with fresh, cold water. T Open the water tank cover. T Remove the water tank and rinse it with cold water.
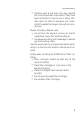
3 Daily operation T Refit the coffee grounds container and the drip tray. T Rinse the water tank with clean water. T Clean the fine foam frother (see Chapter 5 ‘Maintenance – Cleaning the fine foam frother’). T Remove the milk pipe and rinse it thoroughly under running water. T Dismantle and rinse the fine foam frother (see Chapter 5 ‘Maintenance – Dismantling and rinsing the fine foam frother’). T Wipe the surface of the machine with a clean, soft, damp cloth (e.g. microfibre cloth).
3 Daily operation If milk has been prepared but you have not started milk system cleaning, the milk system is rinsed first (‘Milk system is being rinsed’). ‘Machine is rinsing’, the system rinses itself. The operation stops automatically. Your JURA is switched off.
4 Permanent settings in programming mode 4 Permanent settings in programming mode Press the ‘ P ’ button to enter programming mode. You can navigate through the programme items and permanently save the required settings using the multi-function buttons.
4 Permanent settings in programming mode Permanent settings in programming mode always follow the same model. Example: Proceed as follows to change the coffee strength for one coffee. Precondition: The start screen is displayed. T Press the ‘ P ’ button. T Press the ‘ > ’ button several times until ‘3/4’ is displayed. T Press the ‘Expert mode’ button. ‘Expert mode’ E Next select the button of the product for which you would like to make settings. No product is prepared at this point.
4 Permanent settings in programming mode T Press the ‘ < ’ or ‘ > ’ button to change the switch-off time. T Press the ‘Save’ button. ‘Saved’ appears briefly on the display. ‘4/4’ T Press the ‘’ button to exit programming mode. The start screen is displayed. Setting the water hardness The harder the water is, the more frequently the JURA needs to be descaled. It is therefore important to set the water hardness accurately. The water hardness was set when the machine was first used.
4 Permanent settings in programming mode T Press the ‘oz’ button. T Press the ‘Save’ button. ‘Saved’ appears briefly on the display. ‘4/4’ T Press the ‘’ button to exit programming mode. The start screen is displayed. Language In this programme item you can set the language used by your JURA. Example: Proceed as follows to change the language from ‘English’ to ‘Deutsch’. Precondition: The start screen is displayed. T Press the ‘ P ’ button.
5 5 Maintenance Maintenance Your JURA has the following integrated maintenance programmes: Rinsing the machine (‘Rinse the coffee system’) Rinsing the fine foam frother (‘Rinse the milk system’) Cleaning the fine foam frother (‘Clean the milk system’) Changing the filter (‘Change the filter’) Cleaning the machine (‘Clean’) Descaling the machine (‘Descale’) U U U U U U E Carry out each maintenance programme when you are prompted to do so.
5 Maintenance T Place a receptacle under the fine foam frother. T Press the ‘ c ’ button (red Maintenance symbol). ‘Switch open’ T Turn the switch to the x position. ‘Milk system is being rinsed’appears and the fine foam frother is rinsed. The rinse stops automatically. ‘Switch close’ appears on the display. T Turn the switch to the ° position. The start screen is displayed.
5 Maintenance T Turn the switch to the ° position. ‘Clean the milk system’ T Rinse the receptacle thoroughly, fill it with 250 ml of fresh water and immerse the milk pipe in the water. T Empty the other receptacle and place it under the fine foam frother once more. T Press the ‘Next’ button. ‘Switch open’ T Turn the switch to the x position. ‘Milk system is being cleaned’ appears and the fine foam frother and the milk pipe are rinsed with fresh water. ‘Switch close’ T Turn the switch to the ° position.
5 Maintenance Precondition: The start screen is displayed. T Remove and empty the water tank. T Fit the filter cartridge extension supplied on top of a CLARIS Smart filter cartridge. T Insert the filter cartridge with its extension into the water tank. T Turn the filter cartridge clockwise until it audibly clicks into place. T Fill the water tank with fresh, cold water and reinsert the tank. E The machine automatically detects that you have just inserted the filter cartridge.
5 Maintenance T Fit the filter cartridge extension on top of a new CLARIS Smart filter cartridge. T Insert the filter cartridge with its extension into the water tank. T Turn the filter cartridge clockwise until it audibly clicks into place. T Fill the water tank with fresh, cold water and reinsert the tank. ‘Saved’ appears briefly on the display. The machine has automatically detected that you have just changed the filter cartridge.
5 Maintenance Precondition: ‘Clean machine’ is displayed. T Press the ‘ c ’ button (red Maintenance symbol). ‘Clean’ T Press the ‘Start’ button. T Press the ‘Next’ button. ‘Empty coffee grounds container’ T Empty the drip tray and coffee grounds container and put them back into the machine. ‘Clean’ T Place a receptacle under the coffee spout. T Press the ‘Next’ button. ‘Machine is being cleaned’, water flows out of the coffee spout. The operation is interrupted, ‘Add cleaning tablet’.
5 Maintenance CAUTION If the wrong descaling agent is used, the machine could be damaged and/or traces could be left behind in the water. T Use only original JURA maintenance products. CAUTION If the descaling operation is interrupted, there may be damage to the machine. T Allow the descaling programme to run to the end. CAUTION If the descaling agent comes into contact with sensitive surfaces (e.g. marble), damage cannot be ruled out. T Clean up any splashes immediately.
5 Maintenance T Turn the switch to the ° position. ‘Machine is being descaled’, the descaling operation is continued. The operation is interrupted, ‘Empty drip tray’. T Empty the drip tray and coffee grounds container and put them back into the machine. ‘Fill water tank’ T Empty the receptacle and place it under the fine foam frother and the coffee spout. T Remove the water tank and rinse it thoroughly. T Fill the water tank with fresh, cold water and reinsert the tank.
5 Maintenance Descaling the water tank 34 Limescale deposits may form in the water tank. To ensure correct function of the machine, descale the water tank from time to time. T Remove the water tank. T If you use a CLARIS Smart filter cartridge, remove this. T Completely fill the water tank and dissolve 3 JURA descaling tablets in it. T Leave the water tank with the descaling solution for several hours (e.g. overnight). T Empty the water tank and rinse it thoroughly.
6 Display messages 6 Display messages Message ‘Fill water tank’ Cause/Result The water tank is empty. You cannot prepare any products. ‘Empty coffee grounds container’ The coffee grounds container is full. You cannot prepare any products. T Empty the coffee grounds container and the drip tray (see Chapter 3 ‘Daily operation – Daily maintenance’). ‘Drip tray not fitted’ The drip tray is not inserted correctly or is not inserted at all. You cannot prepare any products. The bean container is empty.
7 Troubleshooting 7 Troubleshooting Problem Insufficient foam is produced when the milk is frothed or milk sprays out of the fine foam frother. Cause/Result The fine foam frother is dirty. Coffee only comes out in drips when it is being prepared. The coffee is ground too finely and obstructs the system. The water hardness may not have been correctly set. T Set the grinder to a coarser setting (see Chapter 2 ‘Preparation – Adjusting the grinder’).
7 Problem Other ‘ERROR’ messages are displayed. Cause/Result Troubleshooting Action – T Switch the JURA off with the On/ Off button Q. Contact customer support in your country (see Chapter 11 ‘JURA contact details / Legal information’). E If you were unable to solve the problem, contact customer support in your country (see Chapter 11 ‘JURA contact details / Legal information’).
8 8 Transport and environmentally friendly disposal Transport and environmentally friendly disposal Transport / Emptying the system Keep the packaging for your JURA. It should be used to protect the machine during transport. In order to protect the JURA from frost during transport, the system must be emptied. Precondition: The start screen is displayed. T Remove the milk pipe from the fine foam frother. T Place a receptacle under the fine foam frother. T Press the ‘Milk foam’ button.
9 Technical data 9 Technical data Voltage Power Conformity mark Pump pressure Holding capacity of water tank (without filter) Holding capacity of bean container Holding capacity of coffee grounds container Cable length Weight Dimensions (W × H × D) 220–240 V ~, 50 Hz 1450 W A static, max. 15 bar 1.9 l 280 g max. 16 portions approx. 1.1 m approx. 9.6 kg 28.0 × 35.1 × 43.
10 Index 10 A B C Index Addresses 44 Adjusting the product settings 22 Aroma preservation cover Bean container with aroma preservation cover 4 Automatic switch-off 23 Bean container Bean container with aroma preservation cover 4 Cleaning 33 Filling 10 Bus bar Technical data 39 Button On/Off button 4 Cappuccino 16 Cappuccino frother rinsing 26 Central grounding point 39 CLARIS Smart filter cartridge Changing 29 Insert 28 Cleaning Bean container 33 Fine foam frother 27 Machine 30 Coffee 15 Two coffees 1
10 J L M P JURA Contact details 44 Internet 10 R Language 25 Machine Cleaning 30 Descaling 31 Regular maintenance 20 Rinsing 26 Setting up 10 Switching off 20 Switching on 19 Mains cable 4 Maintenance 26 Daily maintenance 19 Regular maintenance 20 Messages, display 35 Milk Connecting milk 14 Milk foam 17 Permanently setting the water for the cup size 17 Permanent settings in programming mode 22 Preparation 15 Cappuccino 16 Coffee 15 Espresso 15 Hot water 18 Milk foam 17 Two coffees 16 Two espressi 16
J72123/E6-E60/en/201503 11 JURA contact details / Legal information 11 JURA contact details / Legal information JURA Elektroapparate AG Kaffeeweltstrasse 10 CH-4626 Niederbuchsiten Tel. +41 (0)62 38 98 233 @ You will find additional contact details for your country at www.jura.com.