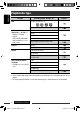
DVD/CD RECEIVER Refer to page of How to reset your unit KD-ADV5580/KD-DV5500 RECEPTOR CON DVD/CD KD-ADV5580/KD-DV5500 RÉCEPTEUR DVD/CD KD-ADV5580/KD-DV5500 FRANÇAIS ESPAÑOL ENGLISH Instructions Having TROUBLE with operation? Please reset your unit DVD/CD RECEIVER Still having trouble?? USA ONLY Call 1-800-252-5722 http://www.jvc.com For canceling the display demonstration, see page 11. Para cancelar la demostración en pantalla, consulte la página 11.
ENGLISH Thank you for purchasing a JVC product. Please read all instructions carefully before operation, to ensure your complete understanding and to obtain the best possible performance from the unit. INFORMATION (For U.S.A.) This equipment has been tested and found to comply with the limits for a Class B digital device, pursuant to Part 15 of the FCC Rules. These limits are designed to provide reasonable protection against harmful interference in a residential installation.
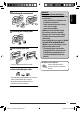
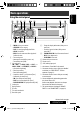
Attaching the control panel How to reset your unit WARNINGS: (To prevent accidents and damage) • DO NOT install any unit or wire any cable in a location where; – it may obstruct the steering wheel and gearshift lever operations. – it may obstruct the operation of safety devices such as air bags. – it may obstruct visibility. • DO NOT operate the unit while driving. • If you need to operate the unit while driving, be sure to look around carefully. • The driver must not watch the monitor while driving.
ENGLISH Indication language: In this manual, English indications are used for purposes of explanation. You can select the indication language on the monitor on the “LANGUAGE” setting (see page 33). KD-ADV5580 is equipped with the steering wheel remote control function. • See the Installation/Connection Manual (separate volume) for connection. Caution for DualDisc playback For safety... • Do not raise the volume level too much, as this will block outside sounds, making driving dangerous.
Detaching the control panel ...................................................................................................... Attaching the control panel ...................................................................................................... How to reset your unit .............................................................................................................. How to forcibly eject a disc........................................................................................
ENGLISH Playable disc type Disc type Recording format, file type, etc DVD-Video (Region Code: 1) * DVD Playable 1 DVD-Audio/DVD-ROM DVD Recordable/Rewritable (DVD-R/-RW *2, +R/+RW *3) • DVD Video: UDF bridge • DVD-VR • MPEG-1/MPEG-2/MP3/WMA/ WAV: ISO 9660 level 1, level 2, Romeo, Joliet DVD-Video DVD-VR MPEG1/MPEG2 MP3/WMA/WAV AAC/JPEG/MPEG4/DivX/DVD+VR/DVD-RAM Dual Disc DVD side CD/VCD Audio CD/CD Text (CD-DA) Non-DVD side VCD (Video CD) DTS-CD/SVCD (Super Video CD)/CD-ROM/ CD-I (CD-I Ready) CD
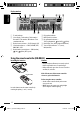
ENGLISH Basic operations Using the control panel 1 • FM/AM: Select preset station. • • • • 2 3 4 5 6 7 8 9 p SIRIUS/XM: Select category. DISC: Select title/program/playlist/folder. CD-CH: Select folder. IPOD: Enter the main menu/Pause playback/ Confirm selection. • Turn on the power. • Attenuate the sound (if the power is on). • Turn off the power [Hold]. Select the source.
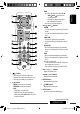
ENGLISH Display window 1 Tr (track) indicator 2 Source display / Track number / Folder number / Disc number / Title number / PBC indicator / Time countdown indicator 3 Playback source indicators—CH (CD changer), DISC 4 Sound mode indicators —CLASSIC, HIP HOP, JAZZ, ROCK, POPS, USER 5 Playback mode / item indicators— RND (random), (disc), (folder), RPT (repeat) 6 EQ (equalizer) indicator 7 LOUD (loudness) indicator 8 Disc information indicators— TAG (Tag information), (track/file), (folder) 9 Main di
ENGLISH • IPOD: – 5 : Enters the main menu (then 5 / ∞ / 4 / ¢ work as menu selecting buttons.) 5 : Returns to the previous menu. ∞ : Confirms the selection. – ∞ : Pauses or resumes playback. 4 / ¢ buttons • FM/AM: – Searches for stations automatically if pressed briefly. – Searches for stations manually if pressed and held. • SIRIUS/XM: – Changes the channels if pressed briefly. – Changes the channels rapidly if pressed and held. • DISC/CD-CH: – Reverse skip/forward skip if pressed briefly.
ENGLISH 7 * TOP MENU button • DVD-Video: Shows the disc menu. • DVD-VR: Shows the Original Program screen. • VCD: Resumes PBC playback. 8 * OSD (on-screen display) button • Shows the on-screen bar. 9 SHIFT button u * % / fi buttons • DVD-Video: Makes selection/settings. • CD-CH: Changes discs in the magazine. @ / # buttons • DVD-Video: Makes selection/settings. • MPEG Video: Skips back or forward by about five minutes. • Functions with other buttons.
ENGLISH Preparation Canceling the display demonstration and setting the clock • See also page 29. 1 Turn on the power. 2 Cancel the display demonstrations Press and hold until the main menu is called up. [Turn] = [Press] • Repeat this procedure. Select “DEMO,” then “DEMO OFF.” Set the clock Select “CLOCK” = “CLOCK SET.” Adjust the hour, then press control dial once to proceed to adjust the minute. • To return to the previous menu, press BACK. Listening to the radio 1 2 Select “FM” or “AM.
ENGLISH Improving the FM reception 3 When an FM stereo broadcast is hard to receive, activate monaural mode for better reception. • See also page 30. Local FM stations with the strongest signals are searched and stored automatically. • To stop searching, press 4 /¢ . To preset other 6 stations, repeat from step 1 again. [Turn] = [Press] Manual presetting (FM/AM) You can preset up to 18 stations for FM and 6 stations for AM. Ex.: Storing FM station of 92.50 MHz into preset number “04.
Before performing any operations... Turn on the monitor to watch the playback picture. If you turn on the monitor, you can also control playback of other discs by referring to the monitor screen. (See pages 18 – 21.) The disc type is automatically detected, and playback starts automatically (for DVD: automatic start depends on its internal program). If the current disc does not have any disc menu, all tracks will be played repeatedly until you change the source or eject the disc.
ENGLISH Changing the display information Current chapter number and Elapsed playing time = Current chapter number and Clock = Current title and chapter number = (back to the beginning) Current chapter number and Elapsed playing time = Current chapter number and Clock = Current program (or playlist) number and chapter number = (back to the beginning) Elapsed playing time = Folder number and Clock = Folder name = Track title = (back to the beginning) Current track number and Elapsed playing time = Current t
[Press] Select track [Hold] Reverse/fast-forward track *1 [Press] Pause/resume playback — [Press] Select track Select folder [Hold] Reverse/fast-forward track *1 [Press] Select track [Hold] Reverse/fast-forward track *1 ENGLISH Disc type [Press] Pause/resume playback [Press] Pause/resume playback — *1 Search speed: *2 Search speed: Selecting the playback modes You can use only one of the following playback modes at a time.
ENGLISH Disc type REPEAT RANDOM TRACK RPT:Repeat current track FOLDER RPT: Repeat current folder FOLDER RND: Randomly play all tracks of current folder, then tracks of next folders ALL RND: Randomly play all tracks TRACK RPT: Repeat current track ALL RND: Randomly play all tracks • To cancel repeat play or random play, select “RPT OFF” or “RND OFF.” • To return to the previous menu, press BACK.
Stop play Stop play Stop play Start play/Pause (if pressed during play) Start play/Pause (if pressed during play) Start play/Pause (if pressed during play) ENGLISH Button Reverse/forward track search *1 Reverse/forward track search *1 Reverse/forward track search *1 • Forward slow motion *2 during pause (No sound can be heard.) – Reverse slow motion does not work. [Press] Select track [Hold] Reverse/fast-forward track search *3 (No sound can be heard.
ENGLISH • For MPEG Video/MP3/WMA/WAV, track is searched within the same folder. • For DVD-VR, program/playlist search is possible during Original program playback (PG)/Playlist playback (PL). • To erase a misentry, press CLR (clear) while holding SHIFT. • To return to the previous screen, press RETURN. Operations using the on-screen bar (DVD/DVD-VR/MPEG Video/VCD) These operations are possible on the monitor using the remote controller. 1 Show the on-screen bar (see page 19).
On-screen bar ENGLISH Ex.: DVD-Video Information Operation 1 Disc type 2 • DVD-Video: Audio signal format type and channel • VCD: PBC 3 Playback mode *1 DVD-Video: T. RPT: Title repeat C. RPT: Chapter repeat DVD-VR: C. RPT: Chapter repeat PG. RPT: Program repeat MPEG Video: T. RPT: Track repeat F. RPT: Folder repeat A. RND: All random F. RND: Folder random VCD *2: T. RPT: Track repeat A.
ENGLISH Operations using the control screen (MPEG Video/MP3/WMA/WAV/CD) These operations are possible on the monitor using the remote controller. 6 Current track number/total number of tracks in the current folder (total number of tracks on the disc) 7 Track information 8 Track list with the current track selected Selecting a playback mode 1 Show the control screen. MPEG Video: Press 7 during play. MP3/WMA/WAV/CD: Automatically appear during play.
(DVD-VR/MPEG Video/MP3/WMA/WAV) These operations are possible on the monitor using the remote controller. Before playing, you can display the folder list/track list to confirm the contents and start playing a track. 1 Display the folder list while stop. 2 Select an item from the folder list.
ENGLISH Listening to the CD changer It is recommended to use a JVC MP3-compatible CD changer (not supplied) with your unit. You can connect a CD changer to the CD changer jack on the rear of the unit. • You can only play conventional CDs (including CD Text) and MP3 discs. Preparation: Make sure “CH/IPOD” is selected in the “SRC SELECT” = “EXT IN” setting, see page 31. 1 2 3 Select “CD-CH.” Enter the list mode. Select a disc, folder, then the track. [Turn] = [Press] Playback starts automatically.
Before operating, connect either one of the following (not supplied) to the CD changer jack on the rear of this unit. • JVC SIRIUS satellite radio System, SC-C1 and KS-SRA100, PnP, SC-VDOC1 and KS-SRA100, for listening to the SIRIUS Satellite radio. • XM satellite radio System, JVC Smart Digital Adapter–XMDJVC100, CNP2000UC and CNPJVC1 for listening to the XM Satellite radio.
ENGLISH 1 2 Select “SIRIUS” or “XM.” 3 Select a channel to listen. Select a category. SIRIUS: If you select “ALL,” you can tune in to all the channels of all categories. • Holding the button changes the channels rapidly. • While searching, invalid and unsubscribed channels are skipped. XM: If you do not select a channel within 15 seconds, category selected in step 2 is canceled. You can select all channels of all categories now (including noncategorised channels).
Before operating, connect the Interface adapter for iPod, KS-PD100 (not supplied) to the CD changer jack on the rear of the unit. Preparation: Make sure “CH/IPOD” is selected in the “SRC SELECT” = “EXT IN” setting, see page 31. 1 2 ENGLISH Listening to the iPod Select “IPOD.” Select a song. Playback starts automatically.
REPEAT RANDOM ENGLISH ONE RPT : Functions the same as “Repeat One” of the iPod. * Functions only if you select “ALL ALBUMS” in “ALBUMS” of the main menu. ALL RPT : Functions the same as “Repeat All” of the iPod. • To cancel repeat play or random play, select “RPT OFF” or “RND OFF.” ALBUM RND * : Functions the same as “Shuffle Albums” of the iPod. SONG RND • To return to the previous menu, press BACK. : Functions the same as “Shuffle Songs” of the iPod.
ENGLISH Selecting a preset sound mode You can select a preset sound mode suitable to the music genre. • See also page 29. Selecting from Menu. or [Turn] = [Press] • See page 28 for “USER” settings. Preset value setting for each sound mode Preset value Sound mode BASS Freq. Level MIDDLE Q Freq. Level TREBLE Q Freq. Level Q USER 60 Hz 00 Q1.0 1.0 kHz 00 Q1.0 10.0 kHz 00 Q1.25 ROCK 100 Hz +03 Q1.0 1.0 kHz 00 Q1.25 10.0 kHz +02 Q1.25 CLASSIC 80 Hz +01 Q1.0 1.0 kHz 00 Q1.25 10.
ENGLISH Storing your own sound mode Sound element You can store your own adjustments in memory. 1 Select “USER.” [Turn] = [Press] 2 While “USER” is shown on the display... 3 Select a tone. 5 Range/selectable item BASS MIDDLE TREBLE Frequency 60 Hz 80 Hz 100 Hz 120 Hz 0.5 kHz 1.0 kHz 1.5 kHz 2.5 kHz 7.5 kHz 10.0 kHz 12.5 kHz 15.0 kHz Level –06 to +06 –06 to +06 –06 to +06 Q Q0.5 Q1.0 Q1.5 Q2.0 Q0.75 Q1.0 Q1.25 Q1.5 Q0.75 Q1.
1 2 Call up the menu. Select the desired item. 3 [Turn] = [Press] Repeat step 2 if necessary. • To return to the previous menu, press BACK. • To exit from the menu, press DISP or MENU. ENGLISH Menu operations Initial: Underlined DEMO Category Menu item Selectable setting, [reference page] DEMO Display demonstration • DEMO ON CLOCK DISP * Clock display • CLOCK ON 1 • DEMO OFF CLOCK • CLOCK OFF : Clock time is shown on the display at all times when the power is turned off.
Selectable setting, [reference page] DIMMER Dimmer • DIMMER ON • DIMMER OFF SCROLL *4 Scroll • SCROLL ONCE : Scrolls the displayed information once. • SCROLL AUTO : Repeats scrolling (at 5-second intervals). • SCROLL OFF : Cancels. DISPLAY ENGLISH Category Menu item Pressing DISP for more than one second can scroll the display regardless of the setting.
Category Menu item : Adjust the front and rear speaker output balance. (Initial: 00) BALANCE Balance L06 – R06 : Adjust the left and right speaker output balance. (Initial: 00) LOUD Loudness • LOUD OFF • LOUD ON : Cancels. : Boost low and high frequencies to produce a well-balanced sound at a low volume level. VOL ADJUST Volume adjust VOL ADJ –05 — VOL ADJ +05 (Initial: VOL ADJ 00) : Preset the volume adjustment level of each source (except FM), compared to the FM volume level.
ENGLISH Title assignment You can assign titles to 30 station frequencies (FM and AM) using 8 characters (maximum) for each title. 1 Select “FM” or “AM.” 2 Show the title entry screen. 4 Finish the procedure. To erase the entire title In step 2 on the left column... 3 Assign a title. 1 Select a character. 2 Move to the next (or previous) character position. 3 Repeat steps 1 and 2 until you finish entering the title. 32 EN28-37_KD-ADV5580[J]1.
ENGLISH Disc setup menu These operations are possible on the monitor using the remote controller. 1 Enter the disc setup menu while stop. 2 Select a menu. 3 Select an item you want to set up. • To cancel pop-up menu, press RETURN. 4 Select an option. To return to normal screen LANGUAGE Menu Item Setting MENU LANGUAGE Select the initial disc menu language. Refer also to “Language codes” on page 37. AUDIO LANGUAGE Select the initial audio language. Refer also to “Language codes” on page 37.
Item Setting MONITOR TYPE Select the monitor type to watch a wide screen picture on your monitor. OSD POSITION Select the on-screen bar position on the monitor. • 1 : Higher position • 2 : Lower position (Guidance below the disc setup menu will disappear.) DIGITAL AUDIO OUTPUT Select the signal format to be emitted through the DIGITAL OUT (Optical) terminal. • OFF : Cancels.
General Turning on the power • By pressing SRC button on the unit, you can also turn on the power. If the source is ready, playback also starts. • When storing a station manually, the previously preset station is erased when a new station is stored in the same preset number. Disc operations General • If you turn off the power while listening to a disc, disc play will start automatically, next time you turn on the power. • In this manual, words “track” and “file” are interchangeably used.
ENGLISH • This unit can show the names of albums, artists (performer), and Tag (Version 1.0, 1.1, 2.2, 2.3, or 2.4) for the MP3/WMA/WAV files. • This unit can display only one-byte characters. No other characters can be correctly displayed. • This unit can play back files recorded in VBR (variable bit rate). Files recorded in VBR have a discrepancy in elapsed time indication. • This unit cannot play back the following files: – MP3 files encoded with MP3i and MP3 PRO format.
Disc setup menu Title assignment • If you try to assign titles to more than 30 station frequencies, “NAME FULL” appears. Delete unwanted titles before assignment. • When the language you have selected is not recorded on a disc, the original language is automatically used as the initial language. In addition, for some discs, the initial languages settings will not work as you set due to their internal disc programming.
ENGLISH About sounds reproduced through the rear terminals On-screen guide icons During playback, the following guide icons may appear for a while on the monitor. : Playback : Pause : DVD-Video/VCD: Forward slow motion : DVD-Video: Reverse slow motion : Forward search : Reverse search • Through the analog terminals (Speaker out/LINE OUT): 2-channel signal is emitted. When playing a multi-channel encoded disc, multi-channel signals are downmixed. (AUDIO—DOWN MIX: see page 34.
How to clean the connectors Frequent detachment will deteriorate the connectors. To minimize this possibility, periodically wipe the connectors with a cotton swab or cloth moistened with alcohol, being careful not to damage the connectors. Connectors Moisture condensation Moisture may condense on the lens inside the unit in the following cases: • After starting the heater in the car. • If it becomes very humid inside the car. Should this occur, the unit may malfunction.
What appears to be trouble is not always serious. Check the following points before calling a service center. Symptom Discs in general FM/AM General ENGLISH Troubleshooting Remedy/Cause • Sound cannot be heard from the speakers. • Adjust the volume to the optimum level. • Check the cords and connections. • The unit does not work at all. Reset the unit (see page 3). • “EXT IN” and “AUX IN” cannot be selected. Check the “SRC SELECT” = “EXT IN” or “AUX IN” setting (see page 31).
CD changer MPEG Video/MP3/WMA/WAV Remedy/Cause • Disc cannot be played back. • Change the disc. • Record the tracks using a compliant application in the appropriate discs (see page 6). • Add the extension code <.mpg>, <.mpeg>, <.mp3>, <.wma>, or <.wav> to the file names. • Noise is generated. Skip to another track or change the disc. ENGLISH Symptom • Tracks cannot play back as you have intended Playback order is determined when files are recorded. them to play. • Longer readout time is required.
ENGLISH Symptom Remedy/Cause • “CALL 1-888-539-SIRIUS TO SUBSCRIBE” scrolls on the display while listening to the SIRIUS Satellite radio. Starts subscribing to SIRIUS Satellite radio (see page 23). • No sound can be heard. “UPDATE XX%” or “UPDATING” appears on the display. The unit is updating the channel information and it takes a few minutes to complete. • “NO SIGNAL” appears on the display. Move to an area where signals are stronger.
iPod Symptom Remedy/Cause • • • • Check the connecting cable and its connection. Update the firmware version. Charge the battery. Reset the iPod. • The sound is distorted. Deactivate the equalizer either on this unit or the iPod. • “NO IPOD” appears on the display. • Check the connecting cable and its connection. • Charge the battery. • Playback stops. The headphones are disconnected during playback. Restart the playback operation (see page 25).
ENGLISH Specifications Power Output: AUDIO AMPLIFIER SECTION Signal-to-Noise Ratio: Load Impedance: Tone Control Range: Audio Output Level: Color System: Video Output (composite): Other Terminal: TUNER SECTION Frequency Range: FM Tuner: AM Tuner: 20 W RMS × 4 Channels at 4 Ω and ≤ 1% THD+N 80 dBA (reference: 1 W into 4 Ω) 4 Ω (4 Ω to 8 Ω allowance) ±12 dB (60 Hz, 80 Hz, 100 Hz, 120 Hz) Q0.5, Q1.0, Q1.5, Q2.0 Middle: ±12 dB (0.5 kHz, 1.0 kHz, 1.5 kHz, 2.5 kHz) Q0.75, Q1.0, Q1.25, Q1.
Signal Detection System: Non-contact optical pickup (semiconductor laser) DVD/CD PLAYER SECTION Frequency Response: DVD, fs=48 kHz/96 kHz: 16 Hz to 22 000 Hz CD, fs=44.1 kHz: 16 Hz to 20 000 Hz Dynamic Range: 96 dB Signal-to-Noise Ratio: 98 dB Wow and Flutter: MPEG Video: Less than measurable limit Video: Max.
Muchas gracias por la compra de un producto JVC. Como primer paso, por favor lea detenidamente este manual para comprender a fondo todas las instrucciones y obtener un máximo disfrute de esta unidad. ESPAÑOL IMPORTANTE (EE.UU.) Este equipo se ha sometido a todo tipo de pruebas y cumple con las normas establecidas para dispositivos de Clase B, de conformidad con la Parte 15 de las reglas de la FCC (Comisión Federal de Comunicaciones).
Fijación del panel de control Cómo reposicionar su unidad • También se borrarán los ajustes preestablecidos por usted. Cómo expulsar el disco por la fuerza ADVERTENCIAS: (Para evitar daños y accidentes) • NO instale ningún receptor o tienda ningún cable en una ubicación donde; – puede obstaculizar las maniobras del volante de dirección y de la palanca de cambios. – puede obstaculizar la operación de los dispositivos de seguridad, como por ejemplo, bolsas de aire. – Donde pueda obstruir la visibilidad.
Idioma para las indicaciones: En este manual, se utilizan indicaciones en inglés para fines de explicación. El idioma para las indicaciones se puede seleccionar en el monitor en el ajuste “IDIOMA” (véase página 33). El KD-ADV5580 está equipado con la función de control remoto en el volante de dirección. • Para la conexión, consulte el Manual de instalación/conexión (volumen separado). ESPAÑOL Precaución sobre la reproducción de DualDisc Para fines de seguridad...
Desmontaje del panel de control .............................................................................................. Fijación del panel de control ..................................................................................................... Cómo reposicionar su unidad .................................................................................................... Cómo expulsar el disco por la fuerza .......................................................................................
Tipo de disco reproducible Tipo de disco DVD-Vídeo (Códigos regionales: 1) * DVD ESPAÑOL Formato de grabación, tipo de archivo, etc.
Operaciones básicas ESPAÑOL Uso del panel de control 1 • FM/AM: Selecciona la emisora preajustada. 2 3 4 5 6 7 8 9 p • SIRIUS/XM: Seleccione una categoría. • DISC: Selecciona el título/programa/lista de reproducción/carpeta. • CD-CH: Seleccionar la carpeta. • IPOD: Ingresa al menú principal/pausa la reproducción/confirma la selección. • Enciende el sistema. • Atenúa el sonido (si el sistema está encendido). • Apaga el sistema [Sostener]. Seleccione la fuente.
ESPAÑOL Ventanilla de visualización 1 Indicador Tr (pista) 2 Visualización de fuente / Número de pista / Número de carpeta / Número de disco / Número de título / Indicador PBC / Indicador de cuenta regresiva 3 Indicadores de la fuente de reproducción—CH (cambiador de CD), DISC 4 Indicadores del modo de sonido—CLASSIC, HIP HOP, JAZZ, ROCK, POPS, USER 5 Indicadores del modo de reproducción / ítem— RND (aleatoria), (disco), (carpeta), RPT (repetición) 6 Indicador EQ (ecualizador) 7 Indicador LOUD (sonorida
ESPAÑOL • IPOD: – 5 : Entra al menú principal (seguidamente, 5 / ∞ / 4 / ¢ funcionan como botones selectores de menú). 5 : Vuelve al menú anterior. ∞ : Confirma la selección. – ∞ : Pausa o reanuda la reproducción. Botones 4 / ¢ • FM/AM: – Efectúa automáticamente la búsqueda de emisoras si lo pulsa brevemente. – Efectúa manualmente la búsqueda de ensembles, si lo pulsa y mantiene pulsado. • SIRIUS/XM: – Cambia los canales si lo pulsa brevemente.
7 * Botón TOP MENU • DVD-Vídeo: Muestra el número de disco. • DVD-VR: Muestra la pantalla Original Program (programa original). • VCD: Reanuda la reproducción de PBC. ESPAÑOL 8 * Botón OSD (visualización en pantalla) • Muestra la barra en pantalla. u * Botones % / fi • DVD-Vídeo: Efectúa la selección/los ajustes. • CD-CH: Cambia los discos en el cargador. Botones @ / # • DVD-Vídeo: Efectúa la selección/los ajustes. • MPEG Vídeo: Salta hacia atrás o hacia adelante aproximadamente cinco minutos.
Preparativos Cancelación de la demostración en pantalla y puesta en hora del reloj 1 Encienda la unidad. 2 Cancele las demostraciones en pantalla. Pulse y mantenga pulsado hasta que aparezca el menú principal. [Gire] = [Pulse] • Repita este procedimiento. ESPAÑOL • Consulte también la página 29. Seleccione “DEMO” y, a continuación, “DEMO OFF”. Ponga el reloj en hora Seleccione “CLOCK” = “CLOCK SET”. Ajuste la hora y luego presione una vez el control giratorio para efectuar el ajuste de los minutos.
Mejora de la recepción FM 3 ESPAÑOL Active el modo monoaural para mejorar la recepción cuando la recepción de una radiodifusión en FM estéreo sea errática. • Consulte también la página 30. [Gire] = [Pulse] Las emisoras de FM locales con las señales más fuertes serán exploradas y almacenadas automáticamente. • Para detener la búsqueda, pulse 4 /¢ . Para preajustar otras 6 emisoras, repita el procedimiento desde el paso 1.
Antes de realizar alguna operación... Encienda el monitor para ver la imagen reproducida. Si enciende el monitor, también podrá controlar la reproducción de otros discos viendo la pantalla del monitor. (Consulte las páginas 18 a 21.) El tipo de disco se detecta automáticamente, y la reproducción se inicia también automáticamente (para DVD: el inicio automático depende de su programa interno).
Cambio de la información en pantalla Número de capítulo actual y tiempo de reproducción transcurrido = Número del capítulo actual y reloj = Número de título y capítulo actual = (vuelta al comienzo) ESPAÑOL Número de capítulo actual y tiempo de reproducción transcurrido = Número del capítulo actual y reloj = Número de programa actual (o lista de reproducción) y número de capítulo = (vuelta al comienzo) Tiempo de reproducción transcurrido = Número de carpeta y reloj = Nombre de la carpeta = Título de pista
Tipo de disco [Pulse] Seleccionar la pista [Sostener] Retroceso/avance rápido de pista *1 — Seleccionar la carpeta [Pulse] Seleccionar la pista [Sostener] Retroceso/avance rápido de pista *1 [Pulse] Pausar/reanudar la reproducción ESPAÑOL [Pulse] Seleccionar la pista [Sostener] Retroceso/avance rápido de pista *1 [Pulse] Pausar/reanudar la reproducción [Pulse] Pausar/reanudar la reproducción — *1 Velocidad de búsqueda: *2 Velocidad de búsqueda: Cómo seleccionar los modos de reproducción Podrá util
ESPAÑOL Tipo de disco REPEAT RANDOM TRACK RPT: Repetir la pista actual FOLDER RPT: Repetir la carpeta actual FOLDER RND: Reproduce aleatoriamente todas las pistas de la carpeta actual y luego las pistas de las siguientes carpetas ALL RND: Reproducir aleatoriamente todas las pistas TRACK RPT: Repetir la pista actual ALL RND: Reproducir aleatoriamente todas las pistas • Para cancelar la reproducción repetida o aleatoria, seleccione “RPT OFF” o “RND OFF”. • Para volver al menú anterior, pulse BACK.
Parar la reproducción Parar la reproducción Parar la reproducción Iniciar la reproducción/Pausar (si se lo pulsa durante la reproducción) Búsqueda de retroceso/avance de pista *1 • Cámara lenta hacia adelante *2 durante la pausa (El sonido no se escucha.) – La cámara lenta hacia atrás no funciona. [Pulse] Seleccionar la pista [Sostener] Búsqueda de retroceso/ avance rápido de pista *3 (El sonido no se escucha.
ESPAÑOL • En el caso de MPEG Vídeo/MP3/WMA/WAV, busca la pista dentro de la misma carpeta. • En caso de DVD-VR, es posible realizar una búsqueda por programa/lista de reproducción durante la Reproducción de programas originales (PG)/ Reproducción de listas de reproducción (PL). • Para borrar un error de entrada, pulse CLR (limpiar) mientras mantiene pulsado SHIFT. • Para volver a la pantalla anterior, pulse RETURN.
Barras en pantalla Ej.: DVD-Vídeo Información 1 Tipo de disco 2 • DVD-Vídeo: Tipo de formato de señal de audio y canal • VCD: PBC 3 Modo de reproducción *1 DVD-Vídeo: T. RPT: Repetición de título C. RPT: Repetición de capítulo DVD-VR: C. RPT: Repetición de capítulo PG. RPT: Repetición de programa MPEG Vídeo: T. RPT: Repetición de pista F. RPT: Repetición de carpeta A. RND: Todo aleatorio F. RND: Aleatoria de carpetas VCD *2: T. RPT: Repetición de pista A.
Operaciones utilizando la pantalla de control ESPAÑOL (MPEG Vídeo/MP3/WMA/WAV/CD) Estas operaciones se pueden realizar en el monitor usando el control remoto. 1 Muestre la pantalla de control. MPEG Vídeo: Pulse 7 durante la reproducción. MP3/WMA/WAV/CD: Aparece automáticamente durante la reproducción. 2 Seleccione la columna “Folder” o la columna “Track” (excepto para CD). 3 Seleccione una carpeta o una pista.
(DVD-VR/MPEG Vídeo/MP3/WMA/WAV) Estas operaciones se pueden realizar en el monitor usando el control remoto. Antes de la reproducción, puede visualizar la lista de carpetas/lista de pistas para confirmar los contenidos e iniciar la reproducción de una pista. 1 Visualice la lista de carpetas mientras está detenido. 2 Seleccione una opción de la lista.
Escuchando el cambiador de CD ESPAÑOL Se recomienda usar, con esta unidad, un cambiador de CD compatible con MP3 JVC (no suministrado). Puede conectar un cambiador de CD al jack del cambiador de CD en la parte trasera de la unidad. • Solamente se podrán reproducir discos CD (incluyendo CD Text) y MP3 convencionales. Preparativos:Asegúrese de que esté seleccionado “CH/IPOD” en el ajuste “SRC SELECT” = “EXT IN”; consulte la página 31. 1 2 3 Seleccione “CD-CH”. Ingrese en el modo de lista.
Antes de la operación, conecte cualquiera de las dos unidades siguientes (no suministrado) al jack del cambiador de CD de la parte trasera de esta unidad. • Sistema de radio satelital JVC SIRIUS, SC-C1 y KS-SRA100, PnP, SC-VDOC1 y KS-SRA100, para escuchar la radio satelital SIRIUS. • Sistema XM satellite radio, JVC Smart Digital Adapter–XMDJVC100, CNP2000UC y CNPJVC1 para escuchar la radio XM Satellite.
Seleccione “SIRIUS” o “XM”. 3 Seleccione el canal de audición. ESPAÑOL 1 2 Seleccione una categoría. SIRIUS: Si selecciona “ALL”, puede sintonizar todos los canales de todas las categorías. • Al mantener pulsado el botón, los canales se cambian rápidamente. • Durante la búsqueda, se omiten los canales no válidos y aquellos a los que no está suscrito. XM: Si no selecciona un canal en el lapso de 15 segundos, se cancelará la categoría seleccionada en el paso 2.
Para escuchar el iPod Preparativos:Asegúrese de que esté seleccionado “CH/IPOD” en el ajuste “SRC SELECT” = “EXT IN”; consulte la página 31. 1 2 Seleccione “IPOD”. Seleccione una canción. ESPAÑOL Antes de hacer funcionar, conecte la interfaz adaptadora para iPod, KS-PD100 (no suministrado) al jack del cambiador de CD en la parte posterior de la unidad. La reproducción se inicia automáticamente.
REPEAT RANDOM ESPAÑOL ONE RPT : Funciona de igual manera que “Repetir Una” del iPod. * Funciona solamente si selecciona “ALL ALBUMS” en “ALBUMS” en el menú principal. ALL RPT : Funciona de igual manera que “Repetir Todas” del iPod. • Para cancelar la reproducción repetida o aleatoria, seleccione “RPT OFF” o “RND OFF”. ALBUM RND * : Funciona de igual manera que “Aleatorio Álbumes” del iPod. SONG RND • Para volver al menú anterior, pulse BACK.
Selección de un modo de sonido preajustado Podrá seleccionar un modo de sonido preajustado adecuado al género musical. • Consulte también la página 29. Seleccionando desde el menú. ESPAÑOL o [Gire] = [Pulse] • Para los ajustes de “USER”, consulte la página 28. Configuración del valor preajustado para cada modo de sonido Valor preajustado Modo de sonido BASS Frec. Nivel MIDDLE Q Frec. Nivel TREBLE Q Frec.
Cómo guardar su propio modo de sonido Elemento de sonido Es posible almacenar sus propios ajustes en la memoria. ESPAÑOL 1 Seleccione “USER”. [Gire] = [Pulse] 2 Mientras “USER” se muestra en la pantalla... 3 Seleccione un tono.
1 2 Llame el menú. Seleccione la opción que desea. [Gire] = [Pulse] 3 Repita el paso 2, si es necesario. • Para volver al menú anterior, pulse BACK. • Para salir del menú, pulse DISP o MENU.
DISPLAY ESPAÑOL Categoría Opción del menú Ajuste seleccionable, [página de referencia] DIMMER Atenuador de luminosidad • DIMMER ON • DIMMER OFF SCROLL *4 Desplazamiento • SCROLL ONCE : Desplaza una vez la información visualizada. • SCROLL AUTO : El desplazamiento se repite (a intervalos de 5 segundos). • SCROLL OFF : Se cancela. Pulsando DISP durante más de 1 segundo podrá desplazar la indicación independientemente del ajuste.
AUDIO Categoría Opción del menú Ajuste seleccionable, [página de referencia] R06 – F06 : Ajusta el balance de salida de los altavoces delanteros y traseros. (Inicial: 00) BALANCE Balance L06 – R06 : Ajusta el balance de salida de los altavoces izquierdo y derecho. (Inicial: 00) LOUD Sonoridad • LOUD OFF • LOUD ON : Se cancela. : Refuerza las frecuencias altas y bajas para producir un sonido bien balanceado a bajos niveles de volumen.
Asignación de título ESPAÑOL Puede asignar títulos a 30 frecuencias de emisoras (FM y AM), con un máximo de 8 carácteres para cada título. 1 Seleccione “FM” o “AM”. 2 Muestre la pantalla de entrada de título. 4 Finalice el procedimiento. Para borrar el título entero En el paso 2 de la izquierda... 3 Asigne un título. 1 Seleccione un carácter. 2 Muévase a la posición del carácter siguiente (o anterior). 3 Repita los pasos 1 y 2 hasta que termine de introducir el título.
Menú de configuración del disco Estas operaciones se pueden realizar en el monitor usando el control remoto. Ingrese el menú de configuración del disco mientras está detenido. 2 Seleccione un menú. 3 Seleccione la opción que desea configurar. ESPAÑOL 1 • Para cancelar el menú emergente, pulse RETURN. 4 Seleccione una opción. Para volver a la pantalla normal IDIOMA Menú Opción Ajuste IDIOMA DE MENU Selecciona el idioma inicial del menú de disco.
Opción Ajuste TIPO DE MONITOR Seleccione el tipo de monitor para ver una imagen en pantalla ancha en su monitor. POSICIÓN DEL OSD Seleccione la posición de la barra en pantalla en el monitor. • 1 : Posición más alta • 2 : Posición más baja (La guía que está debajo del menú de configuración desaparece). SALIDA DE AUDIO DIGITAL Seleccione el formato de señal a emitirse a través del terminal DIGITAL OUT (óptico). • DESCONECTAR : Se cancela.
Más sobre este receptor Conexión de la alimentación • También es posible conectar la alimentación pulsando el botón SRC en la unidad. Si está preparada la fuente, también se iniciará la reproducción. • Al almacenar una emisora manualmente, la emisora preajustada previamente se borra cuando se almacena una emisora nueva en el mismo número de preajuste.
ESPAÑOL • Esta unidad puede mostrar los nombres de los álbumes, artistas (ejecutantes), y etiqueta (Versión 1,0, 1,1, 2,2, 2,3, o 2,4) para los archivos MP3/WMA/ WAV. • Esta unidad puede manejar solamente caracteres de un byte. Otros caracteres no serán visualizados correctamente. • Este receptor puede reproducir archivos grabados en VBR (velocidad variable de bits). Los archivos grabados en VBR presentan una discrepancia en la indicación del tiempo transcurrido.
Menú de configuración del disco Asignación de título • Cuando intente asignar títulos a más de 30 frecuencias de emisoras, aparecerá “NAME FULL”. Antes de asignar, borre los títulos que no necesita. • Cuando se selecciona un idioma no grabado en el disco, el idioma original será utilizado automáticamente como idioma inicial. Asimismo, en algunos discos, los ajustes iniciales para los idiomas no se activarán de la manera deseada debido a la programación interna del disco.
ESPAÑOL Acerca de los sonidos reproducidos a través de los terminales traseros Iconos de guía en pantalla • A través de los terminales analógicos (Salida de altavoz/LINE OUT): Se emite la señal de 2 canales. Cuando se reproduce un disco codificado multicanal, se mezclan las señales multicanal. (AUDIO— MEZCLA: consulte la página 34.) • A través de DIGITAL OUT (óptico): Las señales digitales (PCM Lineal, Dolby Digital, MPEG Audio) se emiten a través de este terminal.
Mantenimiento Conectores Condensación de humedad Podría condensarse humedad en el lente del interior de la unidad, en los siguientes casos: • Después de encender el calefactor del automóvil. • Si hay mucha humedad en el habitáculo. Si se produce condensación, la unidad podría no funcionar correctamente. En este caso, saque el disco y deje el receptor encendido durante algunas horas hasta que se evapore la humedad.
Localización de averías Lo que aparenta ser una avería podría resolverse fácilmente. Verifique los siguientes puntos antes de llamar al centro de servicio. General ESPAÑOL Síntoma • No se puede escuchar elsonido a través de los • Ajuste el volumen al nivel óptimo. altavoces. • Inspeccione los cables y las conexiones. • El receptor no funciona en absoluto. Reinicialice el receptor (consulte la página 3). • “EXT IN” y “AUX IN” no se pueden seleccionar.
Cambiador de CD Soluciones/Causas • No se puede reproducir el disco. • Cambie el disco. • Grabe las pistas en los discos apropiados, utilizando una aplicación compatible (consulte la página 6). • Añada el código de extensión <.mpg>, <.mpeg>, <.mp3>, <.wma>, o <.wav> a los nombres de archivos. • Se generan ruidos. Salte a otra pista o cambie el disco. • Las pistas no se reproducen de la manera intentada por usted. Se ha determinado el orden de reproducción durante la grabación de los archivos.
Radio satelital ESPAÑOL Síntoma Soluciones/Causas • El texto “CALL 1-888-539-SIRIUS TO SUBSCRIBE” (llame al 1-888-539-SIRIUS para suscribirse) se desplaza por la pantalla mientras escucha la radio SIRIUS. Se inicia la suscripción a la radio satelital SIRIUS (consulte la página 23). • El sonido no se escucha. El texto “UPDATE XX%” se desplaza o “UPDATING” aparece en la pantalla. El receptor está actualizando la información de canal y tarda algunos minutos en finalizar.
Soluciones/Causas • • • • • El sonido está distorsionado. Desactive el ecualizador en esta unidad o en el iPod. • Aparece “NO IPOD” en la pantalla. • Verifique el cable de conexión y su conexión. • Cargue la pila. • La reproducción se detiene. Los auriculares están desconectados durante la reproducción. Vuelva a iniciar la operación de reproducción (consulte la página 25). • No se escucha ningún sonido al conectar un iPod nano. • Desconecte los auriculares del iPod nano.
Especificaciones SECCIÓN DEL AMPLIFICADOR DE AUDIO SECCIÓN DEL SINTONIZADOR ESPAÑOL Salida de potencia: Relación señal a ruido: 20 W RMS × 4 canales a 4 Ω y ≤ 1% THD+N 80 dBA (referencia: 1 W en 4 Ω) Impedancia de carga: Gama de control de tono: Graves: Gama de frecuencias: FM: 4 Ω (tolerancia de 4 Ω a 8 Ω) ±12 dB (60 Hz, 80 Hz, 100 Hz, 120 Hz) Q0,5, Q1,0, Q1,5, Q2,0 Mediana: ±12 dB (0,5 kHz, 1,0 kHz, 1,5 kHz, 2,5 kHz) Q0,75, Q1,0, Q1,25, Q1,5 Agudos: ±12 dB (7,5 kHz, 10,0 kHz, 12,5 kHz, 15,0 kHz)
ESPAÑOL SECCIÓN DEL REPRODUCTOR DVD/CD Sistema de detección de Captor óptico sin contacto (láser semiconductor) señal: Número de canales: 2 canales (estereofónicos) Respuesta de DVD, fs=48 kHz/96 kHz: 16 Hz a 22 000 Hz frecuencias: CD, fs=44,1 kHz: 16 Hz a 20 000 Hz Gama dinámica: 96 dB Relación señal a ruido: 98 dB Lloro y trémolo: Inferior al límite medible MPEG Vídeo: Vídeo: Resolución máx.
FRANÇAIS Merci pour avoir acheté un produit JVC. Veuillez lire attentivement toutes les instructions avant d’utiliser l’appareil afin de bien comprendre son fonctionnement et d’obtenir les meilleures performances possibles. Attention: Tout changement ou modification non approuvé par JVC peut annuler l’autorité de l’utilisateur d’utiliser l’appareil. IMPORTANT POUR PRODUITS LASER 1. PRODUIT LASER CLASSE 1 2. ATTENTION: N’ouvrez pas le couvercle supérieur.
Fixation du panneau de commande Comment réinitialiser votre appareil • Vos ajustements préréglés sont aussi effacés. Comment forcer l’éjection d’un disque AVERTISSEMENTS: (Pour éviter tout accident et tout dommage) • N’INSTALLEZ aucun appareil ni aucun câble dans un endroit où: – il peut gêner l’utilisation du volant ou du levier de vitesse. – il peut gêner le fonctionnement de dispositifs de sécurité tels que les coussins de sécurité. – où il peut gêner la visibilité.
Langue des indications: Dans ce manuel, les indications en anglais sont utilisées à titre d’exemples. Vous pouvez choisir la langue des indications sur le moniteur avec le réglage “LANGUE” (voir page 33). FRANÇAIS Pour sécurité... • N’augmentez pas trop le volume car cela bloquerait les sons de l’extérieur rendant la conduite dangereuse. • Arrêtez la voiture avant de réaliser toute opération compliquée. Température à l’intérieur de la voiture...
Retrait du panneau de commande ............................................................................................ Fixation du panneau de commande .......................................................................................... Comment réinitialiser votre appareil ........................................................................................ Comment forcer l’éjection d’un disque .....................................................................................
Type de disque compatible Type de disque Format d’enregistrement, type de fichier, etc Compatible DVD-Vidéo (Code de région: 1) *1 DVD FRANÇAIS DVD-Audio/DVD-ROM DVD enregistrable/ réinscriptible (DVD-R/-RW *2, +R/+RW *3) • DVD vidéo: UDF bridge • DVD-VR • MPEG-1/MPEG-2/MP3/WMA/ WAV: ISO 9660 Niveau 1, Niveau 2, Romeo, Joliet DVD Vidéo DVD-VR MPEG1/MPEG2 MP3/WMA/WAV AAC/JPEG/MPEG4/DivX/DVD+VR/DVD-RAM Dual Disc Côté DVD CD/VCD CD Audio/CD Text (CD-DA) Face non DVD VCD (CD Vidéo) DTS-CD/SVCD (Supe
Opérations de base FRANÇAIS Utilisation du panneau de commande 1 • FM/AM: Sélection d’une station préréglée. 2 3 4 5 6 7 8 9 p • SIRIUS/XM: Sélection de la catégorie. • DISC: Choisissez un titre/programme/liste de lecture/dossier. • CD-CH: Sélection d’un dossier. • IPOD: Accès au menu principal/Pause de la lecture/Confirmation de votre choix. • Mettez l’appareil sous tension. • Atténuation du son (si l’appareil est sous tension). • Mise hors tension de l’appareil [Maintenez pressée].
FRANÇAIS Fenêtre d’affichage 1 Indicateur Tr (plage) 2 Affichage de la source / Numéro de plage / Numéro de dossier / Numéro de disque / Numéro de titre / Indicateur PBC / Indicateur de compte à rebours 3 Indicateurs de source de lecture—CH (changeur de CD), DISC 4 Indicateurs de mode sonore—CLASSIC, HIP HOP, JAZZ, ROCK, POPS, USER 5 Indicateurs de mode de lecture / indicateurs d’option—RND (aléatoire), (disque), (dossier), RPT (répétition) 6 Indicateur EQ (égaliseur) 7 Indicateur LOUD (loudness) 8 Indi
1 Touche • Appuyez brièvement sur cette touche pour mettre l’appareil sous tension ou atténuer le son si l’appareil est déjà sous tension. • Maintenez cette touche pressée pour mettre l’appareil hors tension. 2 Touches 5/∞ • FM/AM: Choisit des stations préréglées. • SIRIUS/XM: Permet de choisir les catégories. • DISC: – DVD-Vidéo: Permet de choisir le titre. – DVD-VR: Choisit le programme/liste de lecture. – MPEG Vidéo/MP3/WMA/WAV: Choisit les dossiers s’il y en a.
7 * Touche TOP MENU • • • DVD Vidéo: Affiche le menu de disque. DVD-VR: Affiche l’écran du programme original. VCD: Reprend la lecture PBC. 8 * Touche OSD (affichage sur l’écran) • Affiche la barre d’écran. 9 Touche SHIFT • Fonctionne avec les autres touches. u * Touches % / fi • DVD Vidéo: Permet de réaliser la sélection/les réglages. • CD-CH: Changes les disques dans le magasin. Touches @ / # • DVD Vidéo: Permet de réaliser la sélection/les réglages.
Préparation Annulation de la démonstration des affichages et réglage de l’horloge • Référez-vous aussi à la page 29. 1 Mise sous tension de l’appareil. 2 Annulez de la démonstration des affichages [Tournez] = [Appuyez sur la touche] • Répétez cette procédure. Choisissez “DEMO”, puis “DEMO OFF”. Réglez l’horloge Choisissez “CLOCK” = “CLOCK SET”. Ajustez l’heure, puis appuyez une fois sur la molette de commander pour passer à l’ajustement des minutes. • Pour revenir au menu précédent, appuyez sur BACK.
Amélioration de la réception FM 3 Quand une émission FM stéréo est difficile à recevoir, mettez en service le mode monaural pour améliorer la réception. • Référez-vous aussi à la page 30. FRANÇAIS [Tournez] = [Appuyez sur la touche] Les stations FM locale avec les signaux les plus forts sont recherchées et mémorisées automatiquement. • Pour arrêter la recherche, appuyez sur 4 /¢ . Pour prérégler les autres 6 stations, répétez la procédure à partir de l’étape1.
Opérations des disques Si “ ” apparaît sur le moniteur quand vous appuyez sur une touche, c’est que l’autoradio ne peut pas accepter la commande effectuée. • Dans certains cas, la commande peut être refusée sans que “ ” apparaisse. 1 Mise sous tension de l’appareil. 2 Insérez un disque Arrête la lecture et éjecte le disque. FRANÇAIS Avant de réaliser n’importe quelle opération... Mettez le moniteur sous tension pour regarder l’image de lecture.
Changement des informations sur l’affichage Numéro du chapitre actuel et durée de lecture écoulée = Numéro du chapitre actuel et horloge = Titre et numéro du chapitre actuel = (retour au début) Numéro du chapitre actuel et durée de lecture écoulée = Numéro du chapitre actuel et horloge = Programme (ou liste de lecture) actuelle et numéro de chapitre = (retour au début) FRANÇAIS Durée de lecture écoulée = Numéro de dossier et horloge = Nom du dossier = Titre de la plage = (retour au début) Numéro de la pl
Type de disque [Appuyez sur la touche] Mettez en pause/ reprenez la lecture. — [Appuyez sur la touche] Sélection d’un dossier Sélection d’une plage [Maintenez pressée la touche] Recherche rapide de plage vers l’arrière/vers l’avant *1 [Appuyez sur la touche] Sélection d’une plage [Maintenez pressée la touche] Recherche rapide de plage vers l’arrière/vers l’avant *1 *1 Vitesse de recherche: *2 Vitesse de recherche: [Appuyez sur la touche] Mettez en pause/ reprenez la lecture.
Type de disque REPEAT RANDOM TRACK RPT:Répéter la plage actuelle FOLDER RPT: Répéter le dossier actuel FOLDER RND: Reproduire aléatoirement toutes les plages du dossier actuel, puis toutes les plages des dossiers suivants ALL RND: Reproduire aléatoirement toutes les plages TRACK RPT: Répéter la plage actuelle ALL RND: Reproduire aléatoirement toutes les plages FRANÇAIS • Pour annuler la lecture répétée ou la lecture aléatoire, choisissez “RPT OFF” ou “RND OFF”.
Arrêt de la lecture Arrêt de la lecture Arrêt de la lecture Démarre la lecture/met la lecture en pause (si la touche est pressée pendant la lecture) Recherche de plage vers l’arrière/ vers l’avant *1 • Lecture au ralenti vers l’avant *2 si la touche est pressée pendant une pause (Aucun son n’est entendu.) – La lecture au ralenti vers l’arrière ne fonctionne pas.
• Pour les MPEG Vidéo/MP3/WMA/WAV, une plage est recherchée à l’intérieur du même dossier. • Pour les DVD-VR, la recherche de programme/liste de lecture est possible pendant la lecture du programme original (PG)/liste de lecture (PL). • Pour annuler une mauvaise entrée, appuyez sur CLR (annuler) tout en maintenant SHIFT pressée. • Pour revenir à l’écran précédent, appuyez sur RETURN. FRANÇAIS Utilisation des fonctions de commande à partir du menu...
Barres sur l’écran Ex.: DVD Vidéo Informations Opérations canal • VCD: PBC 3 Mode de lecture *1 DVD Vidéo: T. RPT: C. RPT: DVD-VR: C. RPT: PG. RPT: Vidéo MPEG: T. RPT: F. RPT: A. RND: F. RND: VCD *2: Répétition de titre Répétition de chapitre Répétition de chapitre Répétition de programme Répétition de plage Répétition de dossier Tout aléatoire Lecture aléatoire de dossiers Répétition de plage Tout aléatoire T. RPT: A.
Opérations en utilisant l’écran de commande FRANÇAIS (MPEG Vidéo/MP3/WMA/WAV/CD) Ces opérations sont possibles sur le moniteur en utilisant la télécommande. 6 Numéro de la plage actuelle/nombre total de plages du dossier actuel (nombre total de plage du disque) 7 Informations sur la plage 8 Liste des plages et la plage actuellement choisie Sélection d’un mode de lecture 1 Affiche l’écran de commande. Vidéo MPEG: Appuyez sur 7 pendant la lecture.
Opérations en utilisant l’écran de liste (DVD-VR/MPEG Vidéo/MP3/WMA/WAV) Ces opérations sont possibles sur le moniteur en utilisant la télécommande. Avant de commencer la lecture, vous pouvez afficher la liste des dossiers/plages pour vérifier le contenu et démarrer la lecture d’une plage. Affichez la liste des dossiers quand l’appareil est à l’arrêt. 2 Choisissez un élément sur la liste.
Écoute du changeur de CD Il est recommandé d’utiliser un changeur de CD JVC compatible MP3 (non fournie) avec votre autoradio. Vous pouvez connecter un changeur de CD à la prise de changeur de CD à l’arrière de l’appareil. • Vous pouvez uniquement reproduire les CD ordinaire (y compris les CD Text) et les disques MP3. Préparation:Assurez-vous que “CH / IPOD” est choisi pour le réglage “SRC SELECT” = “EXT IN”, voir page 31. FRANÇAIS 1 2 3 Choisissez “CD-CH”. Entrée en mode de liste.
Écoute de la radio satellite Avant de commencer, connectez un des appareils suivants (non fournie) à la prise du changeur de CD à l’arrière de l’appareil. • Système de radio satellite JVC SIRIUS, SC-C1 et KS-SRA100, PnP, SC-VDOC1 et KS-SRA100, pour l’écoute de la radio satellite SIRIUS. • Système radio satellite XM, Adaptateur numérique intelligent JVC XMDJVC100, CNP2000UC et CNPJVC1 pour écouter la radio satellite XM.
FRANÇAIS 1 2 Choisissez “SIRIUS” ou “XM”. 3 Choisissez un canal à écouter. Choisissez une catégorie. SIRIUS: Si vous choisissez “ALL”, vous pouvez accorder tous les canaux de toutes les catégories. • Maintenir la touche pressée permet de changer les canaux rapidement. • Pendant la recherche, les canaux invalides et ceux auxquels vous n’avez pas souscrits sont sautés. XM: Si vous ne choisissez pas de canal avant 15 secondes, la catégorie choisie à l’étape 2 est annulée.
Écoute de iPod Avant de commencer, connectez l’adaptateur d’interface pour iPod, KS-PD100 (non fournie) à la prise du changeur de CD à l’arrière de l’appareil. Préparation: Assurez-vous que “CH/IPOD” est choisi pour le réglage “SRC SELECT” = “EXT IN”, voir page 31. 1 2 Choisissez “IPOD”. Sélection d’un morceau.
REPEAT RANDOM FRANÇAIS ONE RPT : Fonctionne de la même façon que la fonction “Répéter Un” pour iPod. ALL RPT : Fonctionne de la même façon que la fonction “Répéter Tous” pour iPod. * Fonctionne uniquement si vous choisissez “ALL ALBUMS” dans “ALBUMS” du menu principal. • Pour annuler la lecture répétée ou la lecture aléatoire, choisissez “RPT OFF” ou “RND OFF”. • Pour revenir au menu précédent, appuyez sur BACK. ALBUM RND * : Fonctionne de la même façon que la fonction “Aléatoire Albums” pour iPod.
Sélection d’un mode sonore préréglé Vous pouvez sélectionner un mode sonore préréglé adapté à votre genre de musique. • Référez-vous aussi à la page 29. Sélection à partir du menu. ou FRANÇAIS [Tournez] = [Appuyez sur la touche] • Référez-vous à la page 28 pour les réglages “USER”. Valeur préréglée pour chaque mode sonore Valeur préréglée Mode sonore BASS Fréq. Niveau MIDDLE Q Fréq. Niveau TREBLE Q Fréq.
Mémorisation de votre propre mode sonore Élément du son Vous pouvez mémoriser vos propres ajustements en mémoire. 1 FRANÇAIS 5 2 Pendant que “USER” apparaît sur l’affichage... 3 Choisissez une tonalité. BASS MIDDLE TREBLE Fréquence 60 Hz 80 Hz 100 Hz 120 Hz 0,5 kHz 1,0 kHz 1,5 kHz 2,5 kHz 7,5 kHz 10,0 kHz 12,5 kHz 15,0 kHz Niveau –06 à +06 –06 à +06 –06 à +06 Q Q0,5 Q1,0 Q1,5 Q2,0 Q0,75 Q1,0 Q1,25 Q1,5 Q0,75 Q1,25 Choisissez “USER”.
Utilisation des menus 1 2 Appelez le menu. Choisissez l’élément souhaité. 3 [Tournez] = [Appuyez sur la touche] Répéter l’étape 2 si nécessaire. • Pour revenir au menu précédent, appuyez sur BACK. • Pour quitter le menu, appuyez sur DISP ou MENU.
Catégorie Article de menu DIMMER Gradateur • DIMMER ON : Assombrit l’éclairage de l’affichage de des touches. • DIMMER OFF : Annulation. SCROLL *4 Défilement • SCROLL ONCE : Fait défiler une fois les informations affichées. • SCROLL AUTO : Répète le défilement (à 5 secondes d’intervalle). • SCROLL OFF : Annulation. DISPLAY FRANÇAIS Réglage pouvant être choisi, [page de référence] Appuyer sur DISP pendant plus d’une seconde peut faire défiler l’affichage quelque que soit le réglage utilisé.
SRC SELECT Réglage pouvant être choisi, [page de référence] FADER *7 Fader R06 – F06 : Ajustez la balance de sortie avant-arrière des enceintes. (Réglage initial: 00) BALANCE Balance L06 – R06 : Ajustez la balance de sortie gauche-droite des enceintes. (Réglage initial: 00) LOUD Loudness • LOUD OFF • LOUD ON : Annulation. : Accentue les basses et hautes fréquences pour produire un son plus équilibré aux faibles niveaux de volume.
Affectation d’un titre Vous pouvez affecter un titre à 30 fréquences de station (FM et AM) et 8 caractères (maximum) pour chaque titre. 1 Choisissez “FM” ou “AM”. 2 Affiche l’écran d’entrée de titre. 4 Terminez la procédure. Pour effacer tout le titre FRANÇAIS À l’étape 2 ci-à gauche.... 3 Affectez un titre. 1 Choisissez un caractère. 2 Déplacez-vous à la position de caractère suivante (ou précédente). 3 Répétez les étapes 1 et 2 jusqu’à ce que vous terminiez d’entrer le titre.
Menu de réglage du disque Ces opérations sont possibles sur le moniteur en utilisant la télécommande. Accédez au menu de réglage du disque quand l’appareil est à l’arrêt. 2 Choisissez un menu. 3 Choisissez l’élément que vous souhaitez régler. FRANÇAIS 1 • Pour annuler le menu déroulant, appuyez sur RETURN. 4 Choisisse une option. Pour revenir à l’écran normal LANGUE Menu Élément Réglage LANGUE MENU Choisissez la langue initiale du menu de disque.
Élément Réglage TYPE D’ECRAN Choisissez le type de moniteur de façon à ce qu’il corresponde à une image d’écran large sur votre moniteur. POSITION OSD Choisissez la position de la barre sur l’écran, sur le moniteur. • 1 : Position élevée • 2 : Position basse (les instructions d’aide sous le menu de réglage du disque disparaissent.) SORTIE AUDIO NUM. Choisissez le format de signal à émettre par la prise DIGITAL OUT (optique). • ARRET : Annulation.
Pour en savoir plus à propos de cet autoradio Mise sous tension de l’appareil • Vous pouvez aussi mettre l’appareil sous tension en appuyant sur la touche SRC. Si la source est prête, la lecture démarre aussi. Mise hors tension de l’appareil • Si vous mettez l’appareil hors tension pendant l’écoute d’un disque, la lecture du disque reprend automatiquement, la prochaine fois que vous mettez l’appareil sous tension. Généralités • Si vous changez la source, la lecture s’arrête aussi (sans éjecter le disque).
FRANÇAIS • Cet appareil peut afficher le nom de l’album, l’artiste (interprète) et les balises (version 1,0, 1,1, 2,2, 2,3 ou 2,4) pour les fichiers MP3/WMA/WAV. • Cet autoradio peut afficher uniquement les caractères d’un octet. Les autres caractères ne peuvent pas être affichés correctement. • Cet auroradio peut reproduire les fichiers enregistrés au mode VBR (débit binaire variable). Les fichiers enregistrés en VBR affichent une durée écoulée différente.
Utilisation des menus Menu de réglage du disque Affectation d’un titre • Si vous essayer d’affecter des titres à plus de 30 fréquences de station, “NAME FULL” apparaît. Effacez les titres inutiles avant de faire une autre affectation. • Si la langue que vous avez choisie n’est pas enregistrée sur le disque, la langue originale est utilisée automatiquement comme langue initiale.
FRANÇAIS À propos des sons reproduits par les prises arrière Icônes guides sur l’écran Pendant la lecture, les icônes suivantes peuvent apparaître un instant sur le moniteur. : Lecture : Pause : DVD Vidéo/VCD: Lecture au ralenti vers l’avant : DVD Vidéo: Lecture au ralenti vers l’arrière : Recherche vers l’avant : Recherche vers l’arrière • Par les prises analogiques (Sortie des enceintes/LINE OUT): Un signal à 2 canaux est sorti.
Entretien Connecteurs Condensation d’humidité De la condensation peut se produire sur la lentille à l’intérieur de l’appareil dans les cas suivants: • Après le démarrage du chauffage dans la voiture. • Si l’intérieur de la voiture devient très humide. Si cela se produit, l’appareil risque de ne pas fonctionner correctement. Dans ce cas, éjectez le disque et laissez l’autoradio sous tension pendant quelques heures jusqu’à ce que l’humidité se soit évaporée.
Guide de dépannage Ce qui apparaît être un problème n’est pas toujours sérieux. Vérifiez les points suivants avant d’appeler un centre de service. FM/AM FRANÇAIS Généralités Symptôme Remède/Cause • Aucun son n’est entendu des enceintes. • Ajustez le volume sur le niveau optimum. • Vérifiez les cordons et les connexions. • Cet autoradio ne fonctionne pas du tout. Réinitialisez l’autoradio (voir page 3). • “EXT IN” et “AUX IN” ne peuvent pas être choisis.
Remède/Cause • Le disque ne peut pas être reproduit. • Changez le disque. • Enregistrez les plages en utilisant une application compatible sur les disques appropriés (voir page 6). • Ajoutez le code d’extension <.mpg>, <.mpeg>, <.mp3>, <.wma>, ou <.wav> aux noms de fichier. • Du bruit est produit. Sautez à une autre plage ou changez le disque. • Les plages ne sont pas reproduites comme vous le souhaitiez. L’ordre de lecture est déterminé quand les fichiers sont enregistrés.
Radio satellite FRANÇAIS Symptôme Remède/Cause • “CALL 1-888-539-SIRIUS TO SUBSCRIBE” défile sur l’affichage lors de l’écoute de la radio satellite SIRIUS. Démarrez la suscription pour la radio satellite SIRIUS (voir page 23). • Aucun son n’est entendu. “UPDATING XX%” ou “UPDATING” apparaît sur l’affichage. L’autoradio est en train de mettre à jour les informations des canaux et cela prend plusieurs minutes. • “NO SIGNAL” apparaît sur l’affichage.
Remède/Cause • iPod ne peut pas être mis sous tension ou ne fonctionne pas. • • • • Vérifiez le câble de connexion et le raccordement. Mettez à jour la version du micrologiciel. Chargez de la batterie. Réinitialisez iPod. • Le son est déformé. Mettez hors service l’égaliseur sur cet appareil ou sur iPod. • “NO IPOD” apparaît sur l’affichage. • Vérifiez le câble de connexion et le raccordement. • Chargez de la batterie. • La lecture s’arrête. Le casque d’écoute a été déconnecté pendant la lecture.
Spécifications Puissance de sortie: SECTION DE L’AMPLIFICATEUR AUDIO FRANÇAIS Rapport signal sur bruit: Impédance de charge: Plage de commande de tonalité: Niveau de Sortie Audio: Standard de couleur: Sortie vidéo (composite): Autre prise: SECTION DU TUNER Plage de fréquences: Tuner FM: Tuner AM: 20 W RMS × 4 canaux à 4 Ω et avec ≤ 1% THD+N 80 dBA (référence: 1 W pour 4 Ω) 4 Ω (4 Ω à 8 Ω admissible) ±12 dB (60 Hz, 80 Hz, 100 Hz, 120 Hz) Q0,5, Q1,0, Q1,5, Q2,0 Médiums: ±12 dB (0,5 kHz, 1,0 kHz, 1,5
Système de détection Capteur optique sans contact (laser semi-conducteur) du signal: SECTION DU LECTEUR DE DVD/CD Réponse en fréquence: 2 canaux (stéréo) DVD, fs=48 kHz/96 kHz: 16 Hz à 22 000 Hz CD, fs=44,1 kHz: 16 Hz à 20 000 Hz Plage dynamique: 96 dB Rapport signal sur bruit: 98 dB Pleurage et scintillement: Inférieur à la limite mesurable Vidéo MPEG: Vidéo: Résolution max.