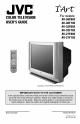
J For models: COLORTELEVISION USER'SGUIDE AV-36F802 AV-36F702 AV-32F802 AV-32F702 AV-27F802 AV-27F702 Illustration of AV-27F802 Serial Number and RM-C301G Model Number LCT0821-001D-A 0901-TN-FAA-JIM
IMPORTANT SAFETY PRECAUTIONS //_ RISKOF ELECTRIC SHOCK DO NOT OPEN /_ CAUTION: To reduce the risk of electric shock. Do not remove cover (or back). No user serviceable parts inside. Refer servicing to qualified service personnel. The lightning flash with arrowhead symbol, within an equilateral triangle is intended to alert the user to the presence of uninsulated "dangerous voltage" within the product's enclosure that may be of sufficient magnitude to constitute a risk of electric shock to persons.
IMPORTANT SAFEGUARDS CAUTION: Please read and retain for your safety. Electrical energy can perform many useful functions. This TV set has been engineered and manufactured to assure your personal safety. But improper use can result in potential electrical shock or fire hazards. In order not to defeat the safeguards incorporated in this TVset, observe the following basic rules for its installation, use and servicing. And also follow all warnings and instructions marked on your TV set.
7 Anoutside antenna system should notbelocated inthevicinity ofoverhead power lines or other electric lightorpower circuits, orwhere itcanfallintosuchpower linesorcircuits. When installing anoutside antenna system, extreme careshould betaken tokeep from touching suchpower linesorcircuits ascontact withthemmight befatal. EXAMPLE OF ANTENNA GROUNDING AS PER NATIONAL ELECTRICAL CODE 8 TV sets are provided with ventilation openings in the cabinet to allow heat generated during operation to be released.
13Foradded protection oftheTVsetduring alightning storm orwhen theTVsetistobeleft unattended foranextended period oftime, unplug itfrom thewalloutlet anddisconnect the antenna.This willprevent damage toproduct duetolightning storms orpower linesurges. 14ATVset andcartcombination should bemoved with ._EIB,_ care. Quick stops, excessive force, and uneven surfaces may cause the TV set and cart combination to overturn.
Table of Contents UNPACKING YOUR TV ..... 7 QUICK SETUP. .......... 8 Getting Started ......... Remote Control ......... Batteries ............. Basic Operation ......... Making Basic Connections Plug In Menu .......... CONNECTIONS ......... Cable and VCR Connections Connecting Connecting Connecting Connecting to to to to 8 8 8 8 . . . 9 10 11 ....... 11 a DVD Player ........ an External Amplifier .... a Camcorder ........ JVC AV Compu Link .... REMOTE CONTROL ......
Unpacking Your Television Thank you for your purchase of a JVC Color Television. Before you begin setting up your new television, please check to make sure you have all of the following items. In addition to this guide, your television box should include: 1 Television 1 Remote Two AA Control Batteries A matching TV stand is also available (optional). Note: Your remote control may differ from the example illustrated here.
Getting Started These quick setup pages will provide you, in three easy steps, with the basic information you need to begin using your new television right away. This information includes basic instructions on operating your remote control, making a simple cable/antenna and optional VCR connection and, finally, information on programming your television's Auto Tuner. If you have questions, or for more detailed information on any of these steps, please consult other sections of this manual.
Step Two - Making Basic Connections Next you will need to connect your television to an antenna or cable system. The most basic antenna/cable connection is shown below. For more detailed connections, such as ones where a cable box is required, see pages 11 to 13. CABLE _t _ OL_T sq J Cable/RF connector Illustration of AV-27F802 1) Connect an RF cable out from the wall outlet in to the RF Input on the back of the TV. You may also wish to connect a VCR at this point.
Step Three - The Plug In Menu When you turn your television on for the first time the Plug In Menu will appear. This menu sets some of the basic settings for your television. A complete description of the Plug In Menu can be found starting on page 22. We recommend you complete the Plug In Menu items before you start using your television. But to begin watching your television right away you only need to run the AutoTuner Setup. This lets your television learn the channels it is able to receive.
Connections Cable and VCR Connections Diagram #1 _ __ Illustration of AV-27F802 1) Connect the antenna or cable TV wire from the wall outlet, in to the RF Input of the two-way splitter. 2) Connect an RFcable from the one of the RF Outputs on the splitter, in to the RF Input on the back of the VCR. 3) Connect an RFcable from the other the RFOutput on the splitter, in to the RF Input on the back of the TV.
Connections Cable and VCR Connections - Continued Diagram #2 _JT Illustration of AV-27F802 1) Connect the antenna or cable TV wire from the wall outlet, in to the RFInput of the cable box. 2) Connect an RF cable from the RFOutput the VCR. of the cable box, in to the RFInput on the back of 3) Connect an RF cable from the RF Output of the VCR, in to the RF Input on the back of the TV.
Connections Cable and VCR Connections - Continued Diagram #3 0tJT Illustration of AV-27F802 1) Connect the antenna or cable TV wire from the wall outlet, in to the RF Input of the two-way splitter. 2) Connect an RFcable from the one of the RFOutputs Input. on the splitter, in to the cable box RF 3) Connect an RF cable from the Cable Box Output, in to the VCR RF Input. 4) Connect an RFcable from the other the RFOutput on the splitter, in to the RF Input on the back of the TV.
Connections Connecting to a DVD player Illustration of AV-27F802 1) Connect Green cable out from DVD player "Y"Component Input. Output, in to TV"Y" Component 2) Connect Blue cable out from DVDplayer "PB" Component Input. Output, in to TV "PB" Component 3) Connect Red cable out from DVD Player "PR" Component Input. Output, in to TV "PR" Component 4) Connect White Audio cable out from DVDLeft Audio Output, in to TV Left Audio Input 2.
Connections Connecting to an External Amplifier Illustration of AV-27F802 1) Connect the white audio cable from the TV's Left Audio Output jack to the Amplifier's Audio Input jack. Left 2) Connect the red audio cable from the TV's Right Audio Output jack to the Amplifier's Audio Input jack. Right • See also "TV Speaker" and "Audio Out'on page 38 for more information speakers.
Connections Connecting to JVC AV Compu Link VCR_ _ Illustration of AV-27F802 To Connect: Plug one end of the AV Compu Link cable into the AV Compu Link input on your VCR, DVD, or other Compu Link device. Plug the other end of the AV Compu Link cable into the AV Compu Link input at the rear of the television. NOTE: • In order for the VCR playback to begin automatically, the recording tabs must be remove from the VHS tape.
Remote Control Remote Control Basics • Before you can operate the remote control, you must first install the batteries (included). See "Changing the Batteries" at the bottom of this page for instructions. (For an illustration, please see page 8.) • Press the POWERbutton to turn the television on or off. • Make sure the TV/CATV switch is set to TV. Move the switch to CATV only if you need to operate a cable box.
Remote Programming Setting the CATV, VCR and DVD Codes Cable Box or Satellite codes The remote control is prog rammed with CATV and/or Satellite codes for power on, power off, channel up, channel down, and 10 key operation. 1) Find the CATV/Satellite brand from the list of codes shown below. 2) Slide the 2-way selector switch to "CATV". 3) Press and hold down the DISPLAYbutton. 4) With the DISPLAYbutton held down, enter the first code number listed using the 10 key pad. 5) Release the DISPLAYbutton.
Remote Programming VCR codes The remote control is programmed with VCR codes for power on, power off, play, stop, fast-forward, rewind, pause, record, channel up, and channel down operation. 1) Find the VCR brand from the list of codes shown below. 2) Slide the first 2-way selector switch to "TV" and the other 2-way selector switch to "VCR". 3) Press and hold down the DISPLAYbutton. 4) With the DISPLAYbutton held down, enter the first code number listed with the 10 key pad. 5) Release the DISPLAYbutton.
Remote Programming DVD codes The remote control is programmed with DVD codes for power on, power off, play, stop, fast-forward, rewind, previous chapter, next chapter, tray open/close, and still/pause operation. 1) Find the DVD player brand from the list of codes shown below. 2) Slide the first 2-way selector switch to "-IV" and the other 2-way selector switch to "DVD". 3) Press and hold down the DISPLAYbutton. 4) With the DISPLAYbutton held down, enter the first code number listed with the 10 key pad.
Onscreen Menus Using the Guide Certain symbols are used throughout this guide to help you learn about the features of your new television. The ones you will see most frequently are: J,V Up and buttons • Move • Move • Move • Back • Scan • • Left and right arrows mean press the VOLUME+or VOLUME--buttons to move left or right to: • • • • ..... Down arrows mean press the CN+ or CH- buttons.
Plug In Menu Introduction The Plug In Menu comes up automatically when you first turn on the TV after plugging it in. The Plug In Menu helps you to get your TV ready to use by letting you set your preferences for: • The Language in which you want the onscreen menus to appear, • The Auto Tuner Setup of which channels you wish to receive, • Setting the TV's clock to the correct time so your timer functions will work properly. Descriptions of each of the Plug In Menu features appear on this page and the next.
Plug In Menu Auto Clock Set Before you use any of your TV's timer functions, you must first set the clock. 'Youmay precisely set your clock using the XDS time signal broadcast by most Public Broadcastingstations.
Plug In Menu Manual Clock Set To set your clock manually (without using the XDS signal), choose MANUAL from the Set Clock menu and follow the steps below. AV To SET CLOCK • • To operate • • To MANUAL A,V To move to the hour • • To set the hour AV To move to minutes • • To set the minutes AV To move to START CLOCK • • To start clock and exit • You will not need to press the MENU button to enter this screen from the Plug In Menu.
Channel Summary Channel Summary Channel Summary allows you to customize the line-up of channels received by your TV. You can add or delete channels from the line-up or prevent any unauthorized viewers from watching any or all 181 channels. Press the MENU button AV TO CHANNEL • • To operate The Channel Summary SUMMARY screen (above) will now be displayed with the channels set to scan marked with an "-/". You can delete channels from the scan by removing the ,,..
V-Chip Your TV is equipped with V-Chip technology which enables -IV Parental Guidelines (for United States and Canada) and Movie (MPAA) Guideline controls. V-Chip technology allows you to program your -IV to receive, or not to receive, programs based on content according to the guidelines. Programs which exceed the ratings limits you set will be blocked.
V-Chip US V-Chip Ratings U.S. PARENTAL RATING SYSTEMS Programs with the following ratings are appropriate [3 TV Y is Appropriate for children. for All Children. Programs are created for very young viewers and should be suitable for all ages, including children ages 2 - 6. [3 TV Y7 is for Older Children. Most parents would find such prog rams suitable for children 7 and above.
V-Chip Setting US V-Chip Ratings Press the MENU button AV ToV-CHIP • • TO operate (Lock icon I_1 will appear) Press ZEROto access the V-Chip menu • • To turnV-Chip J,V To move to SET US -IV RATINGS • • To operate Directions ON or OFF to set US V-Chip Ratings: Line up the cursor in the column (TV PG, TV G, etc.) with the content row (ViFV, S, etc.) and press the • orV feature on or off. to move the cursor to the correct location.
V-Chip Setting ratings with the V-Chip button To access Rating information about a certain program, press the V-CHIP button while viewing that program. A display like this will appear: If you decide you want to block this category of viewing, press "0" while the above screen is visible, and all programs from that category will be blocked.
V-Chip Movie Ratings NR- Not Rated. This is a film which has no rating. In many cases these films were imported from countries which do not use the MPAA ratings system. Other NR films may be from amateur producers who didn't intend to have their film widely released. NR (Not Rated) Programming may contain all types of programming programming, foreign programs, or adult material.
V-Chip Canadian V-Chip Ratings [3 E - Exempt. Exempt programming includes:news, sports, documentaries and other information programming, talk shows, music videos, and variety programming. [3 C - Programming Intended for Children. Violence Guidelines:There will be no realistic scenes of violence. Depictions of aggressive behavior will be infrequent and limited to portrayals that are clearly imaginary, comedic or unrealistic in nature. [3 C8+ - Programming Intended for Children 8 and Over.
V-Chip Unrated Programs Notes About Unrated Prog rams: Unrated programming refers to any programming which does not contain a rating signal. Programming on television stations which do not broadcast rating signals will be placed in the "Unrated Programming" category.
V-Chip Set Lock Code Channel Guard and V-Chip settings are protected by a four-digit Lock Code. Your -iV comes pre-set with a Lock Code of "0000". You may change the code to any four-digit number you wish. To change the Lock Code, follow the steps below. Press the MENU button AV To SETLOCK CODE • • TO operate The lock icon _ appears.
Picture Settings Tint Tint allows you to adjust the levels of red and green in your TV picture. Press the MENU button AV To T I NT • To increase the levels of green • To increase the levels of red AV To move to the next setting Color The color function lets you make all the colors in the TV picture appear either more vivid or subtle.
Picture Settings Noise Muting This feature inserts a blank blue screen over channels which are not broadcasting weak to be received clearly, or are too Press the MENU button AV To NOISE MUTING • • To turn Noise Muting ON or OFF ° Noise Muting will not work during Auto Tuner Setup or when you operate Channel Summary. Set Video Status With Set Video Status, you can save your own set of picture quality adjustments and have access to them at the touch of a button.
Sound Settings Bass You can increase or decrease adjustment. the level of low-frequency sound in the TV's audio with the Bass Press the MENU button AV To BASS • To increase the bass • To decrease the bass AV To move to the next setting Treble Use Treble to adjust the level of high-frequency sound in your TV's audio.
General Items Purity This helps clean up the picture so that it may not contain any "snow". Press the MENU button AV To PURITY • • To enter • • To adjust purity On/Off Timer The On/Off timer lets you program your television to turn itself on or off. You can use it as an alarm to wake up, to help you remember important programs, or as a decoy when you're not home.
General Items TV Speaker If your TV is connected to a stereo system, you can turn off the TV speakers and listen to the audio through your stereo. Press the MENU button A,V ToTVSPEAKER <• To turn the TV's speakers ONor OFF EXiT when finished • Before you turn the TV Speaker setting from OFF to ON, make sure that the TV volume level is low! If the TV volume is set too high, the sound level will be extremely loud. ° After a power interruption, the TVSpeaker settings will return to "ON".
General Items V4 Component-In V2 Component-In (AV-36F802, (AV-36F702, AV-32F802 AV-32F702 & AV-27F802) & AV-27F702) / Get the best quality video from your DVD player by using this setting and the DVD inputs at the rear of the television. Set either to YES for component input (for DVD) or to NO for composite video input (for a regular VCR).
Button Functions Menu The MENU button allows you to access JVC's onscreen the onscreen menu system. menu system. Press MENUto activate • See individual topics (like "Sound Settings") for specific information on using menus. Exit and PIP Off Press the EXIT button to leave a menu screen. On the RM-C301G this button is also labeled "PIP OFF". Press Ex_TIPIP OFF to turn off the Picture-in-Picture for more information on the PIP feature).
Button Functions Video Status The VIDEO STATUSbutton gives you a choice of three TV picture display settings, including a display of your own preferences. Standard - Resets the picture display to the factory settings. Choice - Displays the setting levels you specified on the "Set Video Status"Menu (see page 35). Theater - Gives a rich, film-like look to video.
Button Functions BBE BBE high definition audio adds natural, clear and extraordinary Turn BBE On or Off using the BBE button. sound quality to any program. 100+ Button Use the 100+ button to directly access channels above Channel 99. For example to move to channel 124, press100+, 2 (two), 4 (four). Return+ The RETURN+ button has two functions: Return - Returns to the channel viewed just before the channel currently onscreen.
Button Functions VCR Buttons You can use this remote control to operate the basic functions of your VCR. These functions include:play, record, rewind, fast-forward, stop, pause, channel scan, TViVCR, power on, and power off. Move the selector switch to VCR to operate. ° The remote is preset with the code 000 to control JVC-brand VCR's. For any other manufacturer's brand VCR, please see the code chart and instructions on page 19.
Button Functions- PIP PIP displays two separate pictures on screen. Your television has 2-Tuner PIP, meaning you can view pictures from two different channels simultaneously. A special set of PIP control buttons are located on the upper part of the remote control. Descriptions of each button appear on this page. The PIP feature is available on models AV-36F802, AV-32F802 & AV-27F802 only. Cable Box Note The 2-Tuner PIP function may not operate when used with certain cable boxes.
Button Functions- PIP Freeze Use the FREEZEbutton to lock a single, still image onto the PIP window. • If PIP is off when FREEZEiS pressed, a snapshot of the main screen is taken and placed in the PIP window. • If PIP is on when FREEZEiS pressed, the image in the window when the button was pressed is held. Swap You can exchange the channel displayed dow by pressing SWAP.
Troubleshooting T__) •_ 46 __ _;_I _r_ _'h_:_ _ _n_
jVC o Warranty JVC COMPANY OF AMERICA warrants this product and all parts thereof, except as set forth below ONLY TO THE ORIGINAL PURCHASER AT RETAIL to be FREE FROM DEFECTIVE MATERIALS AND WORKMANSHIP from the date of original retail purchase for the period below (the "Warranty Period") (PICTURE TUBE is covered for Two (2) years.) shown Parts 1 YEAR I Lab°r 1 YEAR I THIS LIMITED WARRANTY IS VALID ONLY IN THE FIFTY (50) UNITED DISTRICT OF COLUMBIA AND COMMONWEALTH OF PUERTO RICO.
Warranty 7) Accessories; 8) Batteries (except that Rechargeable Batteries are covered for 90 days from date of purchase.) There are no express warranties except as listed above. THE DURATION OF ANY IMPLIED WARRANTIES,INCLUDING THE IMPLIED WARRANTY OF MERCHANTABILTY, IS LIMITED TO THE DURATION OF THE EXPRESS WARRANTY HEREIN.
Authorized Service Centers JVC HOW TO LOCA TEYOUR TOLL JVC SERVICE CENTER FREE: 1 (800) 537-5722 http://www.jvc.com Dear Customer, In order to receive the most satisfaction from instruction booklet before operating the unit. sary, or for the address nearest your location States, please call 1 (800) 537-5722 for your our website at www.JVC.
Search Codes Cable/Satellite 1) 2) 3) 4) 5) 5) Codes Function: Slide the first 2-way selector switch to "TV" and the other 2-way selector switch to "VCR". Press the VCR POWERand RETURN+ buttons. Hold for at least three seconds and release. Press VCR POWER,see if the VCR responds. If there was a response, press RETURN+.The operating codes are now set.If there was no response, repeat Step 3.
Specifications Specifications subject to change without notice.
JVC COMPANY OF AMERICA Division of JVC Americas Corp. 1700 Valley Road Wayne, New Jersey, 07470 JVC CANADA, INC.