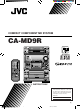
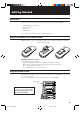
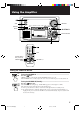
COMPACT COMPONENT MD SYSTEM CA-MD9R CD REPEAT COMPACT CD 3 CD 2 CD 1 CD 3 CD 2 CD 1 DIGITAL AUDIO CD PLAY MODE 3 CD PLAY & EXCHANGE COMPACT VOLUME STANDBY + TUNER AUX COMPACT COMPONENT MD SYSTEM MX-MD9R CLOCK /TIMER SOUND DIGITAL AUDIO – DEMO BASS DISPLAY /CHARA REC PAUSE TITLE EDIT RDS CONTROL REPEAT PTY SEARCH EON ON/OFF 1 2 TA/NEWS/ INFO DISPLAY MODE PLAY MODE TRIPLE REC MD FM MODE MUTE PTY SELECT 4 5 LISTENING 1ST TRACK REC 6 TUNER 7 8 10 +10 LONG REC
Warnings, Cautions and Others IMPORTANT for the U.K. DO NOT cut off the mains plug from this equipment. If the plug fitted is not suitable for the power points in your home or the cable is too short to reach a power point, then obtain an appropriate safety approved extension lead or consult your dealer. BE SURE to replace the fuse only with an identical approved type, as originally fitted.
IMPORTANT FOR LASER PRODUCTS REPRODUCTION OF LABELS 2 WARNING LABEL, PLACED INSIDE THE UNIT 1 CLASSIFICATION LABEL, PLACED ON REAR ENCLOSURE CLASS LASER DANGER: Invisible laser radiation when open and interlock failed or defeated. AVOID DIRECT EXPOSURE TO BEAM. (e) 1 PRODUCT VARNING: Osynlig laserstrålning när denna del är öppnad och spärren är urkopplad. Betrakta ej strålen. (s) ADVARSEL: Usynlig laserstråling ved åbning, når sikkerhedsafbrydere er ude af funktion.
Thank you for purchasing the JVC Compact Component MD System. Be sure to read this instruction manual carefully before operating your new stereo system. For questions that are not be answered in the manual, contact your dealer. Features Here are some of the things that make your CA-MD9R powerful and easy to use. ❏ The controls and operations have been redesigned to make them very easy to use so you can spend your time listening to music.
Table of Contents Features .................................................................. 1 How This Manual Is Organized ............................. 1 IMPORTANT CAUTIONS ................................... 1 Getting Started ..............................................................3 Accessories ............................................................ 3 How to Put Batteries in the Remote Control ......... 3 Using the Remote Control .....................................
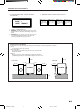
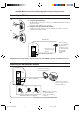
Getting Started Accessories Check that you have all of the following items, which are supplied with the CA-MD9R. AM (MW/LW) Loop Antenna (1) Remote Control (1) Batteries (2) FM Antenna (1) If any of these items is missing, contact your dealer immediately. How to Put Batteries in the Remote Control Match the polarity (+ and –) on the batteries with the + and – markings in the battery compartment. R6P (SUM-3)/AA (15F) CAUTION: Handle batteries properly.
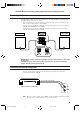
CAUTION: Make all connections before plugging the unit into an AC power outlet. Connecting the FM Antenna A ANT ENN A. Using the Supplied FM Antenna The FM antenna provided can be connected to the FM 75Ω COAXIAL terminal as temporary measure. Extend the supplied FM antenna horizontally. B. Using the Coaxial Type Connector (Not Supplied) A 75Ω antenna with coaxial type connector (DIN 45332) should be connected to the FM 75Ω COAXIAL terminal.
CAUTION: Make all connections before plugging the unit into an AC power outlet. Connecting the Speakers (Refer to instructions for speakers as well.) For each speaker, connect one end of the speaker wire to the speaker terminals on the back of the CA-MD9R and the other end to the speaker. 1. Open the terminals and insert the speaker wires firmly (be sure to remove the insulation at the ends of each wire first), then close the terminals. 2.
Demo Mode When the CA-MD9R is connected to an AC power outlet, a Demo automatically starts showing some of the main features. DEMO To stop the Demo, press any button. “DEMO OFF” appears on the display and the Demo stops. To restart the Demo, press the DEMO button. One Touch Operation One Touch Operation is JVC’s feature that lets you control the most frequently used functions of the CA-MD9R with a single touch. One Touch Operation starts playing a CD or a MD, turns on the radio, plays a tape, etc.
Using the Amplifier VOLUME STANDBY + TUNER AUX VOLUME AUX COMPACT DEMO SOUND COMPONENT MD SYSTEM MX-MD9R – CLOCK /TIMER BASS DISPLAY /CHARA SOUND / REC PAUSE TITLE EDIT BASS REPEAT LONG REC PLAY MODE TRIPLE REC 3 MD MD LISTENING 1ST TRACK REC SKIP MD CD REC MULTI JOG dial 2 MD 1 CANCEL SET MULTI JOG SET RDS CONTROL PTY SEARCH EON ON/OFF 1 2 TA/NEWS/ INFO DISPLAY MODE 4 SLEEP 3 FM MODE MUTE PTY SELECT 5 6 7 8 9 10 +10 TUNER AUX TAPE CD ACTIVE BASS EX
Adjusting the Volume Turn the VOLUME control clockwise to increase the volume or counterclockwise to decrease it. When using the Remote Control, press the VOLUME + button to increase the volume or press the VOLUME – button to decrease it. You can adjust the volume level between 0 (minimum) and 50 (maximum). VOLUME + – 3 or 3 MD CD 2 2 1 1 CD VOLUME 1 2 3 4 5 6 7 8 9 10 For private listening Connect a pair of headphones to the PHONES jack. No sound comes out of the speakers.
Sound Modes The CA-MD9R has some preset sound effects that give you control of the way your music sounds, so you can tailor it for your room and for the quality of the source. You can also create your own customized S.E.A. (Sound Effect Amplifier) settings and store it in the unit’s memory. ❏ You cannot use the Sound Modes for recording. Live surround modes D.(Dance) CLUB HALL STADIUM Increases resonance and bass. Adds depth and brilliance to the sound, like in a concert hall.
Creating Your Own Customized Sound Mode —————————————— You can create you own customized Sound Mode and store it in the CA-MD9R’s memory. To do the following procedure, use the buttons on the unit. BASS SOUND 1. Press the SOUND button repeatedly until “MANUAL” appears on the display. 3 3 MD CD 2 2 1 1 R·D·S EON EON TA NEWS NEWS INFO TA INFO STEREO TUNED PROGRAM MD RANDOM CD REPEAT 1 CD MD ALL SET 1 2 3 4 5 6 7 8 9 10 11 12 13 14 15 SLEEP DAILY REC 1 2 3 16 2.
Using the Tuner VOLUME STANDBY + TUNER TUNER AUX DEMO COMPACT COMPONENT MD SYSTEM MX-MD9R – CLOCK /TIMER BASS DISPLAY /CHARA SOUND REPEAT / REC PAUSE TITLE EDIT LONG REC PLAY MODE TRIPLE REC 3 MD LISTENING 1ST TRACK REC SKIP MD MD CD REC MULTI JOG dial 2 MD 1 CANCEL SET MULTI JOG RDS CONTROL RDS function buttons Number buttons DISPLAY /CHARA RDS CONTROL PTY SEARCH EON ON/OFF 1 2 TA/NEWS/ INFO DISPLAY MODE SET SLEEP 3 FM MODE MUTE PTY SELECT 4 5 6 7 8 9
Selecting a Radio Station ————————————————————— ❏ Press the or button on the unit repeatedly. The frequency changes in one step increments. “TUNED” appears on the display when a station is tuned in. ❏ Press and hold the or button for a few seconds, the frequency changes continuously until a station is tuned in. “TUNED” appears on the display. ❏ Possible only after presetting stations (For presetting methods, see “Presetting Stations” below).
Changing the FM Reception Mode When an FM stereo broadcast is hard to receive or noisy, press the FM MODE MUTE button on the Remote Control (after pressing the TUNER button on the Remote Control) so that “MONO” appears on the display. (The STEREO indicator goes off.) Reception improves, but there are no stereo effects. In this monaural mode, noise comes out while tuning in stations (since muting is canceled).
Description of the PTY codes: NONE: Undefined. NEWS: News. AFFAIRS: Topical program expanding or enlarging upon the news — debate, or analysis. INFO: Program the purpose of which is to impart advice in the widest sense. SPORT: Program concerned with any aspect of sports. EDUCATE: Educational programs. DRAMA: All radio plays and serials. CULTURE: Programs concerning any aspect of national or regional culture, including language, theatre, etc.
Changing the RDS Information ———————————————————— RDS CONTROL You can see RDS information on the display while listening to an FM station. To view RDS information on the display, press the DISPLAY MODE button after pressing the RDS CONTROL button on the Remote Control. Each time you press the button the display changes to show the following information: 3 PS (Program Service): Station names will be displayed. “no PS” appears if no signal is sent.
EON Function —————————————————————————— RDS CONTROL The EON function allows the unit to switch temporarily to a broadcast program of your choice (NEWS, TA, and/or INFO) from a different station except when you are listening to a non-RDS stations (all AM (MW/LW) and some FM stations). ❏ The EON indicator lights up while receiving a station with the EON code. ❏ EON Standby reception is applicable for preset stations only. To set EON Standby reception, use the Remote Control: EON ON/OFF 1.
Notes: • EON data sent from some stations may not be compatible with this unit. • While listening to a program tuned in by the EON function, the station does not change even if another network station starts broadcasting a program of the same EON data. • While listening to a program tuned in by the EON function, you can only use the EON ON/OFF and DISPLAY MODE button as the tuner operation buttons.
Using the CD Player 7 (Stop) ‹/8 (Play/Pause) CD REPEAT COMPACT CD REPEAT CD 3 CD 2 CD 1 CD 3 CD 2 CD 1 DIGITAL AUDIO CD PLAY MODE CD PLAY MODE 3 CD CD (1 to 3) PLAY & EXCHANGE 0 (Eject) VOLUME STANDBY + TUNER AUX COMPACT DEMO COMPONENT MD SYSTEM MX-MD9R – CLOCK /TIMER BASS SOUND DISPLAY /CHARA / REC PAUSE TITLE EDIT RDS CONTROL PTY SEARCH EON ON/OFF 1 2 TA/NEWS/ INFO DISPLAY MODE SLEEP 3 FM MODE MUTE PTY SELECT 4 5 6 7 8 9 10 +10 TUNER AUX MODE SELEC
The Player built in the CA-MD9R has 3 CD trays. You can use Continuous, Random, Program or Repeat Play for the CDs on CD1, CD2 and CD3 trays. Repeat Play can repeat all the tracks on all the CDs, the tracks on one of the CDs or one track on one CD. There is also the Disc Lock function, prohibiting CD ejection (see page 66.) The Quickest Way to Start a CD Is with the One Touch Operation —————— The power comes on, and operations are done automatically.
Playing CDs ——————————————————————————— You can play the CDs continuously. (Continuous Play) CD 3 CD 2 CD 1 DISC 1 DISC 2 1. 2. DISC 3 Prepare the CDs. Press the CD button (1 to 3) (or the DISC button (1 to 3) on the Remote Control) for the CD you want to play. The first track of the selected CD will begin playing. When the selected CD finishes playing, the next CD begins playing automatically. When the last CD has finished playing, the unit stops playing the CDs.
Selecting a Track ————————————————————————— Using the unit Rotate the MULTI JOG dial while playing or pausing. • Rotate the MULTI JOG dial clockwise to select the next tracks. • Rotate the MULTI JOG dial counterclockwise to select the previous tracks. ❏ If you rotate the MULTI JOG dial over the last track of the selected CD, the unit jumps to the first track of the next CD. MULTI JOG Using the Remote Control Press the 4 or ¢ button while playing or pausing.
2. CD 3 CD 2 CD 1 Press one of the CD buttons (1 to 3) to select a CD. The CD and track numbers start flashing. CD number Track Step number number 3 3 MD CD 2 2 1 1 PROGRAM CD 15 ❏ If the CD and track numbers stop flashing, press the CD button (1 to 3) again. 3. Rotate the MULTI JOG dial to select a track. The track number appears on the display. 3 3 MD CD 2 2 1 1 PROGRAM CD 15 MULTI JOG 4. SET Press the SET button.
3. DISC 1 DISC 2 Press one of the DISC buttons (1 to 3). The CD and track numbers start flashing. DISC 3 CD Step Track number number number 3 3 MD CD 2 2 1 1 PROGRAM CD 15 ❏ If the CD and track numbers stop flashing, press the DISC button (1 to 3) again. 4. PTY SEARCH EON ON/OFF 1 TA/NEWS/ INFO 2 DISPLAY MODE 3 PTY SELECT 4 5 6 7 8 9 10 +10 Press the number buttons to select the tracks. ❏ Example: For track 5, press 5. For track 15, press +10 then 5.
Random Play The tracks of all loaded CDs will play at random. CD PLAY MODE 1. While the CD player is stopped, press the CD PLAY MODE button repeatedly until the RANDOM indicator appears on the display. “CD RANDOM” also appears on the display. 3 3 MD CD 2 2 1 1 RANDOM CD 1 2 3 4 5 6 7 8 9 10 11 12 13 14 15 16 ❏ Each time you press the CD PLAY MODE button, CD play mode changes as follows: = CD PROGRAM = CD RANDOM = Off (Continuous Play) = (back to the beginning) 2.
Using the MD Recorder (Playing) 7 (Stop) ‹ / 8 (Play/Pause) VOLUME STANDBY + TUNER AUX COMPACT DEMO COMPONENT MD SYSTEM MX-MD9R – CLOCK /TIMER BASS REPEAT REPEAT PLAY MODE SOUND DISPLAY /CHARA REC PAUSE / TITLE EDIT 0 (Eject) LONG REC PLAY MODE TRIPLE REC 3 MD LISTENING 1ST TRACK REC SKIP MD MD CD REC MULTI JOG dial 2 MD 1 CANCEL SET MULTI JOG MD (1 to 3) RDS CONTROL PTY SEARCH EON ON/OFF 1 2 TA/NEWS/ INFO DISPLAY MODE 4 SLEEP 3 FM MODE MUTE PTY SELECT 5 6 7
The MD Recorder has 3 MD loading slots. You can use Continuous, Random, Program or Repeat Play for the MDs in MD1, MD2 and MD3 loading slots. Repeat Play can repeat all the tracks on all the MDs, the tracks on one of the MDs or one track on one MD. There is also the Disc Lock function, prohibiting MD ejection (see page 66.) The Quickest Way to Start a MD Is with the One Touch Operation —————— The power comes on, and operations are done automatically.
Playing MDs ——————————————————————————— 3 MD MD You can play the MDs continuously. (Continuous Play) 1. 2. 2 MD 1 DISC 1 DISC 2 DISC 3 Prepare the MDs. Press the MD button (1 to 3) (or the DISC button (1 to 3) on the Remote Control) for the MD you want to play. The first track of the selected MD will begin playing. When the selected MD finishes playing, the next MD will begin playing automatically. When the last MD has finished playing, the unit will stop playing the MDs.
Selecting a Track ————————————————————————— Using the unit Rotate the MULTI JOG dial while playing or pausing. • Rotate the MULTI JOG dial clockwise to select the next tracks. • Rotate the MULTI JOG dial counterclockwise to select the previous tracks. ❏ If you rotate the MULTI JOG dial over the last track of the selected MD, the unit jumps to the first track of the next MD. MULTI JOG Using the Remote Control Press the 4 or ¢ button while playing or pausing.
2. 3 MD MD Press one of the MD buttons (1 to 3) to select an MD. The MD and track numbers start flashing. MD Track Step number number number 2 MD 3 1 3 MD CD 2 2 1 1 PROGRAM MD CD 15 ❏ If the MD and track numbers stop flashing, press the MD button (1 to 3) again. 3. Rotate the MULTI JOG dial to select a track. The track number appears on the display. 3 3 MD CD 2 2 1 1 PROGRAM MD CD 15 4. MULTI JOG SET Press the SET button.
3. DISC 1 DISC 2 Press one of the DISC buttons (1 to 3). The MD and track numbers start flashing. DISC 3 MD Track Step number number number 3 3 MD CD 2 2 1 1 PROGRAM MD CD 15 ❏ If the MD and track numbers stop flashing, press the DISC button (1 to 3) again. 4. Press the number buttons to select the tracks. ❏ Example: For track 5, press 5. For track 15, press +10 then 5. For track 20, press +10 then 10. For track 32, press +10 three times, then 2.
Random Play The tracks of all loaded MDs will play at random. PLAY MODE 1. While the MD Recorder is stopped, press the PLAY MODE button repeatedly until the RANDOM indicator appears on the display. “MD RANDOM” also appears on the display. 3 3 MD CD 2 2 1 1 MD RANDOM CD 1 2 3 4 5 6 7 8 9 10 11 12 13 14 15 16 ❏ Each time you press the PLAY MODE button, MD play mode changes as follows: = MD PROGRAM = MD RANDOM = Off (Continuous Play) = (back to the beginning) / 2.
Using the MD Recorder (Recording) REC PAUSE 7 (Stop) ‹/8 (Play/Pause) VOLUME STANDBY + TUNER AUX COMPACT DEMO COMPONENT MD SYSTEM MX-MD9R BASS REPEAT LONG REC TRIPLE REC LISTENING SKIP CD REC SOUND DISPLAY /CHARA REC PAUSE / TITLE EDIT LONG REC PLAY MODE TRIPLE REC 3 MD LISTENING 1ST TRACK REC SKIP DISPLAY /CHARA – CLOCK /TIMER MD CD REC MD 2 MD 1 CANCEL SET MULTI JOG 1ST TRACK REC MD (1 to 3) RDS CONTROL PTY SEARCH EON ON/OFF 1 2 TA/NEWS/ INFO DISPLAY MODE SLE
Things to Know Before You Start Recording —————————————— ❏ It should be noted that it may be unlawful to re-record pre-recorded tapes, records, or discs without the consent of the owner of copyright in the sound or video recording, broadcast or cable programme and in any literary, dramatic, musical, or artistic embodied therein. ❏ Press the DOLBY B NR button — the indicator lights up — to reduce tape hiss. ❏ When you record onto partially recorded MD, its contents are not erased or overwritten.
Standard Recording To record any source currently playing use the following procedure. ❏ You can also record the same source on the tape at the same time. (See page 55 for tape recording.) MD 1. Insert a blank or recordable MD into one of the MD loading slots. 2. Press the MD button (1 to 3) (or the DISC button (1 to 3) on the Remote Control) corresponding to the slot number you put the MD, then press the 7 button. 3.
Long Recording (LONG REC) The LONG REC function allows you to record any source continuously onto 3 MDs, enabling you to make long recording of radio program, or to record three CDs continuously, etc. The Recording begins on MD1 (MD in the MD1 slot) and continues on MD2, then MD3. LONG REC 1. Insert the MDs you want to record on into the MD loading slots. ❏ Always use the MD1 loading slot.
One Touch CD Recording (CD REC) The CD REC function allows you to easily record CDs on the MD1. CD REC 1. Prepare CDs and a recordable MD into the MD1 loading slot. ❏ You can load the CDs on any CD trays, but always load the recordable MD into the MD1 loading slot. If not, this function does not work. 2. Be sure that the CD you want to start recording from is selected as the playing source. ❏ If not, select it by pressing the corresponding CD button (1 to 3), then the 7 button. 3.
Three CD Recording (TRIPLE REC) The TRIPLE REC function allows you to easily record three CDs onto three MDs. TRIPLE REC 1. Prepare CDs and recordable MDs. ❏ Always place a CD on the CD1 tray and insert an MD into the MD1 loading slot. If not, this function does not work. ❏ If you record from two CDs onto two MDs, use CD1 and 2 trays and MD1 and 2 slots. 2. Press the TRIPLE REC button. The indicator next to the TRIPLE REC button lights up and the recording begins automatically.
Listening Edit Recording (LISTENING) The LISTENING function allows you to make a program while listening and checking each track of the loaded CDs, then to start recording the program. ❏ You can program up to 32 tracks. LISTENING 1. Prepare CDs and a recordable MD into the MD1 loading slot. ❏ Always place a CD on the CD1 tray and insert the MD into the MD1 loading slot. If not, this function does not work. 2. Press the LISTENING button. “L.
5. When you finish checking all CDs or if there is no more remaining time for recording on the MD, recording starts automatically. “L. EDIT” appears on the display and recording starts. 3 3 3 MD CD 2 2 1 1 3 MD CD 2 2 \ 1 1 CD CD 1 2 3 4 5 6 7 8 9 10 11 1 12 2 3 4 5 6 7 8 9 10 11 12 Remaining time of Remaining time the current track of the MD ❏ If the remaining time of the MD becomes short, this unit will search a track fitting into the remaining time.
First Track Recording (1ST TRACK REC) The 1ST TRACK REC function allows you to record the first track of each loaded CD. You can, for example, make a directory of all your best CDs. 1ST TRACK REC 1. Prepare CDs, and a recordable MD into the MD1 loading slot. ❏ Always place a CD on the CD1 tray and insert the recordable MD into the MD1 loading slot. If not, this function does not work. 2. Press the 1ST TRACK REC button. The indicator next to the 1ST TRACK REC button lights up and the recording starts.
Using the MD Recorder (Editing) 7 (Stop) ‹/8 (Play/Pause) EDIT TITLE VOLUME STANDBY + TUNER AUX COMPACT DEMO COMPONENT MD SYSTEM MX-MD9R BASS REPEAT SOUND DISPLAY /CHARA REC PAUSE / TITLE EDIT LONG REC PLAY MODE TRIPLE REC 3 MD LISTENING 1ST TRACK REC SKIP DISPLAY/CHARA – CLOCK /TIMER MD MD CD REC 2 MD MULTI JOG dial 1 CANCEL SET MULTI JOG CANCEL SET One of the great features of the MD is its capacity to be edited freely.
DIVIDE Function This function allows you to divide one track into two separate tracks. It is useful, for example, when you want to add track marks at a certain point within a track or if you want to separate a recording. 3 MD / MD 2 MD 1 \ BASS TITLE 1. 2. Be sure that the MD you want to edit is in one of the MD loading slots. 3. Press the EDIT button repeatedly until “DIVIDE” appears on the display.
8. Rotate the MULTI JOG dial to precisely adjust the dividing point. You can shift the dividing point up to ±128. This range (±128) corresponds to approximately ±8 seconds from the original point (Position 0). Shifted position 3 3 MD CD MULTI JOG 2 2 1 1 MD 1 2 3 4 5 6 7 8 9 10 11 12 When you stop rotating the MULTI JOG dial, the unit repeats the newly selected dividing point. When you find the right position, go to step 9. BASS TITLE SOUND EDIT 9. Press the EDIT button.
JOIN Function This function allows you to join two adjacent tracks into one track. 3 MD / MD 2 MD \ 1 BASS TITLE SOUND EDIT 1. 2. Be sure that the MD you want to edit is in one of the MD loading slots. 3. Press the EDIT button repeatedly until “JOIN” appears on the display. ❏ Each time you press the button, the MD editing functions change as follow: Select the MD you want to edit. Press the corresponding MD button (1 to 3), then the 7 button.
MOVE Function This function allows you to move a track to the position you prefer on the same MD. It is useful to change the order of the tracks as you like. 3 MD / MD 2 MD 1 \ BASS TITLE 1. 2. Be sure that the MD you want to edit is in one of the MD loading slots. 3. Press the EDIT button repeatedly until “MOVE” appears on the display. ❏ Each time you press the button, the MD editing functions change as follow: SOUND EDIT Select the MD you want to edit.
8. SET Press the SET button. 3 3 MD CD 2 2 1 1 MD 1 2 3 4 5 6 7 8 9 10 11 12 13 14 15 16 ❏ If you have selected wrong track numbers, press the CANCEL button then select the correct track numbers again. ❏ If you cancel the editing, press the 0 button. 9. BASS TITLE Press the EDIT button. 3 SOUND EDIT 3 MD CD 2 2 1 1 MD 1 2 3 4 5 6 7 8 9 10 11 12 13 14 15 16 10. Press the 0 button to eject the MD.
ERASE Function This function allows you to erase an unwanted track. 3 MD / MD 2 MD \ 1 BASS TITLE SOUND EDIT 1. 2. Be sure that the MD you want to edit is in one of the MD loading slots. 3. Press the EDIT button repeatedly until “ERASE” appears on the display. ❏ Each time you press the button, the MD editing functions change as follow: Select the MD you want to edit. Press the corresponding MD button (1 to 3), then the 7 button.
ALL ERASE Function This function allows you to erase all the tracks on an MD. 3 MD / MD 2 MD \ 1 BASS TITLE SOUND EDIT 1. 2. Be sure that the MD you want to edit is in one of the MD loading slots. 3. Press the EDIT button repeatedly until “ALL ERASE” appears on the display. ❏ Each time you press the button, the MD editing functions change as follow: Select the MD you want to edit. Press the corresponding MD button (1 to 3), then the 7 button.
TITLE Function This function allows you to give a name containing up to 32 characters to each MD and to each track. Giving a Title to an MD 3 MD / MD 2 MD 1 \ BASS TITLE SOUND EDIT —————————————————————— After putting a name to a disc, it will appear when you play the disc. 1. 2. Be sure that the MD you want to edit is in one of the MD loading slots. 3. Press the TITLE button. Select the MD you want to edit. Press the corresponding MD button (1 to 3), then the 7 button.
Giving a Title to a Track —————————————————————— BASS TITLE SOUND EDIT 1. 2. Be sure that the MD you want to edit is in one of the MD loading slots. 3. 4. Press the TITLE button. Select the MD you want to edit. Press the corresponding MD button (1 to 3), then the 7 button. Rotate the MULTI JOG dial to select the track you want to title. Selected track number appears. 3 3 MD CD 2 2 1 1 MULTI JOG MD 1 5. 2 3 4 5 6 7 8 9 10 11 12 13 14 15 16 Follow steps 4 to 10 of page 49.
Using the Cassette Deck (Playing) Tape Direction indicators ¤ ‹ (Play) DOLBY B NR DOLBY B NR REC PAUSE 1¡ CD REC AUTO REVERSE 7 (Stop) AUTO TAPE SELECTOR DOLBY B NR PHONES 0 (Eject) RDS CONTROL PTY SEARCH EON ON/OFF 1 2 TA/NEWS/ INFO DISPLAY MODE SLEEP 3 FM MODE MUTE PTY SELECT 4 5 6 7 8 9 10 +10 TUNER AUX TAPE MODE SELECT TAPE CD MD TAPE DIRECTION TAPE DIRECTION 1/£/7/¡ REC PAUSE ACTIVE BASS EX.
One Touch Play ————————————————————————— ❏ Press the ¤ or ‹ button (or the £ button on the Remote Control). The power comes on and “TAPE” appears on the display. When a tape is already in the cassette holder, the tape is played in the direction of the button pressed. If there is no tape in the cassette holder, the CA-MD9R automatically turns on and “NO TAPE” appears on the display. Regular Play If the power is already on, you can use this basic procedure: 1. 2. Press down the 0 button. 3. 4.
Music Scan To find the beginning of a music track during play, use the Music Scan function. Music Scan searches for blank portions that usually separate selections, then plays the next selection. Finding the Beginning of the Current Selection ————————————— Press the 1 or ¡ button during play. ❏ Make sure that you press the 1 or ¡ button in the opposite direction to that in which the tape is playing. Searching stops at the beginning of the current selection, and the current selection starts automatically.
Using the Cassette Deck (Recording) DOLBY B NR ¤ ‹ (Play) DOLBY B NR REC PAUSE REC PAUSE CD REC CD REC AUTO REVERSE 7 (Stop) AUTO TAPE SELECTOR PHONES DOLBY B NR IMPORTANT: Before using the Remote Control for the tape operations, set the Remote Control to the tape operation mode by pressing the TAPE button.
Standard Recording You can record any sound source on the tape. ❏ You can also record the same source on the MD at the same time. (See page 34.) Using the unit only 1. 2. Insert a blank or erasable tape into cassette holder. 3. Prepare the source, for example, by tuning in a radio station, loading CDs or MDs, or turning on the external component. 4. Press the REC PAUSE button. The indicator above the button lights up and the CA-MD9R enters recording pause mode. 5.
CD Direct Recording Everything on the CD goes onto the tape in the order it is on the CD, or according to the order you have set in a program. You can even record in Random Play. In this case, the tracks of the 3 CDs are recorded randomly on the tape. CD REC 1. Prepare CDs. (See page 19.) Check that the CD Player is not playing a CD. 2. Insert a blank or erasable cassette in the cassette holder. ❏ When you want to record on both sides of a tape, press the button to turn on the auto reverse mode.
Using the Timers CLOCK/TIMER VOLUME STANDBY + TUNER AUX COMPACT DEMO COMPONENT MD SYSTEM MX-MD9R – CLOCK /TIMER BASS REPEAT SOUND DISPLAY /CHARA REC PAUSE / TITLE EDIT LONG REC PLAY MODE TRIPLE REC 3 MD LISTENING 1ST TRACK REC SKIP CD REC MD MD MULTI JOG dial 2 MD 1 CANCEL SET MULTI JOG CANCEL SET The timers let you control recording and listening functions automatically.
❏ Each time you press the button, the Clock/Timer setting mode changes as follows: DAILY on/off DAILY Timer On Time REC1 on/off REC1 Timer On Time REC2 on/off REC2 Timer On Time REC3 on/off REC3 Timer On Time Clock Setting Normal Display (current source) MULTI JOG SET These will not appear when you set the clock for the first time. 2. Rotate the MULTI JOG dial clockwise or counterclockwise to adjust the hour.
Setting the Daily Timer With this timer you can wake up to music from a CD, a MD, a tape, your favorite radio program, or the external source. ❏ You can set the Daily Timer whether the unit is on or off. ❏ If the clock has not been set, you cannot select the Daily Timer. Procedure for Setting the Daily Timer CLOCK /TIMER 1. Press the CLOCK/TIMER button repeatedly until the Daily Timer On-Time setting mode is selected. The DAILY indicator starts flashing on the display.
4. SET \ Select the source you want to listen to. 1. Rotate the MULTI JOG dial clockwise or counterclockwise until the source you want appears on the display. The selected source changes as follow: FM MULTI JOG AM CD TAPE MD AUX 2. Press the SET button to enter the source. SET 5. If you have selected CD or MD as the source in step 4, select a disc to play. 1. Rotate the MULTI JOG dial clockwise or counterclockwise to select a disc. 2. Press the SET button. 6. Set the Volume Level.
Before Turning Off the unit ❏ If you have selected “FM” or “AM” as the source, make sure that the station you want is selected. If not, select the station you want. ❏ If you have selected “CD” or “MD,” make sure that you have prepared a CD or an MD. ❏ If you have selected “TAPE” as the source: • Make sure that there is a tape in the cassette holder. • Check that the tape direction is correct. This is important especially when the auto reverse mode is off.
Setting the Recording Timer With the Recording Timer you can record a radio broadcast automatically whether or not you are home. ❏ You can set the Recording Timer whether the unit is on or off. ❏ You can set three different Recording Timer settings (REC 1 to 3). ❏ If the clock has not been set, you cannot select the Recording Timer. Procedure for Setting the Recording Timer 1. CLOCK /TIMER Press the CLOCK/TIMER button repeatedly until Recording timer on-time setting mode appears on the display.
SET 4. \ Select a preset station you want to record. 1. Rotate the MULTI JOG dial to select a preset station. 2. Press the SET button to enter the preset station. MULTI JOG 3 3 MD CD 2 2 1 1 STEREO TUNED 1 5. MULTI JOG 2 3 4 5 6 7 8 9 10 11 12 13 14 15 16 REC 1 Select the recording equipment. The recording equipment changes as follows: TAPE : To record on the tape. MD 1 : To record on the MD 1. MD 2 : To record on the MD 2. MD 3 : To record on the MD 3.
Setting the Sleep Timer By setting this timer, you can fall asleep to music. ❏ You can only set the Sleep Timer when the unit is on. SLEEP Procedure for Setting the Sleep Timer 1. While playing a source, press the SLEEP button on the Remote Control. “SLEEP” appears on the display. 2. Press the SLEEP button repeatedly to set the length of time you want the source to play before shutting off.
Timer Priority Since each timer can be set independently, you may wonder what happens if the settings overlap. Here are the priorities for each timer: ❏ If the Recording Timer is set to come on while another timer is operating, the other timer will shut off 10 seconds before the Recording Timer is set to turn on, and the Recording Timer will then take over. (Example 1) ❏ If two Recording Timers overlaps, the one with a late on-time has the priority.
Disc Lock Function When the Disc Lock function is on, the CD trays and MD loading slot cover cannot be opened even if you press the 0 button. This function can only be possible by using the buttons on the unit. Locking the Discs CD 3 CD 2 CD 1 1. 2. Press the ———————————————————————— button to turn off the unit (in standby mode). While pressing the 7 button, press the 0 button for CD1 tray. “LOCKED” appears on the display, and discs are “locked.
Care and Maintenance General Notes Cassette Tapes In general, you will have the best performance by keeping your tapes, CDs, MDs and the mechanism clean. • Store tapes, CDs and MDs in their cases, and keep them in cabinets or on shelves. • Keep the cassette holder, the CD trays, and the MD loading slot cover closed when not in use. • • Compact Discs • • • • • Remove the CD from the case by holding it at the edges while pressing the center hole lightly.
Troubleshooting • • If you are having a problem with your CA-MD9R, check this list for a possible solution before calling for service. If you cannot solve the problem from the hints given here, or the unit has been physically damaged, call a qualified person, such as your dealer, for service. Symptom Possible Cause Action No sound is heard. Connections are incorrect, or loose. Check all connections and make corrections. (See pages 4 – 5.) Unable to record on an MD. • • • • Unable to record.
MD Error Messages Error Message Signification Solution BLANK DISC The disc is blank. Change the disc with another if you want to enjoy playback. CANNOT JOIN You are trying to join tracks which cannot be joined. This is not a malfunction. (See MD limitations.) DISC ERROR There is a problem with this disc. Change the disc. There is no more space on the disc or there are over 254 tracks. Use another recordable MD or erase some tracks. A malfunction occurs during the recording.
Specifications Amplifier Section Output Power (IEC 268-3/DIN) 37 watts per channel, min. RMS, both channels driven, into 6 ohms at 1 kHz with no more than 0.9% total harmonic distortion. Input Sensitivity/Impedance (1 kHz) AUX 400 mV/47 kohms Speaker terminals Main speakers 6 – 16 ohms Tuner Section FM Tuner Tuning Range 87.5 – 108.0 MHz AM Tuner Tuning Range MW 522 – 1,629 kHz LW 144 – 288 kHz Timer Section Rec Timer Daily Timer Sleep Timer Clock Display 1 min. to 23 hours 59 min. 1 min.
Additional Informations Some Words about MDs There are two types of MDs: premastered (prerecorded) and recordable (blank). Premastered MDs Premastered MDs, which have been recorded at music studio, can be played back like regular CDs. On an MD of this type, data is recorded as the presence or absence of tiny pits. A laser beam focuses on the pits on the surface of the MD and reflects the detection back to the lens in the MD Recorder. The MD Recorder then decodes the signals and plays them back as music.
Serial Copy Management System (SCMS) The MD Recorder integrated to this unit uses the Serial Copy Management System which allows only first-generation digital copies to be made of premastered software (like CDs or prerecorded MDs). 1st Generation DIGITAL OK 2nd Generation NO DIGITAL ABCDEFG Sound Skip Guard Memory The biggest weakness of discs is their susceptibility to vibration. The “Sound Skip Guard Memory” has been developed to cope with this weakness.
VICTOR COMPANY OF JAPAN, LIMITED V J EN CA-MD9R.Cover[B]/F 4 98.2.