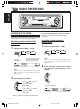
KS-FX621 ENGLISH CASSETTE RECEIVER !"#$ KS-FX621 ‰∑¬ KS-FX621 «‘∑¬ÿ‡§√◊ËÕ߇≈Ëπ‡∑ª 7 8 MO 9 10 11 RPT 12 RND MODE SCM For installation and connections, refer to the separate manual. !"#$%&'()*+,-.
ENGLISH How to reset your unit While holding SEL (select), press (standby/ on/attenuator) for more than 2 seconds. This will reset the built-in microcomputer. NOTE: Your preset adjustments — such as preset channels or sound adjustments — will also be erased. (standby/on/attenuator) SEL (select) How to use the MODE button If you press MODE, the unit goes into functions mode then the number buttons and ¢/4 buttons work as different function buttons. Ex.: When number button 2 works as MO (monaural) button.
Thank you for purchasing a JVC product. Please read all instructions carefully before operation, to ensure your complete understanding and to obtain the best possible performance from the unit. OTHER MAIN FUNCTIONS ............... 15 How to reset your unit .............................. How to use the MODE button .................. 2 2 LOCATION OF THE BUTTONS ........... 4 Control panel ............................................ 4 BASIC OPERATIONS ...................... 5 Turning on the power ..
ENGLISH LOCATION OF THE BUTTONS Control panel Display window f gh a s d jk l/ 1 2 z 3 4 7 q 1 2 3 4 5 6 7 8 9 p q w e r t y u i o ; 5 8 MO we x 9 r (standby/on/attenuator) button LOUD (loudness) button SEL (select) button Display window Cassette compartment 0 (eject) button CD-CH (CD changer) button FM/AM button TAPE 23 button ¢/4 buttons • Also function as SSM buttons when pressed together.
ENGLISH BASIC OPERATIONS 7 1 8 MO 9 11 RPT 12 RND 3 MODE SCM 2 Turning on the power 1 10 3 Adjust the volume. Turn on the power. To increase the volume. To decrease the volume. Note on One-Touch Operation: When you select a source in step 2 below, the power automatically comes on. You do not have to press this button to turn on the power. 2 Volume (or audio) level indicator (See page 16). Select the source. 4 Volume level appears. Adjust the sound as you want. (See pages 12 – 14.
ENGLISH RADIO OPERATIONS 7 8 MO 9 10 Listening to the radio You can use either automatic searching or manual searching to tune in to a particular station. Searching a station automatically: Auto search 1 11 RPT MODE SCM To stop searching before a station is received, press the same button you have pressed for searching. Searching a station manually: Manual search 1 Select the band (FM1 – 3, AM). Select the band (FM1 – 3, AM). FM1 Selected band appears.
Tune in to a station you want while “M” is flashing. Press ¢ to tune in to stations of higher frequencies. You can use one of the following two methods to store broadcasting stations in memory. • Automatic preset of FM stations: SSM (Strongstation Sequential Memory) • Manual preset of both FM and AM stations to tune Press 4 in to stations of lower frequencies. FM station automatic preset: SSM • If you release your finger from the button, the manual mode will automatically turn off after 5 seconds.
4 ENGLISH Manual preset You can preset up to 6 stations in each band (FM1, FM2, FM3 and AM) manually. Ex.: Storing an FM station of 88.3 MHz into the preset number 1 of the FM1 band 1 Select the band (FM1 – 3, AM) you want to store stations into (in this example, FM1). FM1 2 FM2 AM Repeat the above procedure to store other stations into other preset numbers. Notes: • A previously preset station is erased when a new station is stored in the same preset number.
ENGLISH TAPE OPERATIONS 7 8 MO 9 10 Listening to a cassette You can play back type I (normal) tapes. 1 Insert a cassette into the cassette compartment. The unit turns on and tape play starts automatically. When one side of the tape reaches its end during play, the other side of the tape automatically starts playing. (Auto Reverse) Note on One-Touch Operation: When a cassette is already in the cassette compartment, pressing TAPE 23 turns on the unit and tape play starts automatically.
ENGLISH Finding the beginning of a tune Other convenient tape functions Multi Music Scan allows you to automatically start playback from the beginning of a specified tune. You can specify up to 9 tunes ahead of or before the current tune. Skipping the blank portions on the tape During playback Specify how many tunes ahead of or before the current tune the one you want is located. You can skip blank portions between the tunes (Blank Skip).
Prohibiting cassette ejection You can play the current tune repeatedly (Repeat Play). You can prohibit cassette ejection and can “lock” a cassette in the cassette compartment. While holding TAPE 23, press 0 (eject) for more than 2 seconds. “NO EJECT” flashes on the display for about 5 seconds, and the cassette is “locked.” MODE 1 Press MODE to enter the functions mode while playing a tune you want to hear over again on a cassette. This unit enters the functions mode.
ENGLISH SOUND ADJUSTMENTS Adjusting the sound Indication To do: Adjust the bass. –06 (min.) | +06 (max.) TRE Adjust the treble. –06 (min.) | +06 (max.) FAD* Adjust the front and rear speaker balance. R06 (Rear only) | F06 (Front only) BAL Adjust the left and right speaker balance. L06 (Left only) | R06 (Right only) VOL Adjust the volume. 00 (min.) | 50 (max.) You can adjust the sound characteristics to your preference. 1 Select the item you want to adjust.
The human ear is less sensitive to low and high frequencies at low volumes. The loudness function can boost these frequencies to produce a well-balanced sound at low volume levels. Selecting preset sound modes You can select a preset sound adjustment suitable to the music genre. Each time you press SCM, the sound mode changes as follows. ENGLISH Turning on/off the loudness function SCM SCM OFF Each time you press LOUD, the loudness function turns on and off alternately.
ENGLISH Storing your own sound adjustments You can adjust the sound modes (BEAT, SOFT, POP) to your preference and store your own adjustments in memory. • There is a time limit in doing the following procedure. If the setting is canceled before you finish, start from step 1 again. 1 Call up the sound mode you want to adjust. 4 5 To turn on or off the loudness function. • See page 13 for details. 6 • See page 13 for details. SCM Repeat steps 2 and 3 to adjust the other items.
OTHER MAIN FUNCTIONS 2 Adjust the minute. 1 Press and hold SEL (select) for more than 2 seconds. “CLOCK H”, “CLOCK M”, “LEVEL”, “B. SKIP”, or “EXT IN*” appears on the display. * Displayed only when one of the following sources is selected — FM, AM and Tape. 2 ENGLISH Setting the clock 4 Finish the setting. Set the hour. 1 Select “CLOCK H (hour)” if not shown on the display. CLOCK H CLOCK M EXT IN B.
ENGLISH Selecting the level display —LEVEL 3 You can select the level display according to your preference. When shipped from the factory, “AUDIO2” is selected. • AUDIO1: • AUDIO2: • OFF: 1 Level meter illuminates. Alternates level meter and illumination display. Erases the audio level indicator. Select the desired mode—“AUDIO 1,” “AUDIO 2” or “OFF.” AUDIO1 OFF 4 Finish the setting. Press and hold SEL (select) for more than 2 seconds. “CLOCK H”, “CLOCK M”, “LEVEL”, “B.
You can connect the external component to the CD changer jack on the rear using the Line Input Adaptor KS-U57 (not supplied). To use the external component as the playback source through this unit, you need to select which component – CD changer or external component – to use. When shipped from the factory, CD changer is selected as the external component. 3 Select the desired mode—“LINE IN” or “CHANGER.” LINE IN 4 ENGLISH Selecting the external component to use—EXT IN CHANGER Finish the setting.
ENGLISH Detaching the control panel You can detach the control panel when leaving the car. When detaching or attaching the control panel, be careful not to damage the connectors on the back of the control panel and on the panel holder. Attaching the control panel 1 Insert the left side of the control panel into the groove on the panel holder. Detaching the control panel Before detaching the control panel, be sure to turn off the power. 1 Unlock the control panel.
MP3 ENGLISH CD CHANGER OPERATIONS 7 8 MO 9 10 11 RPT 12 RND MODE SCM We recommend that you use the JVC MP3compatible CD changer with your unit. Playing discs By using this CD changer, you can play back your original CD-R (Recordable) and CD-RWs (Rewritable) recorded either in audio CD format or in MP3 format. • You can also connect other CH-X series CD changers (except CH-X99 and CH-X100). However, they are not compatible with MP3 discs, so you cannot play back MP3 discs.
ENGLISH MP3 To fast-forward or reverse the track/file • When the current disc is a CD: Playback starts from the first track of the current disc. Press and hold ¢, during play, to fast-forward the track/file. Press and hold 4 , during play, to reverse the track/file. To go to the next or previous tracks/files Disc number Press ¢ briefly during play, to skip ahead to the beginning of the next track/file.
Selecting the playback modes To play back tracks/files at random (Disc Random/Magazine Random Play) MODE To play back tracks/files repeatedly (Track Repeat/ Disc Repeat Play) MODE mode during play. 1 Press MODE to enter the functions mode during play. 11 RPT 12 RND 1 Press MODE to enter the functions ENGLISH MP3 2 Press RPT (repeat), while still in the functions mode, so that “TRK RPT” or “DISC RPT” appears on the display.
ENGLISH EXTERNAL COMPONENT OPERATIONS 7 8 MO 9 10 11 RPT Playing an external component 2 You can connect the external component to the CD changer jack on the rear using the Line Input Adaptor KS-U57 (not supplied). 3 Preparations: • For connecting the Line Input Adaptor KS-U57 and the external component, refer to the Installation/ Connection Manual (separate volume). • Before operating the external component using the following procedure, select the external input correctly.
USING THE REMOTE CONTROLLER 2. Place the battery. Slide the battery into the holder with the + side facing upwards so that the battery is fixed in the holder. Lithium coin battery (product number: CR2025) ENGLISH Before using the remote controller: • Aim the remote controller directly at the remote sensor on the main unit. Make sure there is no obstacle in between. 3. Return the battery holder. Insert again the battery holder pushing it until you hear a clicking sound.
ENGLISH Location of the buttons RM-RK31 5 6 1 2 7 3 • Functions as the PRESET button while listening to the radio. Each time you press the button, the preset station number increases, and the selected station is tuned in. • While playing an MP3 disc on an MP3compatible CD changer; – Skips to the previous disc if pressed briefly. – Skips to the previous folder if pressed and held. NOTE: While playing a CD on a CD changer, this always skips to the previous disc.
What appears to be trouble is not always serious. Check the following points before calling a service center. Symptoms Causes Remedies • A cassette tape cannot be inserted. You have tried to insert a cassette Insert the cassette with the in the wrong way. exposed tape facing to the right. • A cassette tape cannot be ejected. Cassette ejection is prohibited. • Cassette tapes become hot. This is not a malfunction. • Tape sound is at very low level and sound quality is degraded.
ENGLISH When connecting to the CD changer: Symptoms Causes • “NO CD” appears on the display. Remedies No CD is in the magazine. Insert CDs into the magazine. CDs are inserted incorrectly. Insert them correctly. The current disc does not contain Insert a disc that contains any MP3 file. MP3 files. • “RESET 8” appears on the display. This unit is not connected to a CD changer correctly. Connect this unit and the CD changer correctly and press the reset button of the CD changer.
This unit requires very little attention, but you will be able to extend the life of the unit if you follow the instructions below. To clean the head CAUTION: • Do not play the cassettes with peeling labels; otherwise, they can damage the unit. • Tighten tapes to remove slack since loose tape may become entangled with the mechanism. • Do not leave a cassette in the cassette compartment after use, as the tape may become slack.
ENGLISH SPECIFICATIONS AUDIO AMPLIFIER SECTION CASSETTE DECK SECTION Maximum Power Output: Front: 45 W per channel Rear: 45 W per channel Continuous Power Output (RMS): Front: 17 W per channel into 4 Ω, 40 Hz to 20 000 Hz at no more than 0.8% total harmonic distortion. Rear: 17 W per channel into 4 Ω, 40 Hz to 20 000 Hz at no more than 0.8% total harmonic distortion.
KS-FX621 Installation/Connection Manual !"#$ °“√µ‘¥µ—ßÈ /§Ÿ¡Ë Õ◊ °“√µ‘¥µ—ßÈ /ﻛﺘﻴّﺐ ﺗﻌﻠﻴﻤﺎت اﻟﺘﺮﻛﻴﺐ اﻟﺘﻮﺻﻴﻞ GET0113-002A V J C 1202KKSFLEJEIN EN, CH, TH, AR [U] ENGLISH ﻋﺮﺑﻲ ‰∑¬ • ﻟـﻘـﺪﺻـﻤـﻢ ﻫـﺬا اﳉ ـﻬــﺎز ﻟ ـﻴ ـﻌ ـﻤــﻞ ﺑــﻮاﺳـﻄــﺔ ﺗ ـﻴــﺎر اﻧـ ـﻈـ ـﻤـ ــﺔ، ﻓ ــﻮﻟ ــﺖ١٢ ،DC ﻛـ ـﻬ ــﺮﺑ ــﺎﺋـ ــﻲ ﻣـ ـﺒ ــﺎﺷ ــﺮ .ﻛﻬﺮﺑﺎﺋﻴﺔ ﺗﺄرﻳﺾ ﺳﺎﻟﺐ • This unit is designed to operate on 12 V DC, NEGATIVE ground electrical systems.
• When installing the unit without using the sleeve • !"#$%&'($ • ‡¡◊ËÕµ‘¥µ—Èß™ÿ¥ª√–°Õ∫‚¥¬‰¡Ë „™Èª≈Õ°ÀÿÈ¡ • When using the optional stay • !"# • ‡¡◊ËÕ„™Èµ—«¬÷¥·∫∫‡≈◊Õ°‰¥È “¡“√∂‡≈◊Õ°‡ª‘¥§È“߉«È ‰¥È • ﻋﻨﺪﻣﺎ ﺗﺮﻛﺐ اﳉﻬﺎز ﺑﺪون اﺳﺘﺨﺪام اﻟﻬﻴﻜﻞ اﻟﻮاﻗﻲ • ﻋﻨﺪ اﺳﺘﺨﺪام ﻣﺴﻨﺪ اﺿﺎﻓﻲ ﻟﻠﺘﺜﺒﻴﺖ Fire wall ºπ—ß°—π‰ø ﺟﺪار اﳊﻤﺎﻳﺔ ﻣﻦ اﳊﺮﻳﻖ µ—«Õ¬Ë“߇™Ëπ „π√∂¬πµÏ‚µ‚¬µÈ“ „ÀÈ∂Õ¥«‘∑¬ÿµ‘¥√∂¬πµÏÕÕ°°ËÕπ·≈–µ‘¥µ—Èß™ÿ¥ª√–°Õ∫π’ȇ¢È“‰ª·∑π .
ENGLISH A Typical Connections / !"#$ / °“√‡™◊ËÕ¡µËÕ·∫∫ª°µ‘ / اﻟﺘﻮﺻﻴﻼت اﻟﻨﻤﻮذﺟﻴﺔ Before connecting: Check the wiring in the ! !"#$%&'()*+%,& vehicle carefully not to fail in connecting this unit. !"#$%&'()*+,*-./+0 Incorrect connection may cause a serious damage to this unit. The leads of the power cord !"#$%&'()*+, and those of the connector from the car body may 1 !"#$%&'()*+,-.%/0 be different in color. !"#$%&'()*+,-.
Connecting the leads / !"# / µËÕ “¬µ–°—Ë« / ﺗﻮﺻﻴﻞ اﻻﺳﻼك Twist the core wires when connecting. !"#$%&'( CAUTION / / ¢ÈÕ§«√√–«—ß / ﺗﻨﺒﻴﻪ: • To prevent short-circuit, cover the terminals of the UNUSED leads with insulating tape. • !"#$%&'()*+,-.'!/0123 ∫‘¥‡ Èπ≈«¥·°π‡æ◊ËÕ‡™◊ËÕ¡µËÕ .اﺑﺮم اﻻﺳﻼك ﺑﺸﻜﻞ ﺻﺤﻴﺢ ﻗﺒﻞ اﻟﺘﻮﺻﻴﻞ • °“√ªÈÕß°—π°“√≈—¥«ß®√ ®–µÈÕßæ—π¢—È« “¬µ–°—Ë«∑’Ë ‰¡Ë „™È·≈È«¥È«¬‡∑ªæ—𠓬‰ø (Insulating tape) Solder the core wires to connect them securely.