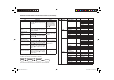
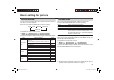
COLOUR TELEVISION EQUALIZER • CINEMA SURROUND • COMPONENT INPUT Contents AV-29BS26 AV-29BX16 AV-29MS26 AV-29MX16 AV-29MX56 AV-29MX76 AV-29SS26 AV-29SX56 AV-29SX76 AV-25MS26 AV-25MX16 AV-25MX56 AV-25MX76 AV-21BS26 AV-21BX16 AV-21BX16B AV-21MS26 AV-21MX16 AV-21MX56 AV-21MX76 Knowing your TV’s features .......................................................3 Remote control buttons and basic functions ..............................4 TV buttons and functions..................................................
Thank you for buying this JVC colour television. To make sure you understand how to use your new TV, please read this manual thoroughly before you begin. WARNING: TO PREVENT FIRE OR SHOCK HAZARD, DO NOT EXPOSE THIS APPLIANCE TO RAIN OR MOISTURE. CAUTION: TO ENSURE PERSONAL SAFETY, OBSERVE THE FOLLOWING RULES REGARDING THE USE OF THIS TV. 1 Operate only from the power source indicated on the rear of the TV. 2 Avoid damaging the power cord and mains plug. When unplugging the TV, grasp the mains plug.
Knowing your TV’s features Main features DVD MENU Just connect DVD player to the television. The television will detect DVD signal and display picture on the screen automatically and you can adjust pictures and sound while you are watching DVD as your desire. When disconnect DVD player, the television will display the previous channel. MaxxBass enhances bass sound that cannot be reproduced by normal speakers to be heard by our ears.
Remote control buttons and basic functions No. 1 2 3 4 5 6 Press POWER MENU/OK 5/∞/2/3 CHANNEL -/+ VOLUME -/+ TV/VIDEO EXIT 7 MUTING 8 DISPLAY /BACK To Turn on or off the TV from standby mode. Display menu and confirm selected function. Select and adjust menu function. Select the desired channel number. Adjust the volume level. Select TV or video terminal input. On the other hand, you can use this button to EXIT from the menu. Turn off the volume. Press this button again to resume the volume.
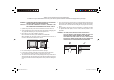
Remote control buttons and basic functions (continued) How to operate menus and menus locations To Display the MENU Note To exit the MENU, Press the MENU/OK button 2. PICTURE MENU is displayed on press the DISPLAY/ BACK button 8 or first press. choose EXIT menu or TV/VIDEO/EXIT button 6. Choose a Top menu Press 2/3 buttons 3 to choose a menu title when the cursor is pointing at MENU. Choose a 2nd menu Press 5/∞ buttons 3 to choose a Press ∞ button 3 2nd menu title.
TV buttons and functions The illustrations shown below is for AV-21BS26 and AV-29SS26 only, which are used for explanation purpose. Your TV may not look exactly the same as illustrated. No. Button/terminal 1 L (main power) 2 POWER lamp Front of the TV AV-29SS26 POWER 3 4 5 6 7 8 9 ! TV/VIDEO R MENU/OK IN(VIDEO-3) L/MONO CHANNEL V VOLUME AV-21BS26 POWER V L / MONO IN (VIDEO-3) Rear of the TV AV-29SS26 6)$%/ ).054 #/-0/.%.4 6)$%/ /54054 ).
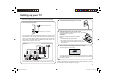
Setting up your TV CAUTION • Turn off the equipment including the TV before connecting. 1 2 Connecting the main plug to the AC outlet. 3 Inserting batteries into the remote control. Insert two batteries by following the + and - polarities and inserting the - end first. CAUTION: Follow the cautions printed on the batteries. Notes: • Use AA/R6/UM-3 dry cell batteries. • If the remote control does not work properly, fit new batteries. The supplied batteries are for testing, not regular use.
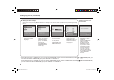
Setting up your TV (continued) 5 Making the initial settings Set up your TV by pressing MENU/OK button or waiting for 15 seconds, then operate the TV by following the steps below: LANGUAGE ENGLISH êìëëäàâ TEXT LANGUAGE GROUP–2 GROUP–3 FRANÇAIS MENU : OK DISPLAY : BACK TV/VIDEO : EXIT AUTO PROGRAM GROUP–1 22% GROUP–4 MENU : OK DISPLAY : BACK TV/VIDEO : EXIT MENU : OK • Press 5/∞ button to select your desired Teletext language group*. For details, see page 13.
Basic setting for picture PICTURE MODE COLOUR SYSTEM You can select the appropriate colour system when the picture is not clear or no colour appears. Press the COLOUR SYSTEM button to select a setting. AUTO PAL SECAM NTSC3.58 NTSC4.43 You can choose the desired picture setting with one-touch. Press the PICTURE MODE button to select a setting.
Basic setting for picture (continued) PICTURE SETTING WHITE BALANCE You can adjust the desired picture setting when selecting USER in PICTURE MODE. 1 Select USER in PICTURE MODE under PICTURE menu. MENU USER PICTURE menu PICTURE MODE MENU 2 Select PICTURE SETTING in PICTURE menu, then adjust the setting. MENU CONTRAST BRIGHT SHARP COLOUR TINT You can change the white balance of the picture to better match the type of video being viewed.
Advanced setting for picture AI ECO SENSOR (ECO)/ECO MODE You can adjust TV screen contrast according to the brightness of your room. Press the ECO button to select the desired mode. OFF MODE-1/ECO-1 MODE-2/ECO-2 DISPLAY (for AI ECO SENSOR only) Cancel the function. Mild contrast (recommended.) Even contrast. Display the graphic of the function. To operate this function with a menu: MENU 2 Press the 5/∞ buttons until the picture becomes level. Then press the MENU/OK button.
Original features for picture PIP TELETEXT You can display a sub picture within the main picture on the screen. Press the PIP operation buttons to display and change the sub picture setting. PIP Display the sub picture. To cancel, press the PIP button again. Notes: • You can hear the sound from the main picture only. • When main picture and sub picture are the same TV channel. Press SUB-P -/+ ( Input ) Press Main picture will be changed TV channel follow as sub picture.
Original features for picture (continued) TEXT LANGUAGE You can set the Teletext language group that corresponds to the programmes. Select TEXT LANGUAGE in the INSTALL menu, then choose the desired language group.
Basic setting for sound SOUND MODE SOUND SYSTEM You can select an appropriate sound system when abnormal sound occurs even when the picture appears normally. Press the SOUND SYSTEM button to select a setting. B/G I D/K M Asia, Middle East Europe Oceania Africa MENU SOUND menu SOUND MODE USER This function is not available in video mode. For the sound system in each country or region, see the table below: Area You can choose the desired sound setting.
Advanced setting for sound CINEMA SURROUND EQUALIZER You can enjoy an enhanced sound for wider audience. Press the CINEMA SURROUND button to select a setting. Cancel the function. Listen to sound with wider audience effect. This function is not available when SOUND MODE is set to SOUND TURBO. To operate this function with a menu: ■ MENU ) EQUALIZER Select stereo sound. Select monaural sound. Select bilingual I (sub I). Select bilingual II (sub II).
DVD Menu AUTO SIGNAL DETECT ON When the DVD input signal is detected, the input mode will be changed to VIDEO-2 automatically. And when the DVD input signal is not detected, the input mode will be changed to RF previous input mode. Select AUTO SIGNAL DETECT in DVD MENU under FEATURES menu then choose ON or OFF (Factory setting is ON). FEATURES menu MENU AUTO SIGNAL DETECT When you set DVD THEATER STATUS to ON, PICTURE MODE, WHITE BALANCE and AI ECO SENSOR / ECO MODE functions are not available.
Customized setting 2 Choose the PR (channel) by pressing the 2/3 button. VNR You can reduce the picture noise. Select VNR in PICTURE menu, then choose a setting of VNR function. MENU PICTURE menu OFF AUTO MIN MAX VNR VNR is turned off. Effect of VNR is automatically controlled. Effect of VNR becomes minimum level. Effect of VNR becomes maximum level. External input, AV position and any un-preset channel cannot be chosen for PR.
Customized setting (continued) VIDEO-2 SETTING DISPLAY You can set the VIDEO-2 SETTING according to the video signal output from external devices connected to the VIDEO-2 terminal. Select VIDEO-2 SETTING in INSTALL menu, then choose a setting (Factory setting is COMPONENT). MENU VIDEO COMPONENT INSTALL menu You can display the programme number, video terminal number and PR list on the screen.
TV channel presetting To register the TV channels automatically (AUTO PROGRAM) 2 Choose EDIT/MANUAL, then press the MENU/OK button. EDIT menu appears. EDIT You can register the TV channels into the TV’s channel list automatically. PR AV 1 2 3 4 5 6 1 Display the INSTALL menu. MENU INSTALL menu 2 Choose AUTO PROGRAM, then press the MENU/OK button. To edit the channel list If a channel is not registered To exit the menu Proceed to Step 3 of “To edit the channel list (PR LIST)” on page 20.
TV channel presetting (continued) To edit the channel list (PR LIST) (MOVE and DELETE in the EDIT menu) You can edit the TV channel list as you like. Note: After this operation, other channel’s PR numbers will be changed. 1 Display the INSTALL menu. MENU INSTALL menu 2 Choose EDIT/MANUAL, then press the MENU/OK button. EDIT menu appears. You can add in new channels in the TV channel list as you like. You need to find the “CH/CC” number for the TV channel.
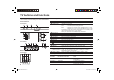
TV channel presetting (continued) CH/CC number When you want to use the INSERT function on page 20, find the CH/CC number corresponding to the channel number of the TV channel from this table. Channel No. US CCIR OIRT AUSTRALIA Country United States, Philippines, etc.. Middle East, Southeast Asia, etc.. Eastern Europe, Russia, Vietnam, etc.. Australia, etc..
Additional preparation The illustrations shown in this section are for AV-21BS26 and AV29SS26 only, which are used for explanation purpose. Your TV may not look exactly the same as illustrated. Connecting to rear component/video input terminals and output terminals Rear of TV Before connecting • Read the manuals provided with the devices for the proper connection. • Turn off all the devices including the TV. • Note that connecting cables are not supplied.
Troubleshooting If a problem occurs when you are using the TV, check the below troubleshooting guide before calling for repair. • No picture, no sound • Deactivate the BLUE BACK function if it is turned on. • Choose the appropriate sound system. Refer to “SOUND SYSTEM” on page 14. • Snowy picture • Colour patches appear • This may due to the magnetized device such as a at the corner of the speaker near to your TV. Keep the device apart from screen your TV.
Specifications TV RF systems B, G, I, D, K, M Colour systems PAL, SECAM, NTSC 3.58 MHz, NTSC 4.43 MHz Receiving channels VHF low channel (VL), VHF high channel (VH), UHF channel (U) Receives cable channels in mid band, super band and hyper band.
COLOUR TELEVISION EQUALIZER • CINEMA SURROUND • COMPONENT INPUT Contents AV-2988SE AV-2986ME AV-2986SE AV-2956BE AV-2956ME AV-2586ME AV-2186ME AV-2156BE AV-2156ME Knowing your TV’s features .......................................................3 Remote control buttons and basic functions ..............................4 TV buttons and functions............................................................6 Setting up your TV ......................................................................
Thank you for buying this JVC colour television. To make sure you understand how to use your new TV, please read this manual thoroughly before you begin. WARNING: TO PREVENT FIRE OR SHOCK HAZARD, DO NOT EXPOSE THIS APPLIANCE TO RAIN OR MOISTURE. CAUTION: TO ENSURE PERSONAL SAFETY, OBSERVE THE FOLLOWING RULES REGARDING THE USE OF THIS TV. 1 Operate only from the power source indicated on the rear of the TV. 2 Avoid damaging the power cord and mains plug. When unplugging the TV, grasp the mains plug.
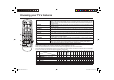
Knowing your TV’s features Main features DVD MENU MaxxBass E X IT PIP (Picture In Picture) TELETEXT FAVORITE CH (Channel) A2/NICAM ( STEREO / I.II ) AI ECO SENSOR ECO MODE AI VOLUME TINT AV-2986SE O O O 3 MaxxBass PICTURE TILT AI ECO SENSOR O O O O O O O O O 3 ECO MODE — — — 1,2 — — AV-2156ME AV-2986ME PIP control buttons (Green label) No. AV-2156BE Function AV-2988SE Model No.
Remote control buttons and basic functions No. 1 2 3 4 5 6 Press POWER MENU/OK 5/∞/2/3 CHANNEL -/+ VOLUME -/+ TV/VIDEO EXIT 7 MUTING 8 DISPLAY /BACK To Turn on or off the TV from standby mode. Display menu and confirm selected function. Select and adjust menu function. Select the desired channel number. Adjust the volume level. Select TV or video terminal input. On the other hand, you can use this button to EXIT from the menu. Turn off the volume. Press this button again to resume the volume.
Remote control buttons and basic functions (continued) How to operate menus and menus locations To Display the MENU Note To exit the MENU, Press the MENU/OK button 2. PICTURE MENU is displayed on press the DISPLAY/ BACK button 8 or first press. choose EXIT menu or TV/VIDEO/EXIT button 6. Choose a Top menu Press 2/3 buttons 3 to choose a menu title when the cursor is pointing at MENU. Choose a 2nd menu Press 5/∞ buttons 3 to choose a Press ∞ button 3 2nd menu title.
TV buttons and functions The illustrations shown below is for AV-2156BE and AV-2988SE only, which are used for explanation purpose. Your TV may not look exactly the same as illustrated. No. Button/terminal 1 L (main power) 2 POWER lamp Front of the TV AV-2988SE POWER 3 4 5 6 7 8 9 ! TV/VIDEO R MENU/OK IN(VIDEO-3) L/MONO CHANNEL V VOLUME AV-2156BE POWER V L / MONO IN (VIDEO-3) Rear of the TV AV-2988SE 6)$%/ ).054 #/-0/.%.4 6)$%/ /54054 ).
Setting up your TV CAUTION • Turn off the equipment including the TV before connecting. 1 2 Connecting the main plug to the AC outlet. 3 Inserting batteries into the remote control. Insert two batteries by following the + and - polarities and inserting the - end first. CAUTION: Follow the cautions printed on the batteries. Notes: • Use AA/R6/UM-3 dry cell batteries. • If the remote control does not work properly, fit new batteries. The supplied batteries are for testing, not regular use.
Setting up your TV (continued) 5 Making the initial settings Set up your TV by pressing MENU/OK button or waiting for 15 seconds, then operate the TV by following the steps below: LANGUAGE ENGLISH êìëëäàâ ìKPA∫HCúKA MENU : OK DISPLAY : BACK TV/VIDEO : EXIT TEXT LANGUAGE AUTO PROGRAM GROUP–1 GROUP–2 GROUP–3 MENU : OK DISPLAY : BACK TV/VIDEO : EXIT 22% MENU : OK • Press 5/∞ button to select your desired Teletext language group. For details, see page 13.
Basic setting for picture PICTURE MODE COLOUR SYSTEM You can select the appropriate colour system when the picture is not clear or no colour appears. Press the COLOUR SYSTEM button to select a setting. AUTO PAL SECAM NTSC3.58 NTSC4.43 You can choose the desired picture setting with one-touch. Press the PICTURE MODE button to select a setting.
Basic setting for picture (continued) PICTURE SETTING WHITE BALANCE You can adjust the desired picture setting when selecting USER in PICTURE MODE. 1 Select USER in PICTURE MODE under PICTURE menu. MENU USER PICTURE menu PICTURE MODE MENU 2 Select PICTURE SETTING in PICTURE menu, then adjust the setting. MENU CONTRAST BRIGHT SHARP COLOUR TINT You can change the white balance of the picture to better match the type of video being viewed.
Advanced setting for picture AI ECO SENSOR (ECO)/ECO MODE You can adjust TV screen contrast according to the brightness of your room. Press the ECO button to select the desired mode. OFF MODE-1/ECO-1 MODE-2/ECO-2 DISPLAY (for AI ECO SENSOR only) Cancel the function. Mild contrast (recommended.) Even contrast. Display the graphic of the function. To operate this function with a menu: MENU 2 Press the 5/∞ buttons until the picture becomes level. Then press the MENU/OK button.
Original features for picture PIP TELETEXT You can display a sub picture within the main picture on the screen. Press the PIP operation buttons to display and change the sub picture setting. PIP Display the sub picture. To cancel, press the PIP button again. Notes: • You can hear the sound from the main picture only. • When main picture and sub picture are the same TV channel. Press SUB-P -/+ ( Input ) Press Main picture will be changed TV channel follow as sub picture.
Original features for picture (continued) TEXT LANGUAGE You can set the Teletext language group that corresponds to the programmes. Select TEXT LANGUAGE in the INSTALL menu, then choose the desired language group.
Basic setting for sound SOUND MODE SOUND SYSTEM You can select an appropriate sound system when abnormal sound occurs even when the picture appears normally. Press the SOUND SYSTEM button to select a setting. B/G I D/K M Asia, Middle East Europe Oceania Africa MENU SOUND menu SOUND MODE USER This function is not available in video mode. For the sound system in each country or region, see the table below: Area You can choose the desired sound setting.
Advanced setting for sound CINEMA SURROUND EQUALIZER You can enjoy an enhanced sound for wider audience. Press the CINEMA SURROUND button to select a setting. Cancel the function. Listen to sound with wider audience effect. This function is not available when SOUND MODE is set to SOUND TURBO. To operate this function with a menu: ■ MENU ) EQUALIZER Select stereo sound. Select monaural sound. Select bilingual I (sub I). Select bilingual II (sub II).
DVD Menu AUTO SIGNAL DETECT ON When the DVD input signal is detected, the input mode will be changed to VIDEO-2 automatically. And when the DVD input signal is not detected, the input mode will be changed to RF previous input mode. Select AUTO SIGNAL DETECT in DVD MENU under FEATURES menu then choose ON or OFF (Factory setting is ON). FEATURES menu MENU AUTO SIGNAL DETECT When you set DVD THEATER STATUS to ON, PICTURE MODE, WHITE BALANCE and AI ECO SENSOR / ECO MODE functions are not available.
Customized setting 2 Choose the PR (channel) by pressing the 2/3 button. VNR You can reduce the picture noise. Select VNR in PICTURE menu, then choose a setting of VNR function. MENU PICTURE menu OFF AUTO MIN MAX VNR VNR is turned off. Effect of VNR is automatically controlled. Effect of VNR becomes minimum level. Effect of VNR becomes maximum level. External input, AV position and any un-preset channel cannot be chosen for PR.
Customized setting (continued) VIDEO-2 SETTING DISPLAY You can set the VIDEO-2 SETTING according to the video signal output from external devices connected to the VIDEO-2 terminal. Select VIDEO-2 SETTING in INSTALL menu, then choose a setting (Factory setting is COMPONENT). MENU VIDEO COMPONENT INSTALL menu You can display the programme number, video terminal number and PR list on the screen.
TV channel presetting To register the TV channels automatically (AUTO PROGRAM) 2 Choose EDIT/MANUAL, then press the MENU/OK button. EDIT menu appears. EDIT You can register the TV channels into the TV’s channel list automatically. PR AV 1 2 3 4 5 6 1 Display the INSTALL menu. MENU INSTALL menu 2 Choose AUTO PROGRAM, then press the MENU/OK button. To edit the channel list If a channel is not registered To exit the menu Proceed to Step 3 of “To edit the channel list (PR LIST)” on page 20.
TV channel presetting (continued) To edit the channel list (PR LIST) (MOVE and DELETE in the EDIT menu) You can edit the TV channel list as you like. Note: After this operation, other channel’s PR numbers will be changed. 1 Display the INSTALL menu. MENU INSTALL menu 2 Choose EDIT/MANUAL, then press the MENU/OK button. EDIT menu appears. You can add in new channels in the TV channel list as you like. You need to find the “CH/CC” number for the TV channel.
TV channel presetting (continued) CH/CC number When you want to use the INSERT function on page 20, find the CH/CC number corresponding to the channel number of the TV channel from this table. Channel No. US CCIR OIRT AUSTRALIA Country United States, Philippines, etc.. Middle East, Southeast Asia, etc.. Eastern Europe, Russia, Vietnam, etc.. Australia, etc..
Additional preparation The illustrations shown in this section are for AV-2156BE and AV2988SE, which are used for explanation purpose. Your TV may not look exactly the same as illustrated. Connecting to rear component/video input terminals and output terminals Rear of TV Before connecting • Read the manuals provided with the devices for the proper connection. • Turn off all the devices including the TV. • Note that connecting cables are not supplied.
Troubleshooting If a problem occurs when you are using the TV, check the below troubleshooting guide before calling for repair. • No picture, no sound • Deactivate the BLUE BACK function if it is turned on. • Choose the appropriate sound system. Refer to “SOUND SYSTEM” on page 14. • Snowy picture • Colour patches appear • This may due to the magnetized device such as a at the corner of the speaker near to your TV. Keep the device apart from screen your TV.
Specifications TV RF systems B, G, I, D, K, M Colour systems PAL, SECAM, NTSC 3.58 MHz, NTSC 4.43 MHz Receiving channels VHF low channel (VL), VHF high channel (VH), UHF channel (U) Receives cable channels in mid band, super band and hyper band.