GR-D290_270PAL.book Page 1 Monday, October 25, 2004 7:15 PM Dear Customer, Thank you for purchasing this digital video camera. Before use, please read the safety information and precautions contained in the pages 3 – 4 and 10 to ensure safe use of this product. ENGLISH DIGITAL VIDEO CAMERA GR-D290 GR-D270 Please visit our Homepage on the World Wide Web for Digital Video Camera: 6 GETTING STARTED VIDEO RECORDING & PLAYBACK 18 DIGITAL STILL CAMERA (D.S.C.
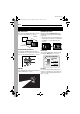
MasterPage: Left GR-D290_270PAL.book Page 2 Monday, October 25, 2004 7:15 PM 2 EN Major Features of this Camcorder Wipe/Fader Effects Backlight Compensation You can use the Wipe/Fader Effects to make pro-style scene transitions. (墌 pg. 41) Simply pressing the BACK LIGHT button brightens the image darkened by backlight. (墌 pg. 40) ● You can also select a spot metering area so that more precise exposure compensation is available. (墌 pg.
MasterPage: Start_Right GR-D290_270PAL.book Page 3 Monday, October 25, 2004 7:15 PM EN SAFETY PRECAUTIONS IMPORTANT (for owners in the U.K.) Connection to the mains supply in the United Kingdom. DO NOT cut off the mains plug from this equipment. If the plug fitted is not suitable for the power points in your home or the cable is too short to reach a power point, then obtain an appropriate safety approved extension lead or consult your dealer.
MasterPage: Left GR-D290_270PAL.book Page 4 Monday, October 25, 2004 7:15 PM 4 EN When the equipment is installed in a cabinet or on a shelf, make sure that it has sufficient space on all sides to allow for ventilation (10 cm or more on both sides, on top and at the rear). Do not block the ventilation holes. (If the ventilation holes are blocked by a newspaper, or cloth etc. the heat may not be able to get out.) No naked flame sources, such as lighted candles, should be placed on the apparatus.
MasterPage: TOC_Heading0_Right GR-D290_270PAL.book Page 5 Monday, October 25, 2004 7:15 PM CONTENTS GETTING STARTED 6 ADVANCED FEATURES Index ................................................................. 6 Provided Accessories ..................................... 11 Power.............................................................. 13 Operation Mode .............................................. 14 Date/Time Settings ......................................... 15 Grip Adjustment ....................
MasterPage: Left GR-D290_270PAL.
MasterPage: Start_Right GR-D290_270PAL.book Page 7 Monday, October 25, 2004 7:15 PM EN Controls Other Parts A Stop Button [8] (墌 pg. 20) V Monitor Latch (墌 pg. 18) W LCD Monitor (墌 pg. 18, 19) X Viewfinder (墌 pg. 16) Y Card Cover [MEMORY CARD] (墌 pg. 17) Z Battery Pack Mount (墌 pg. 13) a Shoulder Strap Eyelet (墌 pg. 11) b Speaker (墌 pg. 20) c Grip Strap (墌 pg. 15) d Lens e LED Light (墌 pg. 37) Index Button [INDEX] (墌 pg. 27) Backlight Compensation Button [BACK LIGHT] (墌 pg.
MasterPage: Left GR-D290_270PAL_04Start.fm Page 8 Tuesday, October 26, 2004 3:56 PM 8 EN GETTING STARTED LCD Monitor/Viewfinder Indications During D.S.C. Recording Only 34 5 During Video Recording Only 123 4 5 6 6 1024 INTERVAL 15 1h40m REC e 7 7 8 9 a Image Size: 1024 (1024 x 768) or 640 0 B Interval Shooting Icon (墌 pg. 25) C Shooting Icon (墌 pg. 25) SOUND 12 B I T 15:55 w q a Selected Wipe/Fader Effect Indicator (墌 pg. 41) B Tape Running Indicator (墌 pg.
MasterPage: Start_Right GR-D290_270PAL_04Start.fm Page 9 Tuesday, October 26, 2004 3:56 PM GETTING STARTED (墌 pg. 25, 38) SLOW: (Appears when using Live Slow.) (墌 pg. 37) K Brightness Control Indicator (LCD monitor/ Viewfinder) (墌 pg. 16) L Battery Remaining Power Indicator (墌 pg. 49) M Date/Time (墌 pg. 15) N Manual Focus Adjustment Indicator (墌 pg. 38) 2 3 4 5 During D.S.C. Playback 1 q L R BR I GHT 6 4 9 3 a Operation Mode Indicator (墌 pg. 27) B Folder/File Number (墌 pg.
MasterPage: Left GR-D290_270PAL_04Start.fm Page 10 Tuesday, October 26, 2004 3:56 PM 10 EN GETTING STARTED Before Using This Camcorder Make sure you only use cassettes with the Mini DV mark . Make sure you only use memory cards with the mark or . This camcorder is designed exclusively for the digital video cassette, SD Memory Card and MultiMediaCard. Only cassettes marked “ ” and memory cards marked “ ” or “ ” can be used with this unit.
MasterPage: Start_Right GR-D290_270PAL_04Start.fm Page 11 Tuesday, October 26, 2004 3:56 PM GETTING STARTED Provided Accessories OR EN 11 NOTES: ● In order to maintain optimum performance of the camcorder, provided cables may be equipped with one or more core filter. If a cable has only one core filter, the end that is closest to the filter should be connected to the camcorder. ● Make sure to use the provided cables for connections. Do not use any other cables.
MasterPage: Left GR-D290_270PAL_04Start.fm Page 12 Tuesday, October 26, 2004 9:46 AM GETTING STARTED 12 EN How To Attach The Core Filter Attach the core filters to the cables. The core filter reduces interference. 1 Release the stoppers on both ends of the core filter. Stopper 2 Run the cable through the core filter, leaving approx. 3 cm of cable between the cable plug and the core filter. Wind the cable once around the outside of the core filter as shown in the illustration.
MasterPage: Start_Right GR-D290_270PAL.book Page 13 Monday, October 25, 2004 7:15 PM GETTING STARTED EN 13 To detach the battery pack Charging The Battery Pack M A OFF PLAY Slide the battery pack upward while pressing PUSH BATT. to detach it. Battery pack Approx. 1 hr. 30 min. BN-VF714U Approx. 2 hr. 40 min. BN-VF733U Approx. 5 hr. 40 min. Power switch * Provided POWER/CHARGE lamp NOTES: POWER/ CHARGE Battery pack mount PUSH BATT. Battery pack Arrow mark To DC connector Open the cover.
MasterPage: Left GR-D290_270PAL.book Page 14 Monday, October 25, 2004 7:15 PM 14 EN GETTING STARTED NOTES: ● Recording time is reduced significantly under the following conditions: • Zoom or Record-Standby mode is engaged repeatedly. • The LCD monitor is used repeatedly. • The playback mode is engaged repeatedly. • The LED Light is used. ● Before extended use, it is recommended that you prepare enough battery packs to cover 3 times the planned shooting time.
MasterPage: Start_Right GR-D290_270PAL.book Page 15 Monday, October 25, 2004 7:15 PM GETTING STARTED MEMORY: ● Allows you to record in a memory card or access data stored in a memory card. ● When the Power Switch is set to “A” or “M”, the currently selected image size appears. Power-Linked Operation When the Power Switch is set to “A” or “M”, you can also turn on/off the camcorder by opening/ closing the LCD monitor or pulling out/pushing in the viewfinder.
MasterPage: Left GR-D290_270PAL.book Page 16 Monday, October 25, 2004 7:15 PM 16 EN GETTING STARTED 7 Press MENU to clear the brightness control indicator from the display. Viewfinder Adjustment 1 Set the Power Switch to “A” or “M” while pressing down the Lock Button located on the switch. 2 Make sure the LCD monitor is closed and locked. Pull out the viewfinder fully and adjust it manually for best viewability.
MasterPage: Start_Right GR-D290_270PAL.book Page 17 Monday, October 25, 2004 7:15 PM GETTING STARTED 3 Close the cassette holder cover firmly until it locks into place. To protect valuable recordings Slide the erase protection tab on the back of the tape in the direction of “SAVE”. This prevents the tape from being recorded over. To record on this tape, slide the tab back to “REC” before loading it.
MasterPage: Left VIDEO RECORDING & PLAYBACK GR-D290_270PAL_05Video.fm Page 18 Thursday, October 28, 2004 8:34 AM 18 EN VIDEO RECORDING Basic Recording NOTE: Before continuing, perform the procedures listed below: ● Power (墌 pg. 13) ● Loading A Cassette (墌 pg. 16) VIDEO/MEMORY ● When a blank portion is left between recorded scenes on the tape, the time code is interrupted and errors may occur when editing the tape. To avoid this, refer to “Recording From The Middle Of A Tape” (墌 pg. 20).
MasterPage: Start_Right GR-D290_270PAL.book Page 19 Monday, October 25, 2004 7:15 PM VIDEO RECORDING Zooming Journalistic Shooting Produces the zoom in/out effect, or an instantaneous change in image magnification. In some situations, different shooting angles may provide more dramatic results. Hold the camcorder in the desired position and tilt the LCD monitor in the most convenient direction. It can rotate 270° (90° downward, 180° upward). Zoom Out Slide the Power Zoom Lever towards “W”.
MasterPage: Advan_Heading0_Right GR-D290_270PAL.book Page 20 Monday, October 25, 2004 7:15 PM 20 EN NOTES: ● The time code cannot be reset. ● During fast-forwarding and rewinding, the time code indication does not move smoothly. ● The time code is displayed only when “TIME CODE” is set to “ON”. (墌 pg. 34) Quick Review Enables to check the end of the last recording. 1) Press during the Recording-Standby mode.
MasterPage: Start_Right GR-D290_270PAL.book Page 21 Monday, October 25, 2004 7:15 PM VIDEO PLAYBACK Allows high-speed search in either direction during video playback. 1) During playback, press 5 for forward search, or 3 for reverse search. 2) To resume normal playback, press 4/9. ● During playback, press and hold 5 or 3. The search continues as long as you hold the button. Once you release the button, normal playback resumes. ● A slight mosaic effect appears on the display during Shuttle Search.
MasterPage: Left GR-D290_270PAL.book Page 22 Monday, October 25, 2004 7:15 PM 22 EN VIDEO PLAYBACK 1 Make sure all units are turned off. 2 Connect the camcorder to a TV or VCR as Connections To A TV Or VCR shown in the illustration. If using a VCR, go to step 3. If not, go to step 4. 3 Connect the VCR output to the TV input, referring to your VCR’s instruction manual. To AV connector Open the cover. mark S/AV cable (provided) 4 Turn on the camcorder, the VCR and the TV.
MasterPage: Start_Right GR-D290_270PAL.book Page 23 Monday, October 25, 2004 7:15 PM VIDEO PLAYBACK Playback Using The Remote Control The Full-Function Remote Control Unit can operate this camcorder from a distance as well as the basic operations (Playback, Stop, Pause, Fast-Forward and Rewind) of your VCR. It also makes additional playback functions possible. (墌 pg. 24) Installing The Battery 1 1 3 Lock tab holder, and be sure to have the “+” mark visible.
MasterPage: Left GR-D290_270PAL.book Page 24 Monday, October 25, 2004 7:15 PM VIDEO PLAYBACK 24 EN . Zoom (T/W) PAUSE or (Up) SLOW (YI) SLOW (IU) PLAY (Right) (Left) STOP or (Down) SHIFT 2) At the point you want to zoom in, press the Zoom Button (T). ● To zoom out, press the Zoom Button (W). 3) You can move the image on the screen around to find a particular portion of the picture. While holding down SHIFT, press (Left), (Right), (Up) and (Down).
DIGITAL STILL CAMERA (D.S.C.) RECORDING & PLAYBACK MasterPage: Start_Right GR-D290_270PAL.book Page 25 Monday, October 25, 2004 7:15 PM D.S.C. RECORDING You can use your camcorder as a Digital Still Camera for taking snapshots. Still images are stored in the memory card. 25 ● The number increases or decreases depending on the Picture Quality/Image Size, etc.
MasterPage: Advan_Heading0_Right GR-D290_270PAL.book Page 26 Monday, October 25, 2004 7:15 PM 26 EN To cancel Interval Shooting mode Set “INT.SHOT” to “OFF” in step 1. NOTES: ● To distinguish between still images taken in Interval Shooting mode and other still images, it is recommended that you reset the file names before shooting. (墌 pg. 28) ● Interval Shooting will stop if the battery runs out of power or the Memory Card becomes full.
MasterPage: Start_Right GR-D290_270PAL.book Page 27 Monday, October 25, 2004 7:15 PM D.S.C. PLAYBACK Auto Playback Of Images EN 27 Removing On-Screen Display You can run through all the images stored in memory card automatically. 1 Perform steps 1 – 3 in “Normal Playback Of 1 Perform steps 1 – 3 in “Normal Playback Of 2 Press MENU. The Menu Screen appears. 3 Press + or – to select “DISPLAY”, and press Images” (墌 pg. 26). 2 Press 4/9 to start Auto Playback. Images” (墌 pg. 26). MENU.
MasterPage: Heading0_Left GR-D290_270PAL.book Page 28 Monday, October 25, 2004 7:15 PM 28 EN ADDITIONAL FEATURES FOR D.S.C. Dubbing Still Images Recorded On A Tape To A Memory Card Still images can be dubbed from a tape to a memory card. 1 Load a cassette. (墌 pg. 16) 2 Load a memory card. (墌 pg. 17) 3 Set “SNAP/SLOW” to the desired mode. (except “SLOW”, 墌 pg. 31, 32) Protecting Files The Protect mode helps prevent the accidental erasure of files.
MasterPage: Start_Right GR-D290_270PAL.book Page 29 Monday, October 25, 2004 7:15 PM ADDITIONAL FEATURES FOR D.S.C. EN 29 To Remove Protection To delete all files stored in the memory card Before doing the following, perform steps 1 – 3 in “Protecting Files”. MENU. The DELETE screen appears. To remove protection from the currently displayed file 4 Press + or – to select “CURRENT”, and press MENU. The PROTECT screen appears.
MasterPage: Left GR-D290_270PAL.book Page 30 Monday, October 25, 2004 7:15 PM 30 EN ADDITIONAL FEATURES FOR D.S.C. 5 Press + or – to select “EXECUTE”, and press MENU. The normal playback screen appears. ● To cancel selection, select “RETURN”. DPOF To Reset The Number Of Prints 1 Perform steps 1 – 3 in “To Print All Still AL L 1 ? EXECUTE RETURN Images (One Print For Each)”. 2 Press + or – to select “RESET”, and press MENU. The DPOF screen appears.
ADVANCED FEATURES MasterPage: Start_Right GR-D290_270PAL.book Page 31 Monday, October 25, 2004 7:15 PM MENUS FOR DETAILED ADJUSTMENT This camcorder is equipped with an easy-to-use, on-screen menu system that simplifies many of the more detailed camcorder settings. (墌 pg. 32 – 36) Lock Button + M A Power Switch VIDEO/MEMORY 1) Press + or – to select the desired parameter. Selected menu icon blinks.
MasterPage: Left GR-D290_270PAL_07Advanced.fm Page 32 Tuesday, October 26, 2004 7:17 PM 32 EN MENUS FOR DETAILED ADJUSTMENT Recording Menus CAMERA The “m CAMERA” settings are effective when the Power Switch is set to both “A” and “M”. However, the menu settings can be changed only when the Power Switch is set to “M”. [ ] = Factory-preset REC MODE [SP]: To record in the SP (Standard Play) mode LP: Long Play—more economical, providing 1.5 times the recording time.
MasterPage: Start_Right GR-D290_270PAL.book Page 33 Monday, October 25, 2004 7:15 PM MENUS FOR DETAILED ADJUSTMENT TELE MACRO [OFF]: Disables the function. ON: When the distance to the subject is less than 1 m, set “TELE MACRO” to “ON”. You can shoot a subject as large as possible at a distance of approx. 60 cm. NOTE: Depending on the zoom position, the lens may go out of focus.
MasterPage: Left GR-D290_270PAL.book Page 34 Monday, October 25, 2004 7:15 PM 34 EN MENUS FOR DETAILED ADJUSTMENT PRIORITY [LCD]: The image is displayed on the LCD monitor when the viewfinder is pulled out while the LCD monitor is opened. FINDER: The image is displayed in the viewfinder when the viewfinder is pulled out while the LCD monitor is opened. LANGUAGE [ENGLISH] / FRANÇAIS / DEUTSCH / ESPAÑOL / ITALIANO / NEDERLANDS / PORTUGUÊS / РУССКИЙ The language setting can be changed. (墌 pg.
MasterPage: Start_Right GR-D290_270PAL.book Page 35 Monday, October 25, 2004 7:15 PM MENUS FOR DETAILED ADJUSTMENT INT.SHOT [OFF]: Disables the function. ON: Enables interval shooting. (墌 pg. 25) INT.TIME 15SEC / 30SEC / [1MIN] / 2MIN / 5MIN / 10MIN / 30MIN / 60MIN Allows you to select the shooting interval for interval shooting. (墌 pg.
MasterPage: Left GR-D290_270PAL.book Page 36 Monday, October 25, 2004 7:15 PM 36 EN MENUS FOR DETAILED ADJUSTMENT BLANK SRCH 墌 pg. 21, “Blank Search” S/AV INPUT [OFF]: Disables audio/video signal input from the S/AV connector. (墌 pg. 43) A/V IN: Enables audio/video signal input from the S/AV connector. (墌 pg. 43) S IN: Enables audio/S-video signal input from the S/AV connector. (墌 pg. 43) SYSTEM Each setting is linked with “s SYSTEM”, which appears when the Power Switch is set to “M”. (墌 pg.
MasterPage: Start_Right GR-D290_270PAL.book Page 37 Monday, October 25, 2004 7:15 PM FEATURES FOR RECORDING LED Light EN 5-Second Recording LED Light can be used to brighten the subject in the dark place during video recording or D.S.C. shooting. Record a vacation or an important event in 5second clips to keep the action moving. This function is available only for video recording. 1 Press LIGHT repeatedly to ● The “5S” indicator appears. 1 Set “5S” to “5S”. (墌 pg.
MasterPage: Left GR-D290_270PAL.book Page 38 Monday, October 25, 2004 7:15 PM 38 EN FEATURES FOR RECORDING Motor Drive Mode Night-Scope Makes dark subjects or areas even brighter than they would be under good natural lighting. Although the recorded image is not grainy, it may look as if it is strobing due to the slow shutter speed. ” appears. ● The shutter speed is automatically adjusted to provide up to 30 times sensitivity.
MasterPage: Start_Right GR-D290_270PAL.book Page 39 Monday, October 25, 2004 7:15 PM FEATURES FOR RECORDING Exposure Control ● When shooting using reverse lighting or when the background is too bright. ● When shooting on a reflective natural background such as at the beach or when skiing. ● When the background is overly dark or the subject is bright. 1 Set the Power Switch to “M”. 2 Set “p” to “MANUAL”. (墌 pg. 31) ● The exposure control indicator appears. 3 To brighten the image, press +.
MasterPage: Left GR-D290_270PAL_07Advanced.fm Page 40 Thursday, October 28, 2004 8:30 AM 40 EN FEATURES FOR RECORDING NOTES: Backlight Compensation Backlight compensation brightens the subject quickly. With simple operation, backlight compensation feature brightens the dark subject portion by increasing the exposure. 1 Set the Power Switch to “M”. 2 Press BACK LIGHT so that the Backlight Compensation indicator “ ” appears.
MasterPage: Start_Right GR-D290_270PAL.book Page 41 Monday, October 25, 2004 7:15 PM FEATURES FOR RECORDING Manual White Balance Adjustment Adjust the white balance manually when shooting under various types of lighting. “u W.BALANCE” menu. (墌 pg. 31) indication blinks slowly. 3 Hold a sheet of plain white paper in front of the subject. Adjust zoom or position yourself so that the white paper fills the screen. 4 Press and hold MENU until WIPE/FADER OFF: Disables the function.
MasterPage: Left GR-D290_270PAL.book Page 42 Monday, October 25, 2004 7:15 PM 42 EN FEATURES FOR RECORDING Program AE With Special Effects 1 Set the Power Switch to “M”. 2 Set “r” to the desired mode. (墌 pg. 31) ● The PROGRAM AE menu disappears and the selected effect is activated. ● The selected effect indicator appears. To deactivate the selected effect Select “OFF” in step 2. The effect indicator disappears.
MasterPage: Start_Right GR-D290_270PAL.book Page 43 Monday, October 25, 2004 7:15 PM EDITING EN 43 4 To stop dubbing, stop recording on the VCR, Dubbing To Or From A VCR then stop playback on the camcorder. NOTES: Open the cover. mark S/AV cable (provided) 1 2 3 4 Cable Adapter* “Y/C”/“CVBS” Video Out Select Switch To VCR TV VCR ● It is recommended to use the AC Adapter as the power supply instead of the battery pack. (墌 pg.
MasterPage: Left GR-D290_270PAL.book Page 44 Monday, October 25, 2004 7:15 PM 44 EN EDITING Dubbing To Or From A Video Unit Equipped With A DV Connector (Digital Dubbing) It is also possible to copy recorded scenes from the camcorder onto another video unit equipped with a DV connector. Since a digital signal is sent, there is little if any image or sound deterioration. NOTES: ● It is recommended to use the AC Adapter as the power supply instead of the battery pack. (墌 pg.
MasterPage: Start_Right GR-D290_270PAL.book Page 45 Monday, October 25, 2004 7:15 PM EDITING EN 45 Connection To A Personal Computer [A] Using USB cable [A] Using USB cable [B] Using DV cable OR It is possible to do the following things: ● Transfer still images stored on a memory card to a PC. ● Transfer still/moving images recorded on a tape to a PC.
MasterPage: Left GR-D290_270PAL.book Page 46 Monday, October 25, 2004 7:15 PM 46 EN EDITING Audio Dubbing The audio track can be customised only when recorded in the 12-BIT and SP modes. (墌 pg. 32) ● Use the provided remote control. Microphone Connector Speaker REW INSERT START/ STOP PAUSE PLAY STOP A.DUB ● While an optional microphone is connected, the built-in microphone is disabled.
REFERENCES MasterPage: Start_Right GR-D290_270PAL.book Page 47 Monday, October 25, 2004 7:15 PM TROUBLESHOOTING The camcorder is a microcomputer-controlled device. External noise and interference (from a TV, a radio, etc.) might prevent it from functioning properly. In such cases, first disconnect its power supply unit (battery pack, AC Adapter, etc.) and wait a few minutes; and then re-connect it and proceed as usual from the beginning. Power No power is supplied.
MasterPage: Left GR-D290_270PAL.book Page 48 Monday, October 25, 2004 7:15 PM 48 EN TROUBLESHOOTING The colour of Snapshot looks strange. “SET DATE/TIME!” appears. ● The light source or the subject does not include white. Or there are various different light sources behind the subject. HFind a white subject and compose your shot so that it also appears in the frame. (墌 pg. 25, 38) ● The date/time is not set. HSet the date/time. (墌 pg.
MasterPage: Start_Right GR-D290_270PAL.book Page 49 Monday, October 25, 2004 7:15 PM TROUBLESHOOTING HPush in the memory card a few more times. (墌 pg. 17) 49 Warning Indications Displays the battery remaining power. Picture does not appear on the LCD monitor. Remaining power level ● The viewfinder is pulled out and “PRIORITY” is set to “FINDER”. HPush the viewfinder back in or set “PRIORITY” to “LCD”. (墌 pg. 18, 31, 34) ● The LCD monitor’s brightness setting is too dark.
MasterPage: Left GR-D290_270PAL.book Page 50 Monday, October 25, 2004 7:15 PM 50 EN TROUBLESHOOTING LENS CAP Appears for 5 seconds after power is turned on if the lens cap is attached or when it is dark. A. DUB ERROR! Appears if Audio Dubbing is attempted on a blank portion of a tape. (墌 pg. 46) A. DUB ERROR! ● Appears if Audio Dubbing is attempted on a tape recorded in the LP mode. (墌 pg.
MasterPage: Advan_Heading0_Right GR-D290_270PAL.book Page 51 Monday, October 25, 2004 7:15 PM USER MAINTENANCE UNIT IN SAFEGUARD MODE EJECT AND REINSERT TAPE The error indications (03 or 04) show what type of malfunction has occurred. When an error indication appears, the camcorder turns off automatically. Eject the cassette once and reinsert it, then check if the indication clears. When it does, you can resume using the camcorder. If the indication remains, consult your nearest JVC dealer.
MasterPage: Heading0_Left GR-D290_270PAL.book Page 52 Monday, October 25, 2004 7:15 PM 52 EN CAUTIONS ● Charging times are for a fully discharged battery pack. Battery Packs The supplied battery pack is a lithium-ion battery. Before using the supplied battery pack or an optional battery pack, be sure to read the following cautions: ● To avoid hazards Terminals ... do not burn. ... do not short-circuit the terminals. When transporting, make sure the provided battery cap is attached to the battery.
MasterPage: Start_Right GR-D290_270PAL.book Page 53 Monday, October 25, 2004 7:15 PM CAUTIONS LCD Monitor ● To prevent damage to the LCD monitor, DO NOT ... push it strongly or apply any shocks. ... place the camcorder with the LCD monitor on the bottom. ● To prolong service life ... avoid rubbing it with coarse cloth. ● Be aware of the following phenomena for LCD monitor use. These are not malfunctions ...
MasterPage: Left GR-D290_270PAL.book Page 54 Monday, October 25, 2004 7:15 PM 54 EN CAUTIONS How To Handle A CD-ROM ● Take care not to soil or scratch the mirror surface (opposite to the printed surface). Do not write anything or put a sticker on either the front or back surface. If the CD-ROM gets dirty, gently wipe it with a soft cloth outward from the centre hole. ● Do not use conventional disc cleaners or cleaning spray. ● Do not bend the CD-ROM or touch its mirror surface.
MasterPage: Start_Right GR-D290_270PAL_09Spec.fm Page 55 Thursday, October 28, 2004 8:34 AM SPECIFICATIONS For General Power supply DC 11 V (Using AC Adapter) DC 7.2 V (Using battery pack) Power consumption Approx. 3.2 W (3.5 W*) (LCD monitor off, viewfinder on) Approx. 4.2 W (4.5 W*) (LCD monitor on, viewfinder off) * Using LED Light Dimensions (W x H x D) 56 mm x 94 mm x 112 mm (with the LCD monitor closed and the viewfinder pushed back in, without ring of the lens) Weight Approx.
MasterPage: BackCover Back cover GR-D290_270PAL_10IX.fm Page 56 Monday, October 25, 2004 8:06 PM TERMS EN A N AC Adapter .................................................... 14 Animation ....................................................... 33 Audio Dubbing ............................................... 46 Night-Scope ................................................... 38 B Backlight Compensation ................................ 40 Battery Pack .......................................