GR-DF428AH.book Page 1 Friday, March 18, 2005 5:07 PM Dear Customer, Thank you for purchasing this digital video camera. Before use, please read the safety information and precautions contained in the pages 3 – 4 and 10 to ensure safe use of this product. ENGLISH DIGITAL VIDEO CAMERA GR-DF428 6 GETTING STARTED VIDEO RECORDING & PLAYBACK 19 ADVANCED FEATURES 27 REFERENCES 45 TERMS 53 Please visit our Homepage on the World Wide Web for Digital Video Camera: http://www.jvc.co.
MasterPage: Left GR-DF428AH.book Page 2 Friday, March 18, 2005 5:07 PM 2 EN Major Features of this Camcorder Wipe/Fader Effects Backlight Compensation You can use the Wipe/Fader Effects to make pro-style scene transitions. (墌 pg. 38) Simply pressing the BACK LIGHT button brightens the image darkened by backlight. (墌 pg. 36) ● You can also select a spot metering area so that more precise exposure compensation is available. (墌 pg.
MasterPage: Start_Right GR-DF428AH.book Page 3 Friday, March 18, 2005 5:07 PM EN SAFETY PRECAUTIONS WARNING: TO PREVENT FIRE OR SHOCK HAZARD, DO NOT EXPOSE THIS UNIT TO RAIN OR MOISTURE. CAUTIONS: ● If you notice smoke or a peculiar smell coming from the camcorder or AC Adapter, shut it down and unplug it immediately. Continue using the camcorder or AC Adapter under these conditions could lead to fire or electric shock. Contact your JVC dealer. Do not attempt to repair the malfunction yourself.
MasterPage: Left GR-DF428AH.book Page 4 Friday, March 18, 2005 5:07 PM 4 EN Do not point the lens or the viewfinder directly into the sun. This can cause eye injuries, as well as lead to the malfunctioning of internal circuitry. There is also a risk of fire or electric shock. CAUTION! The following notes concern possible physical damage to the camcorder and to the user. When carrying, be sure to always securely attach and use the provided strap.
MasterPage: TOC_Heading0_Right GR-DF428AH.book Page 5 Friday, March 18, 2005 5:07 PM CONTENTS GETTING STARTED 6 ADVANCED FEATURES Index ................................................................. 6 Provided Accessories ..................................... 11 Power.............................................................. 13 Operation Mode .............................................. 15 Language Settings.......................................... 16 Date/Time Settings ........................
MasterPage: Left GR-DF428AH.
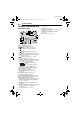
MasterPage: Start_Right GR-DF428AH_04Start.fm Page 7 Tuesday, March 22, 2005 1:56 PM GETTING STARTED EN 7 Controls Connectors A Menu Button [MENU] (墌 pg. 27) The connectors are located beneath the covers. O S-Video Output Connector [S] (墌 pg. 23, 40) P Microphone connector [MIC] (墌 pg. 43) Q Digital Video (i.Link) Connector [DV OUT] (墌 pg. 41, 42) i.Link: i.Link refers to the IEEE1394-1995 industry specification and extensions thereof. The logo is used for products compliant with the i.Link standard.
MasterPage: Left GR-DF428AH.book Page 8 Friday, March 18, 2005 5:07 PM 8 EN GETTING STARTED LCD Monitor/Viewfinder Indications During Video Recording 9 1 2 0 q we r t Viewfinder) (墌 pg. 17) V Manual Focus Adjustment Indicator (墌 pg. 35) T REC 3 4 5 6 7 BRIGHT SOUND 12 B I T 8 15:55 y u i d 50m o 1 0 . 11 . 05 10 : 00 s a (墌 pg. 47) T Date/Time (墌 pg. 16) U Brightness Control Indicator (LCD monitor/ 1h40m 15 x W S Battery Remaining Power Indicator p a Operation Mode (墌 pg.
MasterPage: Start_Right GR-DF428AH.book Page 9 Friday, March 18, 2005 5:07 PM GETTING STARTED EN 9 During Video Playback 12 L /MI X BLANK SEARCH PUSH "STOP" BUTTON TO CANCEL 20 : 21 : 2 1 0 11 . 05 10: 0 0 a Sound Mode Indicator (墌 pg. 31) B Blank Search Indicator (墌 pg. 22) C Tape Speed (墌 pg.
MasterPage: Left GR-DF428AH.book Page 10 Friday, March 18, 2005 5:07 PM 10 EN GETTING STARTED Before Using This Camcorder Make sure you only use cassettes with the Mini DV mark . This camcorder is designed exclusively for the digital video cassette. Only cassettes marked “ ” can be used with this unit. Remember that this camcorder is not compatible with other digital video formats. Remember that this camcorder is intended for private consumer use only.
MasterPage: Start_Right GR-DF428AH_04Start.fm Page 11 Tuesday, March 22, 2005 1:57 PM GETTING STARTED Provided Accessories EN 11 NOTES: ● In order to maintain optimum performance of the camcorder, provided cables may be equipped with one or more core filter. If a cable has only one core filter, the end that is closest to the filter should be connected to the camcorder. ● Make sure to use the provided cables for connections. Do not use any other cables.
MasterPage: Left GR-DF428AH.book Page 12 Friday, March 18, 2005 5:07 PM 12 EN GETTING STARTED How To Attach The Shoulder Strap How To Use The Audio Extension Cable Follow the illustration. When using an optional external microphone, connect to the provided Audio extension cable (with a core filter attached), then connect the Audio extension cable to the camcorder. The core filter reduces interference. (墌 pg. 13) 1 Thread the strap through the eyelet.
MasterPage: Start_Right GR-DF428AH.book Page 13 Friday, March 18, 2005 5:07 PM GETTING STARTED How To Attach The Core Filter EN 13 Power Attach the core filters to the cables. The core filter reduces interference. 1 Release the stoppers on both ends of the core filter. This camcorder’s 2-way power supply system lets you choose the most appropriate source of power. Do not use provided power supply units with other equipment. Charging The Battery Pack BATT.
MasterPage: Left GR-DF428AH.book Page 14 Friday, March 18, 2005 5:07 PM 14 EN GETTING STARTED To detach the battery pack Slide the battery pack to the left while pressing BATT. RELEASE to detach it. Battery pack Charging time BN-VF707U* Approx. 1 hr. 30 min. BN-VF714U Approx. 2 hr. 40 min. BN-VF733U Approx. 5 hr. 40 min. * Provided NOTES: ● This product includes patented and other proprietary technology and will operate only with JVC Data Battery.
MasterPage: Start_Right GR-DF428AH.book Page 15 Friday, March 18, 2005 5:07 PM Using AC Power EN 15 NOTE: M (Manual Recording): Allows you to set various recording functions using the Menus. (墌 pg. 27) If you want more creative capabilities than Full Auto Recording, try this mode. The provided AC Adapter features automatic voltage selection in the AC range from 110 V to 240 V. OFF: Allows you to switch off the camcorder. Perform steps 4 – 5 in “Charging The Battery Pack”.
MasterPage: Left GR-DF428AH.book Page 16 Friday, March 18, 2005 5:07 PM 16 EN GETTING STARTED Language Settings Grip Adjustment The language on the display can be changed. (墌 pg. 27, 30, 32) 1 Set the Power Switch to “M” while pressing down the Lock Button located on the switch. 2 Open the LCD monitor fully. (墌 pg. 19) 3 Press MENU. The Menu Screen appears. CAMERA D I S PLAY 4 Press or to select BRIGHT “n”, and press SET. The CAMERA DISPLAY Menu appears.
MasterPage: Start_Right GR-DF428AH_04Start.fm Page 17 Tuesday, March 22, 2005 1:57 PM GETTING STARTED The camcorder needs to be powered up to load or eject a cassette. MENU to “M” or “PLAY” while pressing down the Lock Button located on the switch.
MasterPage: Left GR-DF428AH.book Page 18 Friday, March 18, 2005 5:07 PM 18 EN NOTES: GETTING STARTED ● If you wait a few seconds and the cassette holder does not open, close the cassette holder cover and try again. If the cassette holder still does not open, turn the camcorder off then on again. ● If the tape does not load properly, open the cassette holder cover fully and remove the cassette. A few minutes later, insert it again.
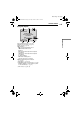
VIDEO RECORDING & PLAYBACK MasterPage: Video_Heading0_Right GR-DF428AH.book Page 19 Friday, March 18, 2005 5:07 PM VIDEO RECORDING EN 19 NOTES: NOTE: Before continuing, perform the procedures listed below: ● Power (墌 pg. 13) ● Loading A Cassette (墌 pg. 17) Power Zoom Lever Power Switch Recording Start/Stop Button ● If the Record-Standby mode continues for 5 minutes, the camcorder’s power shuts off automatically.
MasterPage: Left GR-DF428AH.book Page 20 Friday, March 18, 2005 5:07 PM 20 EN VIDEO RECORDING NOTES: ● The image will not appear simultaneously on the LCD monitor and the viewfinder. When the viewfinder is pulled out while the LCD monitor is opened, you can select which one to use. Set “PRIORITY” to the desired mode in SYSTEM Menu. (墌 pg. 27, 30) ● Coloured bright spots may appear all over the LCD monitor or the viewfinder. However, this is not a malfunction. (墌 pg.
MasterPage: Start_Right GR-DF428AH.book Page 21 Friday, March 18, 2005 5:07 PM EN 21 Time Code Quick Review During recording, a time code is recorded on the tape. This code is to confirm the location of the recorded scene on the tape during playback. Enables to check the end of the last recording. 1) Press Q.REVIEW during the RecordingStandby mode. 2) Tape is rewound for about several seconds and played back automatically, then pauses in the Recording-Standby mode for the next shot.
MasterPage: Left GR-DF428AH.book Page 22 Friday, March 18, 2005 5:07 PM 22 EN VIDEO PLAYBACK Shuttle Search Normal Playback MENU Power Switch 4/9/ VOL. +/– Lock Button Allows high-speed search in either direction during video playback. 1) During playback, press 5 for forward search, or 3 for reverse search. 2) To resume normal playback, press 4/9. ● During playback, press and hold 5 or 3. The search continues as long as you hold the button. Once you release the button, normal playback resumes.
MasterPage: Start_Right GR-DF428AH_05Video.fm Page 23 Tuesday, March 22, 2005 1:58 PM VIDEO PLAYBACK EN 23 A Black to S-VIDEO IN (Connect when your TV/ ● Before starting Blank Search, if the current position is at a blank portion, the camcorder searches in the reverse direction. If the current position is at a recorded portion, the camcorder searches in the forward direction. ● If the beginning or end of the tape is reached during Blank Search, the camcorder stops automatically.
MasterPage: Left GR-DF428AH.book Page 24 Friday, March 18, 2005 5:07 PM 24 EN VIDEO PLAYBACK Playback Using The Remote Control Buttons And Functions The Full-Function Remote Control Unit can operate this camcorder from a distance as well as the basic operations (Playback, Stop, Pause, Fast-Forward and Rewind) of your VCR. It also makes additional playback functions possible. (墌 pg. 25) Installing The Battery The remote control uses one lithium battery (CR2025).
MasterPage: Start_Right GR-DF428AH.book Page 25 Friday, March 18, 2005 5:07 PM VIDEO PLAYBACK EN 25 Zoom (T/W) PAUSE or (Up) SLOW (YI) SLOW (IU) PLAY (Right) (Left) STOP or (Down) SHIFT Slow-Motion Playback During normal video playback, press SLOW (YI or IU) more than approx. 2 seconds. ● After approx. 10 minutes, normal playback resumes. ● To pause Slow-Motion playback, press PAUSE (9). ● To stop Slow-Motion playback, press PLAY (U).
MasterPage: Left GR-DF428AH.book Page 26 Friday, March 18, 2005 5:07 PM 26 EN VIDEO PLAYBACK Playback Zoom Playback Special Effects Magnifies the recorded image up to 47X at any time during video playback. 1) Press PLAY (U) to start video playback. Or perform normal playback of images. Allows you to add creative effects to the video playback image. 2) At the point you want to zoom in, press the Zoom Button (T). ● To zoom out, press the Zoom Button (W).
ADVANCED FEATURES MasterPage: Start_Right GR-DF428AH.book Page 27 Friday, March 18, 2005 5:07 PM MENUS FOR DETAILED ADJUSTMENT Changing The Menu Settings This camcorder is equipped with an easy-to-use, on-screen menu system that simplifies many of the more detailed camcorder settings. (墌 pg. 28 – 32) MENU Power Switch EN 27 Menus without Sub Menus . v WIPE/FADER (墌 pg. 38) r PROGRAM AE (墌 pg. 38) p EXPOSURE (墌 pg. 35) u W. BALANCE (墌 pg. 37) Selected menu icon blinks.
MasterPage: Left GR-DF428AH.book Page 28 Friday, March 18, 2005 5:07 PM 28 EN MENUS FOR DETAILED ADJUSTMENT Recording Menus CAMERA The “m CAMERA” settings are effective when the Power Switch is set to both “A” and “M”. However, the menu settings can be changed only when the Power Switch is set to “M”.
MasterPage: Start_Right GR-DF428AH_06Advanced.fm Page 29 Tuesday, March 22, 2005 4:55 PM MENUS FOR DETAILED ADJUSTMENT DIS OFF: Disables the function. [ON ]: To compensate for unstable images caused by camera-shake, particularly at high magnification. NOTES: ● Accurate stabilisation may not be possible if hand shake is excessive, or depending on the shooting condition. ● The “ ” indicator blinks or goes out if the Stabiliser cannot be used.
MasterPage: Left GR-DF428AH.book Page 30 Friday, March 18, 2005 5:07 PM 30 EN MENUS FOR DETAILED ADJUSTMENT REMOTE OFF: Disables the remote control operations. [ON]: Enables the remote control operations. BRIGHT 墌 pg. 17, “Brightness Adjustment Of The Display” DEMO MODE ON SCREEN OFF: Automatic demonstration will not take place. [ON]: Demonstrates certain functions such as Program AE with special effects, etc., and can be used to confirm how these functions operate.
MasterPage: Start_Right GR-DF428AH.book Page 31 Friday, March 18, 2005 5:07 PM MENUS FOR DETAILED ADJUSTMENT EN 31 Playback Menus VIDEO [ ] = Factory-preset SOUND MODE and NARRATION During tape playback, the camcorder detects the sound mode in which the recording was made, and plays the sound back. Select the type of sound to accompany your playback picture. According to the menu access explanation on page 27, select “SOUND MODE” or “NARRATION” from the Menu Screen and set it to the desired parameter.
MasterPage: Left GR-DF428AH.book Page 32 Friday, March 18, 2005 5:07 PM 32 EN MENUS FOR DETAILED ADJUSTMENT SYSTEM Each setting is linked with “s SYSTEM”, which appears when the Power Switch is set to “M”. (墌 pg. 27) ● The parameters are the same as in the description on page 29. VIDEO DISPLAY The “n” (VIDEO DISPLAY) settings are effective only for video playback except “BRIGHT”, “LANGUAGE” and “AUDIO LEV.”.
MasterPage: Start_Right GR-DF428AH.book Page 33 Friday, March 18, 2005 5:07 PM FEATURES FOR RECORDING 5-Second Recording LED Light can be used to brighten the subject in the dark place during video recording or D.S.C. shooting. Record a vacation or an important event in 5second clips to keep the action moving. This function is available only for video recording. 1 Press LIGHT repeatedly to ● The “5S” indicator appears. change the setting. LED Light OFF: Turns off the light.
MasterPage: Left GR-DF428AH.book Page 34 Friday, March 18, 2005 5:07 PM 34 EN FEATURES FOR RECORDING Night-Scope Snapshot (For Video Recording) Makes dark subjects or areas even brighter than they would be under good natural lighting. Although the recorded image is not grainy, it may look as if it is strobing due to the slow shutter speed. This feature lets you record still images that look like photographs onto a tape. 1 Set the Power Switch to “M”. 2 Set “r” to “NIGHTSCOPE”. (墌 pg. 38) The (墌 pg.
MasterPage: Start_Right GR-DF428AH.book Page 35 Friday, March 18, 2005 5:07 PM FEATURES FOR RECORDING Manual Focus 1 Set the Power Switch to “M”. Manual exposure control is recommended in the following situations: ● When shooting using reverse lighting or when the background is too bright. ● When shooting on a reflective natural background such as at the beach or when skiing. ● When the background is overly dark or the subject is bright. 1 Set the Power Switch to “M”. 2 Set “p” to “MANUAL”. (墌 pg.
MasterPage: Left GR-DF428AH.book Page 36 Friday, March 18, 2005 5:07 PM 36 EN FEATURES FOR RECORDING Iris Lock Like the pupil of the human eye, the iris contracts in well-lit environments to keep too much light from entering, and dilates in dim environments to allow in more light. Use this function in the following situations: ● When shooting a moving subject. ● When the distance to the subject changes (so its size in the LCD monitor or the viewfinder changes), such as when the subject is backing away.
MasterPage: Start_Right GR-DF428AH.book Page 37 Friday, March 18, 2005 5:07 PM FEATURES FOR RECORDING The white balance refers to the correctness of colour reproduction under various lighting. If the white balance is correct, all other colours will be accurately reproduced. The white balance is usually adjusted automatically. However, more advanced camcorder operators control this function manually to achieve a more professional colour/ tint reproduction. To change the setting Set “u” to the desired mode.
MasterPage: Left GR-DF428AH.book Page 38 Friday, March 18, 2005 5:07 PM 38 EN FEATURES FOR RECORDING Wipe Or Fader Effects WIPE–SLIDE: Wipe in from right to left, or wipe out from left to right. These effects let you make pro-style scene transitions. Use them to spice up the transition from one scene to the next. Wipe or Fader works when video recording is started or stopped.
MasterPage: Start_Right GR-DF428AH.book Page 39 Friday, March 18, 2005 5:07 PM FEATURES FOR RECORDING OFF: Disables the function. (Factory-preset) NIGHTSCOPE: (墌 pg. 34) SHUTTER 1/50: The shutter speed is fixed at 1/50th of a second. Black bands that usually appear when shooting a TV screen become narrower. SHUTTER 1/120: The shutter speed is fixed at 1/120th of a second. The flickering that occurs when shooting under a fluorescent light or mercury-vapour lamp is reduced.
MasterPage: Heading0_Left GR-DF428AH_06Advanced.fm Page 40 Tuesday, March 22, 2005 2:00 PM 40 EN EDITING NOTES: Dubbing To A VCR Open the cover. To S connector To AV connector AV cable (provided) S cable (optional) 1 2 3 4 TV VCR A To S-VIDEO IN* B Yellow to VIDEO IN C Red to AUDIO R IN D White to AUDIO L IN * Connect when your TV/VCR has an S-VIDEO IN connector. In this case, it is not necessary to connect the yellow video cable. NOTE: The S-Video cable is optional.
MasterPage: Start_Right GR-DF428AH_06Advanced.fm Page 41 Tuesday, March 22, 2005 2:01 PM EDITING Dubbing To A Video Unit Equipped With A DV Connector (Digital Dubbing) It is also possible to copy recorded scenes from the camcorder onto another video unit equipped with a DV connector. Since a digital signal is sent, there is little if any image or sound deterioration. EN 41 1 Make sure all units are turned off.
MasterPage: Left GR-DF428AH_06Advanced.fm Page 42 Tuesday, March 22, 2005 2:02 PM 42 EN EDITING Connection To A Personal Computer When connecting the camcorder to a PC using a DV cable, make sure to follow the procedure below. Connecting the cable incorrectly may cause malfunctions to the camcorder and/or the PC. ● Connect the DV cable first to the PC, and then to the camcorder. ● Connect the DV cable (plugs) correctly according to the shape of the DV connector.
MasterPage: Start_Right GR-DF428AH.book Page 43 Friday, March 18, 2005 5:07 PM EDITING The audio track can be customised only when recorded in the 12-BIT and SP modes. (墌 pg. 28) ● Use the provided remote control. Microphone Connector Speaker REW INSERT START/ STOP PAUSE PLAY STOP A.DUB Stereo Microphone 1 Play back the tape to locate the point where editing will start, then press PAUSE (9). 2 While holding A. DUB (D) on the remote control, press PAUSE (9). The “9D” and “MIC” indicators appear.
MasterPage: Left GR-DF428AH.book Page 44 Friday, March 18, 2005 5:07 PM 44 EN EDITING Insert Editing You can record a new scene into a previously recorded tape, replacing a section of the original recording with minimal picture distortion at the in and out points. The original audio remains unchanged. ● Use the provided remote control. NOTES: ● Before performing the following steps, make sure that “TIME CODE” for CAMERA DISPLAY and VIDEO DISPLAY is set to “ON”. (墌 pg.
REFERENCES MasterPage: Start_Right GR-DF428AH.book Page 45 Friday, March 18, 2005 5:07 PM TROUBLESHOOTING The camcorder is a microcomputer-controlled device. External noise and interference (from a TV, a radio, etc.) might prevent it from functioning properly. In such cases, first disconnect its power supply unit (battery pack, AC Adapter, etc.) and wait a few minutes; and then re-connect it and proceed as usual from the beginning. Power No power is supplied. ● The power is not connected properly.
MasterPage: Left GR-DF428AH.book Page 46 Friday, March 18, 2005 5:07 PM 46 EN TROUBLESHOOTING The colour of Snapshot looks strange. “SET DATE/TIME!” appears. ● The light source or the subject does not include white. Or there are various different light sources behind the subject. HFind a white subject and compose your shot so that it also appears in the frame. (墌 pg. 34) ● The date/time is not set. HSet the date/time. (墌 pg.
MasterPage: Start_Right GR-DF428AH.book Page 47 Friday, March 18, 2005 5:07 PM TROUBLESHOOTING Picture does not appear on the LCD monitor. ● The viewfinder is pulled out and “PRIORITY” is set to “FINDER”. HPush the viewfinder back in or set “PRIORITY” to “LCD”. (墌 pg. 19, 27, 30) ● The LCD monitor’s brightness setting is too dark. HAdjust the brightness of the LCD monitor. (墌 pg. 17) HIf the monitor is tilted upward 180 degrees, open the monitor fully. (墌 pg.
MasterPage: Left GR-DF428AH.book Page 48 Friday, March 18, 2005 5:07 PM 48 EN TROUBLESHOOTING LENS CAP Appears for 5 seconds after power is turned on if the lens cap is attached or when it is dark. A. DUB ERROR! ? Appears when playing back a file that is not compatible with DCF or a file with a size that is not compatible with this camcorder. Appears if Audio Dubbing is attempted on a blank portion of a tape. (墌 pg. 43) UNIT IN SAFEGUARD MODE REMOVE AND REATTACH BATTERY A.
MasterPage: Advan_Heading0_Right GR-DF428AH.book Page 49 Friday, March 18, 2005 5:07 PM USER MAINTENANCE Before cleaning, turn off the camcorder and remove the battery pack and AC Adapter. To clean the exterior Wipe gently with a soft cloth. Put the cloth in diluted mild soap and wring it well to wipe off heavy dirt. Then wipe again with a dry cloth. To clean the LCD monitor Wipe gently with a soft cloth. Be careful not to damage the monitor. Close the LCD monitor.
MasterPage: Left GR-DF428AH.book Page 50 Friday, March 18, 2005 5:07 PM 50 EN CAUTIONS NOTES: ● It is normal for the battery pack to be warm after charging, or after use. Temperature Range Specifications Charging: 10°C to 35°C Operation: 0°C to 40°C Storage: –20°C to 50°C ● The lower the temperature, the longer recharging takes. ● Charging times are for a fully discharged battery pack. Cassettes To properly use and store your cassettes, be sure to read the following cautions: ● During use ...
MasterPage: Start_Right GR-DF428AH.book Page 51 Friday, March 18, 2005 5:07 PM CAUTIONS ... No picture during playback. ... Blocks of noise appear during playback. ... During recording or playback, the Head Clog Warning indicator “ ” appears. ... Recording cannot be performed properly. In such cases, use an optional cleaning cassette. Insert it and play back. If the cassette is used more than once consecutively, damage to the video heads may result.
MasterPage: Heading0_Left GR-DF428AH_08Spec.fm Page 52 Tuesday, March 22, 2005 2:04 PM 52 EN SPECIFICATIONS Camcorder For General Power supply DC 11 V (Using AC Adapter) DC 7.2 V (Using battery pack) Power consumption Approx. 3.2 W (3.5 W*) (LCD monitor off, viewfinder on) Approx. 4.2 W (4.5 W*) (LCD monitor on, viewfinder off) * Using LED Light Dimensions (W x H x D) 75 mm x 74 mm x 111 mm (with the LCD monitor closed and the viewfinder pushed back in) Weight Approx.
MasterPage: Start_Right GR-DF428AH.book Page 53 Friday, March 18, 2005 5:07 PM TERMS EN 53 A P AC Adapter .................................................... 15 Animation ....................................................... 29 Audio Dubbing ............................................... 43 Playback Sound ............................................. 31 Playback Special Effects ............................... 26 Power-Linked Operation ................................
GR-DF428AH.
GR-DF428AH.
MasterPage: BackCover Back cover GR-DF428AH.