HD MEMORY CAMERA GS-TD1 Detailed User Guide LYT2327-002A
Table of Contents Beginner's Guide ............................................................ 4 Charging .................................................................................. 4 Recording ................................................................................ 4 Playback .................................................................................. 4 Shooting Tips ........................................................................... 4 Holiday Season/Christmas ................
WHITE BALANCE ............................................................ 102 BACKLIGHT COMP. ........................................................ 102 TELE MACRO (2D mode only) ........................................ 102 TOUCH PRIORITY AE/AF ............................................... 102 DIS ................................................................................... 102 GAIN UP .......................................................................... 103 WIND CUT ........................
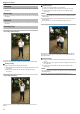
Beginner's Guide o [Getting Ready] Charging 0 Recording 0 Refer to the operating instructions found in the animation on the Detailed User Guide. Playback 0 A Open your feet to the width of your shoulders. B Extend your right hand and hold the camcorder over your head. C Hold the LCD monitor with your left hand and adjust the angle accordingly. Refer to the operating instructions found in the animation on the Detailed User Guide.
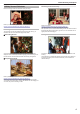
Useful Shooting Techniques Holiday Season/Christmas Recording the Christmas Party Photo by 101st CAB, Wings of Destiny Creative Commons Attribution-No Derivative Works 3.0 Decorating the Tree and Preparing the Dinner The decoration of tree and preparation of dinner are part of the joy of Christmas. Be sure to record these happy family times! Photo by InnerSpirit Creative Commons Attribution-No Derivative Works 3.0 After all preparations, it is finally the Christmas party itself.
Useful Shooting Techniques Wedding Create an awesome wedding video for the bride and groom! Closing Up on the Bride's Face During the Thank You Speech The climax of the event finally comes during the bride and groom's thank you speech and presentation of flowers. The touching words of appreciation from the bride and tears of joy from the parents are scenes that must not be missed. Start by closing up on the bride's face using zoom.
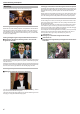
Useful Shooting Techniques o Battery Charger Travel . . Capture all the good times of your domestic or overseas trips! Bringing the Necessary Equipment The necessary things to bring on a trip depends on your traveling purpose and the destination. For overseas trips in particular, you have to think about what to bring in accordance to the local conditions. Here are some suggestions for your consideration.
Useful Shooting Techniques Using Pan at the Places of Interest . . Tourists spots with beautiful scenery or historical sites are places that you would certainly want to record. To capture the magnificence of a scene which cannot be fitted into a single frame, try the panning technique. Refer to the "Shooting Tips" found in this website on how to use panning effectively. In addition, you may also like to take a shot of the signs or monuments that can often be found at the tourist spots.
Useful Shooting Techniques Amusement Park Inducing Responses by Calling Out . . Take more shots of the smiling faces of everyone in the family! Taking Videos or Still Images According to the Attraction You may choose to take videos all the time. However, you may want to take some still images too. The following section explains the scenarios suitable for taking videos or still images. Capturing the Best Moment in a Video as a Still Image Shots with the eyes closed are often taken by accident.
Useful Shooting Techniques Advanced Operation with Backlight Compensation When the subject’s face is in backlight or when the expression cannot be seen clearly, the Intelligent Auto function of this unit automatically increases its brightness for recording. If Intelligent Auto fails to function as expected or if the brightness correction is insufficient, you can increase the brighness by using backlight compensation in the Manual mode. “Setting Details” (A p. 41) . o .
Getting Started Precautions on Recording and Playing Back 3D Images 3D images can be recorded and played back on this unit. You can enjoy realistic and powerful 3D images recorded on this unit by playing back on a 3D compatible TV. Before use, please read the following precautions to ensure safe and comfortable viewing of the 3D images. Recording 3D Images This unit makes use of the misalignment between the images that enter the left and right eyes to create the 3D effect during 3D recording.
Getting Started 3D Display on the LCD Monitor The LCD monitor supports 3D images during both recording and playback. Press the “3D/2D” button on the touch screen to change the display on the LCD monitor between 3D and 2D. 0 When using the 3D recording mode, the image will be recorded in 3D even if the display on the LCD monitor is set to 2D. 0 3D effect appears stronger when viewed at approximately 30 cm (11-3/4”) from the front. 0 3D effect may be weak if viewed from an angle other than the front.
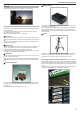
Getting Started Verifying the Accessories If any of the items are missing or defective, consult your JVC dealer or the nearest JVC service center. Illustration Description . AC Adapter AP-V20U 0 Connects to this unit to charge the battery pack. It can also be used when recording or playing back videos indoors. . Battery Pack BN-VF815U 0 Attaches to this unit to supply power. . Remote Control RM-V760U 0 Operates certain functions from a distance. .
Getting Started SD cards are sold separately. “Types of Usable SD Card” (A p. 17) When using the AC adapter overseas, please prepare a commercially available converter plug for the country or region of visit. “Charging the Battery Pack Overseas” (A p.
Getting Started Charging the Battery Pack Detaching the Battery Pack Charge the battery pack immediately after purchase and when the remaining battery power is low. The battery pack is not charged at the time of purchase. Attach the battery pack. . . 1 0 2 Align the top of the battery with the mark on this unit, and slide in until the battery clicks into place. Connect the AC adapter to the DC connector. Press the battery release lever to detach the battery from this unit.
Getting Started Grip Adjustment Inserting an SD Card When a commercially available SD card is inserted, recordings can be made to either the card or built-in memory separately. “Types of Usable SD Card” (A p. 17) “Approximate Video Recording Time” (A p. 50) Open the LCD monitor. 2 Press and hold the M button for 2 seconds or more to turn off the power. 3 Open the cover. 4 Insert an SD card. .
Getting Started Removing the Card 0 Push the SD card inward once, then pull it out straight. 0 0 0 0 0 0 Using SD cards (including SDHC/SDXC cards) other than those specified above may result in recording failure or data loss. To record videos with “VIDEO QUALITY” set to “THR”, use of a Class 10 card is recommended. (Class 6 or higher SDHC/SDXC card is required.) To record videos with “VIDEO QUALITY” set to “UXP”, use of a Class 6 compliant SDHC/SDXC card is recommended.
Getting Started Using the Touch Screen Icon operation buttons, thumbnails, and menu items are displayed on the touch screen according to the mode in use. 0 To operate, tap the icon operation buttons, thumbnails, or menu items on the touch screen lightly. 0 There are two ways to operate the touch screen, namely “tap” and “drag”. The following are some examples. 0 A Tap the displayed button (icon) or thumbnail (file) on the touch screen to make selection.
Getting Started “Deleting the Currently Displayed File” (A p. 65) 6 LCD Monitor 3D/2D Display Switching Button 0 7 Switches the display on the LCD monitor between 3D and 2D. Menu Button “Operating the Menu” (A p. 99) 8 Operation Buttons Clock Setting The “SET DATE/TIME!” screen appears when you turn on this unit for the first time after purchase, when it has not been used for a long time, or when the clock is not set yet. Set the clock before recording. 1 Open the LCD monitor.
Getting Started When using this unit overseas, you can set it to the local time for recording. “Setting the Clock to Local Time when Traveling” (A p. 25) 0 “SET DATE/TIME!” is displayed when you turn on this unit after it has not been used for a prolonged period. Connect the AC adapter for more than 24 hours to charge the internal clock battery of this unit before setting the clock. “Charging the Battery Pack” (A p. 15) Resetting the Clock Set the clock with “CLOCK ADJUST” from the menu. 1 Tap “MENU”.
Getting Started Select the region where you live and tap “SAVE”. Changing the Display Language The language on the display can be changed. 1 Tap “MENU”. 2 Tap “Q”. 3 Tap “LANGUAGE”. . . . The city name and time difference are displayed. Tap < or > to select the city name. . 0 0 0 4 Tap ∧ or ∨ to move upward or downward for more selection. Tap to the desired language. . 7 0 Tap ∧ or ∨ to move upward or downward for more selection.
Getting Started Holding this Unit You can operate this unit from a distance away using the supplied remote control. . When holding this unit, keep your elbows close to your sides to prevent camera shake. Using the Remote Control Memo : 0 . 0 Point the remote control toward the sensor directly and use it within 5 m from this unit. The transmitted beam may not be effective or may cause incorrect operation when the sensor is directly exposed to sunlight or powerful lighting.
Getting Started Operation Buttons on Remote Control Unit Attaching Headphones You can attach optional headphones to this unit. Open the cover of the headphones connector. 2 Connect the headphones to the headphones connector. . . . 1 1 0 2 Takes a still image. Zoom Button 0 0 4 The volume level of the headphones can be adjusted using “HEADPHONE VOL. ADJ.” in the menu. “HEADPHONE VOL. ADJ.” (A p. 108) 0 Starts/stops video recording.
Getting Started Attaching an External Microphone You can attach an optional external microphone to this unit. 0 The recommended external microphone for this unit is MZ-V8. For details, consult your JVC dealer. 1 Attach an external microphone (optional) to the shoe. Using this Unit Overseas The shape of the power outlet varies according to countries and regions. To charge the battery pack, you need a converter plug that matches the shape of the outlet. “Charging the Battery Pack Overseas” (A p.
Getting Started Setting the Clock to Local Time when Traveling Setting Daylight Saving Time Change the date and time display to the local time by selecting your travel destination in “AREA SETTING” of “CLOCK ADJUST”. Restore the region settings after you returned from the trip. When “ON” is selected in “DST SETTING” of “CLOCK ADJUST”, the time is set 1 hour ahead. Tap “MENU”. 2 Tap “Q”. 3 Tap “CLOCK ADJUST”. 1 Tap “MENU”. 2 Tap “Q”. 3 Tap “CLOCK ADJUST”. . . . . . 1 0 .
Getting Started Memo : Optional Accessories You can record for a longer time by using the optional battery pack. Product Name Battery Pack 0 BN-VF815U 0 BN-VF823U Battery Charger 0 AA-VF8 HDMI Cable 0 VX-HD310 0 VX-HD315 0 VX-HD320 0 VX-HD330 Description 0 BN-VF815U is the same battery pack that comes with this unit. BN-VF823U provides a longer recording time than the provided battery pack. It can also be used as a spare battery pack. 0 Enables the battery pack to be charged without using this unit.
Recording Taking Videos in 3D Mode You can record 3D images by pressing the 3D button to set to the 3D mode. During 3D mode, “3D” is displayed on the LCD monitor. 1 Open the lens cover. You can change the display on the LCD monitor between 3D and 2D during recording by tapping on the 3D/2D icon. The image will be recorded in 3D even if the display on the LCD monitor is set to 2D. To record 2D images, press the 3D button to switch to the 2D mode before recording.
Recording Taking Still Images in 3D Mode You can record 3D images by pressing the 3D button to set to the 3D mode. During 3D mode, “3D” is displayed on the LCD monitor. Open the lens cover. 2 Open the LCD monitor and select the still image mode. . . 1 0 Press the 3D button to set to the 3D mode. . 3 The still image icon B appears. 0 0 Set the focus on the subject. . 4 During 3D mode, “3D” is displayed on the LCD monitor. 3D images may be recorded when the 3D button lights up.
Recording Taking Videos in Intelligent Auto Mode Indications During Video Recording You can record without worrying about the setting details by using the Intelligent Auto mode. 0 Before recording an important scene, it is recommended to conduct a trial recording. Open the lens cover. 2 Open the LCD monitor and select the video mode. . . 1 . Display Icon 0 0 Displays the adjusted value when performing parallax adjustment manually. “Adjusting Parallax During Recording” (A p.
Recording Operation Buttons for Video Recording o Scenes of Intelligent Auto Description E Captures one’s skin beautifully. A Allows people to be captured naturally. D Focuses at a far distance and captures a sharp image with vivid colors. I Records with minimal noise in the overall image. B Allows night scenes to be captured accurately with minimal noise in the overall image. J Prevents colors from fading even when recording in a bright environment. G Records while focusing on a near object.
Recording Useful Settings for Recording Zooming 0 When “AUTO POWER OFF” is set to “ON”, this unit turns itself off automatically to conserve power when it is not operated for 5 minutes. (only when using the battery pack) “AUTO POWER OFF” (A p. 124) 0 When “TOUCH PRIORITY AE/AF” is set to “FACE TRACKING”, this unit detects faces and automatically adjusts its brightness and focus to record the faces more clearly. “Capturing Subjects Clearly (TOUCH PRIORITY AE/AF)” (A p.
Recording Taking Still Images in Intelligent Auto Mode Indications During Still Image Recording You can record without worrying about the setting details by using the Intelligent Auto mode. Open the lens cover. 2 Open the LCD monitor and select the still image mode. . . . 1 0 Check if the recording mode is P Intelligent Auto. Display Icon 0 Displays the icon of the image size. 0 The size of still images can be changed. “IMAGE SIZE” (A p. 115) 2 Shutter Speed Displays the shutter speed.
Recording Operation Buttons for Still Image Recording Useful Settings for Recording When “QUICK RESTART” is set to “ON”, this unit turns on immediately if you open the LCD monitor within 5 minutes after the power is turned off by closing the monitor. “QUICK RESTART” (A p. 124) 0 When “AUTO POWER OFF” is set to “ON”, this unit turns itself off automatically to conserve power when it is not operated for 5 minutes. (only when using the battery pack) “AUTO POWER OFF” (A p.
Recording Zooming Adjusting Parallax During Recording When recording 3D images, parallax is automatically adjusted. If the left and right images of an object close to the camera do not appear to be in alignment, or the 3D effect of a distant object is weak, you can make adjustments by bringing the left and right images closer to each other. 0 Parallax can only be adjusted when 3D images are displayed on the unit’s LCD monitor. “3D VIDEO REC FORMAT (3D mode only)” (A p. 104) 1 Tap k. 2 Tap “MANUAL”. .
Recording Manual Recording You can adjust settings, such as brightness and shutter speed, by using the manual mode. Manual recording can be set for both video and still image modes. Open the lens cover. 2 Open the LCD monitor and select the video or still image mode. . . 1 0 Select the Manual recording mode. . 3 The video A or still image B icon appears. 0 If the mode is P Intelligent Auto, press the H/T button to switch to H Manual.
Recording Manual Recording Menu Scene Selection The following items can be set. Common scenes that are often encountered can be recorded with the most suitable settings. Name Description SCENE SELECT 0 FOCUS 0 FOCUS ASSIST 0 0 Sets the color of the outline of a focused object when Focus Assist is used. “FOCUS ASSIST COLOR” (A p. 112) Shutter speed can be adjusted. Use this when shooting a fast-moving subject or to emphasize the subject's movement. “Setting Shutter Speed” (A p. 39) 0 0 .
Recording *The image is only an impression. Setting Effect Increases gain and brightens the scene automatically using a slow shutter when the surrounding is dark. To prevent camera shake, use a tripod. Set this when the focus is not clear in Intelligent Auto or when manual focusing is desired. 1 Tap “MENU”. 2 Tap “FOCUS”. . . b NIGHTALIVE Adjusting Focus Manually Captures night scenes naturally. w PORTRAIT Blurs the background to bring out the people in the picture. . .
Recording Using Focus Assist Adjusting Brightness Focused subject is outlined in color for more precise focus. You can adjust the brightness to your preferred level. Tap “MENU”. 2 Tap “FOCUS ASSIST”. 1 Tap “MENU”. 2 Tap “BRIGHTNESS ADJUST”. . . . . 1 0 0 0 Tap L to exit the menu. Tap J to return to the previous screen. Adjust the focus. Tap ∧ or ∨ to move upward or downward for more selection. Tap L to exit the menu. Tap J to return to the previous screen. 3 Tap “MANUAL”.
Recording Setting Shutter Speed Setting Aperture You can set the shutter speed to suit the type of subject. You can adjust the aperture to capture an image with only the subject in focus. Tap “MENU”. 2 Tap “SHUTTER SPEED”. 1 Tap “MENU”. 2 Tap “APERTURE PRIORITY”. . . . 1 Tap ∧ or ∨ to move upward or downward for more selection. Tap L to exit the menu. Tap J to return to the previous screen. Tap “MANUAL”. 4 Adjust the shutter speed.
Recording Setting White Balance You can set the color tone to suit the light source. 1 Tap “MENU”. 2 Tap “WHITE BALANCE”. . . 0 to the wide angle end to enable the aperture to be stopped down all the way. The larger the aperture value, the darker the subject appears. Tap ∧ or ∨ to move upward or downward for more selection. 0 0 0 Tap J to return to the previous screen. Tap the appropriate shooting environment. . 3 Tap L to exit the menu. Tap ∧ or ∨ to move upward or downward to select.
Recording Setting Backlight Compensation Taking Close-up Shots You can correct the image when the subject appears too dark due to backlight. You can take close-up shots of an object using the tele macro function. Tap “MENU”. . 1 *The image is only an impression. Tap “MENU”. 2 Tap “TELE MACRO”. . 1 Tap “BACKLIGHT COMP.”. . . 2 0 0 0 Tap L to exit the menu. Tap J to return to the previous screen. . Tap “ON”. 0 0 0 3 Tap ∧ or ∨ to move upward or downward for more selection.
Recording Setting the USER Button Making Adjustments with the USER Button By assigning one of manual adjustment functions that you frequently use to the USER button, you can access the function quickly. Operate as follows. 0 In the case of functions that are turned on or off (NIGHTALIVE, BRIGHTNESS ADJUST, SHUTTER SPEED, APERTURE PRIORITY, BACKLIGHT COMP., DIS, FOCUS ASSIST, SELF-TIMER) Press the USER button to turn on or off the function.
Recording When “CLEAR” is selected, all values adjusted by the ADJ button will be set to “AUTO”. (Exits the control menu.) Using the Control Dial for Recording 0 You can use the control dial to change the settings for “FOCUS”, “BRIGHTNESS ADJUST”, “SHUTTER SPEED”, “APERTURE PRIORITY”, “WHITE BALANCE”, and “PARALLAX ADJUSTMENT”. Caution : 1 Press the ADJ button for about 3 seconds to display the control menu. 0 .
Recording Reducing Camera Shake When the image stabilizer is set, camera shake during recording can be effectively reduced. Tap “MENU”. 1 Capturing Subjects Clearly (TOUCH PRIORITY AE/AF) “TOUCH PRIORITY AE/AF” is a function that adjusts focus and brightness based on a tapped position. This function is available for both videos and still images. Select video or still image mode. . . 1 0 Tap “DIS”. 3 Tap “ON” or “ON (AIS)”. The video or still image mode icon appears. 2 Tap “MENU”.
OFF Deactivates the function. FACE TRACKING e appears on the screen. Recording is performed while tracking and automatically adjusting the tapped face (subject) with appropriate focus and brightness. In addition, a blue frame appears around the tapped face (subject). COLOR TRACKING f appears on the screen. Recording is performed while tracking and automatically adjusting the tapped color (subject) with appropriate focus and brightness.
Recording Setting SMILE LEVEL Display (Still image only) “SMILE LEVEL” allows you to set the items to display when faces are detected. This item is only displayed when “TOUCH PRIORITY AE/AF” is set to “FACE TRACKING”. Open the LCD monitor and select the still image mode. 2 Tap “MENU”. Enables the changes of a scene that occur slowly over a long period to be shown within a short time by taking frames of it at a certain interval. This is useful for making observations such as the opening of a flower bud.
Recording Indications During Time-Lapse Recording Time-Lapse Setting The greater the number of seconds, the longer the recording interval. Setting OFF Deactivates the function. 1SEC INTERVAL Takes a frame at 1-second intervals. Recorded videos will be played back at 30 times speed. 10SEC INTERVAL Takes a frame at 10-second intervals. Recorded videos will be played back at 300 times speed. 80SEC INTERVAL Takes a frame at 80-second intervals. Recorded videos will be played back at 2 400 times speed.
Recording Taking Group Shots (Self-timer) 6 Take a still image. The 10-second self-timer and Face Detection self-timer are convenient functions for taking group photos. The 2-second self-timer is useful for preventing camera shake caused by pressing the shutter button. . Memo : When shooting a photo using the self-timer function, use of a tripod is recommended. “Tripod Mounting” (A p. 22) Using the 2-/10-second Self-timer 1 Select still image mode.
Recording 5 After making sure that everyone is facing the camera, press the SNAPSHOT button. Remaining Recording Time/Battery Power You can check the remaining video recording time on the built-in memory and SD card as well as the remaining battery power. Open the LCD monitor and select the video or still image mode. . . 1 0 Press the INFO button. . 2 The video A or still image B icon appears. The photographer enters the frame. 0 3 If in the still image mode, go directly to step 4.
Recording Approximate Video Recording Time o 3D Mode (MP4(MVC)) Quality Built-in Memory (64 GB) SDHC/SDXC Card 4 GB 8 GB 16 GB 32 GB 48 GB 64 GB THR 4h 10 m 30 m 1h 2h 3h 4 h 10 m TSR 6 h 10 m 20 m 40 m 1 h 30 m 3 h 10 m 4 h 40 m 6 h 20 m o 3D Mode (AVCHD) Quality Built-in Memory (64 GB) SDHC/SDXC Card 4 GB 8 GB 16 GB 32 GB 48 GB 64 GB TXP 8 h 10 m 30 m 1h 2h 4 h 10 m 6 h 10 m 8 h 20 m TSP 11 h 40 m 40 m 1 h 20 m 2 h 50 m 5 h 50 m 8 h 40 m 11 h 50 m o 2D Mode
Recording Approximate Recording Time (Using Battery) o 3D Display on LCD Monitor Battery Pack Actual Recording Time Continuous Recording Time 3D Recording MP4(MVC) 3D Recording AVCHD 3D Recording MP4(MVC) 3D Recording AVCHD BN-VF815U (Supplied) 55 m 1h 1 h 45 m 2h BN-VF823U 1 h 20 m 1 h 35 m 2 h 40 m 3h5m o 2D Display on LCD Monitor Battery Pack Actual Recording Time 3D Recording MP4(MVC) 3D Recording AVCHD 2D Recording BN-VF815U (Supplied) 55 m 1h5m 1 h 20 m BN-VF823U 1 h 25 m 1
Playback Playing Back Videos You can select and play back the recorded videos from an index screen (thumbnail display). Select video mode. . 1 0 The video mode icon A appears. Tap q to select the playback mode. 3 Press the 3D button to select 3D or 2D mode. . . 2 0 0 0 Tap on the file to start playback. . 4 Images recorded in 3D mode and 2D mode are displayed on the index screen separately. Press the 3D button to switch to the desired mode for playback.
Playback Operation Buttons for Video Playback During Video Playback . During Index Screen Display Display 1 3D/2D Mode Displays the current playback mode of 3D or 2D. “3D” is displayed during 3D playback, while “2D” is displayed during 2D playback.
Playback Adjusting the Volume of Videos Playing a Video with Defective Management Information Plays videos with defective management information. 1 Select video mode. 2 Tap q to select the playback mode. 3 Tap “MENU”. 4 Tap “PLAYBACK OTHER FILE”. 5 Tap on the file to start playback. . A Press the zoom lever during video playback. Checking the Recording Date and Other Information . . . . . . A Select a file and press the INFO button while playback is paused.
Playback Playing Back Still Images You can select and play back the recorded still images from an index screen (thumbnail display). The contents of the selected media are displayed on the index screen. “REC MEDIA FOR IMAGE” (A p. 123) Select still image mode. 2 Tap q to select the playback mode. During Index Screen Display . . 1 Operation Buttons for Still Image Playback Display Moves to the previous/next date 2 3D/2D Mode Displays the current playback mode of 3D or 2D.
Playback Adjusting Parallax During Playback During Still Image Playback When playing back 3D images of scenes where there are multiple objects arrayed in a line from near to far, or objects that are extremely close to the camera, you can change the way they appear to the eye. 0 Parallax can only be adjusted when 3D images are displayed on the unit’s LCD monitor. Tap k. 2 Tap “MANUAL”. . 1 Display Description Displays the current playback mode of 3D or 2D.
Playback Slideshow Playback Still images can be played back in a slideshow. Select still image mode. 2 Tap q to select the playback mode. 3 Press the 3D button to select 3D or 2D mode. . . 1 . When the power of this unit is turned off or the mode is switched to recording after parallax is manually adjusted, the “PARALLAX ADJUSTMENT” setting returns to “AUTO”. 0 0 0 4 Images recorded in 3D mode and 2D mode are displayed on the index screen separately.
Playback Searching for a Specific Video/Still Image When there is a large number of recorded videos and still images, it is difficult to look for the desired file from the index screen. Use the search function to find the file you want. 0 For both videos and still images, you can search by “SEARCH DATE” (recording date). “To search by recording dates” (A p. 58) Date Search You can search and play videos or still images according to recording dates.
Playback When connected to the TV via the provided HDMI mini cable, images and sounds may not be output properly depending on the TV connected. In such cases, perform the following operations. 1) Disconnect the HDMI mini cable and connect it again. 2) Turn off and on this unit again. 0 If 3D images cannot be seen properly, change the setting in “HDMI OUTPUT”. Refer also to the instruction manual of the TV in use. “HDMI OUTPUT” (A p.
Playback Operating in Conjunction with TV via HDMI Connecting this unit to an HDMI-CEC-enabled TV using the HDMI cable allows linked operations with the TV to be performed. 0 HDMI-CEC (Consumer Electronics Control) is an industry standard that enables interoperability between HDMI-CEC compliant devices that are connected via HDMI cables. Memo : Not all HDMI-control devices comply with the HDMI-CEC standard. The HDMI control function of this unit will not work when connected to these devices.
Playback Connecting via the HDMI Mini Connector 0 If you are using an HDTV, you can play back in HD quality by connecting to the HDMI connector. 0 Use a High Speed HDMI Cable. 0 Refer also to the instruction manual of the TV in use. 0 Close the LCD monitor. . 1 When connected to the TV via the HDMI mini cable, images and sounds may not be output properly depending on the TV connected. In such cases, perform the following operations. 1) Disconnect the HDMI mini cable and connect it again.
Playback Connecting via the AV Connector By connecting the supplied AV cable to the AV connector, videos can be played back on a TV. 0 Refer also to the instruction manual of the TV in use. Open the LCD monitor, then press and hold the power button for 2 seconds or more to turn off the power. 2 Connect to a TV. . . 1 0 A Connect using the provided AV cable. B Connect the AC adapter to this unit. This unit powers on automatically when the AC adapter is connected.
Playback Playing Back a DVD or Blu-ray Disc Created on this Unit BD/DVDs created using the backup function on this unit can be played back on TV using an optional DVD writer (DVDs only) with playback function (CUVD50U) or a normal BD/DVD player. DVDs can also be played back on this unit by connecting the optional DVD writer with playback function. “Playing Back with a DVD Writer” (A p. 77) “Playing Back with an External Blu-ray Drive” (A p. 82) “Playing Back Files in the USB External Hard Disk Drive” (A p.
Playback o 2D Files Playback Device DVD (DVD-Video format) DVD (AVCHD format) Blu-ray Disc Device’s Internal HDD DVD writer with playback function (CU-VD3U, CU-VD50U) P P - - External Blu-ray drive connected to this unit P P P - DVD player/ DVD recorder P P*1 - P Blu-ray player/ Blu-ray recorder P P*1 P*1 P USB external hard disk drive - - - P Computer P *2 *2 P *1: Only on AVCHD compatible devices.
Editing Deleting Unwanted Files Memo : Deleted files cannot be restored. Files that are protected cannot be deleted. Release protection before deleting the file. “Protecting Files” (A p. 66) 0 Be sure to back up important files on a PC. “Backing Up All Files” (A p. 93) 0 0 . Delete unwanted videos and still images when the space in the recording media is running out. The remaining space in the recording media increases after deleting the files. “Deleting the Currently Displayed File” (A p.
Editing 0 0 After deleting is complete, tap “OK”. To cancel the deletion, tap “QUIT”. Memo : Files that are protected cannot be deleted. Release protection before deleting the file. “Protecting Files” (A p. 66) 0 Protecting Files Prevent important videos/still images from being deleted accidently by protecting them. “Protecting/Releasing Protection of the Currently Displayed File” (A p. 66) “Protecting/Releasing Protection of Selected Files” (A p.
Editing Capturing a Still Image in the Video during Playback You can capture still images of the scenes you like in the recorded videos. Select video mode. 2 Tap q to select the playback mode. 3 Tap on the desired video. 4 Tap pause e at the desired scene during playback. . 1 Tap “MENU”. . . 3 Tap “PROTECT/CANCEL”. . . 4 Tap on the files to protect or release protection of.
Editing Capturing a Required Part in the Video (TRIMMING) 7 Tap e to pause playback at the desired end point, then tap “B”. Select the required part of a video and save it as a new video file. 0 The original video remains in its existing location. Select video mode. . 1 . 0 8 Tap “SET”. 9 Tap “SET”. Tap q to select the playback mode. . . 2 To reset the start or end point, tap “A” or “B” at the desired scene (position). Tap “MENU”. . 3 . 0 0 4 Tap “TRIMMING”. Memo : .
Editing Capturing Videos for Uploading to YouTube 7 Tap e to pause playback at the desired start point, then tap “A”. 8 Tap e to pause playback at the desired end point, then tap “B”. Capture and copy a part of a recorded video (maximum 15 minutes) for uploading to YouTube, and save it as a YouTube video. When capturing videos for YouTube, the duration cannot be longer than 15 minutes. Select video mode. . . 1 Tap q to select the playback mode. . 2 0 . 0 Tap “MENU”. 4 Tap “UPLOAD SETTINGS”.
Copying Copying Files You can create discs or copy the files on this unit by connecting it to various devices. 0 Select the appropriate method of copying according to the device. If you are unsure about the method of copying, refer to “Copying Your Files”. “Copying Your Files” (A p. 0 ) o 3D (AVCHD) Files P: Can be copied, -: Cannot be copied Recording Device DVD (AVCHD) Blu-ray Disc Device’s Internal HDD DVD writer connected to this unit “Creating Discs with a DVD Writer” (A p.
Copying o 2D Files P: Can be copied, -: Cannot be copied Recording Device VHS Tape DVD (DVD-Video) DVD (AVCHD) Blu-ray Disc Device’s Internal HDD DVD writer connected to this unit “Creating Discs with a DVD Writer” (A p. 72) - P P - - External Blu-ray drive connected to this unit “Creating Discs with an External Blu-ray Drive” (A p. 78) - P P P - Blu-ray recorder “Creating a Disc Using a Connected Blu-ray Recorder” (A p.
Copying Creating Discs with a DVD Writer You can copy the recorded files to discs or play back the created discs using an optional DVD writer. Changing the Media of the DVD Writer Set the type of media according to the loaded DVD. 1 “Preparing a DVD Writer (CU-VD50U)” (A p. 73) “Preparing a DVD Writer (CU-VD3U)” (A p. 73) Compatible DVD Writers Product Name Prepare a DVD writer. Description 0 Enables the images recorded on this unit to be copied to a DVD without using a PC.
Copying Preparing a DVD Writer (CU-VD50U) 1 Connect the USB cable and the AC adapter. 1 Turn off the camcorder by pressing the M button for about 2 seconds. Connect the USB cable and the AC adapter. 0 Turn off the camcorder by pressing the M button for about 2 seconds. . . 0 Preparing a DVD Writer (CU-VD3U) A Connect the USB cable of the DVD writer to this unit. B Connect the AC adapter of the DVD writer. C Connect the AC adapter to this unit.
Copying Tap “YES” or “NO”. (A mode only) . 7 Select video or still image mode. . 2 0 . 0 When “YES” is selected, videos with similar recording dates are displayed in groups. When “NO” is selected, videos are displayed according to recording dates. Tap “CREATE FROM ALL” (video) or “SAVE ALL” (still image). 8 Tap “EXECUTE”. . 3 0 . 0 While the video mode is shown in the image, the same operations apply for the still image mode. Tap on the media to copy. 5 Tap the desired method.
Copying Copying Files by Date (2D mode only) Videos or still images are sorted and copied according to the date on which they were recorded. 0 Only 2D videos or still images can be sorted and copied according to the date on which they were recorded. Tap “EXECUTE”. Select 2D mode. . 1 7 . 0 Select video or still image mode. 3 Tap “SELECT AND CREATE” (video) or “SELECT AND SAVE” (still image). Tap “YES” or “NO”. (A mode only) . . 2 8 The number of discs required to copy the files is displayed.
Copying When two or more DVDs are created simultaneously, all the discs other than the last one will be finalized automatically even when “AUTO FINALIZE” is set to “OFF”. 0 You can finalize a DVD even when “FINALIZE” is selected in the “BACKUP” menu. “Finalizing Discs After Copying” (A p. 78) 0 To play back a BD-R disc on other devices, select “FINALIZE” after creating the disc. (The “AUTO FINALIZE” function on the basic settings menu can only be used for creating DVDs.) .
Copying When “DO YOU WANT TO FINALIZE?” appears This appears when “AUTO FINALIZE” in the basic settings menu is set to OFF. “AUTO FINALIZE” (A p. 129) 0 To play back on other devices, tap “YES”. 0 To add more files to the DVD later, tap “NO”. . Memo : 12 Press and hold the M button for 2 seconds or more to turn off this unit and disconnect the USB cable. Caution : 0 0 Do not turn off the power or remove the USB cable until copying is complete.
Copying Finalizing Discs After Copying Finalize the disc after copying is finished. This enables the disc to be played back using this unit, PC, DVD writer, DVD player, or external Blu-ray drive that supports the BD-MV and AVCHD formats. 1 Select video or still image mode. Creating Discs with an External Blu-ray Drive You can copy the recorded files to discs or play back the created discs using an optional external Blu-ray drive. Compatible External Blu-ray Drives You can use BE08LU20 from LG.
Copying Preparing an External Blu-ray Drive When connecting to the external Blu-ray drive, use a USB cable with MiniA (Male) – B (Male) connectors. The USB cable provided with this unit cannot be used. 0 To use the USB cable provided with the external Blu-ray drive, purchase the USB extension cable. Mini-A (Male) – A (Female) (Part number: QAM0852-001) . Memo : 2 Select video or still image mode. 3 Tap “CREATE FROM ALL” (video) or “SAVE ALL” (still image). 4 Tap on the media to copy.
. . Copying 0 0 When “YES” is selected, videos with similar recording dates are displayed in groups. When “NO” is selected, videos are displayed according to recording dates. 0 While the video mode is shown in the image, the same operations apply for the still image mode. 4 Tap on the media to copy. 5 Tap “CREATE BY DATE” (video) or “SAVE BY DATE” (still image). Tap “EXECUTE”. . . 8 0 When “INSERT NEXT DISC” appears, change the disc. After copying, tap “OK”. . 9 .
Copying Tap “YES” or “NO”. (A mode only) 3 Tap “SELECT AND CREATE” (video) or “SELECT AND SAVE” (still image). 4 Tap on the media to copy. 5 Tap “SELECT FROM SCENES” (video) or “SELECT FROM IMAGES” (still image). 0 0 Tap “EXECUTE”. . . 9 When “YES” is selected, videos with similar recording dates are displayed in groups. When “NO” is selected, videos are displayed according to recording dates. . . 8 0 When “INSERT NEXT DISC” appears, change the disc. . 10 After copying, tap “OK”. .
Copying Tap “EXECUTE”. . 8 . 0 0 0 0 9 The number of discs required to copy the files is displayed. Prepare the discs accordingly. Tap “YES” or “NO”. (A mode only) 0 0 Tap “J” to return to the “BACK-UP” menu. Images recorded in 3D mode and 2D mode are displayed on the index screen separately. Press the 3D button to switch to the desired mode for playback. During 3D mode, “3D” is displayed on the LCD monitor. During 2D mode, “2D” is displayed on the LCD monitor. Tap on the file to start playback.
Copying Creating a Disc Using a Connected Blu-ray Recorder You can create discs using a Blu-ray recorder by connecting it to this unit using a USB cable. Connect the USB cable and the AC adapter. 1 Turn off the camcorder by pressing the M button for about 2 seconds. You can dub videos in standard quality by connecting to a DVD recorder. 0 Refer also to the instruction manuals of the TV and DVD recorder.
Copying Using a USB External Hard Disk Drive You can copy video and still image files to a USB external hard disk drive from this unit. You can also play the files in the USB external hard disk drive on this unit. 0 Refer also to the instruction manual of the external hard disk drive. Preparing a USB External Hard Disk Drive Memo : 0 0 Compatible External Hard Disk Drives You can use the “LaCie Hard Disk Sleek black design USB2.0” series from LaCie.
Copying Tap “BACK UP”. Playing Back Files in the USB External Hard Disk Drive Videos or still images saved in an external hard disk drive can be played back on this unit. 1 Select 3D or 2D mode. 2 Select video or still image mode. 3 Tap “PLAYBACK”. 4 Tap on the folder to play back. . 3 . Tap on the media to copy. . . 4 Tap the desired method. . . 5 “ALL SCENES” (video)/“ALL IMAGES” (still image): All videos or still images in this unit are copied.
Copying Caution : Deleting Folders in the USB External Hard Disk Drive 0 Files that are copied to the external hard disk drive can be deleted. Caution : Deleted files cannot be restored. Be sure to back up important files on a PC. “Backing Up All Files” (A p. 93) 0 0 1 Select 3D or 2D mode. 2 Select video or still image mode. 3 Tap “DELETE”. 4 Tap on the folder to delete. 5 Tap “YES”. . . . . . To play back 3D images, refer also to “Precautions on Recording and Playing Back 3D Images”.
Copying Formatting the USB External Hard Disk Drive All files on the external hard disk drive can be deleted. 4 Tap “USB HDDFBUILT-IN MEM” or “USB HDDFSD”. Caution : 0 Select video or still image mode. . 1 All data on the external hard disk drive will be deleted when it is formatted. Copy all files on the card to a PC before formatting. 0 Files will be imported to the selected media. Tap on the folder to import. 6 Tap on the files to import. . 5 Tap “FORMAT”. . . 2 Tap “YES”. .
Copying Dubbing Files to a VHS Tape Using a VCR You can dub videos in standard quality by connecting to a VCR. 0 Refer also to the instruction manuals of the TV and VCR. Caution : . 0 10 Press and hold the M button for 2 seconds or more to turn off this unit 3D images cannot be copied to a VHS tape. Images recorded in 3D mode cannot be copied as 2D images. 1 Open the LCD monitor, then press and hold the power button for 2 seconds or more to turn off the power. 2 Connect to a VCR/DVD recorder.
Copying Copying Files to an SD Card You can copy videos and still images from the built-in memory to SD card. Copying still images to cards makes it convenient to bring them to the shop for printing (developing). Caution : 0 0 7 Tap “SET”. 8 Tap “YES”. Make sure that there is enough space left in the destination medium. Videos and still images in the SD card cannot be copied to the built-in memory. Select 3D or 2D mode. . . 1 0 0 0 To remove P from a file, tap on the file again.
Copying Moving Files to an SD Card You can move videos and still images from the built-in memory to SD card. Files that are moved will be deleted from the built-in memory. Moving still images to SD cards makes it convenient to bring them to the shop for printing (developing). Caution : 0 0 0 0 0 0 P appears on the selected files. To remove P from a file, tap on the file again. Tap “SEL ALL” to select all files. Tap “REL ALL” to release all selections. “SET” is deactivated when no file is selected.
Copying Copying to Windows PC You can copy files to a computer using the provided software. DVDs can also be created using the computer's DVD drive. If the provided software is not installed, this unit will be recognized as an external storage when connected. Memo : 0 0 To record to discs, a recordable DVD or Blu-ray drive is required for the computer in use. Still images cannot be recorded to discs using the provided software.
Copying Verifying System Requirements (Guideline) Right-click on “Computer” (or “My Computer”) in the “Start” menu and select “Properties” to check the following items. Windows Vista/Windows 7 0 Refer to the operating instructions found in the animation on the Detailed User Guide. Windows XP 0 Refer to the operating instructions found in the animation on the Detailed User Guide.
Copying Backing Up All Files Before making backup, make sure that enough free space is left in the computer's hard disk (HDD). Connect the USB cable and the AC adapter. . 1 0 6 Backup starts. After backup is complete, click “OK”. . Memo : A Connect using the provided USB cable. B Connect the AC adapter to this unit. 0 This unit powers on automatically when the AC adapter is connected. 0 Be sure to use the supplied JVC AC adapter. 0 The “SELECT DEVICE” menu appears.
Copying Organizing Files Identifying Video or Still Image: After backing up your files, organize them by adding labels such as “Family Trip” or “Athletic Meet”. This is useful not only for creating discs, but for viewing the files too. 0 1 0 You can select files using the "SELECT" menu on the top right of the screen. Check the video/still image icon on the top right corner of the thumbnail. Double-click on the Everio MediaBrowser 3D icon. The provided software starts up. . .
Copying Recording Videos to Discs Copy the files that are arranged using the user list to discs. 1 Insert a new disc into the PC's recordable DVD or Blu-ray drive. 2 Select the desired user list. 0 0 0 0 .
Copying Backing Up Files Without Using Provided Software Copy the files to a computer using the following method. Connect the USB cable and the AC adapter. 1 Click “Safely Remove Hardware and Eject Media”. 2 Click “Safely Remove USB Mass Storage Device”. 3 (For Windows Vista) Click “OK”. 4 Disconnect the USB cable and close the LCD monitor. . . 1 Disconnecting this Unit from Computer A Connect using the provided USB cable. B Connect the AC adapter to this unit.
Copying List of Files and Folders . Folders and files are created in the built-in memory and SD card as shown below. They are created only when necessary. Caution : 0 When the folders or files are deleted/moved/renamed in the computer, they cannot be played back on this unit anymore.
Copying JVC Software Licence Agreement 7 You agree that You will not ship, transfer or export the Program or underlying information and technology to any countries to which Japan and other relevant countries have initiated an embargo on such goods. IMPORTANT TO CUSTOMERS: PLEASE MAKE SURE TO READ THIS CAREFULLY BEFORE INSTALLING OR USING THE SOFTWARE PROGRAM NAMED "DIGITAL PHOTO NAVIGATOR" ("Program") ON YOUR PC.
Menu Settings Operating the Menu There are two types of menus in this unit. 0 Main menu: Menu that contains all the items specific to the video recording, still image recording, video playback, and still image playback modes respectively. Q menu in main (common) menu: Menu that contains all common items in the video recording, still image recording, video playback, and still image playback modes. Operating the Main Menu . 0 2 Tap “Q”. 3 Tap the desired setting.
Menu Settings Main Menu for Video Recording You can adjust various settings, such as brightness and white balance, to suit the subject or purpose. You can also change settings such as picture quality and gain. Select video mode. 2 Tap q to select the recording mode. 3 Tap “MENU”. . . . 1 Setting Details SCENE SELECT Settings to suit the shooting condition can be selected. “Scene Selection” (A p. 36) *Displayed only in the manual recording mode. FOCUS Focus can be adjusted manually.
Menu Settings Setting Details BACKLIGHT COMP. Corrects the image when the subject appears dark due to backlight. “Setting Backlight Compensation” (A p. 41) *Displayed only in the manual recording mode. TELE MACRO Enables close-up shots when using the telephoto (T) end of the zoom. “Taking Close-up Shots” (A p. 41) *Displayed only in the 2D manual recording mode. TOUCH PRIORITY AE/AF Automatically adjusts focus and brightness based on the subjects’ faces or selected area.
Menu Settings SCENE SELECT BRIGHTNESS ADJUST Settings to suit the shooting condition can be selected. Operating Details “Scene Selection” (A p. 36) Adjusts the overall brightness of the screen. Operating Details “Adjusting Brightness” (A p. 38) FOCUS SHUTTER SPEED Focus can be adjusted manually. Operating Details “Adjusting Focus Manually” (A p. 37) Shutter speed can be adjusted. Operating Details “Setting Shutter Speed” (A p.
Menu Settings GAIN UP WIND CUT Makes the subject appear bright automatically when recording in dark places. Reduces the noise caused by wind. Setting Details OFF Deactivates the function. ON Electrically brightens the scene when it is dark. AUTO SLOWSHUTTER Automatically brightens the scene when it is dark. Memo : Setting Details OFF Deactivates the function. ON Activates the function. Displaying the Item 1 Select video mode. 2 Tap q to select the recording mode. 3 Tap “MENU”.
Menu Settings GRID 3D VIDEO REC FORMAT (3D mode only) Displays gridlines to make it easier to detect when the subject appears slanted. You can select a recording format for 3D video recording. Setting Details OFF Turns off grid display. ON Turns on grid display. Displaying the Item Select video mode. 2 Tap q to select the recording mode. 3 Tap “MENU”. 4 Tap “GRID”. Details AVCHD Records in AVCHD format. Set to this recording format for higher compatibility.
Menu Settings VIDEO QUALITY 4 Sets the video quality. Tap “VIDEO QUALITY”. o 3D Mode (MP4(MVC)) Setting Details THR Enables recording in high picture quality. TSR Enables long recordings. Setting . o 3D Mode (AVCHD) Details TXP Enables recording in high picture quality. TSP Enables long recordings. o 2D Mode Setting Details UXP Enables recording in the best picture quality. 0 Applies to Blu-ray discs only. Videos taken in high-definition quality cannot be saved to DVDs.
Menu Settings ZOOM (2D mode only) x.v.Color (2D mode only) Sets the maximum zoom ratio. Captures the true colors. (Use an x.v.Color compatible TV for playback.) Setting Details Setting Details 10x/OPTICAL Enables recording with 1 - 10x optical zoom. Set this when digital zoom is not desired. OFF 40x/DIGITAL Enables recording with 1 - 10x optical zoom and 11 - 40x digital zoom. Captures colors with the same standard as TV broadcasting.
Menu Settings 3D SOUND MIC LEVEL Records realistic audio sounds. Make the adjustments such that “MIC LEVEL” does not turn red. Setting Details Setting Details OFF Does not record with 3D sound effects. OFF Hides display of microphone input level. ON Records with 3D sound effects. ON Shows display of microphone input level. Displaying the Item 1 Select video mode.
Menu Settings MIC LEVEL SETTING HEADPHONE VOL. ADJ. Sets the microphone level. Make the adjustments such that “MIC LEVEL” does not turn red. Sets the volume level of the connected headphones. Details +2 Increases the microphone input level. +1 Increases the microphone input level slightly. 0 The microphone input level is not changed. -1 Decreases the microphone input level slightly. -2 Decreases the microphone input level.
. Menu Settings Tap q to select the playback mode. 3 Adjust the volume level of the headphones. . 2 To turn up the volume, set the zoom lever to the T end. To turn down the volume, set the zoom lever to the W end. .
Menu Settings Main Menu for Still Image Recording You can adjust various settings, such as brightness and white balance, to suit the subject or purpose. You can also change settings such as picture quality and gain. Select still image mode. 2 Tap q to select the recording mode. 3 Tap “MENU”. . . . 1 Setting Details SCENE SELECT Settings to suit the shooting condition can be selected. “Scene Selection” (A p. 36) *Displayed only in the manual recording mode.
Menu Settings Setting Details BACKLIGHT COMP. Corrects the image when the subject appears dark due to backlight. “Setting Backlight Compensation” (A p. 41) *Displayed only in the manual recording mode. TELE MACRO Enables close-up shots when using the telephoto (T) end of the zoom. “Taking Close-up Shots” (A p. 41) *Displayed only in the 2D manual recording mode. TOUCH PRIORITY AE/AF Automatically adjusts focus and brightness based on the subjects’ faces or selected area.
Menu Settings SCENE SELECT BRIGHTNESS ADJUST Settings to suit the shooting condition can be selected. Operating Details “Scene Selection” (A p. 36) Adjusts the overall brightness of the screen. Operating Details “Adjusting Brightness” (A p. 38) FOCUS SHUTTER SPEED Focus can be adjusted manually. Operating Details “Adjusting Focus Manually” (A p. 37) Shutter speed can be adjusted. Operating Details “Setting Shutter Speed” (A p.
Menu Settings GAIN UP GRID Makes the subject appear bright automatically when recording in dark places. Displays gridlines to make it easier to detect when the subject appears slanted. Setting Details Setting Details OFF Deactivates the function. OFF Turns off grid display. ON Electrically brightens the scene when it is dark. ON Turns on grid display. Memo : Setting can be adjusted separately for videos. “GAIN UP (Video)” (A p. 103) 0 Displaying the Item 1 Select still image mode.
Menu Settings SHUTTER MODE CONT. SHOOTING SPEED Continuous shooting settings can be adjusted. Sets the speed for continuous shooting. Setting Details RECORD ONE SHOT Records one still image. CONTINUOUS SHOOTING Records still images continuously while the SNAPSHOT button is pressed. Setting HIGH SPEED Details 0 0 Memo : You can change the continuous shooting speed with “CONT. SHOOTING SPEED” in the “COMMON” menu. “CONT. SHOOTING SPEED” (A p.
Menu Settings IMAGE SIZE USER BUTTON SETTING Sets the image size (number of pixels) for still images. Assigns a frequently used function to the USER button. Operating Details “Setting the USER Button” (A p. 42) o 3D Mode Setting 1920X1080(2M) (16:9) Details Takes still images with aspect ratio 16:9. Memo : 0 0 During 3D mode, IMAGE SIZE is fixed at 1920X1080(2M) (16:9) and cannot be changed. When still images are captured in the 3D mode, they will be saved in both 3D and 2D formats.
Menu Settings Main Menu for Video Playback You can delete or look for specific videos. Select video mode. 2 Tap q to select the playback mode. 3 Tap “MENU”. . . . 1 Setting Details SEARCH DATE Narrows down the video index screen according to recording dates. “SEARCH DATE” (A p. 117) PROTECT/CANCEL Protects files from being deleted accidently. “Protecting/Releasing Protection of the Currently Displayed File” (A p. 66) “Protecting/Releasing Protection of Selected Files” (A p.
Menu Settings SEARCH DATE 3D MOTION RELIEF (3D mode only) Narrows down the video index screen according to recording dates. Operating Details “Date Search” (A p. 58) Plays back in stop-motion the scenes that are likely to cause motion sickness to prevent its occurrence. PROTECT/CANCEL Protects files from being deleted accidently. Operating Details “Protecting/Releasing Protection of the Currently Displayed File” (A p. 66) “Protecting/Releasing Protection of Selected Files” (A p.
Menu Settings Main Menu for Still Image Playback You can delete or look for specific still images. Select still image mode. 2 Tap q to select the playback mode. 3 Tap “MENU”. . . . 1 Setting Details SEARCH DATE Narrows down the still image index screen according to recording dates. “Date Search” (A p. 58) PROTECT/CANCEL Protects files from being deleted accidently. “Protecting/Releasing Protection of the Currently Displayed File” (A p.
Menu Settings Common Menu Select video or still image mode. 2 Tap “MENU”. 3 Tap “Q”. . . . 1 Setting Details CLOCK ADJUST Resets the current time or sets to the local time when using this unit overseas. “Clock Setting” (A p. 19) “Setting the Clock to Local Time when Traveling” (A p. 25) “Setting Daylight Saving Time” (A p. 25) DATE DISPLAY STYLE Sets the order of year, month, day and the time display format (24H/12H). “DATE DISPLAY STYLE” (A p.
Menu Settings Setting Details DEMO MODE Introduces the special features of this unit in digest form. “DEMO MODE” (A p. 125) TOUCH SCREEN ADJUST Adjusts the response position of the buttons on the touch screen. “TOUCH SCREEN ADJUST” (A p. 126) 3D DISPLAY WARNING (3D mode only) Sets whether to display warnings during 3D playback. “3D DISPLAY WARNING (3D mode only)” (A p. 127) VIDEO OUTPUT (2D mode only) Sets the aspect ratio (16:9 or 4:3) according to the connecting TV.
Menu Settings CLOCK ADJUST Clock Set Style Resets the current time or sets to the local time when using this unit overseas. Operating Details “Clock Setting” (A p. 19) “Setting the Clock to Local Time when Traveling” (A p. 25) “Setting Daylight Saving Time” (A p. 25) The clock set style of this unit varies with the models. DATE DISPLAY STYLE Sets the order of year, month, day and the time display format (24H/12H). Tap “MENU”. 2 Tap “Q”. . . . . 1 . 0 Tap “DATE DISPLAY STYLE”.
Menu Settings LANGUAGE REC MEDIA FOR VIDEO The language on the display can be changed. Operating Details “Changing the Display Language” (A p. 21) Sets the recording/playback media of videos. MONITOR BRIGHTNESS Sets the brightness of the LCD monitor. Setting Details Brightens the backlight of the monitor regardless of the surrounding conditions. 3 Sets to the standard brightness. 2 Darkens the backlight of the monitor regardless of the surrounding conditions. 1 Sets to dim brightness.
Menu Settings REC MEDIA FOR IMAGE OPERATION SOUND Sets the recording/playback media of still images. Turns on or off the operation sound. Setting Setting Details BUILT-IN MEMORY Records still images to this unit's built-in memory. SD CARD Records still images to the SD card. Displaying the Item Tap “MENU”. 2 Tap “Q”. 3 Tap “REC MEDIA FOR IMAGE”. OFF Turns off the operation sound. ON Turns on the operation sound. Displaying the Item 1 Tap “MENU”. 2 Tap “Q”. 3 Tap “OPERATION SOUND”.
Menu Settings AUTO POWER OFF QUICK RESTART Prevents the situation of forgetting to turn off the power when this is set. Enables the power to turn on quickly when the LCD monitor is opened again within 5 minutes. Setting Details OFF Power is not turned off even if this unit is not operated for 5 minutes. ON Turns off the power automatically if this unit is not operated for 5 minutes. Setting OFF Deactivates the function.
Menu Settings REMOTE DEMO MODE Enables remote control operation. Plays a demonstration of the special features of this unit. Setting Setting Details Details OFF Disables remote control operation. OFF Deactivates the function. ON Enables remote control operation. ON Plays a demonstration of the special features of this unit. Displaying the Item 1 Tap “MENU”. Displaying Demo Mode 0 0 A Remove the battery pack and SD card. B Connect the AC adapter.
Menu Settings TOUCH SCREEN ADJUST Adjusts the response position of the buttons on the touch screen. Tap “MENU”. . 1 0 Setting ends and returns to the menu screen. Caution : . 0 2 Memo : Tap “Q”. . 0 0 Tap “TOUCH SCREEN ADJUST”. . 3 0 The touch screen adjustment screen appears. Tap “+”. (3 times in total) . 4 0 Keep tapping “+” as its position changes with every tap. Tap “+” again to confirm the adjusted positions. (3 times in total) .
Menu Settings 3D DISPLAY WARNING (3D mode only) VIDEO OUTPUT (2D mode only) Sets whether to display warnings during 3D playback. Sets the aspect ratio (4:3 or 16:9) according to the connecting TV. Setting Details Setting Details OFF Shows a 3D warning icon (*) instead of the 3D warning message. 4:3 Select this when connecting to a conventional TV (4:3). ON Shows a 3D warning message at a regular interval. 16:9 Select this when connecting to a widescreen TV (16:9).
Menu Settings HDMI OUTPUT Sets the output from the HDMI connector of this unit when it is connected to a TV. 1 Tap “MENU”. 2 Tap “Q”. 3 Tap “HDMI OUTPUT”. o 3D Mode AUTO Output images according to the supported monitor output format. SIDE-BY-SIDE OUTPUT Outputs images from the HDMI connector in “SIDE-BY-SIDE OUTPUT” (960x1080ix2ch) regardless of the supported monitor output format.
Menu Settings HDMI CONTROL AUTO FINALIZE Sets whether to link operations with an HDMI-CEC compliant TV. Finalizes the discs created automatically so that they can be played back on compatible devices. Setting Details OFF Turns off linked operations. ON Turns on linked operations. Displaying the Item Tap “MENU”. Details OFF Does not finalize the disc. Data can be added to the disc later. ON Finalizes the disc and sets it to a readable state. Displaying the Item 1 Tap “MENU”. 2 Tap “Q”.
Menu Settings FACTORY PRESET FORMAT BUILT-IN MEM. Returns all the settings to their default values. Deletes all files on the built-in memory. 1 Tap “MENU”. Setting Details FILE Deletes all files on the built-in memory. FILE + MANAGEMENT NO Deletes all files on the built-in memory and resets the folder and file numbers to "1". . Caution : 2 Tap “Q”. 0 0 All data on the built-in memory will be deleted when it is formatted. Copy all files on the built-in memory to a PC before formatting.
Menu Settings FORMAT SD CARD ERASE ALL DATA Deletes all files on the SD card. Execute this process when disposing of this unit or passing it to another person. Setting Details FILE Deletes all files on the SD card. FILE + MANAGEMENT NO Deletes all files on the SD card and resets the folder and file numbers to "1". 1 Tap “MENU”. 2 Tap “Q”. 3 Tap “ERASE ALL DATA”. 4 Tap “YES”. 0 0 0 Not available for selection when no SD card is inserted.
Names of Parts Rear . . Front 1 SNAPSHOT (Still Image Recording) Button 0 2 3 During shooting: Adjusts the shooting range. During playback (index screen): Moves to the next or previous page. During video playback: Adjusts the volume. Shoe 0 2 3 0 5 Lens Cover 0 0 6 Do not cover the microphone with your fingers during video recording. Do not touch the lens. Do not cover the lens with your fingers during recording. Remote Sensor Lights up/blinks during recording or playback.
Names of Parts Interior . Bottom 1 0 0 . 1 Tripod Mounting Hole “Tripod Mounting” (A p. 22) LCD Monitor 2 Turns the power on/off by opening and closing. Enables self-portraits to be taken by rotating the monitor. USER Button “Setting the USER Button” (A p. 42) 3 A / B (Video/Still Image) Button 0 4 i.AUTO Button 0 5 Switches between video and still image modes. Switches between Intelligent Auto and Manual modes. 3D Button 0 0 Switches between 3D and 2D modes.
Indications on the LCD monitor 1 Shutter Speed . Video Recording . Common Recording Indications 1 “Setting Shutter Speed” (A p. 39) 2 Tele Macro (2D mode only) “Taking Close-up Shots” (A p. 41) 3 Scene Select “Scene Selection” (A p. 36) 4 White Balance “Setting White Balance” (A p. 40) 5 Date/Time “Clock Setting” (A p. 19) 6 3D/2D Mode “3D Button” (A p. 133) 7 Media “REC MEDIA FOR VIDEO” (A p. 122) “REC MEDIA FOR IMAGE” (A p.
Indications on the LCD monitor Video Playback . . Still Image Recording 1 2 Still Image Mode 1 Scene Counter “A / B (Video/Still Image) Button” (A p. 133) 2 Video Mode “IMAGE SIZE” (A p. 115) 3 4 3 “SHUTTER MODE” (A p. 114) “CONT. SHOOTING SPEED” (A p. 114) 4 Self-Timer 5 Focus “Taking Still Images in Intelligent Auto Mode” (A p. 32) 6 Remaining Number of Shots 7 Recording in Progress Operation Indicator “Playing Back Videos” (A p.
Indications on the LCD monitor . Still Image Playback 1 Still Image Mode “A / B (Video/Still Image) Button” (A p. 133) 2 Operation Indicator “Playing Back Still Images” (A p. 55) 3 Folder Number 4 File Number 5 Date/Time “Clock Setting” (A p. 19) 6 3D/2D Mode “3D Button” (A p. 133) 7 Media “REC MEDIA FOR IMAGE” (A p. 123) 8 External Storage Playback “Playing Back with a DVD Writer” (A p. 77) “Playing Back with an External Blu-ray Drive” (A p.
Troubleshooting Battery Pack Recording Unable to turn on the power when using the battery pack. Recording cannot be performed. Recharge the battery pack. “Charging the Battery Pack” (A p. 15) If the terminal of this unit or the battery pack is dirty, wipe it with a cotton swab or something similar. If you use any other battery packs besides JVC battery packs, safety and performance cannot be guaranteed. Be sure to use JVC battery packs. Check the A/B button. “Interior” (A p.
Troubleshooting Card Cannot insert the SD card. Make sure not to insert the card in the wrong direction. “Inserting an SD Card” (A p. 16) Unable to copy to SD card. To record to the card, it is necessary to perform media settings. “REC MEDIA FOR VIDEO” (A p. 122) To use cards that have been used on other devices, it is necessary to format (initialize) the card using “FORMAT SD CARD” from media settings. “FORMAT SD CARD” (A p. 131) Playback Sound or video is interrupted. No date/time display.
Troubleshooting Editing/Copying Computer Unable to delete file. Unable to copy files to DVD with a PC. Files (videos/still images) that are protected cannot be deleted. Release protection before deleting the file. “Protecting Files” (A p. 66) To record to discs, a recordable DVD drive is required for the PC in use. Unable to copy/move files to SD card. If the SD card is write protected, set it to off. BACK-UP menu does not disappear. While the USB cable is connected, the “BACK-UP” menu is displayed.
Troubleshooting Screen/Image Other Problems The LCD monitor is difficult to see. The buttons on the touch screen do not work. The LCD monitor may be difficult to see if used in bright areas such as under direct sunlight. The LCD monitor appears darker when 3D images are displayed. Change the display to 2D when it is difficult to see, such as when using this unit outdoors. Tap the buttons on the touch screen with your fingers.
Troubleshooting Error Message? CHECK LENS COVER Open the lens cover. SET DATE/TIME! THIS FILE IS PROTECTED Switch off the “PROTECT/CANCEL” function in the “EDIT” menu. “Protecting Files” (A p. 66) CHECK CARD'S WRITE PROTECTION SWITCH Set the write protect switch of the SD card to off. Connect the AC adapter, charge the battery for more than 24 hours and set the clock. (If the message still appears, the clock battery is exhausted. Consult your nearest JVC dealer.) “Clock Setting” (A p.
Maintenance Perform regular maintenance of this unit to enable it to be used for a long time. Caution : 0 Be sure to detach the battery pack, AC adapter, and power plug before performing any maintenance. Camcorder 0 0 Wipe this unit with a dry, soft cloth to remove any dirt. When it is extremely dirty, soak the cloth in a solution of neutral detergent, wipe the body with it, and then use a clean cloth to remove the detergent. Caution : 0 0 0 Do not use benzene or thinner.
Specifications Camera Item Item Power supply Power consumption Details 3D Mode (AVCHD) 4.8 W (when display on LCD monitor is set to “3D” and “MONITOR BRIGHTNESS” is set to “STANDARD”), Rated Current Consumption: 1.0 A 4.5 W (when display on LCD monitor is set to “2D” and “MONITOR BRIGHTNESS” is set to “STANDARD”), Rated Current Consumption: 1.0 A 0 3D Mode (MP4(MVC)) 5.5 W (when display on LCD monitor is set to “3D” and “MONITOR BRIGHTNESS” is set to “STANDARD”), Rated Current Consumption: 1.0 A 5.
Specifications Video Still Image o 3D Mode (AVCHD) Item o 3D Mode Details Item Details Recording/ Playback format AVCHD standard Video: MPEG-4 AVC/H.264 Audio: Dolby Digital 2ch Recording format MPF(compatible with Disparity) Extension .MPO Extension .MTS Image size Signal system Digital high definition system (1080/60i x 2) NTSC standard “Approximate Number of Still Images (Unit: Number of Shots)” (A p.
Specifications AC Adapter (AP-V20U) Item Details Power supply AC 110 V to 240 V, 50 Hz/60 Hz Output DC 11 V, 1.0 A Allowable operating temperature 0°C to 40°C (32°F to 104°F) (10°C to 35°C (50°F to 95°F) during charging) Dimensions (mm) 78 x 34 x 46 (3-1/8” x 1-3/8” x 1-13/16”) (W x H x D: excluding cord and AC plug) Mass Approx. 100 g (0.22 lbs) Battery Pack (BN-VF815U) Item Details Power voltage 7.2 V Capacity 1460 mAh Dimensions (mm) 30.5 x 32.