HD MEMORY CAMERA GZ-E10/ GZ-HM40 Detailed User Guide LYT2432-002A
Table of Contents Beginner’s Guide ........................................................... 4 Charging .................................................................................. 4 Recording ................................................................................ 4 Playback .................................................................................. 4 Shooting Tips ........................................................................... 4 Holiday Season/Christmas .................
LCD Monitor .......................................................................... 75 Indications on the LCD monitor Video Recording .................................................................... 75 Video Playback ...................................................................... 76 Troubleshooting When the unit is not working properly .................................... 76 Battery Pack .......................................................................... 77 Recording .................
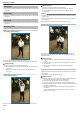
Beginner’s Guide o [Getting Ready] Charging 0 Recording 0 Refer to the operating instructions found in the animation on the Detailed User Guide. Playback 0 A Open your feet to the width of your shoulders. B Extend your right hand and hold the camcorder over your head. C Hold the LCD monitor with your left hand and adjust the angle accordingly. Refer to the operating instructions found in the animation on the Detailed User Guide.
Useful Shooting Techniques Holiday Season/Christmas Finding the Presents Record the happy Christmas celebration with your family! . . Decorating the Tree and Preparing the Dinner The decoration of tree and preparation of dinner are part of the joy of Christmas. Be sure to record these happy family times! For children, the greatest joy of Christmas is receiving presents the next morning.
Useful Shooting Techniques Wedding Create an awesome wedding video for the bride and groom! Recording the Expressions and Comments of Guests o Setting the shot from eye level to chest level . Discussing and Planning Before the Event . You can record comments from the guest by going around asking, "Please say a few words for the bride and groom". This can be done at the guests' waiting room, when the bride and groom are changing, or during the entertainment programs.
Useful Shooting Techniques Recording the congratulatory messages from friends at the same time Travel Capture all the good times of your domestic or overseas trips! . . Bringing the Necessary Equipment The necessary things to bring on a trip depends on your traveling purpose and the destination. For overseas trips in particular, you have to think about what to bring in accordance to the local conditions. Here are some suggestions for your consideration.
Useful Shooting Techniques Recording cannot be performed when an AC adapter is connected to the camcorder for battery charging. You can bring an additional battery charger to charge battery packs if you plan to use the camcorder for recording at night. You can also charge multiple battery packs by using both the battery charger and this camcorder at the same time. o Tripod . . A tripod is an essential item to take stable images.
Useful Shooting Techniques Amusement Park o Take more shots of the smiling faces of everyone in the family! . . Taking Videos of Moving Subjects o . . Scenarios with changes in body movement are suitable for taking videos. This includes situations where there are rapid changes in facial expressions or voices of surprise and delight. *Some amusement parks do not allow passengers to perform any recording. Be sure to check beforehand.
Getting Started Key Features Key features of your camcorder 1 Full High Definition (1920×1080 pixels) Video Recording 2 i.
Getting Started Verifying the Accessories If any of the items are missing or defective, consult your JVC dealer or the nearest JVC service center. Illustration Description AC Adapter AC-V11U 0 Connects to this unit to charge the battery pack. It can also be used when recording or playing back videos indoors. . Battery Pack BN-VG107U 0 Attaches to this unit to supply power. . AV Cable 0 Connects this unit to a TV to play back recorded images on the TV. .
Getting Started Memo : Charging the Battery Pack Charge the battery pack immediately after purchase and when the remaining battery power is low. The battery pack is not charged at the time of purchase. 1 Attach the battery pack. . 0 2 Align the top of the battery with the mark on this unit, and slide in until the battery clicks into place. Connect the AC adapter to the DC connector. . 3 Plug in the power. AC Adapter To AC Outlet (110 V to 240 V) .
Getting Started Grip Adjustment Detaching the Battery Pack . Slide the battery release lever to detach the battery from this unit. Approximate Battery Charging Time (Using AC Adapter) Battery Pack Charging Time BN-VG107U 1 h 50 m BN-VG114U 2 h 30 m BN-VG121U 3 h 30 m BN-VG138U 6 h 10 m A Open the lever on the strap lock B Adjust the length of the belt C Close the lever . 0 Caution : 0 Be sure to fasten the grip belt properly.
Getting Started Inserting an SD Card Removing the Card Insert a commercially available SD card before recording. “Types of Usable SD Card” (A p. 14) “Approximate Video Recording Time” (A p. 34) 1 Push the SD card inward once, then pull it out straight. Close the LCD monitor. . . 2 Open the cover. Types of Usable SD Card The following SD cards can be used on this unit. Operations are confirmed on the SD cards from the following manufacturers. 0 Panasonic 0 TOSHIBA 0 SanDisk SD Card .
Getting Started 0 0 0 0 0 0 This unit is not guaranteed to operate with all SD cards, even when using the ones specified above. Some SD cards may not work due to specification changes, etc. To record videos with “VIDEO QUALITY” set to “UXP”, use of a Class 6 or higher compliant SDHC/SDXC card is recommended. Class 4 and Class 6 are guaranteed to have a minimum transfer rate of 4 MB/s and 6 MB/s respectively during reading or writing of data. You can also use a Class 10 compliant SDHC/SDXC card.
Getting Started Clock Setting The “SET DATE/TIME!” screen appears when you turn on this unit for the first time after purchase, when it has not been used for a long time, or when the clock is not set yet. Set the clock before recording. Memo : To select/move cursor towards up/left or down/right, press the button UP/< or DOWN/>. . 1 Open the LCD monitor. . 0 0 2 The unit turns on. When the LCD monitor is closed, the unit turns off. Select “YES” and press OK when “SET DATE/TIME!” is displayed.
Getting Started Resetting the Clock CLOCK/AREA SETTING GMT Set the clock with “CLOCK ADJUST” from the menu. Memo : To select/move cursor towards up/left or down/right, press the button UP/< or DOWN/>. . 0 0 The city name and time difference are displayed. To cancel and return to the previous screen, press MENU. . 1 Press MENU. . 2 Select “CLOCK ADJUST” and press OK. CLOCK ADJUST . 0 0 3 Press UP/< or DOWN/> to move the cursor. To cancel and return to the previous screen, press MENU.
Getting Started Changing the Display Language The language on the display can be changed. Memo : Holding this Unit When holding this unit, keep your elbows close to your sides to prevent camera shake. To select/move cursor towards up/left or down/right, press the button UP/< or DOWN/>. . 1 Press MENU. 2 Select “DISPLAY SETTINGS” and press OK. . DISPLAY SETTINGS . Caution : . 0 0 3 Press UP/< or DOWN/> to move the cursor. To cancel and return to the previous screen, press MENU.
Getting Started Using this Unit Overseas Setting the Clock to Local Time when Traveling The shape of the power outlet varies according to countries and regions. To charge the battery pack, you need a converter plug that matches the shape of the outlet. “Charging the Battery Pack Overseas” (A p. 19) Change the date and time display to the local time by selecting your travel destination in “AREA SETTING” of “CLOCK ADJUST”. “Setting the Clock to Local Time when Traveling” (A p.
Getting Started Setting Daylight Saving Time When “ON” is selected in “DST SETTING” of “CLOCK ADJUST”, the time is set 1 hour ahead. Optional Accessories You can record for a longer time by using the optional battery pack. Memo : To select/move cursor towards up/left or down/right, press the button UP/< or DOWN/>. Product Name Battery Pack 0 BN-VG114U 0 BN-VG121U 0 BN-VG138U 0 Provides a longer recording time than the battery pack that comes with this unit. It can also be used as a spare battery pack.
Recording Taking Videos in Intelligent Auto Mode Indications During Video Recording Recording Media Battery Indicator You can record without worrying about the setting details by using the Intelligent Auto mode. Settings such as exposure and focus will be adjusted automatically to suit the shooting conditions. 0 In case of specific shooting scenes such as person etc., its icon is displayed on the screen. 0 Before recording an important scene, it is recommended to conduct a trial recording. Memo : .
Recording o Scenes of Intelligent Auto Display Icon Useful Settings for Recording Description When “QUICK RESTART” is set to “ON”, this unit turns on immediately if you open the LCD monitor within 5 minutes after the power is turned off by closing the monitor. “QUICK RESTART” (A p. 68) 0 E Captures one’s skin beautifully. A Allows people to be captured naturally. D Focuses at a far distance and captures a sharp image with vivid colors. I Records with minimal noise in the overall image.
Recording Manual Recording You can adjust settings, such as brightness, by using the manual mode. Manual Recording Menu The following items can be set. Memo : To select/move cursor towards up/left or down/right, press the button UP/< or DOWN/>. . 1 Open the lens cover. Name Description SCENE SELECT Recordings that suit the shooting conditions can be performed easily. “Scene Selection” (A p. 24) FOCUS Use manual focus if the subject is not focused automatically. “Adjusting Focus Manually” (A p.
Recording *The image is only an impression. Scene Selection Common scenes that are often encountered can be recorded with the most suitable settings. Memo : To select/move cursor towards up/left or down/right, press the button UP/< or DOWN/>. Setting b NIGHTALIVE Effect Increases gain and brightens the scene automatically using a slow shutter when the surrounding is dark. To prevent camera shake, use a tripod. . 1 Select the Manual recording mode. .
Recording Adjusting Focus Manually Set this when the focus is not clear in Intelligent Auto or when manual focusing is desired. Memo : To select/move cursor towards up/left or down/right, press the button UP/< or DOWN/>. 0:00:00 [05:56] . 0 0 7 Press UP/< to focus on a distant subject. Press DOWN/> to focus on a near subject. Press OK to confirm. . 1 Select the Manual recording mode. 0:00:00 [05:56] . 0 When focus is confirmed, the focusing frame disappears and E and p are displayed.
Recording Adjusting Brightness You can adjust the brightness to your preferred level. Memo : To select/move cursor towards up/left or down/right, press the button UP/< or DOWN/>. 0:00:00 [05:56] . 0 0 0 7 . 1 Compensation range during video recording: -2.0 to +2.0 EV Press UP/< to increase the brightness. Press DOWN/> to decrease the brightness. Press OK to confirm. Select the Manual recording mode. 0:00:00 [05:56] . . 0 2 If the mode is P Intelligent Auto, press the i.
Recording Setting White Balance You can set the color tone to suit the light source. Memo : To select/move cursor towards up/left or down/right, press the button UP/< or DOWN/>. Setting Details AUTO Adjusts automatically to the natural colors. MWB Use this when the problem of unnatural colors is not resolved. FINE Set this when shooting outdoors on a sunny day. CLOUD Set this when shooting on a cloudy day or inside a shade.
Recording Setting Backlight Compensation Taking Close-up Shots You can correct the image when the subject appears too dark due to backlight. You can take close-up shots of an object using the tele macro function. Memo : To select/move cursor towards up/left or down/right, press the button UP/< or DOWN/>. . *The image is only an impression. Memo : To select/move cursor towards up/left or down/right, press the button UP/< or DOWN/>. . 1 Select the Manual recording mode. .
Recording Capturing Human Subjects Clearly (Face Detection AE/AF) OFF “FACE PRIORITY AE/AF” automatically adjusts the detected face with appropriate focus and brightness. ON Memo : To select/move cursor towards up/left or down/right, press the button UP/< or DOWN/>. . 0 After setting, the tele macro icon o appears. Setting Details OFF Enables close-up shots up to 1 m at the telephoto (T) end. Enables close-up shots up to 5 cm at the wide angle (W) end.
Recording Caution : 0 0 When “FACE PRIORITY AE/AF” is set to “ON”, the following settings will change. - If “SCENE SELECT” is set to “SPOTLIGHT”, it will be switched to “OFF”. - If “FOCUS” is set to “MANUAL”, it will be switched to “AUTO”. - If “BACKLIGHT COMP.” is set to “ON”, it will be switched to “OFF”. When the following settings are made, “FACE PRIORITY AE/AF” will switch to “OFF”. - When “SCENE SELECT” is set to “SPOTLIGHT” - When “FOCUS” is set to “MANUAL” - When “BACKLIGHT COMP.
Recording Recording at Intervals (TIME-LAPSE RECORDING) Indications During Time-Lapse Recording Video Quality Speed Indicator Recording in Progress Record-Standby Enables the changes of a scene that occur slowly over a long period to be shown within a short time by taking frames of it at a certain interval. This is useful for making observations such as the opening of a flower bud. Memo : To select/move cursor towards up/left or down/right, press the button UP/< or DOWN/>.
Recording Time-Lapse Setting The greater the number of seconds, the longer the recording interval. Setting Details OFF Deactivates the function. 1SEC INTERVAL Takes a frame at 1-second intervals. Recorded videos will be played back at 30 times speed. 2SEC INTERVAL Takes a frame at 2-second intervals. Recorded videos will be played back at 60 times speed. 5SEC INTERVAL Takes a frame at 5-second intervals. Recorded videos will be played back at 150 times speed.
Recording 0 0 0 Digital zoom and image stabilizer are not available after “AUTO REC” is set. “AUTO REC” cannot be used together with “TIME-LAPSE RECORDING” . When both are set, priority is given to “TIME-LAPSE RECORDING”. The auto power off and power-saving modes are not available after “AUTO REC” is set. Memo : 0 0 0 0 0 Recording stops when there are no changes for 5 seconds during video recording. Settings of “AUTO REC” are not saved when the power is turned off.
Recording Approximate Video Recording Time Quality SDHC/SDXC Card 4 GB 8 GB 16 GB 32 GB 48 GB 64 GB UXP 20 m 40 m 1 h 20 m 2 h 50 m 4 h 10 m 5 h 40 m XP 30 m 1h 2h 4h 6h 8 h 10 m SP 40 m 1 h 20 m 2 h 50 m 5 h 50 m 8 h 30 m 11 h 30 m EP 1 h 40 m 3 h 30 m 7 h 10 m 14 h 40 m 21 h 30 m 28 h 50 m SSW 1 h 20 m 2 h 40 m 5 h 30 m 11 h 20 m 16 h 40 m 22 h 20 m SEW 2 h 50 m 5 h 40 m 11 h 30 m 23 h 30 m 34 h 30 m 46 h 10 m 0 The actual recording time may shorten depend
Playback Playing Back Videos You can select and play back the recorded videos from an index screen (thumbnail display). Memo : To select/move cursor towards up/left or down/right, press the button UP/< or DOWN/>. Zoom N / Vol.+ Increases volume level Stop (returns to thumbnail display) Zoom O / Vol.
Playback Playing a Video with Defective Management Information The management information of a video may be damaged if recording is not performed correctly, such as turning off the power in the middle of recording. You can perform the following operations to play back the videos with defective management information. Memo : To select/move cursor towards up/left or down/right, press the button UP/< or DOWN/>. . 1 Select the playback mode. . 2 Press MENU. .
Playback Date Search You can search and play videos according to recording dates. Memo : To select/move cursor towards up/left or down/right, press the button UP/< or DOWN/>. Connecting to and Viewing on TV You can connect this unit to a TV for playback. The image quality on TV varies with the type of TV and the connecting cable. Select the connector that best suits your TV. 0 Refer also to the instruction manual of the TV in use. “Connecting via the HDMI Mini Connector” (A p.
Playback 0 Connecting via the HDMI Mini Connector If you are using an HDTV, you can play back in HD quality by connecting to the HDMI mini connector. 0 Use a High Speed HDMI Cable. 0 Refer also to the instruction manual of the TV in use. Memo : To select/move cursor towards up/left or down/right, press the button UP/< or DOWN/>. . 1 Connect to a TV. TV To HDMI Mini Connector HDMI Cable (Optional) HDMI Connector Input . 2 Connect the AC adapter to this unit.
Playback Operating in Conjunction with TV via HDMI Connecting via the AV Connector Connecting this unit to an HDMI-CEC enabled TV using the HDMI mini cable allows linked operations with the TV to be performed. 0 HDMI-CEC (Consumer Electronics Control) is an industry standard that enables interoperability between HDMI-CEC compliant devices that are connected via HDMI cables. By connecting the supplied AV cable to the AV connector, videos can be played back on a TV.
Editing Deleting Unwanted Files Delete unwanted videos when the space in the recording media is running out. The capacity of the recording media can be restored after deleting the files. “Deleting the Currently Displayed File” (A p. 40) “Deleting Selected Files” (A p. 41) “Deleting All Files” (A p. 42) DELETE Memo : . Deleted files cannot be restored. Files that are protected cannot be deleted. Release protection before deleting the file. “Protecting Files” (A p.
Editing Deleting Selected Files Deletes the selected files. Memo : To select/move cursor towards up/left or down/right, press the button UP/< or DOWN/>. . 7 Select “EXECUTE” and press OK. DELETE? EXECUTE QUIT . Caution : 0 1 RETURN Deleted files cannot be restored. . 0 0 0 Select the playback mode. After deleting, press OK. To cancel the deletion, select “QUIT” and press OK. To return to the previous screen, select “RETURN” and press OK. Memo : Files that are protected cannot be deleted.
Editing Protecting Files Deleting All Files Deletes all files. Memo : To select/move cursor towards up/left or down/right, press the button UP/< or DOWN/>. Prevent important videos from being deleted accidently by protecting them. “Protecting/Releasing Protection of the Currently Displayed File” (A p. 42) “Protecting/Releasing Protection of Selected Files” (A p. 43) “Protecting All Files” (A p. 44) “Releasing Protection of All Files” (A p.
Editing VIDEO PROTECT PROTECT? YES NO . . 0 0 0 0 0 The file to protect appears on this screen. To cancel the protection, select “NO” and press OK. Press the zoom lever to select the previous or next file. After setting, press OK. To exit the screen, press MENU. 0 0 6 A protect mark I appears on the selected file. To remove the protect mark I, press OK again. To move to the next page on the index screen, slide along the N/O (zoom) lever.
Editing Protecting All Files Releasing Protection of All Files Protects all files. Releases protection of all files. To select/move cursor towards up/left or down/right, press the button UP/< or DOWN/>. To select/move cursor towards up/left or down/right, press the button UP/< or DOWN/>. Memo : Memo : . . 1 Select the playback mode. 2 Press MENU. 1 Select the playback mode. 2 Press MENU. . . . 3 . Select “PROTECT/CANCEL” and press OK. 3 Select “PROTECT/CANCEL” and press OK.
Copying Dubbing Files to a Disc by Connecting to a DVD Recorder You can dub videos in standard quality by connecting to a DVD recorder. 0 Refer also to the instruction manuals of the TV and DVD recorder. 1 Open the LCD monitor. Creating a Disc Using a Connected Blu-ray Recorder You can create discs using a Blu-ray recorder by connecting it to this unit using a USB cable. Memo : To select/move cursor towards up/left or down/right, press the button UP/< or DOWN/>. . 2 Connect to a DVD recorder. .
Copying Copying to Windows PC You can copy files to a computer using the provided software. Discs can also be created using the computer’s DVD or Blu-ray drive. If the provided software is not installed, this unit will be recognized as an external storage when connected. Memo : To record to discs, a recordable DVD or Blu-ray drive is required for the computer in use. To create DVD-Video discs, it is necessary to update the provided software. For details, refer to the Pixela homepage. http://www.pixela.
Copying Installing the Provided Software (Built-in) Installation Procedure You can display the recorded images in calendar format and perform simple editing using the provided software. o Windows Vista/Windows 7 0 Refer to the operating instructions found in the animation on the Detailed User Guide. Preparations o Windows XP 0 Refer to the operating instructions found in the animation on the Detailed Connect this unit to a computer with a USB cable. 1 User Guide. Open the LCD monitor. .
Copying Backing Up All Files Before making backup, make sure that enough free space is left in the computer's hard disk (HDD). Backup will not start if there is not enough free space. Memo : 1 Click To select/move cursor towards up/left or down/right, press the button UP/< or DOWN/>. 2 Click Click “Next” Click “All volume in camcorder” . 6 . 1 Start backup. Open the LCD monitor. Saving Destination (PC) . 2 Click Connect the USB cable and the AC adapter. .
Copying 3 (For Windows Vista) Click “OK”. Organizing Files 4 Disconnect the USB cable and close the LCD monitor. After backing up your files, organize them by adding labels such as “Family Trip” or “Athletic Meet”. This is useful not only for creating discs, but for viewing the files too. 1 Double-click on the Everio MediaBrowser 4 icon. 0 The provided software starts up. . 2 Display the month of the files to organize. Click Recording Month . 3 Create a user list. Recording Date Click .
Copying User List Thumbnails Recording Videos to Discs Copy the files that are arranged using the user list to discs. 1 Insert a new disc into the PC's recordable DVD or Blu-ray drive. 2 Select the desired user list. Drag Drop . Memo : 0 If you encounter any problems with the provided software Everio MediaBrowser 4, please consult the “Pixela User Support Center”.
Copying Backing Up Files Without Using Provided Software Copy the files to a computer using the following method. Memo : To select/move cursor towards up/left or down/right, press the button UP/< or DOWN/>. Click . Memo : The following types of discs can be used on the provided software Everio MediaBrowser 4. DVD-R DVD-R DL DVD-RW DVD+R DVD+R DL DVD+RW 0 The following formats are supported by the provided software Everio MediaBrowser 4. AVCHD DVD-Video* http://www.pixela.co.
Copying 0 Open the folder with the desired files. “List of Files and Folders” (A p. 53) 6 Copy the files to any folder in the computer (desktop, etc). Caution : 0 When the folders or files are deleted/moved/renamed in the computer, they cannot be played back on this unit anymore. Memo : 0 0 To edit/view the files, use a software that supports AVCHD (video) files. The above operations on computer may vary with the system used.
Copying List of Files and Folders Folders and files are created in the SD card as shown below. They are created only when necessary. [ JVC CA M_ SD ] 「DCIM」 (SD Card) 「EXTMOV」 「PRIVATE」 (Management Information) . DEM_0000.MPG MOV _0001.MTS MOV _0002.MTS MOV _0003.MTS (Demo Video File) *There may be no demo video file.
Copying Copying to Mac Computer 0 Copy the files to a Mac computer using the following method. Memo : To select/move cursor towards up/left or down/right, press the button UP/< or DOWN/>. The subsequent operations are to be performed on the Mac computer. Caution : 0 0 When the folders or files are deleted/moved/renamed in the computer, they cannot be played back on this unit anymore. MTS files that are copied to a Mac computer cannot be imported to iMovie.
Menu Settings Operating the Menu Use the operation buttons to set the menu. 0 The menu differs according to the mode in use. Memo : To select/move cursor towards up/left or down/right, press the button UP/< or DOWN/>. . 1 Press MENU. . 2 Select the desired menu and press OK. GAIN UP . 3 Select the desired setting and press OK. AUTO SLOW-SHUTTER . Memo : 0 To return to the previous screen, press MENU.
Menu Settings Recording Menu (Video) You can adjust various settings, such as brightness and white balance, to suit the subject or purpose. You can also change settings such as picture quality and gain. Setting Details MANUAL SETTING Recording settings can be adjusted manually. 0 They are displayed only when recording in the manual mode. “Manual Recording” (A p. 23) FACE PRIORITY AE/AF Detects faces and adjusts the brightness and focus automatically.
Menu Settings GAIN UP WIND CUT Makes the subject appear bright automatically when recording in dark places. Reduces the noise caused by wind. Setting Details OFF Deactivates the function. ON Electrically brightens the scene when it is dark. AUTO SLOWSHUTTER Slows down the shutter speed to brighten the scene when it is dark. Memo : 0 Although “AUTO SLOW-SHUTTER” brightens the scene more than “ON” , movements of the subject may become unnatural. Setting Details OFF Deactivates the function.
Menu Settings VIDEO QUALITY ZOOM Sets the video quality. Sets the maximum zoom ratio. Setting UXP Details Enables recording in the best picture quality. 0 Applies to Blu-ray discs only. Videos taken in high-definition quality cannot be saved to DVDs. XP Enables recording in high picture quality. SP Enables recording in standard quality. EP Enables long recordings. SSW Enables recording in the best picture quality. SEW Enables recording in the best picture quality.
Menu Settings ZOOM MIC CLOCK ADJUST Sets the zoom microphone. Resets the current time or sets to the local time when using this unit overseas. Setting Details OFF Deactivates the zoom microphone. ON Records audio sounds in the same direction as the zoom operation. Setting Details CLOCK SETTING Resets the current time or changes the settings. “Resetting the Clock” (A p. 17) AREA SETTING Sets to the local time when using this unit overseas simply by selecting the destination.
Menu Settings Manual Settings Menu Recording settings can be adjusted manually. Memo : 0 They are displayed only when recording in the manual mode. Setting Details SCENE SELECT Settings to suit the shooting condition can be selected. “Scene Selection” (A p. 24) FOCUS Focus can be adjusted manually. “Adjusting Focus Manually” (A p. 25) BRIGHTNESS ADJUST Adjusts the overall brightness of the screen. “Adjusting Brightness” (A p. 26) WHITE BALANCE Adjusts the color according to the light source.
Menu Settings Playback Menu (Video) You can delete or look for specific videos. Setting Details DISPLAY DATE/TIME Displays the recording date and time. “DISPLAY DATE/TIME” (A p. 62) DELETE Deletes unwanted videos. “Deleting the Currently Displayed File” (A p. 40) “Deleting Selected Files” (A p. 41) “Deleting All Files” (A p. 42) PROTECT/CANCEL Protects files from being deleted accidently. “Protecting/Releasing Protection of the Currently Displayed File” (A p.
Menu Settings DISPLAY DATE/TIME DELETE Displays the recording date and time. Deletes unwanted videos. Operating Details “Deleting the Currently Displayed File” (A p. 40) “Deleting Selected Files” (A p. 41) “Deleting All Files” (A p. 42) Setting Details OFF Does not display the recording date and time. ON Displays the recording date and time. Displaying the Item Memo : To select/move cursor towards up/left or down/right, press the button UP/< or DOWN/>.
Menu Settings CLOCK ADJUST ON-SCREEN DISPLAY Resets the current time or sets to the local time when using this unit overseas. Sets whether to show on-screen displays such as icons during playback. Setting Details CLOCK SETTING Resets the current time or changes the settings. “Resetting the Clock” (A p. 17) AREA SETTING Sets to the local time when using this unit overseas simply by selecting the destination. “Setting the Clock to Local Time when Traveling” (A p.
Menu Settings Display Settings Menu You can adjust various display settings such as the LCD monitor's brightness, etc. Setting Details LANGUAGE The language on the display can be changed. “Changing the Display Language” (A p. 18) DATE DISPLAY STYLE Sets the order of year, month, day and the time display format (24H/12H). “DATE DISPLAY STYLE” (A p. 64) MONITOR BRIGHTNESS Sets the brightness of the LCD monitor. “MONITOR BRIGHTNESS” (A p.
Menu Settings Clock Set Style MONITOR BRIGHTNESS The clock set style of this unit varies with the models. Sets the brightness of the LCD monitor. CLOCK SETTING Setting DATE 2012 1 TIME 1 10 00 . CLOCK SETTING DATE JAN 1 AUTO Sets the brightness automatically to “4” when using outdoors and to “3” when using indoors. 4 Brightens the backlight of the monitor regardless of the surrounding conditions. 3 Sets to the standard brightness.
Menu Settings Basic Settings Menu You can adjust various camera settings such as operation sound, etc. Setting Details DEMO MODE Introduces the special features of this unit in digest form. “DEMO MODE” (A p. 66) OPERATION SOUND Turns on or off the operation sound. “OPERATION SOUND” (A p. 67) AUTO POWER OFF Prevents the situation of forgetting to turn off the power when this is set. “AUTO POWER OFF” (A p.
Menu Settings OPERATION SOUND AUTO POWER OFF Turns on or off the operation sound. Prevents the situation of forgetting to turn off the power when this is set. Setting Details OFF Turns off the operation sound. ON Turns on the operation sound. Displaying the Item Setting Details OFF Power is not turned off even if this unit is not operated for 5 minutes. ON Turns off the power automatically if this unit is not operated for 5 minutes.
Menu Settings QUICK RESTART PC SOFTWARE UPDATE Enables the power to turn on quickly when the LCD monitor is opened again within 5 minutes. Updates the built-in PC software of this unit to the latest version. Setting Details OFF Deactivates the function. ON Enables the power to turn on quickly when the LCD monitor is opened again within 5 minutes. FACTORY PRESET Returns all the settings to their default values.
Menu Settings Connection Settings Menu You can adjust various settings for connecting to a TV or DVD recorder. Setting Details DISPLAY ON TV Displays icons and date/time on a TV screen. “DISPLAY ON TV” (A p. 69) VIDEO OUTPUT Sets the aspect ratio (16:9 or 4:3) according to the connecting TV. “VIDEO OUTPUT” (A p. 69) HDMI OUTPUT Sets the definition of the video output from the HDMI mini connector. “HDMI OUTPUT” (A p.
Menu Settings HDMI OUTPUT HDMI CONTROL Sets the output from the HDMI connector of this unit when it is connected to a TV. Sets whether to link operations with an HDMI-CEC compliant TV. Setting Details AUTO It is recommended to select “AUTO” usually. 480p Select this when the video is not output in “AUTO” correctly. Memo : 0 “1080p” will be displayed on the LCD monitor if a 1080p compatible TV is connected to this unit in playback mode. Setting Details OFF Turns off linked operations.
Menu Settings Media Settings Menu You can perform various settings for the recording media. Setting Details FORMAT SD CARD Deletes all files on the SD card. “FORMAT SD CARD” (A p. 71) FORMAT SD CARD FORMAT SD CARD Deletes all files on the SD card. Setting Details FILE Deletes all files on the SD card. FILE + MANAGEMENT NO Deletes all files on the SD card and resets the folder and file numbers to "1". FILE + MANAGEMENT NO . 5 Select “YES” and press OK.
Menu Settings MOBILE USER GUIDE When you are outside, you can refer to the Mobile User Guide. Displaying the Item Memo : To select/move cursor towards up/left or down/right, press the button UP/< or DOWN/>. . 1 Press MENU. 2 Select “MOBILE USER GUIDE” and press OK. . MOBILE USER GUIDE . 3 Read the “QR code”. MOBILE USER GUIDE URL: . Memo : 0 0 Enter the URL manually if the QR code cannot be read. The Mobile User Guide is supported by Android devices and iPhone.
Names of Parts Front Rear . . 1 Lens Cover 0 0 2 Do not cover the microphone with your fingers during video recording. Zoom/Volume Lever 0 0 0 Do not touch the lens and lens cover. Do not cover the lens with your fingers during recording. Stereo Microphone 0 1 2 i.AUTO Button 0 3 Lights up/blinks during recording or playback. Do not remove the battery pack, AC adapter, or SD card. POWER/CHARGE (Power/Charge) Lamp 0 0 0 6 Connects to an AC adapter to charge the battery.
Names of Parts Bottom Interior . 1 Speaker 0 2 L (Play/Record) Button 0 3 1 Tripod Mounting Hole “Tripod Mounting” (A p. 18) 2 5 “Charging the Battery Pack” (A p. 13) 4 Battery Mount 6 Confirms the selection. / Displays information as follows. Recording: Displays the remaining time and battery power. Playback: Displays file information such as recording date. AV Connector 0 Connects to a TV, etc. 7 MENU (Menu) Button 8 HDMI Mini Connector 0 9 Connects to TV using an HDMI mini cable.
Names of Parts LCD Monitor Video Recording r 12:45 0:00:00 [05:56] . . 1 1 “VIDEO QUALITY” (A p. 58) LCD Monitor 0 0 Turns the power on/off by opening and closing. Enables self-portraits to be taken by rotating the monitor. Video Quality 2 Auto REC “Recording Automatically by Sensing Movements (AUTO REC)” (A p. 32) 3 Backlight Compensation “Setting Backlight Compensation” (A p. 28) 4 Tele Macro “Taking Close-up Shots” (A p. 28) 5 Scene Select “Scene Selection” (A p. 24) .
Indications on the LCD monitor Video Playback When the unit is not working properly Turning Off the Power 00:01:23 10.10.2011 10:00 00:12:34 1 Turn off the power. . 1 Scene Counter 2 Operation Indicator “Playing Back Videos” (A p. 35) 3 Date/Time “Clock Setting” (A p. 16) 4 Media 5 Playback Time “Playing Back Videos” (A p. 35) 76 . 2 Remove the AC adapter and battery pack from this unit, reattach them, open the LCD monitor and this unit powers on automatically.
Troubleshooting Battery Pack Recording Unable to turn on the power when using the battery pack. Recording cannot be performed. Recharge the battery pack. “Charging the Battery Pack” (A p. 12) Check whether the terminals are dirty. If the terminal of this unit or the battery pack is dirty, wipe it with a cotton swab or something similar. If you use any other battery packs besides JVC battery packs, safety and performance cannot be guaranteed. Be sure to use JVC battery packs.
Troubleshooting Card Cannot insert the SD card. Make sure not to insert the SD card in the wrong direction. “Inserting an SD Card” (A p. 14) Unable to copy to SD card. To use SD cards that have been used on other devices, it is necessary to format (initialize) the SD card using “FORMAT SD CARD” from media settings. “FORMAT SD CARD” (A p. 71) Playback Sound or video is interrupted. Sometimes playback is interrupted at the connecting section between two scenes. This is not a malfunction.
Troubleshooting Editing/Copying Computer Unable to dub to a Blu-ray recorder. Unable to copy files to the computer’s HDD. Dubbing cannot be performed by connecting this unit to a Blu-ray recorder with a USB cable. Connect and dub using the supplied AV cable. “Dubbing Files to a Disc by Connecting to a DVD Recorder” (A p. 45) Connect the USB cable correctly. “Backing Up All Files” (A p. 48) If the provided software Everio MediaBrowser 4 is not installed, some functions may not work properly.
Troubleshooting Screen/Image Other Problems The LCD monitor is difficult to see. The image is grainy. The LCD monitor may be difficult to see if used in bright areas such as under direct sunlight. When digital zoom is used, the image becomes grainy as it is digitally enlarged. A band or a ball of bright light appears on the LCD monitor. This unit heats up. Change the direction of this unit to prevent the light source from coming into view.
Troubleshooting Error Message? CHECK LENS COVER Open the lens cover. SET DATE/TIME! Connect the AC adapter, charge the battery for more than 24 hours and set the clock. (If the message still appears, the clock battery is exhausted. Consult your nearest JVC dealer.) “Clock Setting” (A p. 16) COMMUNICATION ERROR Reconnect the USB cable. Turn off this unit and the devices connected to it, and turn them on again. Reattach the battery pack.
Maintenance Perform regular maintenance of this unit to enable it to be used for a long time. Caution : 0 Be sure to detach the battery pack, AC adapter, and power plug before performing any maintenance. Camcorder 0 0 Wipe this unit with a dry, soft cloth to remove any dirt. When it is extremely dirty, soak the cloth in a solution of neutral detergent, wipe the body with it, and then use a clean cloth to remove the detergent. Caution : 0 0 0 Do not use solvents such as benzene, thinner, or alcohol.
Specifications Camera Item Connectors Details Item Details Power supply Using AC adapter: DC 5.2 V Using battery pack: DC 3.5 V - 3.6 V HDMI output connector HDMI™ mini connector Power consumption 2.2 W (when “MONITOR BRIGHTNESS” is set to “3” (standard)) 2.4 W (when “MONITOR BRIGHTNESS” is set to “4” (brighter)) Rated Current Consumption: 1A AV output connector Video output: 1.0 V (p-p), 75 Ω Audio output: 300 mV (rms), 1 KΩ USB connector Mini USB Type B, USB 2.
Specifications AC Adapter (AC-V11U) Item Details Power supply AC 110 V to 240 V, 50 Hz/60 Hz Output DC 5.2 V, 1 A Allowable operating temperature 0°C to 40°C (32°F to 104°F) (10°C to 35°C (50°F to 95°F) during charging) Dimensions (mm) 66 mm x 28 mm x 47 mm (2-5/8” x 1-1/8” x 1-7/8”) (W x H x D: excluding cord and AC plug) Mass Approx. 71 g (0.15 lbs) Battery Pack (BN-VG107U) Item Details Power voltage 3.5 V - 3.6 V Capacity 700 mAh Dimensions (mm) 31 mm x 21.
©©2011 Company of Japan, Limited 2011Victor JVC KENWOOD Corporation US 0911ZAR-SW-VM C2A 1111ZAR-SW-VM