
Projection Television Users Guide
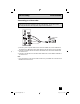
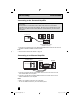
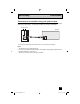
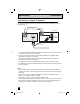
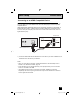
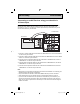
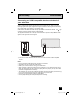
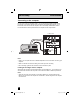
Table Of Contents
- Important Safety Precautions
- Warnings
- Quick Setup AA
- Remote Programming
- Onscreen Menus
- Initial Setup
- Picture Adjust
- Sound Adjust
- Clock/Timers
- Button Functions
- Multi Screen Function
- Twin
- Index
- Freeze
- Swap
- Select
- Power
- Number Buttons - 10Key Pad
- Tune
- Input
- TheaterPro D6500K
- Return +/TV
- Sound
- Video Status
- Natural Cinema
- Muting
- Sleep Timer
- ML/MTS
- Display
- C.C. (Closed Caption)
- Channel +/–
- Volume +/–
- Favorite
- Aspect
- Menu
- OK
- Back
- TV/CATV Slide Switch
- VCR/DVD Slide Switch
- VCR Buttons
- DVD Buttons
- Light
- Digital Setup
- Digital Button Functions
- Media Card Viewer
- OSD Information
- Cable Card Information
- Troubleshooting
- Appendix
21
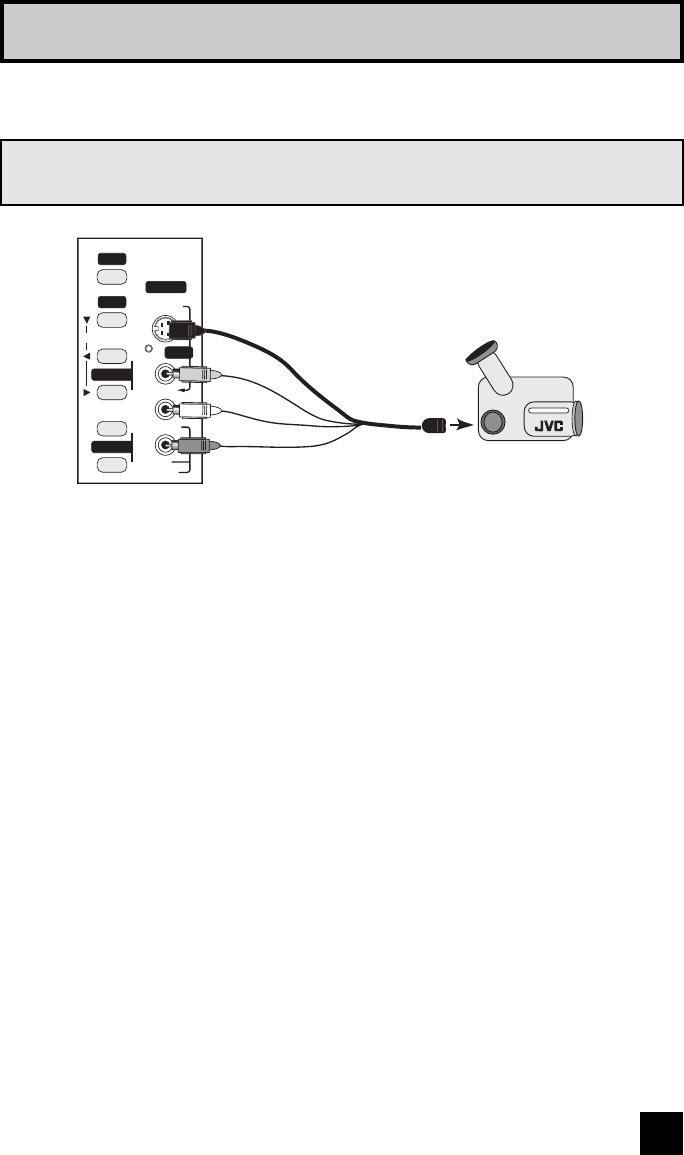
Quick Setup Connections
1) Connect a yellow composite cable from the camcorder VIDEO OUT, into the VIDEO IN on
the side of the TV, OR connect an S-Video cable from the side of the TV to the camcorder.
2) Connect a white cable from the camcorder LEFT AUDIO OUT, into the LEFT AUDIO IN on
the side of the TV.
3) Connect a red cable from the camcorder RIGHT AUDIO OUT, into the RIGHT AUDIO IN on
the side of the TV.
Note:
• If your camcorder is a mono sound model it will have only one AUDIO OUT. Connect it to the
L/MONO on the side of the TV.
You may connect a camcorder, game console or other equipment to your television by using
the side input jacks (Input 4) located on the side of the television. You can also connect
these using the television’s rear input jacks, using the same instructions.
VOLUME
INPUT 4
CHANNEL
OPERATE
+
–
+
–
MENU
OVER
S-VIDEO
VIDEO
L/MONO
R
AUDIO
INPUT
CAMCORDER
- OR -
Connecting to a Camcorder
LCT2024 English.indd 21LCT2024 English.indd 21 11/8/05 9:27:19 AM11/8/05 9:27:19 AM