
Projection Television Users Guide


Table Of Contents
- Important Safety Precautions
- Warnings
- Quick Setup AA
- Remote Programming
- Onscreen Menus
- Initial Setup
- Picture Adjust
- Sound Adjust
- Clock/Timers
- Button Functions
- Multi Screen Function
- Twin
- Index
- Freeze
- Swap
- Select
- Power
- Number Buttons - 10Key Pad
- Tune
- Input
- TheaterPro D6500K
- Return +/TV
- Sound
- Video Status
- Natural Cinema
- Muting
- Sleep Timer
- ML/MTS
- Display
- C.C. (Closed Caption)
- Channel +/–
- Volume +/–
- Favorite
- Aspect
- Menu
- OK
- Back
- TV/CATV Slide Switch
- VCR/DVD Slide Switch
- VCR Buttons
- DVD Buttons
- Light
- Digital Setup
- Digital Button Functions
- Media Card Viewer
- OSD Information
- Cable Card Information
- Troubleshooting
- Appendix
58
This feature is used if you have a DTV or HDMI compatible component connected to your TV.
Press the MENU button
π†
To DIGITAL-IN AUDIO
è
To select ANALOG, DIGITAL or AUTO
Press the Menu button when fi nished
Notes:
• If your DTV or HDMI component is capable of digital
audio and video, choose DIGITAL. If your DTV or HDMI
component is capable of analog audio and digital video, choose ANALOG.
• Refer to your DTV or HDMI component’s instruction manual for more information.
• When you select AUTO, the television will select "ANALOG" or "DIGITAL" automatically,
depending on the audio input from the HDMI.
• When you select DIGITAL, select PCM on Digital Sound in the Digital Setup menu. See page
79.
• When your input is DIGITAL-IN2, DIGITAL-IN AUDIO cannot be selected.
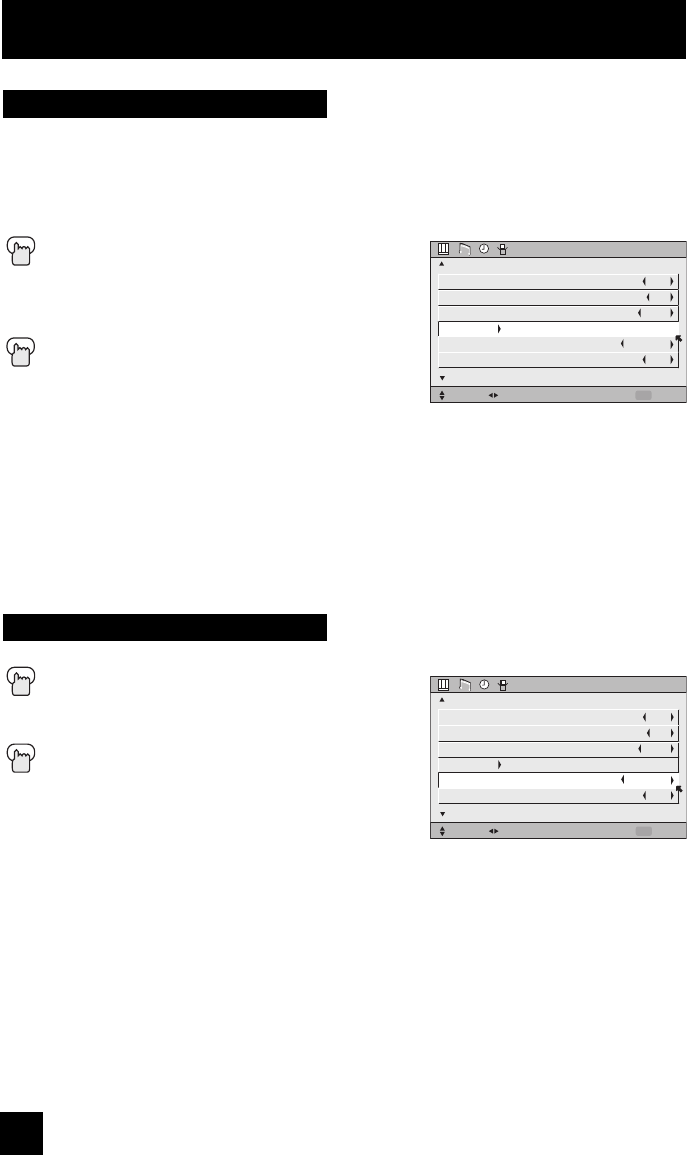
Initial Setup
INITIAL SETUP
SELECT OPERATE EXIT
MENU
NEXT PAGE
PREVIOUS
(1/5)
VIDEO-1 MONITOR OUT
TV SPEAKER
AUDIO OUT
DIGITAL-IN
DIGITAL-IN AUDIO
CENTER CH INPUT
OFF
ON
VARI
AUTO
DIGITAL
OFF
The DIGITAL-IN option can only be displayed in the INITIAL SETUP menu when an HDMI480p
picture signal is being input to the DIGITAL-IN terminal. This option adjusts the position when
an HDMI or DVI 480p picture signal is being displayed on the screen. There are two types of
HDMI480p picture signals: 640x480 and 720x480. If the displayed picture is slightly shifted, the
position can be adjusted by selecting either SIZE1 or SIZE2.
Press the M
ENU button
π†
To DIGITAL-IN
è
To enter
π†
To select AUTO, SIZE1 or SIZE2
Press the MENU button to finish
Digital-In
Digital-In Audio
INITIAL SETUP
SELECT OPERATE EXIT
MENU
NEXT PAGE
PREVIOUS
(1/5)
VIDEO-1 MONITOR OUT
TV SPEAKER
AUDIO OUT
DIGITAL-IN
DIGITAL-IN AUDIO
CENTER CH INPUT
OFF
ON
VARI
AUTO
DIGITAL
OFF
Notes:
• The DIGITAL-IN menu can only be displayed when a HDMI or DVI 480p picture signal is
input to the Digital-In terminal and the picture is being displayed on the screen.
• You can select AUTO only when the signal is 480p for HDMI. When you select AUTO, the
televison will select "SIZE1" or "SIZE2" automatically.
LCT2024 English.indd 58LCT2024 English.indd 58 11/8/05 9:27:31 AM11/8/05 9:27:31 AM