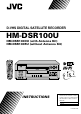
D-VHS DIGITAL SATELLITE RECORDER HM-DSR100U HM-DSR100DU (with Antenna Kit) HM-DSR100RU (without Antenna Kit) SAT TV D-VHS AUX POWER TV/VCR MODE MTP NTSC MENU MUTE UME VOL GU ID E ¶ T H E M E B R O W S E SELECT CH INFO MENU SELECT D-VHS L IN E FO NC CA ™INDEX VIEW INDEX£ 1 2 TM Ä CH 3 SKIP AUTO TRACK SKIP 4 5 REC POWER FF/BROWSE REW/BROWSE 7 6 8 q 9 ADDRESS REW 2 FF 3 RECALL TV/VCR 0 8 EJECT POWER REC PAUSE TIMER EP COUNTER RESET REC PAUSE STOP 6 5 PLAY
Dear Customer, Thank you for purchasing the JVC D-VHS digital satellite recorder. Before use, please read the safety information and precautions contained in the following pages to ensure safe use of your new VCR. CAUTIONS CAUTION RISK OF ELECTRIC SHOCK DO NOT OPEN CAUTION: TO REDUCE THE RISK OF ELECTRIC SHOCK. DO NOT REMOVE COVER (OR BACK). NO USER-SERVICEABLE PARTS INSIDE. REFER SERVICING TO QUALIFIED SERVICE PERSONNEL.
IMPORTANT PRODUCT SAFETY INSTRUCTIONS Electrical energy can perform many useful functions. But improper use can result in potential electrical shock or fire hazards. This product has been engineered and manufactured to assure your personal safety. In order not to defeat the built-in safeguards, observe the following basic rules for its installation, use and servicing. ATTENTION: Follow and obey all warnings and instructions marked on your product and its operating instructions.
USE SERVICING 1. Accessories 1. Servicing To avoid personal injury: • Do not place this product on an unstable cart, stand, tripod, bracket, or table. It may fall, causing serious injury to a child or adult, and serious damage to the product. • Use only with a cart, stand, tripod, bracket, or table recommended by the manufacturer or sold with the product. • Use a mounting accessory recommended by the manufacturer and follow the manufacturer’s instructions for any mounting of the product.
Table of Contents T Important Product Safety Instructions .................................................... ii Chapter 1: Introduction .......................................................................... 1-1 Welcome! .................................................................................................................... 1-1 Highlights ................................................................................................................... 1-1 About Satellite Television .....
User and Installation Guide Chapter 5: VCR Features ....................................................................... 5-1 Cassettes and Recording Modes ............................................................................. 5-1 Simple Playback and Recording .............................................................................. 5-1 Playback Features ..................................................................................................... 5-6 Recording Features ................
1 Introduction WELCOME! Congratulations on your selection of this satellite television system. Thank you for your purchase. You will be pleased with the performance, capabilities, entertainment options, and ease of operation of your system for many years to come. Your system complies with MPEG II and DVB standards for compressing audio and video data. Your system also features an advanced new recording technology called D-VHS, which records digital MPEG II satellite signals as digital data.
User and Installation Guide ABOUT SATELLITE TELEVISION Satellite television uses satellites orbiting in geosynchronous orbit over the Earth to deliver television and audio programming. "Geosynchronous" means that the satellites stay aligned over one place on the surface of the Earth. Once your satellite antenna is aimed at the satellites, the antenna does not have to move to follow the satellites.
Introduction About D-VHS 1 ABOUT D-VHS The "D" in D-VHS represents Digital Data. As this name suggests, D-VHS is an extension of the world's most popular VHS home video format, which adds new digital recording (storage) capabilities that make it an ideal match for digital broadcasts. Like VHS, D-VHS is a tape-based format. Unlike VHS, D-VHS records digital signals as a digital bit stream (data) which is compatible with the MPEG II and DVB standards utilized by your satellite system.
User and Installation Guide FEATURES OVERVIEW For more detailed information, see Chapter 2 – The Parts of Your System. STANDARD FEATURES l Recorder The IRR (Integrated Receiver-Recorder) features an allin-one design that makes it easy to install and operate. l Remote Control This remote control is specifically designed for easy access to the menus. l Simple Menu Operation Simple "highlight and select" options allow quick, easy navigation and programming.
Introduction Available Services 1 AVAILABLE SERVICES Your system is capable of receiving a wide range of exciting and entertaining services. The available services encompass an unlimited variety of interests, including movies, sports, news, music, shopping, comedy, and more. Call the Service Center for more information on any of these.
User and Installation Guide QUICK START TIPS This is a quick reference to start common procedures: Change Channels If you are watching a program, press the Up or Down arrow button, or enter the channel number using the number buttons. 1 2 3 4 5 6 7 8 9 0 Open the Main Menu Press the Menu button. MENU Open the Program Guide Press the Guide button. GU ID E Open the Browse Banner Press the Browse button.
The Parts of Your System 2 T HE RECORDER THE RECORDER FRONT PANEL ACCESS DOOR CASSETTE LOADING SLOT ¶ CH INFO MENU SELECT D-VHS Ä TM REC POWER q TV/VCR 8 EJECT POWER REC PAUSE TIMER REW 2 CH FF 3 EP PAUSE STOP 6 5 PLAY VIDEO (MONO)L–AUDIO–R The recorder front panel provides control buttons, plus access to the Smart Card slot. ACCESS DOOR The Smart Card slot is behind this door. The recorder is shipped with the Smart Card preinstalled in this slot.
User and Installation Guide POWER LIGHT The POWER light illuminates when the recorder is turned ON. This light flashes when the recorder memory contains unread mail messages. POWER REC LIGHT The REC light illuminates while a tape is being recorded. This light blinks during Instant Timer Recording (ITR). PAUSE LIGHT REC PAUSE The PAUSE light illuminates when recording or playback is paused.
The Parts of Your System The Recorder 2 TV/VCR BUTTON Press the TV/VCR button to select the signal source that your TV receives. Choose TV position to watch TV or to watch one program while recording another. Choose VCR position to watch a tape, monitor a recording, or watch a satellite or local TV broadcast being received by the recorder. TV/VCR EJECT BUTTON Press the EJECT button to eject a cassette from the cassette loading slot.
User and Installation Guide THE RECORDER BACK PANEL AC`IN HIGH SPEED DATA PORT DC OUT 5V 1 ANT. IN OUT 2 PHONE JACK ACCESSORY AC-3 13/18V}400mA SATELLITE R S-VIDEO L AUDIO VHF/UHF ANT. IN VIDEO UHF REMOTE ANTENNA RF OUT CH3 CH4 The back panel of the recorder provides the connectors that you use to wire the recorder to all the other components and equipment that you may use.
The Parts of Your System The Recorder 2 RF OUT (RF OR VHF CONNECTION) RF OUT The recorder sends non-stereo output through this connector. If you are connecting cable TV or a broadcast TV antenna to the recorder, use this connection to connect to the TV for good picture and good non-stereo sound. Use the TV Phono (RCA) Audio/Video Output or the S-VIDEO Output to support the highest quality stereo sound and video for your satellite channels.
User and Installation Guide AC-3 (DOLBY DIGITAL OUTPUT) By connecting this output terminal to an external decoder, you can enjoy Dolby Digital (AC-3) 5.1-channel surround sound when viewing appropriately encoded satellite broadcasts or recorded tapes. AC-3 l Dolby, Dolby Digital, AC-3, Dolby Pro Logic are registered trademarks or Dolby Laboratories Licensing Corporation. HIGH SPEED DATA PORT There is a high speed data port under the cover plate.
The Parts of Your System The Remote Control 2 THE REMOTE CONTROL This section describes the features of your remote control. For details on using the remote, turn to Using the Remote Control on page 3-1. SAT TV D-VHS AUX POWER TV/VCR You can program your remote to control your TV, audio amplifier, and other equipment. See Programming the Remote Control on page 4–39 for this procedure.
User and Installation Guide ABOUT THE UHF REMOTE CONTROL The UHF remote sends ultra-high frequency radio signals to a UHF antenna that is connected to the back of the recorder. Because UHF signals travel through solid objects, you can use the remote to control the recorder from another room, or even from another floor in the building. The remote uses IR(Infrared) signals to control certain other equipment (see explanation below).
The Parts of Your System The Remote Control 2 REMOTE BUTTONS TV/VCR BUTTON Depending on how you wire your system together, the TV/VCR button does the following: l In SAT (Satellite) mode, the TV/VCR button switches the TV connected to the RF or VHF output between satellite TV and broadcast or cable TV. However, the Local TV Link feature is an easier way to view both satellite programming and local broadcast programming (see Local TV Link on page 3-13 for information).
User and Installation Guide MUTE BUTTON Press the Mute button to temporarily activate the mute function on your TV. Press the Mute button again to restore the sound. MUTE Note: This button works only if you have programmed the remote to control a TV or a stereo amplifier. The Mute button changes the volume at the corresponding electronic component, not at the recorder. MENU BUTTON Press the Menu button to open the Main Menu.
The Parts of Your System The Remote Control 2 l When viewing a program, press the Up or Down arrow button to change channels. l When you have the Browse Banner open, press the Up or Down arrow button to view the Browse Banner for the next channel. (Not available during playback) l When a menu offers you a list of choices, press the Up or Down arrow button to bring more choices into view. l When you have the Program Guide open, press the Up or Down arrow button to move the highlight through the channels.
User and Installation Guide CANCEL BUTTON L Press the Cancel button to cancel the current procedure and to return to the previous menu or to viewing your program. CA NUMBER P AD BUTTONS You can use the number pad buttons for several purposes: l When viewing a program or when the Program Guide is open, enter the 3-digit channel number and press the Select button to change immediately to that channel. l Use these buttons to enter menu option numbers.
The Parts of Your System The Remote Control 2 RECALL BUTTON/COUNTER RESET BUTTON With the remote in the SAT mode, press the Recall button to go back to the last channel you were watching. Press repeatedly to alternate between the last two channels that you viewed.With the remote in the D-VHS mode, and if there is a tape loaded in the recorder, press the Counter Reset button to change the current tape counter reading to "0:00:00".
User and Installation Guide THE SATELLITE ANTENNA The satellite antenna collects the signals transmitted from the satellites. A coaxial cable (or cables) carries these signals to the receiver (or receivers), where they are decoded and processed so you can view television programming. In this Guide, "satellite antenna" means the "dish," as well as the "dish" mounting hardware, including the "mast assembly," the "support arm," and the "LNBF." See Components of the Satellite Antenna on page 6-4.
3 Getting Started USING THE REMOTE CONTROL INSTALLING BATTERIES IN THE REMOTE The remote control is shipped with four AAA batteries, packaged separately. When you replace old batteries, you should replace all four batteries. Use four batteries of the same grade, for example, alkaline or carbon zinc, and do not mix batteries of different grades. Alkaline batteries provide longer battery life.
User and Installation Guide CHANGING MODES ON THE REMOTE Use the Mode button to set the remote to control other electronic components, such as your TV. See Mode Button on page 2-9 for more information. To change modes, do the following: Press the Mode button on the remote repeatedly until the appropriate mode light flashes rapidly. MODE For example, to control the built-in satellite receiver, make sure the SAT light is flashing.
Getting Started Using the Remote Control 5. Press the Address button to save the new address in the remote memory. If the address you entered is valid for your remote, the SAT mode light blinks three times. 3 ADDRESS 6. If the recorder is ON, turn it OFF using the recorder Power button. 7. Wait for 15 seconds to allow the recorder to reset. 8. Press the Info button on the recorder. This will display the Important System Information menu.
User and Installation Guide TURNING ON THE SYSTEM Remote Buttons Menu Options 1. Turn ON the TV and any other installed equipment. 2. Turn ON the recorder. The power light on the recorder front panel illuminates. POWER Note: The remote must be in SAT mode to use it to turn ON the recorder. CHANGING CHANNELS If the program you select to view is security locked, you must enter the system password to view it. Remote Buttons Menu Options Either: Press the Up or Down arrow button to change channels.
Getting Started Canceling a Procedure 3 CANCELING A PROCEDURE Sometimes, when you are trying to make changes via the menus, you may want to stop and start over. From any menu or screen, you can press the Cancel or View button repeatedly until you return to your program. If you do not do anything in a menu for several minutes, such as press a button or select an option, the menu automatically closes. This also discards any changes you made, and returns the recorder to the program you were viewing.
User and Installation Guide ABOUT MENUS AND OTHER MULTIPLE-CHOICE SCREENS We designed the menus to make programming your recorder and selecting services quick and easy. The recorder displays the menus on your TV screen (“on-screen”). You use menus to communicate with the recorder and use the recorder features, such as setting security locks, selecting a program, or defining a Favorites List. These features are discussed in Chapter 4 - Using the System.
Getting Started About Menus and Other Multiple-Choice Screens 5 3 DISPLAYING MENUS You can use either of two methods to open the menus. l Open the Main Menu, then open any of the other menus from the Main Menu, or l Press the appropriate button on the remote to immediately open the desired menu. MENU OPTIONS A typical menu option looks like this: or this: OK 1 Program Guide First you must highlight the menu option, then you select it.
User and Installation Guide MULTIPLE - CHOICE LISTS When you select a choice from a list, the recorder does not apply the change until you select the Save or OK option. If you do not want to save any changes, select the Cancel option to discard all changes made in the menu. There are two types of lists: single selection and multiple selection. Single-selection allows only one choice to be selected at one time. If you select another choice, the previous choice is deselected.
Getting Started About Menus and Other Multiple-Choice Screens When you highlight a choice in a single-selection list, it typically appears as shown below: Languages English Spanish When you highlight a choice in a multiple-selection list, it typically appears as shown below: Channels FOX - 247 HBO-E - 300 CNN - 206 French SHO-E - 310 German MAX-E - 320 Italian NBC - 241 Japanese When you select a choice in a single-selection list, the choice is marked as shown below: Languages English Spanish C
User and Installation Guide THE MAIN MENU The Main Menu provides access to all the features available in the menus. To open the Main Menu, press the Menu button. The Main Menu looks like the following.
Getting Started The System Setup Menu 3 1 INSTALLATION This option displays the Installation and Setup menu. You will use this menu most while you are initially setting up your system. l Use the Point Dish and Signal Strength menu to aim the satellite antenna. Transponder refers to the channel transponder numbers that this unit receives. Transponder numbers are automatically displayed. ZIP Code refers to the postal number code of the region where you live.
User and Installation Guide l Select Picture Size: You can choose the picture format if a program is transmitted in both standard (4x3) and wide-screen (16x9) formats. You can use the 16x9 format only if you have a wide-screen TV that supports the 16x9 format. l Decide how to order the channel numbers while you are displaying the Program Guide. You can display the channel numbers in ascending or descending order. l Set up the system upgrade authorization.
Getting Started Local TV Link 3 L OCAL TV LINK The Local TV Link feature allows you to view your local broadcast or cable channels via your system. Once you get the channels set up, you can select and view those channels through the Program Guide, or the Browse Banner; that is, the same way as you would any of the satellite channels.
User and Installation Guide ADDING LOCAL OR CABLE CHANNELS To add local broadcast or cable channels, do the following: Remote Buttons 1. Press the Mode button until the remote is in SAT mode. MODE 2. Press the Menu button to open the Main Menu. MENU Menu Options 3. Select the System Setup option. 6 6 System Setup 4. Select the Installation option. 1 1 Installation 5. Select the Add Local Channel option.
Getting Started Local TV Link 8. Select the Choose option. Press the Right arrow and Up arrow button to highlight the Choose and press the Select button. This will display the Choose Local Channel screen. 3 Choose 9. Notice that the first time you display the Choose Local Channel screen, the only channel in the Selected Local Channels list is channel 000. This is the AUX INPUT channel, which is the input from the Auxiliary Phono (RCA) Audio/Video Input, usually attached to a VCR.
User and Installation Guide 13.Press the Left arrow button to move the highlight to the keypad area. T H E M E 14.Use the arrow buttons to highlight a letter. Press Select. Repeat to spell out the name of the channel. You can enter up to five characters for the channel name. A J S 1 B K T 2 C L U 3 D M V 4 E N W 5 F O X 6 space If necessary, select the space option to insert a space in the channel name or the
Getting Started Local TV Link 19.Once you are finished, select the Save option. The recorder will display the Choose Local Channel screen. The channel that you have just added should now appear in the Selected Local Channels list. 3 Save 20.Repeat steps 10 through 19 until all desired channels are added. Once you are finished, select the Save option to save the list.
User and Installation Guide 7. Press the Left arrow button twice to move the highlight to the Selected Local Channels list. T H E M E Either: Use the Up or Down arrow button to highlight the channel you want to delete. Press Select. Repeat until all desired channels are deleted. SELECT Note: When the Selected Local Channels list is saved, the system will arrange the list to fill in blank spaces caused by deleting channels.
Getting Started Local TV Link 3 EDITING THE NAME OF A CHANNEL If you have entered the wrong channel name or want to add a channel name for a channel (except Ch 000) that is on the Selected Local Channels list, do the following: Remote Buttons Menu Options 1. Press the Mode button until the remote is in SAT mode. MODE 2. Press the Menu button to open the Main Menu . MENU 3. Select the System Setup option. 6 6 System Setup 4. Select the Installation option. 1 1 Installation 5.
User and Installation Guide 9. Press the Left arrow button to move the highlight to the keypad area. 10.Use the arrow buttons to highlight a letter. Press Select. Repeat to spell out the name of the channel. T H E M E A J S 1 B K T 2 C L U 3 D M V 4 E N W 5 F O X 6 space If necessary, select the space option to insert a space in the channel name or the
4 Using the System ABOUT THE PROGRAM BANNER The Program Banner is displayed for a few seconds at the top and bottom of the TV screen every time you change the channel, begin playback of a recording, or press the View button on the remote. The top Program Banner provides information about the program that you are viewing. The bottom Program Banner provides information about the status of your VCR.
User and Installation Guide While recording a program, the Program Banner information is expanded to include more information, including a graphical tape position indicator. At the start of playback, the Program Banner provides information about the program being currently played, as well as the current playback status. Depending on the recorded program, the following information may be displayed.
Using the System About the Browse Banner 4 ABOUT THE BROWSE BANNER You can use the Browse Banner to change channels; see what other programs are on without removing the current program from view; and, create an event timer.
User and Installation Guide OPENING THE BROWSE BANNER To open the Browse Banner while you are viewing a program, press the Right arrow button. B R O W S E VIEWING BANNER INFORMATION FOR OTHER CHANNELS To view Browse Banner information about other channels, do the following: Remote Buttons 1. Press the Mode button until the remote is in SAT mode. MODE 2. Press the Right arrow button to display the Browse Banner for the current program. 3.
Using the System About the Browse Banner 4 CHANGING CHANNELS VIA THE BROWSE BANNER If you are browsing and see a program that you would like to view, do the following to change to the new channel: Remote Buttons Menu Options 1. Make sure the channel you want to view is displayed in the lower portion of the Browse Banner. 2. Press the Select button to change to the new channel. The Browse Banner automatically closes.
User and Installation Guide ABOUT THE PROGRAM GUIDE The Program Guide provides a complete listing of the available channels and programs. Note: You must add your local broadcast or cable channels to the Program Guide yourself. See Local TV Link on page 3-13. However, the Program Guide automatically displays "prime time" program information for the major broadcast networks. "Prime time" hours vary in different areas.
Using the System About the Program Guide 4 Indicates that the last viewable time period is in view (you cannot display a time later than this). 142 This display is normally blank with two arrows. When it is not blank, it shows: The number of hours being entered on the remote control number pad. Press the Left or Right arrow button to skip the display forward or backward that number of hours. or The channel number of the channel being entered on the remote control number pad.
User and Installation Guide SCANNING THROUGH CHANNELS You can scan through the available channels in the Program Guide to see what programming is available. To do this, do the following: Remote Buttons Either: Enter the desired 3-digit channel number. Optional: Press the Select button. Menu Options 1 2 3 4 5 6 7 8 9 or 0 Press the Up or Down arrow button to highlight the desired channel. or Press the Fast Forward button to page up, or the Rewind button to page down through the Program Guide.
Using the System About the Program Guide 4 CHANGING CHANNELS VIA THE PROGRAM GUIDE To change to a new channel using the Program Guide, do the following: Remote Buttons 1. Press the Mode button until the remote is in SAT mode. MODE GU ID E 2. Press the Guide button to open the Program Guide. 3. Either: Enter the desired 3-digit channel number using the number pad buttons. Then, press Select to change to the new program.
User and Installation Guide VIEWING INFORMATION ABOUT PROGRAMS If you want more information about a program listed in the Program Guide, do the following: Remote Buttons 1. Press the Mode button until the remote is in SAT mode. 2. Press the Guide button to open the Program Guide. Menu Options MODE GU ID E 3. Highlight the desired program using the arrow buttons on the remote control. 4. Press the Info button.
Using the System About Themes 4 ABOUT THEMES The system allows you to list and select programs according to the theme of their contents. For example, you can list just movies or just sports. You can then quickly list programs based on that theme, and select the program you want without having to search through all the channels. The themes list only displays programs that are available for the current date. DISPLAYING PROGRAMS BY THEME Remote Buttons 1.
User and Installation Guide SELECTING A PROGRAM IN THE THEMES L IST You can change to a program in the Themes list by doing the following: Remote Buttons 1. Press the Mode button until the remote is in SAT mode. Menu Options MODE 2. Use the Page Up and Page Down options (or the Fast Forward and Rewind buttons) to speed your search for the desired program. Page Up Page Down 3. Press the Left arrow button to move the highlight to the program list. T H E M E 4.
Using the System Ordering Pay Per View Programs 4 ORDERING PAY PER VIEW PROGRAMS A pay per view program is a program that you order and pay a small fee to view once. There are many types of programs available through the pay per view service, such as movies, sports, comedies, and musicals. You can find out what pay per view programs are available by viewing the Program Guide information starting at channel 500 (see About the Program Guide on page 4-6).
User and Installation Guide 4. At the Confirmation Screen: Either: Select the Yes option again to confirm Yes the purchase. The fee will appear on your invoice. or Select the No option or the Cancel option to cancel the purchase. Note: You cannot cancel previously ordered pay per view programs using this procedure. No Cancel To order through the Service Center: Call the Service Center to order the pay per view program. The pay per view fee is added to your next invoice.
Using the System Favorites Lists 4 CREATING OR MODIFYING A FAVORITES LIST You can add channels to, and remove channels from a Favorites List. Remote Buttons 1. Press the Mode button until the remote is in SAT mode. MODE 2. Press the Menu button to open the Main Menu . MENU 3. Select the Favorites option. 4 Menu Options 4 4. Select the Favorites List to be changed. This example shows the list names that come with your system. Note that you cannot modify the "ALL CHAN" list in any way.
User and Installation Guide 7. In the Channels list, highlight the channel you want to add to your Favorites List. Channels CNN - 200 DISC - 182 FAM - 180 Either: Use the Up or Down arrow button TLC - 178 to bring the desired channel into view. TOON - 176 DISNE - 172 NICK - 170 or TNN - 168 Use the number pad buttons to enter the channel number.
Using the System Favorites Lists 4 CHANGING THE NAME OF A FAVORITES LIST Since the lists are initially named "LIST 1," LIST 2," etc., you may want to give them more meaningful names. "MOM," "DAD," or "MYFAV" are all possible Favorites Lists names. Remote Buttons 1. Press the Mode button until the remote is in SAT mode. MODE 2. Press the Menu button to open the Main Menu . MENU 3. Select the Favorites option. 4. Select the Favorites List to be changed.
User and Installation Guide MAKING A FAVORITES LIST ACTIVE When a Favorites List is active, the recorder displays only the channels in that list. However, you can still view a channel not on the list by entering the 3digit channel number using the remote number pad buttons, or by selecting a program on that channel using the Theme Categories menu.
Using the System Security Features 4 SECURITY FEATURES ABOUT SECURITY FEATURES Security features let you make sure your system is being used the way you want it to be used. You can use two levels of security: l You can lock your system, so that only those who know the password can access locked features (see below). l You can set up a Personal Identification Number (PIN) at the Service Center to keep unauthorized users from calling and ordering services (see Service Center Security on page 4-29).
User and Installation Guide To lock the system, you must set a password: l When you lock the system, you must enter and verify a 4-digit number password, which you make up. l Later, you must enter the same password to unlock the system, make changes to locked features, or access locked programs. When you have locked the system: l If you try to access a locked program or channel, the recorder displays a message prompting you to enter the password.
Using the System Security Features 4. If the system is locked, enter the system password using the number pad buttons. As soon as you enter the fourth digit of the password, the system highlights the OK option. Press the Select button. 1 2 3 4 5 6 7 8 9 * * * 0 5. Select the Channel Locks option. 2 6. Press the Left arrow button to move the highlight into the Channels list. Highlight each channel that you want to lock or unlock.
User and Installation Guide CREATING OR MODIFYING PROGRAM LOCKS Do the following to lock programs with certain rating or extended rating (content) codes. Only someone who knows the password can then view these programs. See Glossary on page A-7 for a definition of each of the rating codes. Parents beware, the rating and extended rating (content) codes that the system uses for program locks reflect the codes that the original program providers assigned to the programs.
Using the System Security Features 7. Highlight the expanded rating code(s) to lock, if desired. 4 Expanded Rating Violence Language Press the Select button. Nudity SELECT Sexual Content 8. To unlock a rating code, highlight the code and then press the Select button. SELECT 9. Select the Save option to save the changes. Save 10.If the system is not locked, lock it to put the lock you just created into effect. See Locking the System on page 4-25.
User and Installation Guide 5. In the Parental and System Locks menu, select the Front Panel Lock option. 4 4 Front Panel Lock 6. At the Lock Front Panel Buttons screen, select the Lock option. Lock Front Panel Buttons Disable the operation of the front panel buttons. The system must be locked for this lock to take effect! Do you wish to lock the front panel buttons? 7. If the system is not locked, lock it to put the lock you just created into effect. See Locking the System on page 4-25.
Using the System Security Features Remote Buttons 4 Menu Options 1. Choose a channel or a program that you have locked. The recorder displays an ATTENTION message telling you that the item is locked and prompting you to enter the system password. 2. If the system is locked, enter the system password using the number pad buttons. As soon as you enter the fourth digit of the password, the system highlights the OK option. Press the Select button. 1 2 3 4 5 6 7 8 9 * * * * 0 3.
User and Installation Guide 3. Select the Locks option. If the system prompts you for a password, it has already been locked. 5 5 Locks 4. Select the Lock System option. The recorder displays a message prompting you to enter the system password. Note: If this option says "Unlock System" instead, then the system has already been locked. 3 3 Lock System 5. Enter and verify a password, using the number pad buttons. Write down the password and put it in a safe place.
Using the System Security Features 4. Enter the system password using the number pad buttons. As soon as you enter the fourth digit of the password, the system highlights the OK option. Press the Select button. 1 2 3 4 5 6 7 8 9 * * 4 * * 0 5. Select the Unlock System option. Note: If this option says "Lock System" instead, then the system has already been locked. 3 3 Unlock System CHANGING THE SYSTEM P ASSWORD Remote Buttons 1. Press the Mode button until the remote is in SAT mode.
User and Installation Guide 7. Enter the new password using the number pad buttons. As soon as you enter the fourth digit of the password, the system highlights the OK option. Go on to the next step. 1 2 3 4 5 6 7 8 9 * * * * 0 8. Either: Select the OK option. OK or If you do not want to change the password, select the Cancel option to cancel the password change. You can stop here. 9. Enter the new password again for verification, using the number pad buttons.
Using the System Security Features Remote Buttons 1. Press the Mode button until the remote is in SAT mode. MODE 2. Press the Menu button to open the Main Menu . MENU 4 Menu Options 3. Select the System Setup option. 6 6 System Setup 4. Select the Installation option. 1 1 Installation 5. Select the Factory Defaults option. 5 5 Factory Defaults 6. Select the Yes option.
User and Installation Guide ELECTRONIC MAIL You may occasionally receive electronic mail from the Service Center via the satellite signal. If your recorder is powered on and the LED is blinking on the front panel, you have mail. This mail typically tells you about upcoming events, programs, special offers, and system changes. You may also receive mail that is specifically addressed to you, telling you about billing changes or asking you to call the Service Center.
Using the System Software Upgrades 4 5. If necessary, press the Up or Down arrow button to view all of the message. 6. Either: After you are finished reading, select the Delete option to delete the mail message. Delete Save or Select the Save option to save the message. SOFTWARE UPGRADES Occasionally, the Service Center may send you, at no extra cost, a list of newly available system features.
User and Installation Guide 6. Press the Left arrow button to move the highlight to the Without my permission option. 7. Press the Up or Down arrow button to select either the Without my permission option to have upgrades automatically downloaded to your system or the Ask before downloading option to have upgrades downloaded with your authorization first. If you select the Ask before downloading option, the recorder will display a message to notify you when an upgrade is available.
Using the System Viewing Programs in Other Languages 4 VIEWING PROGRAMS IN OTHER LANGUAGES You can change the language of the programs you view by using the Alternate Audio menu. To change to an alternate language, do the following: Note: An alternate language may not be available for all programs. Some programs, such as movies, indicate at the start of the program whether an alternate language is available.
User and Installation Guide 8. Either: Select the Save option to save your language choice. The recorder returns to the System Setup menu. Save Press the Cancel button to cancel any changes you have made in the Alternate Audio menu. The recorder displays a confirmation screen. L or CA NC E At the Confirmation Screen, Either: Select the Yes option to abandon Yes any language changes you have made. or Select the No option to save any language changes you have made.
Using the System Setting Up Channel Order 4 SETTING UP CHANNEL ORDER You can set up the Program Guide to display the channels either in ascending order (for example, from top to bottom, 122, 140, 170, 172, 200, ...) or in descending order (for example, from top to bottom, 200, 172, 170, 140, 122, ...). Note: If you do not specify a channel order, the recorder automatically displays the channels in ascending order. Remote Buttons Menu Options 1. Press the Mode button until the remote is in SAT mode.
User and Installation Guide DIAGNOSTIC TESTS Diagnostic Tests are available for you to verify that the main components of your system are working correctly. The Diagnostics menu includes tests for the following components: front panel, remote control, dish signal, telephone connection, and the main unit (that is, the recorder). The Customer Service representative may ask you to perform some or all of these tests while trouble-shooting problems.
Using the System Diagnostic Tests 4 2. Press any front panel button on your recorder, except the Power button. If the front panel is working correctly, the recorder briefly displays a message that says "Front Panel button." If the front panel is not working correctly, the recorder displays a failure message. See the Diagnostic Test section of the Problems and Solutions Tables on page A-18. 3. Press the Power button or Cancel button to end the test.
User and Installation Guide DISH SIGNAL DIAGNOSTIC TEST This test verifies that your system has good signal reception. Select the Dish Signal option to begin the test. The recorder displays a message asking you to wait until the test is completed. If the system signal reception is normal, the recorder displays a message that says "Signal Reception OK." If the signal reception is not working correctly, the recorder displays a failure message.
Using the System Programming the Remote Control 4 PROGRAMMING THE REMOTE CONTROL You can program the remote to control not only the recorder, but also your TV, and cable box or amplifier. This remote supports most brands and models; however, there may be some brands or models that it does not support. You can program the remote to control a maximum of four different electronic components.
User and Installation Guide 5. Use the number pad buttons to enter the first 3-digit code listed for your equipment brand in the table. The mode light stops flashing and stays lit. 1 2 3 4 5 6 Note: If you are entering a code for the AUX mode, you 7 8 9 have to enter a four-digit code. The first digit is the code for the piece of equipment: 0 0 - indicates a second TV 1 - indicates a second VCR For example, to program the AUX mode to control a Sony TV, enter 0 and then 000.
Using the System Programming the Remote Control 4 REDUCING THE RANGE OF THE UHF REMOTE CONTROL If a neighbor frequently uses a UHF remote control, the signals from that remote may block signals from your remote from reaching your recorder. To prevent such interference, you can install a 10 dB F-connector attenuator. This will reduce the sensitivity of the recorder to UHF signals, so it will not respond to signals from distant remotes.
User and Installation Guide 4. Press the Up or Down arrow button to set the remote to the next code. The Down arrow button scans backward, and the Up arrow button scans forward. When the correct code is reached, the equipment (whether VCR, TV, or other) powers OFF. 5. Press the Address button to store the code in the remote. If the code is valid for your remote, the mode light blinks three times. 6. Power the equipment back ON. 7. Try some other functions to make sure you have the correct code.
Using the System Programming the Remote Control 4 DETERMINING THE CURRENT REMOTE SETTINGS You can find out which code is currently set for each remote mode. Remote Buttons 1. Press the Mode button on the remote until the appropriate mode light is flashing rapidly. 2. Press the Address button twice. MODE ADDRESS For SAT mode, the mode light flashes the number of times that matches the recorder address. For example, if the recorder is addressed to 4, the mode light flashes four times.
User and Installation Guide EQUIPMENT CODES FOR PROGRAMMING THE REMOTE TELEVISIONS Note: Not all the codes listed in these tables are valid for all remote controls.
Installation and Setup Equipment Codes for Programming the Remote VCRS Aiwa Akai 088, 122, 123, 124 013, 014, 015, 016, 017, 018, 019, 020, 068 Alba 046 Amstrad 088 ASA 065 Audio Dynamics 100 Broksonic 059 Bush 089 Candle 080, 092, 093 Canon 042, 054 Capehart 043, 046 Citizen 091, 092, 093 Craig 091, 108 Curtis Mathes 054, 092, 105 Daewoo 034, 046, 047, 093, 126, 127 Daytron 046 DBX 100 Dumont 049 Dynatch 088 Electrohome 109 Emerson 005, 006, 007, 008, 009, 010, 011, 012, 059, 068, 088, 090, 109, 118 Finl
User and Installation Guide NOTES Page 4-46
5 VCR Features SIMPLE PLAYBACK AND RECORDING This recorder has a built-in VCR which will let you play back tapes that have been recorded in the D-VHS (bit stream) and VHS (analog) formats, as well as make your own recordings in the D-VHS and VHS formats. D-VHS cassettes and VHS can be used in the HMDSR100DU/RU. For information on what types of cassettes can be used and which recording formats they work with, see the table below.
User and Installation Guide SIMPLE PLAYBACK To play back a D-VHS or VHS tape, do the following: Remote Buttons Menu Options 1. Load a cassette into the cassette loading slot. l The VCR's power comes on automatically. l If the cassette's record safety tab has been removed, playback begins automatically. 2. If you want to rewind or fast forward to a different section of the tape, press the Rewind or Fast Forward button. 3. Press the Stop button to stop winding. 4.
VCR Features Simple Playback and Recording 5 SIMPLE RECORDING Remember that both digital and analog signals can be recorded on a D-VHS tape, and that only analog signals can be recorded on a VHS tape. Follow the following procedure to record on a D-VHS or VHS tape: Remote Buttons 1. Press the Mode button until the remote is in the SAT mode. Menu Options MODE 2. Load a cassette into the cassette loading slot. l Make sure the record safety tab is intact.
User and Installation Guide 4. Use the arrow buttons to select Bit Stream (D-VHS) Recording "ON" or "OFF" in the Mode section of the VCR Setup screen. Refer to the next page for further instructions. l Bit Stream (D-VHS) Recording is possible only when you record a satellite channel using a D-VHS cassette, and when Bit Stream (D-VHS) Recording setting is set to "ON". 5. Use the arrow buttons to select the Recording Speed ("SP" or "EP") for analog recordings in the Mode section of the VCR Setup screen.
VCR Features Simple Playback and Recording 5 SETTING THE BIT STREAM (D-VHS) RECORDING AND TAPE SPEED Remember that a D-VHS tape can record both bit stream and analog signals, while a VHS tape can record only analog signals. To record on a D-VHS or VHS tape, do the following: Remote Buttons 1. Press the Mode button until the remote is in the SAT mode. MODE 2. Press the Menu button to open the Main Menu . MENU 3. Select the VCR Setup option. 8 4.
User and Installation Guide PLAYBACK FEATURES To make finding and playing the taped program or scene you want as easy as possible, the recording is equipped with a variety of convenient playback features. HIGH-SPEED SEARCH Best with: Analog recordings. To search for a location with a high-speed visual playback picture, do the following: Remote Buttons Menu Options 1. During playback or still, press the Fast Forward button for high-speed search, or press the Rewind button for reverse high-speed search. 2.
VCR Features Playback Features 5 3. To stop, press the Stop button at any time. Notes: l When playing back a bit stream recorded tape, the program information for the program being fast forwarded is displayed on the TV screen for about 5 seconds, but the playback picture may appear frozen (still picture) or block noise may appear during search. l When playing back an analog recorded tape, a fast-motion playback picture appears, but no program information is displayed.
User and Installation Guide INDEX SEARCH Best with: Bit stream and analog recordings. Index codes are placed on the tape at the start of each recording. You can find and automatically play back from the start of any recording using the Index Search function. Do the following: Remote Buttons 1. Press the Mode button until the remote is in the D-VHS mode. Menu Options MODE 2. While the tape is stopped, press the Index ™ or £ button.
VCR Features Playback Features 5 STILL PICTURE/FRAME-BY-FRAME PLAYBACK Best with: Analog recordings. To "freeze" the playback picture and view it one frame at a time, do the following: Remote Buttons 1. Press the Mode button until the remote is in the D-VHS mode. Menu Options MODE 2. During playback, press the Pause button. l If there is vertical jitter, use the Up or Down arrow button to correct the picture. 3.
User and Installation Guide MANUAL TRACKING Best with: Bit stream and analog recordings. Once playback begins, the recorder's automatic tracking functions is engaged. If noise appears in the picture, you can override this and make the adjustment manually by doing the following: Remote Buttons 1. Press the Mode button until the remote is in the D-VHS mode. 2. During playback, press the Auto Track button on the remote to cancel the automatic tracking mode and enable manual tracking adjustment.
VCR Features Playback Features 5 VIDEO STABILIZER Only with: Playback of analog recorded tapes. You can correct vertical vibration when playing back unstable EP recordings that were made on another VCR. To turn this function on for automatic correction of vertical vibration, do the following: Remote Buttons 1. Press the Mode button until the remote is in the SAT mode. MODE 2. Press the Menu button to open the Main Menu . MENU 3. Select the VCR Setup option. 8 Menu Options 8 VCR Setup 4.
User and Installation Guide SUPERIMPOSE This function, which can be switched on or off, determines whether or not the recorder's operational indicators will appear on the TV screen. Do the following: Remote Buttons 1. Press the Mode button until the remote is in the SAT mode. MODE 2. Press the Menu button to open the Main Menu. MENU 3. Select the VCR Setup option. 8 Menu Options 8 VCR Setup 4. Press the arrow buttons to move the highlight to Superimpose in the Options list. 5.
VCR Features Playback Features 5 SELECTING THE SOUNDTRACK Only with: Playback of analog recorded tapes. The recorder can record two soundtracks simultaneously (Hi-Fi and Normal) and play back the selected one, or both together. To choose, do the following: Remote Buttons 1. Press the Mode button until the remote is in the SAT mode. MODE 2. Press the Menu button to open the Main Menu . MENU 3. Select the VCR Setup option. 8 Menu Options 8 VCR Setup 4.
User and Installation Guide COUNTER RESET To reset the counter reading to zero, do the following: Remote Buttons 1. Press the Mode button until the remote is in the D-VHS mode. MODE 2. Press the Counter Reset button. l The counter is reset, and the new counter reading is displayed on the TV screen. RECALL Menu Options COUNTER RESET Note: l If the counter reading does not appear on the TV screen although you want it to appear, turn on the Superimpose function (see Superimpose on page 5–12).
VCR Features Playback Features 5. Press the arrow buttons to move the highlight to Save. 6. Press the Select button to save all changes. 5 Save SELECT Note: l If Counter Memory is turned on, "Memory" appears in the View Banner displayed on the TV screen. REPEAT PLAYBACK To repeatedly play the same tape 20 times consecutively, unattended, do the following: Remote Buttons Menu Options 1. During playback, press and hold the Play button for longer than 5 seconds.
User and Installation Guide NEXT-FUNCTION MEMORY The Next Function Memory "tells" the recorder what to do immediately after rewinding. Before continuing, be sure that the recorder's tape is stopped. Front Panel Buttons (a) For Automatic Start of Playback after Tape Rewind... press the Rewind button, then press the Play button within 2 seconds. (b) For Automatic Power Off after Tape Rewind... press the Rewind button, then press the Power button within 2 seconds. (c) For Automatic Eject after Tape Rewind...
VCR Features Recording Features 5 RECORDING FEATURES Various features are provided to make video taping an easy and sure process. RECORDING ONE PROGRAM WHILE W ATCHING ANOTHER To watch a broadcast or cable TV channel while recording another program using the builtin VCR, do the following: Remote Buttons Menu Options 1. During recording, press the TV/VCR button. TV/VCR l If you are using the RF connection (see p. 7-22) to view the output from your recorder, the TV broadcast being recorded disappears.
User and Installation Guide STEREO AND SAP (SECOND AUDIO PROGRAM) The recorder's built-in MTS decoder enables reception of local broadcasts with Multichannel TV Sound. Remote Buttons Menu Options To Record Stereo Programs... simply follow the basic recording procedure. To Listen To Stereo Soundtrack During Recording... select "HI-FI" at the VCR Setup screen (see Selecting the Soundtrack on page 5-13). To Record SAP Programs... 1. Press the Mode button until the remote is in the SAT mode. MODE 2.
VCR Features Recording Features 5 INSTANT TIMER RECORDING (ITR) This "on the fly" timer lets you record from 30 minutes to 6 hours (selectable in 30-min. increments), and shuts the recorder off after recording is finished. To activate, do the following: Recorder Buttons 1. During recording, press the Rec(ord) button on the recorder's front panel at any time to engage the ITR. The recording duration appears on the TV screen for approx. 5 seconds.
User and Installation Guide USING CALLER ID Your system can display caller identification: the name and telephone number of the caller for your incoming telephone calls. However, caller ID only displays information your telephone company provides. You may not get all caller IDs, and some callers may block caller ID. To set up your system to use caller ID, do the following: If you want to activate this feature, you must call your local telephone company and subscribe to the caller ID service.
VCR Features Using Caller ID 8. Select the Save option. 5 Save 9. If you have not already done so, call your telephone company to activate caller ID. When the recorder detects an incoming call, it displays an on-screen message showing the caller's name and telephone number.
User and Installation Guide EVENT TIMERS Event timers are a kind of alarm clock, reminding you when a program you want to watch is about to start. You may set three types of event timers: l VCR Event Timer This timer does all of the above, plus it starts the built-in VCR recording the event. l Auto-Tune Event Timer This timer reminds you that the event is about to start, and changes the channel to that event when it begins.
VCR Features Event Timers 5 Note: In this section, "event" means a program such as a TV show, movie, sports event, or pay per view program. Three minutes before an event timer is to execute, the recorder displays a small blinking icon on your TV screen to remind you that an event timer is scheduled to begin. This icon is displayed only until the event begins.
User and Installation Guide CREATE AN EVENT TIMER You can set the recorder's timer to automatically record a program by choosing the program through the Browse Banner, Program Guide screen, or Theme Categories screen. Remote Buttons Menu Options Load a cassette into the cassette loading slot. l Make sure the record safety tab is intact. l If the tab is missing, cover the hole with adhesive tape before inserting the cassette. To choose through the Browse Banner... 1.
VCR Features Event Timers 5. Press the Up or Down arrow button to highlight the desired timer frequency. Next press the Select button and then press the Right arrow button. 5 Timer Frequency Once Weekly Daily 6. Press the Up or Down arrow button to select "Mode". Then press the Select button. l Select "D-VHS" when recording a satellite broadcast on a D-VHS tape. l Select "SP" or "EP" when recording a satellite broadcast on a VHS tape (analog) or when recording local channels.
User and Installation Guide CREATE A MANUAL EVENT TIMER To program the recorder's built-in timer manually, do the following: Remote Buttons 1. Press the Mode button until the remote is in the SAT mode. Menu Options MODE 2. Load a cassette into the cassette loading slot. l Make sure the record safety tab is intact. l If the tab is missing, cover the hole with adhesive tape before inserting the cassette. 3. Press the Menu button to open the Main Menu. 4. Highlight the Timers option and press Select.
VCR Features Event Timers 8. Press the Up or Down arrow button or number buttons to select the desired channel. Next press the Select button and then press the Down arrow button. 5 Channel AUXIN-0 CBS-4 ABC-7 NBC-9 SELECT 9. Press the Left or Right arrow button to select "Mode". Then press the Select button. l Select "D-VHS" when recording a satellite broadcast on a D-VHS tape. l Select "SP" or "EP" when recording a satellite broadcast on a VHS tape (analog) or when recording local channels. 10.
User and Installation Guide 15.Press the number buttons to input the date under Mo./Day. l To input a one-digit number, be sure to insert a zero first. l Step 15 not necessary if you selected "Mon-Fri" or "Daily" in step 7. l If you selected "Weekly" in step 7, press the Up or Down arrow button to select the Day, and press the Select button. 16.Either: Select the Create Timer option to save the event timer, and press the Select button. The Event Timer Management screen will be displayed.
VCR Features Event Timers 5 SCHEDULING CONFLICTS If you try to create event timers for overlapping events, the recorder displays a menu that says, "WARNING: Event Timer Scheduling Conflict," and shows the dates and times of both events. The recorder also displays this menu if an event time has changed, causing the event timer to overlap a previously created event timer. You must delete one of the scheduled event timers to resolve the conflict. DELETING A CONFLICTING EVENT T IMER Remote Buttons 1.
User and Installation Guide 3. Select the Timers option. The Event Timer Management screen will be displayed. 7 7 Timers Event Timer Management Active Event Timers Cancel 4/26 once 7:00a HBO VCR M-F 12:00p CNN Reminder Wed Weekly 7:30p Daily 5:00a ESPN2 Auto-Tune SHOW VCR Delete Create Edit Help 4. Press the Left arrow button to highlight the first event timer in the event timers list. T H E M E 5. Press the Up or Down arrow button to highlight the event timer that you want to delete.
VCR Features Event Timers 5 TO MAKE CHANGES AFTER SETTING EVENT TIMERS To make changes after you have set event timers, do the following: Remote Buttons Menu Options 1. Perform steps 1 - 6 of Deleting an Event Timer described on page 5-29 and 5-30. 2. Press the Right arrow button, then the Up or Down arrow button to highlight the Edit option. B R O W S E 3. Press the Select button. The Edit a Manual Event Timer screen will be displayed. Edit SELECT 4.
User and Installation Guide 8. Select the Create Timer option to save the event timer, and press the Select button. 9. Press the Power button to turn the recorder off. The TIMER light on the recorder's front panel will illuminate. Create Timer SELECT POWER REVIEWING EVENT TIMERS You can display a list of scheduled event timers at any time, using the Event Timer Management menu. Or, use this menu to delete event timers. To open the Event Timer Management menu, do the following: Remote Buttons 1.
VCR Features Editing to or from Another VCR 5 EDITING TO OR FROM ANOTHER VCR You can use the recorder as the playback unit or the recording unit to edit from VHS to VHS. It is also possible to use the recorder as the playback unit to edit from D-VHS to VHS. It is not possible to edit from D-VHS to D-VHS by connecting to an external D-VHS recorder. To make an edited VHS tape, do the following: Remote Buttons Menu Options 1.
User and Installation Guide EDITING FROM A CAMCORDER You can use a camcorder as the playback unit and the recorder as the recording unit to edit rough footage into personal videos. Do the following: Remote Buttons Menu Options 1. Connect the camcorder's VIDEO OUT and AUDIO OUT connectors to the recorder's VIDEO IN and AUDIO IN connectors using the supplied Audio/Video cable. l If using a monaural camcorder, connect its AUDIO OUT connector to the AUDIO IN L connector on the recorder. 2.
Starting Your Installation 6 INTRODUCTION FOR MORE INFORMATION: If you do not want to install your system yourself, you can have it installed by a professional. Call the DISH Network Service Center at 1-800-799-7175 for information about installation in your area. If you do intend to install your system yourself, this chapter provides installation procedures. The procedures are relatively simple, but do require some skill in construction-related tasks.
User and Installation Guide SUMMARY OF INSTALLATION Following is a summary of the procedures to install and set up your system. Perform the procedures in the order presented. 1. Unpack the satellite antenna*, recorder, and parts (see pages 6–3 through 6–5) and the optional installation kit, if you purchased one (see page 6–7). *Supplied with HM-DSR100DU. Sold separately for HM-DSR100RU. 2. Review "What You Need" (see pages 6–6 through 6–8). Connect the recorder to your TV set. 3.
Starting Your Installation Before You Start Installation 6 BEFORE YOU START INSTALLATION UNPACKING AND CHECKING CONTENTS As you unpack the system, confirm that all the parts are included. See Package Contents below for a list of the included components. Note: Keep the shipping materials in which these items are packed, in case you ever need to return them. Unpack the contents carefully. Electronic equipment can be easily damaged if bumped or handled roughly.
User and Installation Guide COMPONENTS OF THE SATELLITE ANTENNA Note: The following pictures are not to scale. The fully assembled satellite antenna looks like this. Following are descriptions of each piece of the satellite antenna. LNBF (LOW NOISE BLOCK DOWNCONVERTER WITH INTEGRATED FEEDHORN) The "dish" focuses the signals transmitted from the satellites onto the LNBF.
Starting Your Installation Components of the Satellite Antenna 6 DISH The dish reflects and focuses the signals from the satellites onto the LNBF. Flathead bolts with nuts attach the dish to the support arm bracket. LNBF SCREW AND WASHER The LNBF screw and washer attach the LNBF to the end of the support arm. CABLE CLIP (OPTIONAL) The cable clip holds the coaxial cable(s) to the top of the support arm bracket.
User and Installation Guide WHAT YOU NEED WHAT YOU NEED TO KNOW Because you will make modifications to the location where you mount the satellite antenna, you should be somewhat familiar with and be able to safely perform the following procedures. l You should be able to use a plumb line or level to set both horizontal and vertical surfaces. This is especially critical for vertical surfaces. l You should know how to drill holes in the mounting surface (whether wood, brick, cinder block, etc.).
Starting Your Installation Optional Installation Kit 6 l Sledgehammer or small fence post driver l Drill and 1/2 inch drill bit - long enough to drill through the exterior wall of your building l Compass * l Silicone sealant (for sealing drill holes) * Note: You will need additional tools and materials, depending on the type of surface on which you mount the antenna. Each of the procedures for mounting the antenna lists these.
User and Installation Guide l Compass l Silicone sealant Tools, such as drills or screwdrivers, are not included in the Installation Kit. INSTALLING BATTERIES IN THE REMOTE Four AAA batteries, packaged separately, are included with the remote control. See Installing Batteries in the Remote on page 3-1 for this procedure. SETTING THE REMOTE ADDRESS When you get your recorder and remote, they are addressed to 1. Unless you experience problems, you do not need to change the address at this time.
Starting Your Installation Finding the Satellites 6 F INDING THE SATELLITES Before you can decide on the mounting location for the antenna, you must determine the approximate location of the satellites. Then you must find a mounting site that provides an unobstructed signal path from the satellites to the antenna.
User and Installation Guide FINDING THE DIRECTION AND ELEVATION When determining the approximate location of the satellites, you need to find the azimuth (South, Southeast, or Southwest direction to the satellites) and elevation (angle up to the satellites) from your location. "Azimuth" is also called "direction." This Guide uses the term "direction". Finding the satellites is easy. You first need to connect the recorder to your TV, and turn on the recorder and TV. Tune your TV to channel 3 or 4.
Starting Your Installation Finding the Satellites 6 FINDING A CLEAR LINE OF SIGHT "Finding a clear line of sight" means finding a location for the satellite antenna so that its view of the orbiting satellites is unobstructed by trees, buildings, or any other obstructions. This includes making sure that sapling trees are not likely to grow up or out into the line of sight. Also, consider seasonal changes. An unobstructed site in winter may be obstructed by foliage in spring and summer. 1.
User and Installation Guide 3. Use the elevation number to find out how high the satellites are in the sky from your location. You know that vertical is 90°, and horizontal 0°, and halfway in between is 45°. Stand close to where you plan to mount the satellite antenna and face in the direction that you marked for the direction to the satellites. Using the elevation angle, find the closest approximation to that angle in the sky. You now are pointing to the approximate location of the satellites. 4.
Starting Your Installation Discussion of Potential Mounting Sites 6 DISCUSSION OF POTENTIAL MOUNTING SITES When you are surveying your property for appropriate sites for the satellite antenna, keep in mind that you can mount the satellite antenna on a variety of surfaces: brick, cinder block, wood, some sidings, rooftop, or a pole.
User and Installation Guide l Place the satellite antenna as close to the recorder as possible. Use no more than 100 feet of cable between the recorder and the satellite antenna, unless you install a line amplifier to boost the signal. Otherwise, the system is more likely to lose the signal during periods of rain, snow, or heavy cloud cover. l Consider seasonal changes. The site may appear unobstructed in the winter, but spring and summer foliage could block the signal to the satellite antenna.
Starting Your Installation Discussion of Potential Mounting Sites 6 MOUNTING THE ANTENNA ON B RICK Materials Required l 4 wall anchors, 1/4” l 4 machine bolts, 1/4” x 3” Tools Required l drill l 1/2” masonry drill bit l 7/16” socket or box-end wrench l bubble level or plumb line l pencil "Brick" is defined as a solid brick wall or other structure. This does not include brick facing that is used on some buildings over the main structure.
User and Installation Guide MOUNTING THE ANTENNA ON SIDING Materials Required l 2 lag screws, 1/4” x 3” l 4 lag screws, 5/16” x 2” Tools Required l l l l drill 1/8” twist drill bit 3/16” twist drill bit 7/16” socket or box-end wrench l bubble level or plumb line l pencil We do not recommend mounting the satellite antenna on aluminum or vinyl siding. These materials can be structurally unsound, causing eventual shifting of the dish.
Starting Your Installation Discussion of Potential Mounting Sites 6 MOUNTING THE ANTENNA ON CINDER B LOCK Materials Required l 4 toggle anchors, 1/4” l 4 machine bolts, 1/4” x 3” Tools Required l drill l 1/2” masonry drill bit l 7/16” socket or box-end wrench l bubble level or plumb line l pencil You can mount the satellite antenna on cinder blocks, whether they are part of a wall or the side of a building. l The surface must be flat and even.
User and Installation Guide MOUNTING THE ANTENNA ON THE ROOF Materials Required l 2 lag screws, 1/4” x 3” l 4 lag screws, 5/16” x 2” l roof sealant Tools Required l l l l drill 1/8” twist drill bit 3/16” twist drill bit 7/16” socket or box-end wrench l bubble level l ladder l pencil You can mount the satellite antenna on the roof. This usually provides the highest available location. l Attach the satellite antenna to a rafter beneath the roof surface.
Starting Your Installation Discussion of Potential Mounting Sites 6 MOUNTING THE ANTENNA ON WOOD Materials Required l 4 lag screws, 5/16” x 2” Tools Required l l l l drill 1/8” twist drill bit 3/16” twist drill bit 7/16” socket or box-end wrench l bubble level or plumb line l pencil You can mount the satellite antenna on a wooden deck, wooden beam, or other wooden surface. l The surface must be flat and even. l Make sure that the wood has a solid foundation, and is secured.
User and Installation Guide NOTES Page 6-20
7 Installing and Wiring Your System INSTALLING THE SATELLITE ANTENNA Once you have found the direction and elevation of the satellites and decided on the best mounting location, you can install the satellite antenna. Read through the Discussion of Potential Mounting Sites on page 6-13 before selecting your mounting location. ORIENTING THE MAST OR POLE It is very important that the upper part of the mast or the mounting pole, whichever you use, be truly plumb (that is, vertical).
User and Installation Guide INSTALLING THE ANTENNA MOUNT Assemble the satellite antenna in a safe location before climbing up to the mounting location. Use caution when climbing, and when working at the mounting location. Before you attach the satellite antenna to a mounting surface, you should make sure that you can route the cable from your chosen location into the building, drilling holes where necessary, to the recorder. 1. Gather all the items you will need for the assembly. 2.
Installing and Wiring Your System Installing the Satellite Antenna 7 4. Adjust the foot and mast so that when the foot is mounted, the upper part of the mast is, as accurately as possible, vertical. Use a plumb line or bubble level to make sure the upper part of the mast is vertical from at least three readings. Alignment of the dish is nearly impossible if the mast is not vertical. 5. Place the dish on the support arm. Align the flathead bolts with the dish support bolt holes on the dish supports. 6.
User and Installation Guide 9. Slide the mast clamp down onto the mast. Make sure that the pivot bolt rests on the top of the mast. Tighten the elevation bolts and the pivot bolt so that the bracket is snug, but can still be moved up and down. Pivot Bolt Elevation Bolts (one on each side) 10.Turn the antenna mount on the mast or pole to align the LNBF support arm in the direction of the satellites. Use the direction you found earlier using the Point Dish and Signal Strength menu.
Installing and Wiring Your System Installing the Satellite Antenna 11.Thread the LNBF cable into the cable hole near the mast foot, up the mast and out the top of the mast. Cable Loop 2" Dish Support Arm Pivot Bolt Mast Sleeve Do not kink or pinch the cable. 12.Take the end of the cable coming out the top of the mast, and thread it up the support arm. 13.Loop the end of the cable over the pivot bolt.
User and Installation Guide 20.Pull the cable loop up into the top of the mast. Cutaway View of Arm Washer Screw INSTALLING THE ANTENNA ON A METAL POLE Note: Skip this section if you are using the mast that came with the satellite antenna. Materials Required l cable ties Tools Required l post hole digger l cement l 7/16” socket or box-end wrench l bubble level or plumb line l pole You can mount the satellite antenna on a metal pole if necessary.
Installing and Wiring Your System Installing the Satellite Antenna 7 The most common method to install the pole in the ground is to use cement to secure it in the hole. Make sure that the pole remains at 90˚ from horizontal as the cement dries. You may want to use guy wires or braces to keep the pole steady.
User and Installation Guide GROUNDING AND WIRING THE SATELLITE ANTENNA As with any such installed devices, the satellite antenna and the coaxial cable(s) should be grounded in accordance with the National Electrical Code (NEC) and local electrical codes to provide some protection against damage caused by lightning strikes and other electrical discharges. Even lightning strikes several miles away can generate enough electricity in the air to damage your system.
Installing and Wiring Your System Grounding and Wiring the Satellite Antenna 7 l Two pieces of No. 10 solid copper or No. 8 solid aluminum ground wire - long enough to run from the coaxial cable grounding block to the grounding rod. A typical installation requires two to three feet of wire. A ground wire must always be a single piece of wire. Never splice two wires together for a ground. Corrosion and weathering can lead to a poor connection at the splice, making the ground ineffective and dangerous.
User and Installation Guide l Refer to the grounding diagram on page ii of the "Important Product Safety Instructions." Note that this diagram suggests grounding the satellite antenna and coaxial cable to the power service grounding electrode system of the building. l If you install a grounding electrode system separate from the power service grounding electrode system, connect the separate electrode to the grounding system in accordance with the National Electrical Code and local electrical codes.
Installing and Wiring Your System Grounding and Wiring the Satellite Antenna 4. Attach the other end of the ground wire to a grounding electrode in accordance with the National Electrical Code and local electrical codes. Grounding Block 7 Coaxial Cable from Antenna Drip Loop 5. Use the cable clips to attach the cable to the side of the building. This helps prevent damage. The drip loops allow moisture to drip from the cables before being channeled into the grounding block or the building.
User and Installation Guide AIMING THE A NTENNA FOR THE STRONGEST SIGNAL Typically, once you see a clear picture on your TV, a stronger signal will not noticeably affect the quality. Keep trying to aim the satellite antenna for the strongest possible signal. The stronger the signal, the better your chance of uninterrupted reception during periods of rain, snow, and heavy cloud cover. Do this after the satellite antenna is installed, wired, and grounded.
Installing and Wiring Your System Aiming the Antenna for the Strongest Signal 5. Select the Point Dish and Signal Strength option. 1 1 Point Dish/Signal The recorder displays the Point Dish and Point Dish and Signal Strength Signal Strength menu. To calculate azimuth and elevation angles, enter your ZIP code Transponder refers to the channel transponder numbers that the recorder receives. Transponder numbers are automatically displayed.
User and Installation Guide 8. Loosen the elevation bolts and the pivot bolt just enough to be able to move the support bracket. Slowly move the dish up and down until you find the strongest signal. Tighten the elevation bolts and pivot bolt just enough so the dish cannot be moved vertically. Pivot Bolt Elevation Bolts (1 on each side of bracket) 9. Repeat steps 7 and 8 until the Signal Strength bar is green, the word "Locked" is displayed, and you have gained the strongest signal possible.
Installing and Wiring Your System Connecting the Recorder to a Telephone Line 7 CONNECTING THE RECORDER TO A TELEPHONE LINE You must connect your recorder to an active telephone line if you want to purchase pay per view programs using the recorder. Attach a telephone line with a standard RJ-11 connector to the Telephone Jack on the recorder back panel, and then connect the line to an active telephone connection. When you purchase pay per view programs, the recorder stores the information in its memory.
User and Installation Guide 7. Press the Up or Down arrow button to highlight either the TouchTone or the Rotary/Pulse option. 8. Press the Select button. SELECT Note: For most residential installations, you need only specify the telephone system type. If this is the case, select the Save option to save the above setting, and stop here. If not, do steps 9 and 10 before you select the Save option. Save 9. Press the Left arrow button to move the highlight to the Outside Line Prefix list.
Installing and Wiring Your System Ordering Your Programming 7 ORDERING YOUR PROGRAMMING This procedure notifies the Service Center that your system is on-line and installed. You need to have your services activated before you can start enjoying your desired programming. You must authorize your services when you first install your system, and whenever you request to add or remove services.
User and Installation Guide WIRING YOUR SYSTEM TOGETHER MULTIPLE RECEIVERS Each output on the LNBF can support a single receiver. You cannot connect two receivers to the same output (for example, by using a line splitter), because the two receivers would interfere with each other during channel selection. This is a characteristic of satellite television in general, and is not a limitation that is specific to this system.
Installing and Wiring Your System Wiring Your System Together 7 RF OR VHF CONNECTIONS (GOOD PICTURE AND SOUND) Cable Connectors on Recorder VHF/UHF ANT. IN RF OUT The RF or VHF connections (also called the modulator connections) provide good picture and good mono ("non-stereo") sound quality. Be aware that even if you have a TV and other equipment that support stereo sound, this type of connection will give you only non-stereo sound.
User and Installation Guide The phono (RCA) audio/video cable is available as a single cable with three connectors on either end, or as three separate cables. The connectors are color-coded according to the type of signal they carry. l The yellow connector carries the video signal. l The white connector carries the left audio signal. l The red connector carries the right audio signal.
Installing and Wiring Your System Wiring Your System Together 7 WIRING SETUPS The following wiring setups present several methods for wiring your system. Many of these options depend on what electronic components you are connecting, and what type of connectors the components support. See About Cabling and Connections on page 7-18 for more information. Most of the wiring setups assume the following: l You have a broadcast TV antenna or a cable TV box that you want to connect to the system.
User and Installation Guide QUICK INSTALL (WITH RF OR UHF CONNECTION) The Quick Install setup is designed to get your system running as quickly as possible. This is especially useful if you are setting up your system yourself. You use this setup initially to assist you in finding the direction and elevation of the satellite, as well as obtaining a signal from it. Features l l l Equipment Quickest wiring setup. Minimum number of components.
Installing and Wiring Your System Wiring Your System Together 7 FULL INSTALL (WITH AUDIO/VIDEO CONNECTIONS) Features l l l Equipment Can record local or satellite programming on the VCR (you cannot tape copyrighted materials). Can play back tapes on VCR by tuning to channel 000. Can easily view both satellite and local programs by using the Local TV Link feature. l l l Quality l Recorder TV Cable TV box or broadcast antenna l Better Picture to TV Better stereo sound to TV and VCR.
User and Installation Guide FULL INSTALL (WITH S-VIDEO CONNECTION) Features l l l Equipment Can record local or satellite programming on the VCR (you may not tape copyrighted materials). Can play back tapes on VCR by tuning to channel 000. Can easily view both satellite and local programs by using the Local TV Link feature. l l l l Quality l Recorder TV with S-VIDEO IN Cable TV box or broadcast antenna Audio amplifier (optional) Grounding Wire for Mast l l Best picture to TV.
Installing and Wiring Your System Manual Clock Setting 7 MANUAL CLOCK SETTING If the recorder is connected to a properly installed DISH Network™ antenna, the recorder's clock will be set automatically. However, if you ever need to set the clock manually because the DISH antenna has been disconnected, etc., do the following: Remote Buttons 1. Press the Mode button until the remote is in SAT mode. MODE 2. Press the Menu button to open the Main Menu . MENU 3. Select the VCR Setup option. 8 4.
User and Installation Guide 8. Press the Left or Right arrow button to move the highlight to the "Month" under Date. 9. Press the number buttons to set the Month, Day, Hour and Minute. To input a one-digit number, be sure to insert a zero first. 1 2 3 4 5 6 7 8 9 0 10.Press the arrow buttons to select AM or PM and then press Select button. PM AM 11.Press the arrow buttons to move the highlight to Save. 12.Press the Select button to start the clock.
A Appendix FCC COMPLIANCE TELEPHONE COMMUNICATION The following text is extracted from Federal Communication Commission (FCC) regulations, as of the publication date of this Guide. Contact the FCC (see following) or your library for the complete text of the regulations. This equipment complies with Part 68 of the FCC rules. On the rear panel of this equipment is a label that contains, among other information, the FCC registration number and ringer equivalence number (REN) for this equipment.
User and Installation Guide The customer may perform minor adjustments such as the following, in case of problems with the equipment. l Move or realign the antenna or receiving device, such as your broadcast TV antenna. l Increase the distance between the recorder and the equipment with the interference. Change the angle of the recorder relative to the equipment. l Plug the recorder into a different power outlet, preferably on a different fuse circuit within your building.
Appendix National Electrical Code (NEC) A In addition, the FCC provides a booklet that can help you. You can order the booklet from the following address: How to Identify and Resolve Radio-TV Interference Problems Stock No. 004-000-00345-4 U.S. Government Printing Office Washington, DC 20402 NATIONAL ELECTRICAL CODE (NEC) The following text contains excerpts of the National Electrical Code (NEC) that relate to grounding your system.
User and Installation Guide It shall be sized for the largest grounding electrode conductor required among all the available electrodes. (a) Metal Underground Water Pipe. A metal underground water pipe in direct contact with the earth for 10 feet (3.
Appendix National Electrical Code (NEC) A 250-115. CONNECTION TO ELECTRODES The grounding conductor shall be connected to the grounding electrode by exothermic welding, listed lugs, listed pressure connectors, listed clamps, or other listed means. Connections depending on solder shall not be used.
User and Installation Guide (f) Electrode.
Appendix Glossary A GLOSSARY Audio Connection Highest quality phono (RCA) audio connection available. Provides excellent stereo sound. Separate connectors are required for left and right audio signals. Azimuth See Direction. Blacked Out Program A program that cannot be viewed in specific locations (for example, a sports event). Broadcast Programming Your local and network channels. These are local channels available via the system. Cable Programming Your local cable channels.
User and Installation Guide IR (Infra-Red) Some remotes use infra-red light to transmit signals to equipment. Some remotes that come with the recorder use UHF to control the recorder, and IR to control other equipment; others use IR to control the recorder also. LNBF Low-Noise Block amplifier with integrated Feed. This is the component that receives the signals reflected from the dish surface and transmits them to the recorder.
Appendix Glossary A Violence: Graphic Violence. Sexual Content: Sexual scenes. Nudity: Nude scenes. Receiver The piece of equipment that controls your access to all network features and programs. RF Radio Frequency. RF or VHF Connection Also called modulator connection. A type of connection that supports good picture quality, and good mono (“non-stereo”) sound. Usually the easiest and quickest method to wire your system together.
User and Installation Guide PROBLEMS AND SOLUTIONS TABLES Note: For warranty service on your recorder, call the number printed on the outside back cover of this Guide. Use this section if you encounter problems operating the system. Look in this section for a description of your problem before calling the Service Center. Many problems arise from basic misunderstandings of how the system operates, especially when you are just becoming familiar with it.
Appendix Problems and Solutions Tables A ASSEMBLE THE SATELLITE ANTENNA What Is Happening Possible Why What to Do The support arm and bracket are separate pieces. Some models of the support arm/ bracket require assembly. Assemble the support arm and bracket. You want your system to support two receivers, but you have only a single input LNBF. You must have a dual input LNBF Call the Service Center to order a dual output LNBF. to support two receivers.
User and Installation Guide USE THE REMOTE CONTROL What Is Happening Possible Why You cannot find the remote control. When you press a button on the remote control the behavior is not as expected.Instead, you may see one of the following: No mode light (SAT, TV, D-VHS or AUX) flashes. The remote changes to SAT mode. The other equipment does not respond. The mode lights may or may not flash. When you try to control equipment other than the recorder with the remote, the other equipment does not respond.
Appendix Problems and Solutions Tables When you try to control the recorder with the remote, the recorder does not respond (this may occur especially after changing the batteries in the remote). A The remote control may be missing batteries, the batteries may be incorrectly placed in the remote, or the batteries may be weak or dead. You may need to reset the remote address and reprogram the remote for the other equipment. The addresses for the recorder and the remote may not match.
User and Installation Guide VIEWING A PROGRAM ON THE T ELEVISION SCREEN What Is Happening Possible Why The TV/VCR button on the remote does not work. What to Do This button works only when the recorder is wired using only the RF or VHF connections. Remember that with any wiring setup, you can use the Local TV Link feature to select local broadcast or cable channels. Make sure that the TV set is plugged into an electrical outlet, and that the cord, plug and outlet are in good operating condition.
Appendix Problems and Solutions Tables A PROGRAM GUIDE OR BROWSE BANNER What Is Happening Possible Why You try to display future programs in the Program Guide or Browse Banner, but find you cannot display past a limited time. The Program Guide and Browse Banner can only display programs scheduled for a limited time beyond the present. You try to display past programs (programs that have ended) in the Program Guide or Browse Banner, but you cannot find.
User and Installation Guide ELECTRONIC MAIL What Is Happening Possible Why Previously you read The recorder may have deleted messages which are now some old messages because it ran missing. out of memory space for new messages. The Power light on the recorder is flashing. The recorder has received mail. What to Do Delete messages as soon as you have read them, unless they are important enough to save. Read the mail and the light will stop flashing.
Appendix Problems and Solutions Tables A TELEPHONE LINE PROBLEMS What Is Happening Possible Why What to Do During a telephone call, The recorder may have tried to call You do not have to do anything. you hear clicks. the Service Center on the telephone line. When it registered that the telephone was busy, it automatically disconnected. The recorder was in the middle of a Press the telephone receiver button to hang up. Release the call to the Service Center. When it button to get a dial tone.
User and Installation Guide ATTENTION: “Your Smart Card does not currently have authorization to view or purchase this program. Please wait or channel up or down.” You cannot watch the selected program, even though it is There is a problem with the displayed in the Program Guide. Try a different program or Program Guide information transmitted to your recorder via the channel. satellites. ATTENTION: “Acquiring satellite signal.” The recorder was just plugged in, and is acquiring the satellite signal.
Appendix Problems and Solutions Tables A The satellite antenna may have been moved out of alignment with the satellite signal. Connecting cables may have loosened, or have moisture inside. There may be interference with the satellite signal. The dish may be full of snow or debris. Re-aim the satellite antenna, to obtain maximum signal strength. Check the antenna mount, tightening bolts if needed. Check that all cables are firmly connected and dry.
User and Installation Guide EVENT TIMERS What Is Happening Possible Why What to Do You try to set up an You must enter the system event timer, but the password before you can create an recorder displays an event timer for a locked event. ERROR message noting that the event is locked. To be able to set up an event timer for the event, first enter the system password. You try to set up an event timer, but the recorder displays an ERROR message noting that the event is a pay per view event.
Appendix Problems and Solutions Tables A ADD LOCAL OR CABLE CHANNELS TO THE PROGRAM GUIDE What Is Happening Possible Why What to Do A desired local or cable You have not yet added the channel You must add all desired local or cable channels to the Program channel does not appear to the Program Guide. Guide. Note that you cannot add both local and cable channels. in the Program Guide.
User and Installation Guide The tape is running but If you are using the RF OUT Set the channel selector to channel 3 or 4. the picture won't appear connection (see page 7-22), the on the TV screen. channel selector on the TV may be set incorrectly. If you are using the AV connection Set the TV receiver to its AV mode. or S-VIDEO connection (see page 7-23, 24), the TV receiver may be set to the wrong mode. Breaks are noticeable in This may happen when automatic Adjust tracking manually (see page 5-10).
Appendix Questions and Answers A QUESTIONS AND ANSWERS PLAYBACK Q. What happens if the end of the tape is reached during playback or search? A. The tape is automatically rewound to the beginning. Q. Can the VCR indefinitely remain in the still mode? A. No. It stops automatically after 5 minutes to protect the heads. Q. During search, still and frame-by-frame playback, the picture is intermittent. What’s the cause? A.
User and Installation Guide SPECIFICATIONS GENERAL Power requirement Power consumption Temperature Operating Storage Operating position Dimensions (W x H x D) Weight Maximum recording time D-VHS VHS (SP) VHS (EP) CONNECTOR : AC 120 V` , 60 Hz : 50 W : 5°C to 40°C (41°F to 104°F) : –20°C to 60°C (–4°F to 140°F) : Horizontal only : 400 x 142 x 350 mm (15-3/4" x 5-5/8" x 13-13/16") : 7.9 kg (17.5 lbs) : 420 min. with DF-420 video cassette : 210 min. with T-210 video cassette : 630 min.
Appendix For Servicing A F OR SERVICING HOW TO LOCATE YOUR JVC SERVICE CENTER TOLL FREE: 1-800-252-5722 Dear customer: In order to receive the most satisfaction from your purchase, read the instruction booklet before operating the unit. In the event that repair is necessary, or for the address nearest your location, please refer to the factory service center list below or within the Continental United States, call 1-800-252-5722 for your authorized servicer.
User and Installation Guide WARRANTY LIMITED WARRANTY CONSUMER VIDEO 1-90 JVC COMPANY OF AMERICA warrants this product and all parts thereof, except as set forth below ONLY TO THE ORIGINAL PURCHASER AT RETAIL to be FREE FROM DEFECTIVE MATERIALS AND WORKMANSHIP from the date of original retail purchase for the period as shown below.
I Index A FF/Browse 2-12 Guide 2-10 Index 2-12 Info 2-2, 2-11 Locking the Receiver Buttons 4-23 Menu 2-2, 2-10 Mode 2-9 Mute 2-10 Number Pad 2-12 Pause 2-13 Play 2-13 Power 2-1, 2-9 Recall 2-13 Record 2-13 Remote Control 2-7 Rewind 2-13 Rew/Browse 2-12 Select 2-2, 2-11 Skip 2-12 Stop 2-13 TV/VCR 2-3, 2-9 Unlocking the Recorder Buttons 4-24 UP/Down/Left/Right Arrows 2-2, 2-10 View 2-11 Volume 2-10 About Cabling and Connections 7-18 About Satellite Television 1-2 Access Door 2-1 Accessory Jack 2-4 Adding
User and Installation Guide Coaxial Cable Connections 2-4, 7-11, 7-19 Codes, Cable TV Box 4-45 Codes, Television 4-44 Codes, Tuners/Amplifiers 4-45 Codes, VCR 4-45 Components of the Satellite Antenna 6-4 Connections Accessory Jack 2-4 AC-3 (Dolby Digital Output) 2-6 Auxiliary Phono (RCA) Audio/Video Input 2-3 High Speed Data Port 2-6 Satellite Ant. In 2-4 S-VIDEO Output 2-5 Telephone Jack 2-6 VHF/UHF Ant.
INDEX H Installing and Wiring Your System 7-1 Installing Batteries in the Remote 6-8 Installing the Antenna Mount 7-2 Installing the Antenna on Metal Pole 7-6 Installing the Grounding Block 7-10 Installing the Satellite Antenna 7-1 Introduction 1-1 ITR (Instant Timer Recording) 5-19 IR A-8 IR Remote 2-8 Hierarchy of Menus 3-6 High Speed Data Port 2-6 Highlighting a Choice in a List 3-8 Highlighting a Menu Option 3-7 I Important System Information 7-17 Index Search 5-8 Info Button 2-2, 2-11 Information S
User and Installation Guide Mode Button 2-9 Modes Changing on the Remote 3-2 Programming the Remote Control 4-39 Programming the Remote for Other Equipment 4-39 Modulator Connections 7-19, A-8 Mounting Brackets 6-5 Mounting Sites 6-13 Weather and Wind Considerations 6-13 Mounting the Antenna on Brick 6-15 Mounting the Antenna on Cinder Block 6-17 Mounting the Antenna on Siding 6-16 Mounting the Antenna on the Roof 6-18 Mounting the Antenna on Wood 6-19 Multiple Receivers 7-18 Mute Button 2-10 N National El
INDEX Q Quick Install 7-22 Quick Start Tips 1-6 R Radio Frequency (RF) A-9 Radio Interference A-2 Rating Code Locks 4-22 Rating Codes A-8 Recall Button 2-13 Recorder 2-1 Access Door 2-1 Accessory Jack 2-4 AC-3 (Dolby Digital Output) 2-6 Auxiliary Phono (RCA) Audio/Video Input 2-3 Back Panel 2-4 Cassette Loading Slot 2-1 Changing the system Password 4-27 Channel 3/4 Switch 2-5 Connecting to a Telephone Line 7-15 D-VHS Indicator 2-1 Diagnostic Test 4-36 Eject Button 2-3 EP Light 2-2 FF Button 2-3 Front Pane
User and Installation Guide S Safety Instructions ii Recommendations 6-13, 6-14 SAP (Second Audio Program) 5-18 Satellite Antenna 2-14, A-9 Aiming for the Strongest Signal 7-12 Cable Clip (Optional) 6-5 Components 6-4 Dish 6-5 Dual Output LNBF 6-4 Finding the Satellites 6-9 Fine-Tuning the Aim 7-12 Grounding and Wiring 7-8 Installation 7-1 Installing on a Metal Pole 7-6 LNBF 6-4 Mast Assembly 6-5 Mount Installation 7-2 Mounting Bracket 6-5 Mounting Bracket and Mast Assembly 6-5 Mounting on Brick 6-15 Mounti
INDEX I Once Event Timers 5-26 Power Off and Event Timers 5-32 Reminder Event Timers 5-22 Restricted Programs and Event Timers 5-32 Reviewing Event Timers 5-32 Scheduling Conflicts 5-29 Types of Event Timers 5-22 VCR Event Timers 5-22 Weekly Event Timers 5-26 Tips for Quick Start 1-6 Troubleshooting System Diagnostic Tests 3-11 Tuners/Amplifiers Codes 4-45 Turning On the System 3-4 TV/VCR Button 2-9 Types of Cabling and Connections 7-18 U UHF A-9 UHF Attenuator 4-41 UHF Remote 2-8 UHF Remote Address 2-8
User and Installation Guide NOTES Page I-8
HM-DSR100U JVC COMPANY OF AMERICA DIVISION OF US JVC CORP. 41 Slater Drive, Elmwood Park, N.J. 07407 To subscribe to programming, or for assistance with installing or using the system, call the DISH Network Service Center at 1-800-333-3474, or see the Dish Network's home page at http://www.dishnetwork.com on the World Wide Web. For warranty service, or for information about the features and operation of the HM-DSR100U call JVC at 1-800-252-5722.