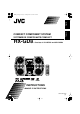
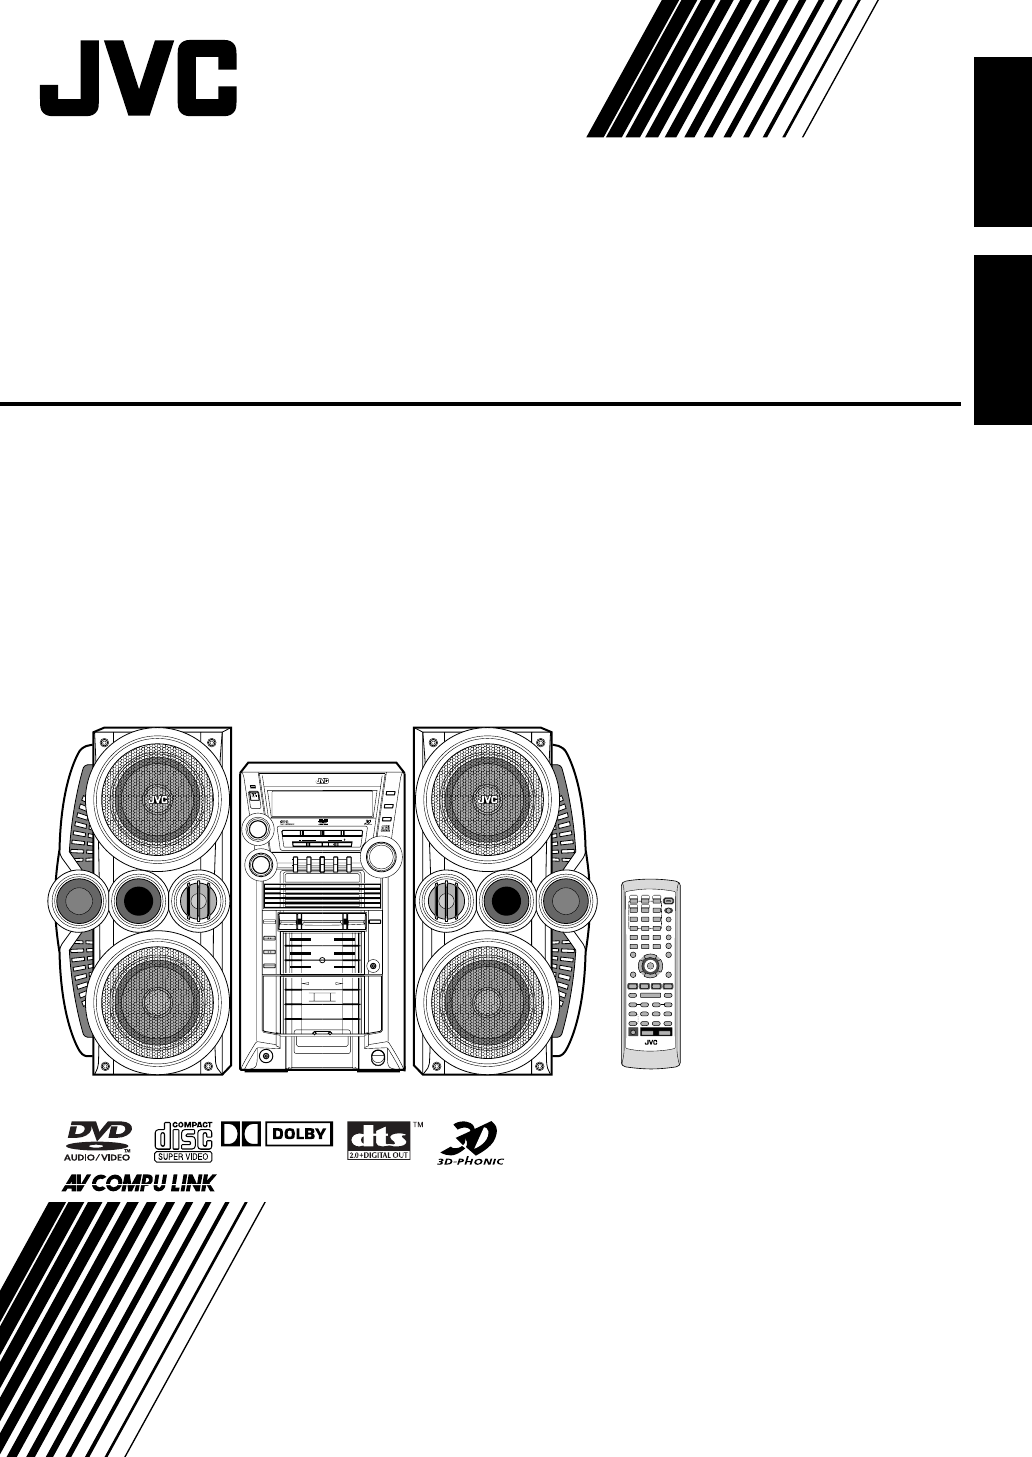
Français English 00-00_Cover[J].fm Page 1 Tuesday, March 16, 2004 5:52 PM COMPACT COMPONENT SYSTEM SYSTEME DE COMPOSANTS COMPACT HX-GD8 —Consists of CA-HXGD8 and SP-HXGD8 For Customer Use: Enter below the Model No. and Serial No. which are located either on the rear, bottom or side of the cabinet. Retain this information for future reference. Model No. Serial No.
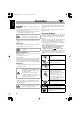
Safty[C].fm Page 1 Tuesday, March 16, 2004 5:49 PM Warnings, Cautions and Others Mises en garde, précautions et indications diverses CAUTION RISK OF ELECTRIC SHOCK DO NOT OPEN CAUTION: TO REDUCE THE RISK OF ELECTRIC SHOCK, DO NOT REMOVE COVER (OR BACK). NO USER SERVICEABLE PARTS INSIDE. REFER SERVICING TO QUALIFIED SERVICE PERSONNEL.
Safty[C].fm Page 2 Tuesday, March 16, 2004 5:49 PM For U.S.A. For Canada/pour le Canada This equipment has been tested and found to comply with the limits for a Class B digital device, pursuant to part 15 of the FCC Rules. These limits are designed to provide reasonable protection against harmful interference in a residential installation.
Safty[C].fm Page 3 Tuesday, March 16, 2004 5:49 PM 1 CLASS 1 LASER PRODUCT 2 CAUTION: Do not open the top cover. There are no user serviceable parts inside the Unit; leave all servicing to qualified service personnel. 3 CAUTION: Visible and invisible laser radiation when open and interlock failed or defeated. Avoid direct exposure to beam. 4 REPRODUCTION OF LABEL: CAUTION LABEL, PLACED INSIDE UNIT. 1 PRODUIT LASER CLASSE 1 2 ATTENTION: N’ouvrez pas le couvercle supérieur.
Contents Introduction ............................................................ 2 Timer Operations ..................................................32 Precautions ..........................................................................2 How to Read This Manual ..................................................2 Setting the Timer...............................................................32 Timer Priority....................................................................33 Getting Started .....
English HX-GD8.book Page 2 Thursday, March 18, 2004 6:43 PM Introduction Precautions Installation • Install in a place which is level, dry and neither too hot nor too cold—between 5°C and 35°C. • Install the System in a location with adequate ventilation to prevent internal heat buildup in the System. DO NOT install the System in a location near heat sources, or in a place subject to direct sunlight, excessive dust or vibration. • Leave sufficient distance between the System and the TV.
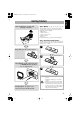
HX-GD8.book Page 3 Thursday, March 18, 2004 6:43 PM Step 1:Unpack the package and check the accessories. English Getting Started Step 1: Unpack After unpacking, check to be sure that you have all the following items. The number in parentheses indicates the quantity of each piece supplied. • FM antenna (1) • AM loop antenna (1) • Composite video cord (1) • Remote control (1) • Batteries (2) If any item is missing, consult your dealer immediately.
English HX-GD8.book Page 4 Thursday, March 18, 2004 6:43 PM Step 3: Hook Up If you need more detailed information, see page 6. Turn the power off to all components before connections. Illustrations of the input/output terminals below are typical examples. When you connect other components, refer also to their manuals since the terminal names actually printed on the rear may vary. VIDEO INPUT TV AM loop antenna (supplied) Turn it until the best reception is obtained.
English HX-GD8.book Page 5 Thursday, March 18, 2004 6:43 PM T For better FM/AM reception AM loop antenna Keep it connected. Vinyl-covered wire (not supplied) Outdoor FM antenna (not supplied) Extend it horizontally. Disconnect the supplied FM antenna, and connect to an outdoor FM antenna using a 75 Ω wire with coaxial type connector (IEC or DIN45325). FM antenna (supplied) Extend it so that you can obtain the best reception.
English HX-GD8.book Page 6 Thursday, March 18, 2004 6:43 PM To connect the AM loop antenna 1 Hold • DO NOT connect more than one speaker to each terminal. • DO NOT push or pull the speakers as this will damage the foot spacers at the bottom of the speakers. 3 Release To connect digital audio 2 Insert • If the AM loop antenna wire or speaker cords are covered with vinyl, remove the vinyl to expose the tip of the antenna by twisting the vinyl.
HX-GD8.book Page 7 Thursday, March 18, 2004 6:43 PM Playable Disc Types INFO This unit has been designed to play back the following discs: Disc Type Mark (Logo) DVD Video DVD Audio Video CD (VCD) Super Video CD (SVCD) Audio CD COMPACT English Before Operating the System Audio formats The System can play back the following digital audio formats.
English HX-GD8.book Page 8 Thursday, March 18, 2004 6:43 PM About the Display Indication The indications on the display teach you a lot of things while you are operating the System. Before operating the System, be familiar with when and how the indicator illuminates on the display. 1 2 3 4 5 6 TITLE GROUP CHAP. TRACK SURROUND DVD AUDIO q LPCM w e D DTS r 7 8 9 MONO DVD LEVEL 123 REC MPEG PRGR. B.S.P.
English HX-GD8.book Page 9 Thursday, March 18, 2004 6:43 PM 1 BEEP ON indicator • Lights when key-touch tone is activated. 2 File type indicators • MP3: lights while playing back an MP3 track. • WMA: lights while playing back a WMA track. • JPEG: lights while playing back a JPEG file. 3 TITLE indicator • Lights to indicate the title number when the source is DVD Video. • Lights to indicate the group title or track title when the source is an MP3/WMA disc.
HX-GD8.book Page 10 Thursday, March 18, 2004 6:43 PM English Daily Operations—Playback In this manual, the operation using the remote control is mainly explained; however, you can use the buttons and controls on the main unit if they have the same (or similar) name and marks. ¥ Turn on the power. The STANDBY lamp on the main unit goes off. • Without pressing (STANDBY/ON), the System also turns on by pressing one of the source select buttons in the next step. ø Select the source.
English HX-GD8.book Page 11 Thursday, March 18, 2004 6:43 PM Listening to the Radio INFO Main Unit ONLY To preset Stations To select the band (FM/AM) You can preset 30 FM and 15 AM stations. FM 1 Tune in to a station you want to preset, then enter into AM the presetting mode. SET /DISPLAY To tune in to a station While FM or AM is selected... 2 Select a preset number for the station you store. 1 sec. PRESET Increases the frequency. Decreases the frequency.
English HX-GD8.book Page 12 Thursday, March 18, 2004 6:43 PM Playing Back a Disc INFO Before operating a disc, be familiar how a disc is recorded. • DVD Video comprises of “Titles” which includes “Chapters,” DVD Audio/MP3/WMA comprise of “Groups” which includes “Tracks,” and CD/SVCD/VCD comprise of only “Tracks.” For JPEG playback, see “Operations on the CONTROL” on page 28.
To select an item directly Remote ONLY You can select a title/chapter/track directly and start playback. For DVD Video, you can select a title before starting playback, while you can select a chapter after starting playback. 7 For SVCD/VCD with PBC: While playing a disc with PBC, “PBC” appears on the display. When disc menu appears on the TV screen, select an item on the menu. Playback of the selected item starts. Examples: To select number 5, press 5. To select number 15, press +10, then 5.
English HX-GD8.book Page 14 Thursday, March 18, 2004 6:43 PM To reverse the tape automatically Playing Back a Tape To insert a tape REV.MODE You can play back type I tapes. • The use of C-120 or longer tape is not recommended. Push (holding then...) • You can also use REVERSE MODE button on the unit. Tape is automatically reversed, and playback repeats until you stop it. Tape will not be reversed. When the current side of the tape reaches its end, playback stops.
HX-GD8.book Page 15 Thursday, March 18, 2004 6:43 PM Adjusting the Volume Remote Control English Daily Operations—Sound&Other Adjustments INFO The volume level can be adjusted in 32 steps (VOLUME MIN, VOLUME 1 – VOLUME 30, VOLUME MAX).
English HX-GD8.book Page 16 Thursday, March 18, 2004 6:43 PM Selecting the Sound Modes INFO You can select one of the preset Sound Modes. • If you want to add surround elements into your Sound Mode, select one of the Surround modes. 2 Enter into the SEA Control Mode. • You can enter the SEA Control Mode only while the Sound Mode appears on the display. Remote control: SET /DISPLAY Main unit: UND MODE SO 3 Adjust the SEA pattern. 1 Select one of the tone—BASS or TRE.
Selecting 3D PHONIC Mode INFO While playing... 3D ACTION 3D OFF 3D PHONIC English HX-GD8.book Page 17 Thursday, March 18, 2004 6:43 PM Remote ONLY Changing the Picture Tone INFO While showing a playback picture on the TV, you can select the preset picture tone, or adjust it and store your own tastes. 3D DRAMA To select a preset picture tone 3D THEATER 1 Activate VFP. ACTION On the TV screen 3D ACTION Suitable for action movies and sports programs. 3D DRAMA Creates natural and warm sound.
English HX-GD8.book Page 18 Thursday, March 18, 2004 6:43 PM GAMMA Adjust if the neutral color is bright or dark. The brightness of dark and bright portions is maintained (–3 to +3). BRIGHTNESS Adjust if the picture is bright or dark as a whole (–8 to +8). CONTRAST Adjust if the far and near position is unnatural (–7 to +7). SATURATION Adjust if the picture is whitish or blackish (–7 to +7). TINT Adjust if the human skin color is unnatural (–7 to +7).
HX-GD8.book Page 19 Thursday, March 18, 2004 6:43 PM 10 Keys Remote ONLY Selecting the Sound Track Remote Control PAGE ANGLE ZOOM AUDIO SUB TITLE English Unique DVD/VCD Operations INFO For DVD Video: While playing back a chapter containing audio languages, you can select the language to listen to. For DVD Audio: While playing back a track containing audio channels, you can select the audio channel to listen to. For SVCD/VCD: When playing back a track, you can select the audio channel to play.
English HX-GD8.book Page 20 Thursday, March 18, 2004 6:43 PM Remote ONLY Selecting the Subtitle Language For DVD Video: While playing back a chapter (of DVD Video) containing subtitles in different languages, you can select the subtitle language to display on the TV screen. For SVCD: While playing, you can select the subtitles even if no subtitles are recorded on the disc. • You can also select the subtitle language using the onscreen bar (see page 25).
Playing Back a Bonus Group English HX-GD8.book Page 21 Thursday, March 18, 2004 6:43 PM Remote ONLY on a DVD AUDIO Slow-motion playback INFO Some DVD Audios have a special group called “bonus group” whose contents are not open to the public. • To play back a bonus group, you have to enter the specific “key number” (a kind of password) for the bonus group. The way of getting the key number depends on the disc. Still picture playback starts. 2 Select slow motion speed. 1 Select the bonus group.
HX-GD8.book Page 22 Thursday, March 18, 2004 6:43 PM English Advanced Disc Operations Programming the Playing Order Remote Control Remote ONLY —Program Play INFO You can arrange the playing order of the tracks (up to 99) before you start playback. 1 Before starting playback, activate Program Play.
To skip a track: To pause: To stop: Playing at Random English HX-GD8.book Page 23 Thursday, March 18, 2004 6:43 PM Remote ONLY —Random Play INFO You can play the contents of all tracks at random. 1 Before starting playback, activate Random Play. To release, press DVD/ CD 3. To check the programmed contents PROGRAM RANDOM Canceled Remote ONLY Before or after playback... in the reverse order 2 Start playback. Playback starts in a random order.
English HX-GD8.book Page 24 Thursday, March 18, 2004 6:43 PM Remote ONLY Playing Repeatedly • You can also select the repeat mode using the on-screen bar (see page 26). CHAP Repeats the current chapter. TITLE Repeats the current title. ALL Repeats all discs or all programmed tracks. Repeat Play TRACK Repeats the current track. You can repeat playback. GROUP Repeats the current group. • For DVD Video: While playing... DISC Repeats the current disc. STEP Repeats the current track.
HX-GD8.book Page 25 Thursday, March 18, 2004 6:43 PM English On-Screen Disc Operations About the On-screen Bar Remote control You can check the information on disc (except for MP3/ WMA/JPEG disc) and use some functions through the onscreen bar. 10 keys On-screen bar Ex.: While playing a DVD Video ZOOM 1 2 3 REPEAT DVD-VIDEO 8.5Mbps TIME TIME 3/2/5/∞ ENTER OFF OFF ON SCREEN DVD/CD 3 8 7 CHAP 3 GROUP 1 TRACK 14 TOTAL 1:25:58 1 2 3 DVD-VIDEO 8.
English HX-GD8.book Page 26 Thursday, March 18, 2004 6:43 PM Changing the time information Remote ONLY Operations Using the On-screen Bar INFO Basic operation procedure through the on-screen bar is as follows: Ex.: Selecting a subtitle (French) for DVD Video While a disc is selected as the source... 1 Display the on-screen bar with the pull-down menu. DVD-VIDEO 8.5Mbps DVD-VIDEO 8.
English HX-GD8.book Page 27 Thursday, March 18, 2004 6:43 PM Time Search 5 Finish the setting. You can move to a particular point by specifying the elapsed playing time from the beginning. Pop-up window goes off. 1 While playing (without PBC for SVCD/VCD), display the on-screen bar with the pull-down menu. • Except for DVD: Time Search can be used before starting playback. 2 Select . 3 Display the pop-up window. To cancel Repeat Play, select “OFF” in step 4. To erase the on-screen bar DVD-VIDEO 8.
English HX-GD8.book Page 28 Thursday, March 18, 2004 6:43 PM Chapter/Track Search You can search for the chapter (DVD Video) or track (DVD Audio) number to play. 1 While playing, display the on-screen bar with the pulldown menu. 2 Select CHAP. or TRACK . 3 Display the pop-up window. DVD-VIDEO 8.5Mbps TOTAL 1:25:58 1:01:58 CHAP233 TOTAL DISC TITLE 2 TITLE 14 2CHAP TIME TIME CHAP. OFF OFF 1/3 1/3 CHAPTER 1/1/3 3 Examples: To select chapter/track 5, press 5.
To move the highlight bar between group list and track list To repeat slide-show for JPEG Before starting playback... Moves the bar to the track list. Moves the bar to the group list. To select a group/track in the list Move the highlight bar to a desired item. • If you move the highlight bar while playing back an MP3/ WMA disc, the selected track starts playback automatically. GROUP REPEAT GROUP REPEAT DISC Canceled REPEAT ALL Repeats the current group. DISC Repeats the current disc.
HX-GD8.book Page 30 Thursday, March 18, 2004 6:43 PM English Advanced Tape Operations IMPORTANT It may be unlawful to record or play back copyrighted material without the consent of the copyright owner. Remote Control Recording on a Tape INFO You can use type I tapes for recording. • To play a tape, see page 14. 1 Insert a recordable cassette. REV.MODE, TAPE 2 3 REC START/STOP Push Insert Close 7 2 Check the tape running direction and Reverse Mode settings on the display.
3 Start playing the source—“FM,” “AM,” “DVD/CD,” or “AUX.” • When recording a disc, you can also use “Synchronized Disc Recording” (see the next column). English HX-GD8.book Page 31 Thursday, March 18, 2004 6:43 PM 4 Start recording. DISC REC START The System automatically creates 4-second blanks between the tunes recorded on the tapes. 4 Start recording. 1 sec. REC START/STOP • When either disc play or recording ends, both disc player and the cassette deck stop at the same time.
HX-GD8.book Page 32 Thursday, March 18, 2004 6:43 PM English Timer Operations Setting the Timer Main unit 4/¢ CLOCK /TIMER SET /DISPLAY CANCEL /DEMO INFO Main Unit ONLY Using Daily Timer, you can wake up with your favorite song. On the other hand, with Recording Timer, you can make a tape of a radio broadcast automatically. • To correct a misentry during the process, press CANCEL/DEMO. You can return to the previous step.
5 For Daily Timers: • You can select the volume level (“VOLUME 5,” “VOLUME 10,” “VOLUME 15” and “VOLUME --”). If you select “VOLUME --,” the volume is set to the last level when the system has been turned off. English HX-GD8.book Page 33 Thursday, March 18, 2004 6:43 PM To turn off the Timer after its setting is done You can turn off the timer after it has been set. • Since Daily Timer is activated at the same time everyday, you may need to cancel it on some particular days.
HX-GD8.book Page 34 Thursday, March 18, 2004 6:43 PM English Set up Menu Operations Operating Procedure Remote control Remote ONLY You can use the Set up Menus only when a disc is selected as the source and its playback is not yet started. Ex.: Selecting “STILL PICTURE” for “FILE TYPE”: 10 keys 1 Show the set up menu. LANGUAGE 3/2/5/∞ ENTER SET UP MENU LANGUAGE ENGLISH AUDIO LANGUAGE ENGLISH SUBTITLE OFF ON SCREEN LANGUAGE ENGLISH SELECT ENTER USE TO SELECT.
7 Repeat steps 3 to 4 to set other items on the same Set up Menu. Repeat steps 2 to 4 to set other items on another Set up Menu. 7 PICTURE Set up Menu You can select the desired options concerning a picture or monitor screen. To finish the Set up Menu PICTURE MONITOR TYPE 4:3 LB PICTURE SOURCE AUTO SCREEN SAVER ON FILE TYPE AUDIO SELECT ENTER 7 LANGUAGE Set up Menu MONITOR TYPE You can select the monitor type of your TV when you play DVD VIDEO recorded with aspect ratio of 16:9.
English HX-GD8.book Page 36 Thursday, March 18, 2004 6:43 PM 7 AUDIO Set up Menu PICTURE SOURCE You can obtain optimal picture quality by selecting an appropriate option—picture source type (either video source or film source). You can adjust the sound settings of the System. AUDIO Select one of the following: AUTO: Normally select this.
English HX-GD8.book Page 37 Thursday, March 18, 2004 6:43 PM D. RANGE COMPRESSION AV COMPULINK MODE You can compress the dynamic range (the difference between the loudest sound and the softest sound) to enjoy a powerful sound even at a low volume level when listening to Dolby Digital software. This is useful at night. • The effectiveness varies depends on a software. When connecting the System to a JVC’s TV with the AV COMPU LINK remote control system, select the proper setting.
English CHOICE.fm Page 38 Wednesday, March 24, 2004 10:01 PM 5 Select “COUNTRY CODE,” then display the pop-up Restricting the Review —Parental Lock window. Remote ONLY PARENTAL LOCK You can restrict playback of DVD Video containing violent scenes and those unsuitable for your family members. Once you have set the rating level, such violent scenes (for which a higher level than you set is assigned) may be skipped or changed to another scene (depending on how the disc is programmed).
English HX-GD8.book Page 39 Thursday, March 18, 2004 6:43 PM To change the setting To release Parental Lock temporarily 1 Display the PARENTAL LOCK sub menu. When you set a strict rating level, some discs may not be played back at all. When you try to play such a disc, the following screen appears on the TV screen. • Follow steps 1 to 4 of “To set Parental Lock” .
HX-GD8.book Page 40 Thursday, March 18, 2004 6:43 PM English Operating the TV Operating TV Remote control Remote ONLY You can operate the JVC’s or other manufacturers’ TV using this remote control. 1 Keep pressing the button until the following steps are complete. 10 Keys TV 2 Enter the code setting mode. TV/VIDEO ENTER TV CHANNEL -/+ 3 Enter the 2-digit manufacture’s code number. TV VOLUME -/+ SHIFT 4 Release TV .
Additional Information Learning More about This System Before Operating the System (see pages 7 to 9) Playable Disc Types: • About audio format – Linear PCM: Uncompressed digital audio, the same format used for CDs and most studio masters. – Dolby Digital: Compressed digital audio, developed by Dolby Laboratories, which enables multi-channel encode to create the realistic surround sound. – DTS (Digital Theater Systems): Compressed digital audio, developed by Digital Theater Systems, Inc.
English HX-GD8.book Page 42 Thursday, March 18, 2004 6:43 PM Selecting the Clock: • “AM 12:00” will flash on the display until you set the clock. • The clock may gain or lose 1 to 2 minutes per month. If this happens, reset the clock. Turning Off the Power Automatically: • If you turn off the System, Sleep Timer is canceled. Unique DVD/VCD Operations (see pages 19 to 21) Selecting the Sound Track: On some DVD Videos, you cannot change audio languages while playing back.
Timer Operations (see pages 32 to 33) Setting the Timer: • If you do not specify the preset station or track number correctly while setting a timer, the currently selected station or the first track will be played when timer is activated. • When you unplug the AC power cord or if a power failure occurs, the timer will be canceled. You need to set the clock first, then the timer again. • Without stopping the recording, you cannot change the source after Recording Timer starts recording.
English HX-GD8.book Page 44 Thursday, March 18, 2004 6:43 PM Troubleshooting If you are having a problem with your System, check this list for a possible solution before calling for service. General: Adjustments or settings are suddenly canceled before you finish. ] There is a time limit. Repeat procedure again. Operations are disabled. ] The built-in microprocessor may malfunction due to external electrical interference. Unplug the AC power cord and then plug it back in.
English HX-GD8.
English HX-GD8.
NP NR NU NZ OM PA PE PF PG PH PK PL PM PN PR PT PW PY QA RE RO RU RW SA SB SC SD Nepal Nauru Niue New Zealand Oman Panama Peru French Polynesia Papua New Guinea Philippines Pakistan Poland Saint Pierre and Miquelon Pitcairn Puerto Rico Portugal Palau Paraguay Qatar Réunion Romania Russian Federation Rwanda Saudi Arabia Solomon Islands Seychelles Sudan SE SG SH SI SJ SK SL SM SN SO SR ST SV SY SZ TC TD TF TG TH TJ TK TM TN TO TP TR Sweden Singapore Saint Helena Slovenia Svalbard and Jan Mayen Slovakia Sie
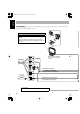
English HX-GD8.book Page 48 Thursday, March 18, 2004 6:43 PM Parts Index Refer to the pages to see how to use the buttons and controls. Remote control DISC1 DISC2 DISC4 DISC5 DISC3 10 40 18 18 22, 23 20 24 13 17 13, 21, 23, 26, 27, 34, 38 – 40 26 11, 13, 20, 22, 23, 27, 28, 38 – 40 PAGE 17 21 19 13 20 SET UP 34, 35, 38 REV.
Cassette deck section Specifications Frequency response Normal (type I): Wow and flutter: Amplifier section—CA-HXGD8 Output Power: SUBWOOFERS: MAIN SPEAKERS: English HX-GD8.book Page 49 Thursday, March 18, 2004 6:43 PM 195 W per channel, min. RMS, driven into 6 Ω at 63 Hz with no more than 10% total harmonic distortion. 80 W per channel, min. RMS, driven into 6 Ω at 1 kHz with no more than 10% total harmonic distortion.
MEMO.
CA-HXGD8[C]_FR.book Page 1 Friday, March 19, 2004 10:29 PM Table des matières Pour démarrer ........................................................ 3 Étape 1: Déballage ..............................................................3 Étape 2: Préparation de la télécommande ...........................3 Étape 3: Connexions............................................................4 Avant d’utiliser la chaîne ....................................... 7 Types de disques reproductibles ........................
CA-HXGD8[C]_FR.book Page 2 Friday, March 19, 2004 10:29 PM Introduction Précautions Français Installation • Installez la chaîne dans un endroit plat, sec, et ni trop chaud, ni trop froid—entre 5°C et 35°C. • Installez la chaîne dans un endroit avec une bonne ventilation pour éviter tout échauffement à l’intérieur de l’appareil. N’INSTALLEZ PAS la chaîne dans en endroit proche d’une source de chaleur ou sujet à la lumière directe du soleil, à un poussière excessive ou à des vibrations.
CA-HXGD8[C]_FR.book Page 3 Friday, March 19, 2004 10:29 PM Pour démarrer accessoires. Étape 1: Déballage Après le déballage, vérifiez que tous les éléments suivants sont présents. Le nombre entre parenthèse indique la quantité de chaque pièce fournie. • Antenne FM (1) • Antenne cadre AM (1) • Cordon vidéo composite (1) • Télécommande (1) • Piles (2) Si quelque chose manquait, consultez votre revendeur immédiatement.
CA-HXGD8[C]_FR.book Page 4 Friday, March 19, 2004 10:29 PM Étape 3: Connexions Français Si vous avez besoin d’informations plus détaillées, voir page 6. Mettez tous les appareils hors tension avant les connexions. Les illustrations des prises d’entrée/sortie ci-dessous sont des exemples typiques. Quand vous connectez d’autres appareils, référez-vous aussi à leurs modes d’emploi car le nom des prises imprimé au dos de l’appareil peut varier.
CA-HXGD8[C]_FR.book Page 5 Friday, March 19, 2004 10:29 PM Français Pour une meilleure réception FM/AM Antenne cadre AM Gardez-la connectée. Antenne FM extérieure (non fournie) Fil recouvert de vinyle (non fourni) Étendez-le horizontalement. Déconnectez l’antenne FM fournie et connectez l’appareil à une antenne FM extérieure en utilisant un connecteur de type coaxial 75 Ω (IEC ou DIN45325). Antenne FM (fournie) Étendez-la de façon à obtenir la meilleure réception possible.
CA-HXGD8[C]_FR.book Page 6 Friday, March 19, 2004 10:29 PM Pour connecter les cordons de l’antenne cadre AM Français 1 Maintenez 3 Relâchez • Certains téléviseurs peuvent quand même être affectés même si vous avez suivi les points ci-dessus. Si cela se produit, éloignez les enceintes du téléviseur. • NE CONNECTEZ PAS plus d’une enceinte à chaque prise. • NE POUSSEZ PAS ni ne tirez les enceintes car cela pourrait endommager les intercalaires des pieds en bas des enceintes.
CA-HXGD8[C]_FR.book Page 7 Friday, March 19, 2004 10:29 PM Avant d’utiliser la chaîne INFO Cet appareil a été conçu pour reproduire les disques suivants: Type de disque Marque (Logo) DVD Vidéo CD Vidéo (VCD) Super CD Vidéo (SVCD) COMPACT DIGITAL AUDIO CD-R CD-RW DVD-R DVD-RW La chaîne peut reproduire les formats audio numériques suivants.
CA-HXGD8[C]_FR.book Page 8 Friday, March 19, 2004 10:29 PM À propos des indications sur l’affichage Les indications sur l’affichage vous donnent beaucoup d’informations pendant l’utilisation de la chaîne. Avant d’utiliser la chaîne, familiarisez-vous avec les indicateurs, et en particulier, quand et comment ils s’allument sur l’affichage. Français 1 2 3 4 5 6 TITLE GROUP CHAP. TRACK 7 q LPCM DTS D w e 9 MONO SURROUND DVD AUDIO 8 DVD LEVEL 123 REC MPEG PRGR. B.S.P.
1 Indicateur BEEP ON r Indicateurs de signal de source • S’allume quand la fonction de tonalité de touche est en service. 2 Indicateurs de type de fichier • MP3: s’allume lors de la lecture d’une plage MP3. • WMA: s’allume lors de la lecture d’une plage WMA. • JPEG: s’allume lors de la lecture d’un fichier JPEG. 3 Indicateur TITLE • S’allume pour indiquer le numéro du titre quand la source est DVD Vidéo.
CA-HXGD8[C]_FR.book Page 10 Friday, March 19, 2004 10:29 PM Opérations quotidiennes—Lecture Français Dans ce manuel, nous expliquons principalement les opérations à l’aide de la télécommande; cependant, vous pouvez utiliser les touches et les commandes de l’appareil si elles portent le même nom (ou un nom similaire) et la même marque. ¥ Mise sous tension de l’appareil. Le témoin STANDBY s’éteint sur l’appareil.
CA-HXGD8[C]_FR.book Page 11 Friday, March 19, 2004 10:29 PM Écoute de la radio INFO Pour prérégler les stations Pour choisir la bande (FM/AM) Main Unit ONLY Vous pouvez préréglez 30 stations FM et 15 stations AM. AM 1 Accordez la station que vous souhaitez prérégler, puis Français FM entrez en mode de préréglage. SET /DISPLAY Pour accorder une station Quand FM ou AM est choisi... 2 Choisissez un numéro de préréglage pour la station à 1 sec. mémoriser. PRESET Augmente la fréquence.
CA-HXGD8[C]_FR.book Page 12 Friday, March 19, 2004 10:29 PM Français Lecture d’un disque INFO Avant d’utiliser un disque, familiarisez vous avec la façon dont un disque est enregistré. • Les DVD Vidéo sont composés de “titres” qui eux-mêmes sont composés de “chapitres”, les DVD Audio/MP3/ WMA sont composés de “groupes” qui eux-mêmes sont composés de “plages”, et finalement, les CD/SVCD/VCD sont composés uniquement de “plages”.
CA-HXGD8[C]_FR.book Page 13 Friday, March 19, 2004 10:29 PM Lors de la lecture d’un disque non WMA/MP3... • Aucun ne sort pendant la recherche sur un DVD/SVCD/ VCD. Pour retourner à la lecture normale, appuyez sur DVD/CD 3. Pour choisir un élément directement Remote ONLY Vous pouvez choisir un titre, un chapitre ou une plage directement et démarrer la lecture.
CA-HXGD8[C]_FR.book Page 14 Friday, March 19, 2004 10:29 PM Pour inverser la bande automatiquement Lecture d’une cassette Français Pour insérer une cassette REV.MODE Vous ne pouvez reproduire les cassettes de type I. • L’utilisation de cassettes C-120 ou plus longues n’est pas recommandée. Poussez (Maintenez pressée, puis...) • Vous pouvez aussi utiliser la touche REVERSE MODE sur l’appareil. La bande est inversée automatiquement et la lecture est répétée jusqu’à ce que vous l’arrêtiez.
CA-HXGD8[C]_FR.book Page 15 Friday, March 19, 2004 10:29 PM Opérations quotidiennes—Ajustement du son et autres ajustements Ajustement du volume Télécommande INFO Le niveau de volume peut être ajuster sur 32 pas (VOLUME MIN, VOLUME 1 – VOLUME 30, VOLUME MAX).
CA-HXGD8[C]_FR.book Page 16 Friday, March 19, 2004 10:29 PM Sélection du mode sonore INFO 1 Choisissez un des modes sonores préréglés. UND MODE SO Vous pouvez choisir un des modes sonores préréglés. Télécommande: Français DANCE OFF HALL ROCK STADIUM CLASSIC POP • Si vous souhaitez ajouter des éléments Surround à votre mode sonore, choisissez un des modes Surround. 2 Entrez en mode de commande SEA.
CA-HXGD8[C]_FR.book Page 17 Friday, March 19, 2004 10:29 PM INFO Changement de la tonalité Remote ONLY de l’image Pendant la lecture... 3D ACTION 3D OFF 3D DRAMA Lors de l’affichage d’une image de lecture sur le téléviseur, vous pouvez choisir une tonalité d’image préréglée, ou l’ajuster et la mémorisée comme réglage personnalisé. 3D THEATER ACTION 3D PHONIC Sur l’écran du téléviseur Pour choisir une tonalité d’image préréglée 3D ACTION Pour les films d’action et les programmes sportifs.
Français CA-HXGD8[C]_FR.book Page 18 Friday, March 19, 2004 10:29 PM GAMMA Ajustez ce réglage si les couleurs neutres sont lumineuses ou sombres. La luminosité des parties sombres et lumineuse est maintenue (–3 à +3). LUMINOSITE Ajustez ce réglage si l’image est entièrement lumineuse ou sombre (–8 à +8). CONTRASTE Ajustez ce réglage si la position éloignée et proche n’est pas naturelle (– 7 à +7). SATURATION Ajustez ce réglage si l’image est blanchâtre ou noirâtre (–7 à +7).
CA-HXGD8[C]_FR.book Page 19 Friday, March 19, 2004 10:29 PM Opérations spécialisées pour les DVD/VCD Touches numériques PAGE ANGLE ZOOM AUDIO SUB TITLE 3/2/5/∞ ENTER Remote ONLY INFO Pour les DVD Vidéo: Lors de la lecture d’un chapitre contenant plusieurs langues audio, vous pouvez choisir la langue à écouter. Pour les DVD Audio: Lors de la lecture d’une plage contenant plusieurs canaux audio, vous pouvez choisir le canaux à écouter.
CA-HXGD8[C]_FR.book Page 20 Friday, March 19, 2004 10:29 PM Remote ONLY Français Sélection de la langue des sous-titres Pour les DVD Vidéo: Lors de la lecture d’un chapitre (d’un DVD Vidéo) contenant des sous-titres en différentes langues, vous pouvez choisir la langue des sous-titres à afficher sur l’écran du téléviseur. Pour les SVCD: Pendant la lecture, vous pouvez choisir les sous-titres, même si aucun sous-titre n’est enregistré sur le disque.
CA-HXGD8[C]_FR.book Page 21 Friday, March 19, 2004 10:29 PM Lecture d’un groupe bonus 2 Avancez l’image fixe, image par image. Remote ONLY sur un DVD Audio INFO Pour retourner à la lecture normale, appuyez sur DVD/CD 3. Lecture au ralenti 1 Pendant la lecture... La lecture d’images fixes démarre. 1 Choisissez le groupe bonus.
CA-HXGD8[C]_FR.book Page 22 Friday, March 19, 2004 10:29 PM Opérations avancées des disques Programmation de l’ordre de Télécommande Remote ONLY lecture—Lecture programmée INFO Français Vous pouvez arranger l’ordre de lecture des plages (99 maximum) avant de démarrer la lecture. Touches numériques CANCEL 1 Avant de démarrer la lecture, mettez en service la lecture programmée.
CA-HXGD8[C]_FR.book Page 23 Friday, March 19, 2004 10:29 PM 4 Démarrez la lecture. La lecture démarre dans l’ordre de programmation. Lecture dans un ordre aléatoire Remote ONLY —Lecture aléatoire INFO Pour sauter une plage: Pour faire une Pour arrêter: pause: 1 Avant de démarrer la lecture, mettez en service la lecture aléatoire. PROGRAM Pour reprendre la lecture, appuyez sur DVD/CD 3. RANDOM 2 Démarrez la lecture. Pour vérifier le contenu programmé La lecture dans un ordre aléatoire démarre.
CA-HXGD8[C]_FR.book Page 24 Friday, March 19, 2004 10:29 PM Répétition de la lecture Remote ONLY Français • Vous pouvez aussi choisir le mode de répétition en utilisant la barre sur l’écran (voir page 26). CHAP Répète le chapitre actuel. TITLE Répète le titre actuel. ALL Répète tous les disques ou les plages programmées. Lecture répétée TRACK Répète la plage actuelle. Vous pouvez répéter la lecture. GROUP Répète le groupe actuel. • Pour les DVD Vidéo: Pendant la lecture...
CA-HXGD8[C]_FR.book Page 25 Friday, March 19, 2004 10:29 PM Opération des disques en utilisant l’affichage sur l’écran À propos de la barre sur l’écran Télécommande Touches numériques Barre sur l’écran Ex.: Lors de la lecture d’un DVD Vidéo ZOOM 1 2 3 REPEAT DVD-VIDEO 8.5Mbps TIME TIME 3/2/5/∞ ENTER OFF OFF ON SCREEN DVD/CD 3 8 7 CHAP 3 GROUP 1 TRACK 14 TOTAL 1:25:58 1 2 3 DVD-VIDEO 8.5Mbps TIME 1:25:58 1:01:58 DISC TITLE 2 TITLE CHAP233 TOTAL 14 2CHAP TIME TIME CHAP.
CA-HXGD8[C]_FR.book Page 26 Friday, March 19, 2004 10:29 PM Opérations en utilisant la Changement de l’information de la durée Remote ONLY Français barre sur l’écran INFO La procédure de fonctionnement de base à l’aide de la barre sur l’écran est la suivante: Ex.: Sélection d’un sous-titre (français) pour un DVD Vidéo Quand un disque est choisi comme source... 1 Affichez la barre sur l’écran avec le menu déroulant.
CA-HXGD8[C]_FR.book Page 27 Friday, March 19, 2004 10:29 PM Recherche temporelle La fenêtre contextuelle disparaît. Pour annuler la lecture répétée, choisissez “ARRET” à l’étape 4. Pour effacer la barre sur l’écran Vous pouvez aller directement à un point particulier en spécifiant la durée écoulée à partir du début. 1 Pendant la lecture (sans PBC pour les SVCD/VCD), affichez la barre sur l’écran avec le menu déroulant.
CA-HXGD8[C]_FR.book Page 28 Friday, March 19, 2004 10:29 PM Recherche de chapitre/plage Français Vous pouvez recherche le numéro de chapitre (DVD Vidéo) ou de plage (DVD Audio) à reproduire. 1 Pendant la lecture, affichez la barre sur l’écran avec le menu déroulant. 2 Choisissez CHAP. ou TRACK . 3 Affichez la fenêtre contextuelle. DVD-VIDEO 8.5Mbps TOTAL 1:25:58 1:01:58 CHAP233 TOTAL DISC TITLE 2 TITLE 14 2CHAP TIME TIME CHAP.
CA-HXGD8[C]_FR.book Page 29 Friday, March 19, 2004 10:29 PM Pour répéter le diaporama des JPEG Avant de démarrer la lecture... REPEAT GROUP Déplace la barre sur la liste des plages. Déplace la barre sur la liste des groupes. Pour choisir un groupe ou une plage dans la liste Déplacez la barre de mise en valeur sur l’élément souhaité. • Si vous déplacez la barre de mise en valeur pendant la lecture d’un disque MP3/WMA, la plage choisie est reproduite automatiquement.
CA-HXGD8[C]_FR.book Page 30 Friday, March 19, 2004 10:29 PM Opérations avancées pour les cassettes IMPORTANT Il peut être illégal d’enregistrement ou de reproduire un matériel protégé par des droits d’auteur sans le consentement du propriétaire des droits. Français Télécommande Enregistrement sur une cassette INFO Vous pouvez utiliser des cassettes de type I pour l’enregistrement. • Pour reproduire une cassette, voir page 14. REV.MODE, TAPE 2 3 REC START/STOP 1 Insérez une cassette enregistrable.
CA-HXGD8[C]_FR.book Page 31 Friday, March 19, 2004 10:29 PM 3 Démarrez la lecture de la source—“FM”, “AM”, “DVD/CD” ou “AUX”. • Lors de l’enregistrement d’un disque, vous pouvez aussi utiliser l’“Enregistrement synchronisé de disque” (voir la colonne suivante). 4 Démarrez l’enregistrement. DISC REC START La chaîne crée automatiquement un blanc de 4 secondes entre les morceaux enregistrés sur les cassettes. Français 4 Démarrez l’enregistrement. 1 sec.
CA-HXGD8[C]_FR.book Page 32 Friday, March 19, 2004 10:29 PM Utilisation de la minuterie Réglage de la minuterie Français Appareil 4/¢ CLOCK /TIMER SET /DISPLAY CANCEL /DEMO Main Unit ONLY INFO En utilisant la minuterie quotidienne, vous pouvez vous réveiller au son de votre musique préférée. D’autre part, avec la minuterie d’enregistrement, vous pouvez enregistrer une émission de radio automatiquement. • Pour corriger une mauvaise entrée pendant la procédure, appuyez sur CANCEL/DEMO.
CA-HXGD8[C]_FR.book Page 33 Friday, March 19, 2004 10:29 PM Numéro de disque Numéro de plage Numéro de groupe Ex.: Quand “DISC” est choisi. 5 Pour les minuteries quotidiennes: • Vous pouvez choisir le niveau de volume (“VOLUME 5”, “VOLUME 10”, “VOLUME 15” et “VOLUME --”). Si vous choisissez “VOLUME --”, le volume est réglé sur le dernier niveau utilisé quand la chaîne est mise hors tension. 3 Mettez la chaîne hors tension (en attente) si vous avez réglez la minuterie avec la chaîne sous tension.
CA-HXGD8[C]_FR.book Page 34 Friday, March 19, 2004 10:29 PM Utilisation du menu de réglages Procédure de fonctionnement Télécommande Vous pouvez utiliser les menus de réglages uniquement quand un disque est choisi comme source et sa lecture n’a pas commencée. Ex.: Sélection de “IMAGE FIXE” pour “TYPE FICHIER”: Touches numériques Français Remote ONLY 1 Affichez le menu de réglage.
CA-HXGD8[C]_FR.book Page 35 Friday, March 19, 2004 10:29 PM 7 Répétez les étapes 3 à 4 pour régler un autre élément sur le même menu de réglage. Répétez les étapes 2 à 4 pour régler un autre élément sur un autre menu de réglage. 7 Menu de réglage IMAGE Vous pouvez choisir les options souhaitées pour l’image ou l’écran du moniteur.
CA-HXGD8[C]_FR.book Page 36 Friday, March 19, 2004 10:29 PM 7 Menu de réglage AUDIO SOURCE D’IMAGE Vous pouvez obtenir une qualité d’image optimale en choisissant l’option appropriée—type de source d’image (source vidéo ou source de film). Vous pouvez ajuster les réglages sonores de la chaîne. AUDIO Français Choisissez un des réglages suivants: AUTO: Normalement choisissez ce réglage.
CHOICE.fm Page 37 Friday, March 19, 2004 10:44 PM COMPRESS. PLAGE DYN. MODE COMPULINK AV Vous pouvez compresser la plage dynamique (la différence entre le son le plus fort et le son le moins fort) pour profiter d’un son puissant même à un faible niveau de volume lors de l’écoute d’un support Dolby Digital. C’est pratique la nuit. • L’efficacité varie en fonction du support.
CA-HXGD8[C]_FR.book Page 38 Friday, March 19, 2004 10:29 PM Restriction de la visualisation Remote ONLY 5 Choisissez “CODE PAYS”, puis affichez la fenêtre contextuelle. —Censure parentale Français CENSURE PARENTALE Vous pouvez limiter la lecture des DVD Vidéo contenant des scènes violentes ou qui ne conviennent pas à certains membres de votre famille.
CA-HXGD8[C]_FR.book Page 39 Friday, March 19, 2004 10:29 PM 1 Affichez le sous-menu CENSURE PARENTALE. • Suivez les étapes 1 à 4 de “Pour régler la censure parentale”. CENSURE PARENTALE CODE PAYS HK ETABLIR NIVEAU 4 CODE ____ Pour annuler temporairement la censure parentale Si vous avez réglé un niveau de classement strict, certains disques ne pourront peut-être pas être reproduits du tout. Quand vous essayez de reproduire un tel disque l’écran suivant apparaît sur l’écran du téléviseur.
CA-HXGD8[C]_FR.book Page 40 Friday, March 19, 2004 10:29 PM Commande du téléviseur Commande du téléviseur Télécommande Remote ONLY Vous pouvez commander un téléviseur JVC ou d’un autre fabricant en utilisant cette télécommande. Français 1 Maintenez cette touche pressée jusqu’à ce que les étapes suivantes soient terminées. Touches numériques TV 2 Entrez en mode de réglage du code. TV/VIDEO ENTER TV CHANNEL -/+ 3 Entrez le numéro de code à 2 chiffres du fabricant.
CA-HXGD8[C]_FR.book Page 41 Friday, March 19, 2004 10:29 PM Pour en savoir plus sur cette chaîne Avant d’utiliser la chaîne (voir pages 7 à 9) Types de disques reproductibles: • À propos du format audio – Linear PCM: Format audio numérique non compressé, le même format qui est utilisé pour les CD et la plupart des originaux de studio. – Dolby Digital: Format audio numérique compressé, mis au point par Dolby Laboratories, qui permet un codage sur plusieurs canaux afin de créer un son Surround réaliste.
Français CA-HXGD8[C]_FR.book Page 42 Friday, March 19, 2004 10:29 PM Réglage de l’horloge: • “AM 12:00” clignote sur l’affichage jusqu’à ce que vous régliez l’horloge. • L’horloge peut avancer ou retarder d’une ou deux minutes par mois. Si cela se produit, réglez de nouveau l’horloge. Mise hors tension automatique de l’appareil automatiquement: • Si vous mettez la chaîne hors tension, la minuterie d’arrêt est annulée.
CA-HXGD8[C]_FR.book Page 43 Friday, March 19, 2004 10:29 PM Utilisation de la minuterie (voir pages 32 à 33) Réglage de la minuterie: • Si vous ne spécifiez pas la station préréglée ou le numéro de plage pendant le réglage de la minuterie, la station actuellement choisie ou la première plage sera reproduite lors de la mise en service de la minuterie. • Si vous débranchez le cordon d’alimentation secteur ou qu’une coupure de courant se produit, la minuterie est annulée.
CA-HXGD8[C]_FR.book Page 44 Friday, March 19, 2004 10:29 PM Guide de dépannage Si vous des problèmes avec votre chaîne, cherchez d’abord une solution dans cette liste avant d’appeler un réparateur. Français Général: Les ajustements ou les réglages sont annulés soudainement avant la fin. ] Il y a un temps limite. Recommencez la procédure. L’appareil ne fonctionne pas. ] Le microprocesseur intégré fonctionne mal à cause d’interférences électriques extérieures.
CA-HXGD8[C]_FR.
CA-HXGD8[C]_FR.
NP NR NU NZ OM PA PE PF PG PH PK PL PM PN PR PT PW PY QA RE RO RU RW SA SB SC SD Népal Nauru Nioué Nouvelle-Zélande Oman Panama Pérou Polynésie française Papouasie-Nouvelle-Guinée Philippines Pakistan Pologne Saint-Pierre-et-Miquelon Pitcairn, Îles Porto Rico Portugal Belau Paraguay Qatar Réunion Roumanie Russie Rwanda Arabie Saoudite Salomon, Îles Seychelles Soudan SE SG SH SI SJ SK SL SM SN SO SR ST SV SY SZ TC TD TF TG TH TJ TK TM TN TO TP TR Suède Singapour Sainte-Hélène Slovénie Svalbard et Jan Maye
CA-HXGD8[C]_FR.book Page 48 Friday, March 19, 2004 10:29 PM Nomenclature Référez-vous aux pages indiquées pour savoir comment utiliser les touches et les commandes. Français Télécommande DISC1 DISC2 DISC4 DISC5 DISC3 10 40 18 18 22, 23 20 24 13 17 13, 21, 23, 26, 27, 34, 38 – 40 26 11, 13, 20, 22, 23, 27, 28, 38 – 40 PAGE 17 21 19 13 20 SET UP 34, 35, 38 REV.
CA-HXGD8[C]_FR.book Page 49 Friday, March 19, 2004 10:29 PM Section de la platine cassette Section de l’amplificateur—CA-HXGD8 Puissance de sortie: SUBWOOFERS: MAIN SPEAKERS: 195 W par canal, min. RMS, entraîné sur 6 Ω à 63 Hz avec moins de 10% de distorsion harmonique totale. 80 W par canal, min. RMS, entraîné sur 6 Ω à 1 kHz avec moins de 10% de distorsion harmonique totale.
00-00_Cover[J].