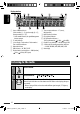
ENGLISH CD RECEIVER KD-BT11 For canceling the display demonstration, see page 4. For installation and connections, refer to the separate manual.
Declaration of Conformity with regard to the R&TTE Directive 1999/5/EC 0984 English: Hereby, JVC, declares that this KD-BT11 is in compliance with the essential requirements and other relevant provisions of Directive 1999/5/ EC.
Svenska: Härmed intygar JVC att denna KD-BT11 står I överensstämmelse med de väsentliga egenskapskrav och övriga relevanta bestämmelser som framgår av direktiv 1999/5/EG. Lietuviu: Šiuo JVC deklaruoja, kad šis KD-BT11 atitinka esminius reikalavimus ir kitas 1999/5/EB Direktyvos nuostatas. Íslenska: Hér með lýsir JVC yfir því að KD-BT11 er í samræmi við grunnkröfur og aðrar kröfur, sem gerðar eru í tilskipun 1999/5/EC.
ENGLISH Thank you for purchasing a JVC product. Please read all instructions carefully before operation, to ensure your complete understanding and to obtain the best possible performance from the unit. IMPORTANT FOR LASER PRODUCTS 1. CLASS 1 LASER PRODUCT 2. CAUTION: Do not open the top cover. There are no user serviceable parts inside the unit; leave all servicing to qualified service personnel. 3. CAUTION: Visible and/or invisible class 1M laser radiation when open.
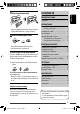
CONTENTS INTRODUCTIONS Preparation .................................................. 4 ENGLISH How to reset your unit OPERATIONS Basic operations ........................................... 5 • Your preset adjustments will also be erased (except the registered Bluetooth device, see pages 10 and 11). How to forcibly eject a disc • Using the control panel............................... 5 Listening to the radio ................................... 6 Disc operations.......................................
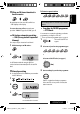
ENGLISH Preparation Cancel the display demonstration and set the clock • See also pages 24 and 25. 1 Turn on the power. 2 Enter the PSM settings. 3 Cancel the display demonstrations Select “DEMO,” then “DEMO OFF.” Set the clock Select “CLOCK HOUR,” then adjust the hour. Select “CLOCK MIN” (minute), then adjust the minute. Select “24H/12H,” then “24 HOUR” or “12 HOUR.” 4 Finish the procedure.
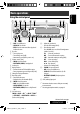
ENGLISH Basic operations Using the control panel 1 • DAB: Select DAB service. 2 3 4 5 6 7 8 9 p q w e • CD/CD-CH: Select folder. • IPOD: Enter the main menu/Pause playback/ Confirm selection. Eject disc. • Turn on the power. • Turn off the power [Hold]. • Attenuate the sound (if the power is on). Volume control [Turn]. • FM/AM: Select the bands. • BLUETOOTH (AUDIO): Start playback Loading slot Display window • Activate/deactivate TA Standby Reception. • Enter programme type searching mode [Hold].
ENGLISH Display window 1 Status of Bluetooth device 2 3 4 5 6 (Device number, [1 – 5]; signal strength, [0 – 3]*; battery reminder, [0 – 3]*) * As the number increases, the signal/battery power becomes stronger.
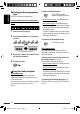
Reception improves, but stereo effect will be lost. • “MO” lights up on the display. To listen to a preset station The following features are available only for FM RDS stations. Searching for FM RDS programme — PTY Search To restore the stereo effect, repeat the same procedure. “MONO OFF” appears and “MO” goes off. FM station automatic presetting —SSM (Strong-station Sequential Memory) You can tune in to a station broadcasting your favorite programme by searching for a PTY code.
ENGLISH Storing your favorite programme types You can store six favorite programme types. Preset programme types in the number buttons (1 to 6): 1 Select a PTY code (see page 7). 2 Select the preset number (1 – 6) you want to store into. To activate TA Standby Reception The TP (Traffic Programme) indicator either lights up or flashes. • If the TP indicator lights up, TA Standby Reception is activated. • If the TP indicator flashes, TA Standby Reception is not yet activated.
When driving in an area where FM reception is not sufficient enough, this unit automatically tunes in to another FM RDS station of the same network, possibly broadcasting the same programme with stronger signals (see the illustration below). When shipped from the factory, Network-Tracking Reception is activated. To change the Network-Tracking Reception setting, see “AF-REG” on page 25.
ENGLISH Pressing (or holding) the following buttons allows you... After pressing M MODE, press the following buttons...
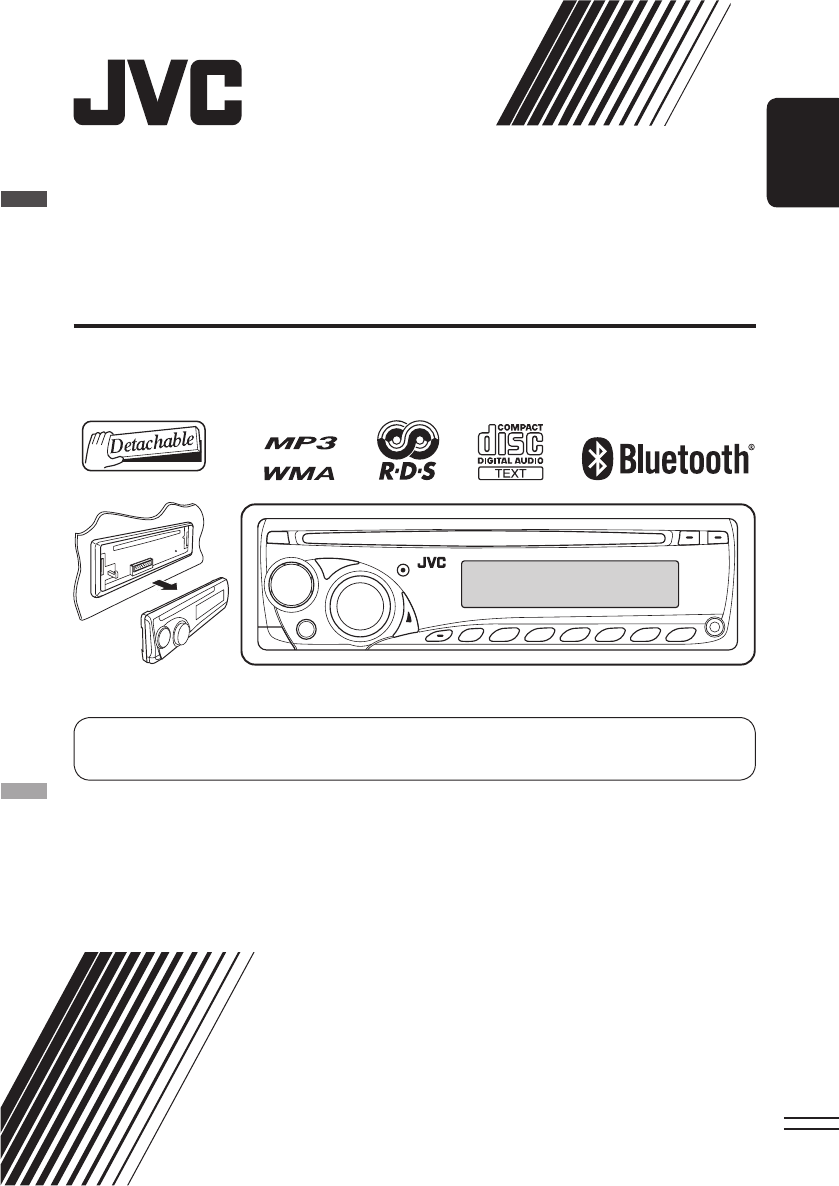
4 Pairing and PIN code When you connect a Bluetooth device to the unit for the first time, make pairing between the unit and the device. Pairing allows Bluetooth devices to communicate with each other. To make pairing, you may need to enter the PIN (Personal Identification Number) code of your Bluetooth device you want to connect. Enter a PIN (Personal Identification Number) code to the unit. • You can enter any number you like (1-digit to 16-digit number).
ENGLISH Deleting a registered device Connecting a registered device (PHONE/ AUDIO) Perform steps 1 and 2 on page 11, then... 1 Select “DELETE PAIR.” Perform steps 1 and 2 on page 11, then... 1 Select “CNNCT PHONE” or “CNNCT AUDIO.” 2 Select a device you want to delete, then select “YES.” 2 Select a device you want. “CONNECTING” flashes, then “CONNECTED” appears on the display when the device is connected. You can set the unit to connect the Bluetooth device automatically when the unit is turned on.
When a call comes in.... When “AUTO ANSWER” is activated.... The unit answers the incoming calls automatically, see page 27. • When “AUTO ANSWER” is deactivated, press any button (except and 0) to answer the incoming call. • You can adjust the microphone volume level (see page 27). To end the call Hold any button (except 1 While listening to a source... 2 Select “CALL.” 3 Select a method to make a call.
Direct operations to redial / Voice Dialing 1 Select a number. You can use the following functions regardless of the current source. To redial ENGLISH How to enter phone number 2 Move the entry position. To activate Voice Dialing You can make a call by your voice. 3 Repeat steps 1 and 2 until you finish entering the number. Speak the name (registered words) you want to call slowly and clearly. Presetting the phone number 4 Confirm the entry. You can preset up to six phone numbers.
Using the Bluetooth audio player 1 2 ENGLISH • Operations and display indications differ depending on their availability on the connected audio player. Select “BLUETOOTH.” • Pressing can enter the Bluetooth menu directly. Establish the connection with a Bluetooth audio player. — If playback does not start automatically, operate the Bluetooth audio player to start playback.
ENGLISH Listening to the CD changer It is recommended to use a JVC MP3-compatible CD changer (separately purchased) with your unit. You can connect a CD changer to the CD changer jack on the rear of the unit. • You can only play conventional CDs (including CD Text) and MP3 discs. Preparation: Make sure “CHANGER” is selected for the external input setting, see page 26. 1 Select “CD-CH.” 2 Select a disc to start playing. [Press] For selecting disc number 1 – 6. [Hold] For selecting disc number 7 – 12.
Before operating, connect the Interface adapter for iPod, KS-PD100 (separately purchased) to the CD changer jack on the rear of the unit. Preparation: Make sure “CHANGER” is selected for the external input setting, see page 26. 1 Select “IPOD.” 2 Select a song to start playing. Selecting a track from the menu 1 Enter the main menu. ENGLISH Listening to the iPod Pause/stop playback • To resume playback, press the button again.
ENGLISH Listening to the DAB tuner Before operating, connect the JVC DAB tuner, KT-DB1000 (separately purchased) to the CD changer jack on the rear of the unit. Preparation: Make sure “CHANGER” is selected for the external input setting, see page 26. 1 Select “DAB.” 2 Select the bands. 3 Searching for an ensemble. 4 Select a service (either primary or secondary) to listen to. Manual Search: Hold either one of the buttons until “MANUAL” flashes on the display, then press it repeatedly.
1 Select a service you want (see steps 1 to 4 on page 18). 2 Select the preset number (1 – 6) you want to store into. Preset number flashes for a while. Tuning in to a preset DAB service Tracing the same programme— Alternative Frequency Reception You can keep listening to the same programme by activating the Alternative Frequency Reception.
ENGLISH Listening to the other external components You can connect an external component to: • CD changer jack on the rear of this unit using the following adapters (separately purchased): – Line Input Adapter, KS-U57 – AUX Input Adapter, KS-U58 Preparation: Make sure “EXT INPUT” is selected for the external input setting, see page 26. • AUX (auxiliary) input jack on the control panel. 1 Select “EXT INPUT” or “AUX IN.” 2 3 — 4 — Turn on the connected component and start playing the source.
ENGLISH Using the remote controller — RM-RK50 This unit can be remotely controlled as instructed here (with an optionally purchased remote controller). We recommend that you use remote controller RM-RK50 with your unit. Installing the lithium coin battery (CR2025) 1 • Turns the power on if pressed briefly or Before using the remote controller: • Aim the remote controller directly at the remote sensor on the unit. • DO NOT expose the remote sensor to bright light (direct sunlight or artificial lighting).
7 • Searches for stations (or DAB services) if pressed • While listening to an iPod (in menu selecting mode): – Selects an item if pressed briefly. (Then, press D ∞ to confirm the selection.) – Skips 10 items at a time if pressed and held. • Reverse skip/forward skip for Bluetooth audio. ENGLISH briefly. • Searches for DAB ensembles if pressed and held. • Fast-forwards or reverses the track if pressed and held. • Changes the tracks if pressed briefly.
Range/selectable items R06 to F06 BALANCE *3 Adjust the left and right speaker balance. L06 to R06 BASS MID TRE Frequency 60 Hz 80 Hz 100 Hz 200 Hz 500 Hz 1.0 kHz 1.5 kHz 2.5 kHz 10.0 kHz 12.5 kHz 15.0 kHz 17.5 kHz Level (LVL) –06 to +06 –06 to +06 –06 to +06 LOUD ON or LOUD OFF Q Q1.0 Q1.25 Q1.5 Q2.0 Q0.5 Q0.75 Q1.0 Q1.25 LOUD *4 (loudness) Boost low and high frequencies to produce a well-balanced sound at a low volume level. Fix SUB.W *1 (subwoofer) Adjust the subwoofer output level.
ENGLISH Preset value setting for each sound mode Sound mode BASS (bass) Freq. Level USER 60 Hz 00 ROCK 100 Hz +03 CLASSIC 80 Hz +01 POPS 100 Hz +02 HIP HOP 60 Hz +04 JAZZ 80 Hz +03 Freq.: Frequency Q: Quality slope Q Q1.25 Q1.0 Q1.25 Q1.25 Q1.0 Q1.25 Preset value MID (mid-range) Freq. Level Q 1.0 kHz 00 Q1.25 1.0 kHz 00 Q1.25 1.0 kHz 00 Q1.25 1.0 kHz +01 Q1.25 1.0 kHz –02 Q1.0 1.0 kHz 00 Q1.25 TRE (treble) Freq. Level Q 10.0 kHz 00 10.0 kHz +02 10.0 kHz +03 Fix 10.0 kHz +02 10.0 kHz +01 10.
Item ( : Initial) Setting, [reference page] 24H/12H Time display mode • 12 HOUR • 24 HOUR : See also page 4 for setting. CLOCK ADJ *2 Clock adjustment • AUTO : The built-in clock is automatically adjusted using the clock data provided via the satellite radio channel. : Cancels.
ENGLISH Indications Item ( : Initial) Setting, [reference page] SCROLL *5 Scroll • ONCE • AUTO • OFF : : : • L/O MODE Line output mode • REAR : Select if the REAR LINE OUT terminals are used for connecting the rear speakers (through an external amplifier). : Select if the REAR LINE OUT terminals are used for connecting a subwoofer (through an external amplifier). • SUB.W Scrolls the displayed information once. Repeats scrolling (at 5-second intervals). Cancels.
You can change the settings listed on the right column according to your preference. 1 Enter the Bluetooth menu. 2 Select “SETTINGS.” 3 Select a setting item. AUTO ANSWER The unit answers the incoming calls automatically. OFF: The unit does not answer the calls automatically. Answer the calls manually. REJECT: The unit rejects all incoming calls.
ENGLISH More about this unit Basic operations Turning on the power • By pressing SRC on the unit, you can also turn on the power. If the source is ready, playback also starts. Turning off the power • If you turn off the power while listening to a track, playback will start from where it had been stopped previously next time you turn on the power. FM/AM/RDS Storing stations in memory • During SSM search... – All previously stored stations are erased and the stations are stored anew.
Playing an MP3/WMA disc • This unit can play back MP3/WMA files with the extension code <.mp3> or <.wma> (regardless of the letter case—upper/lower). • This unit can show the names of albums, artists (performer), and Tag (Version 1.0, 1.1, 2.2, 2.3, or 2.4) for MP3 files and for WMA files. • This unit can display only one-byte characters. No other characters can be correctly displayed.
ENGLISH • Some operations and display information may be different according to the connected phone. • This unit may not work for some Bluetooth devices. • Connecting condition may vary depending on the circumstances around you. • When the unit is turned off, the device is disconnected. • Warning messages for Bluetooth operations • ERROR CNNCT (Error Connection): The device is registered but the connection has failed. Connect the device again. (See page 12.) • ERROR Try the operation again.
ENGLISH Troubleshooting MP3/WMA playback Disc playback FM/AM General What appears to be trouble is not always serious. Check the following points before calling a service center. Symptoms Remedies/Causes • Sound cannot be heard from the speakers. • Adjust the volume to the optimum level. • Check the cords and connections. • The unit does not work at all. Reset the unit (see page 3). • SSM automatic presetting does not work. Store stations manually. • Static noise while listening to the radio.
MP3/WMA playback CD changer Bluetooth ENGLISH Symptoms Remedies/Causes • Tracks do not play back in the order you have intended them to play. The playback order is determined when the files are recorded. • The elapsed playing time is not correct. This sometimes occurs during playback. This is caused by how the tracks are recorded on the disc. • The correct characters are not displayed (e.g. album name). This unit can only display letters (upper case), numbers, and a limited number of symbols.
Remedies/Causes • “noSIGNAL” appears on the display. Move to an area with stronger signals. • “RESET 8” appears on the display. Connect this unit and the DAB tuner correctly and reset the unit (see page 3). • “ANTENNA NG” appears on the display. Check the cords and connections. • The DAB tuner does not work at all. Reconnect this unit and the DAB tuner correctly and reset the unit (see page 3). ENGLISH DAB Symptoms iPod • The iPod does not turn on or does not work.
ENGLISH Maintenance How to clean the connectors Frequent detachment will deteriorate the connectors. To minimize this possibility, periodically wipe the connectors with a cotton swab or cloth moistened with alcohol, being careful not to damage the connectors. Connectors Moisture condensation Moisture may condense on the lens inside the unit in the following cases: • After starting the heater in the car. • If it becomes very humid inside the car. Should this occur, the unit may malfunction.
AUDIO AMPLIFIER SECTION CD PLAYER SECTION Maximum Power Output: Front/Rear: 50 W per channel Continuous Power Output (RMS): Front/Rear: 19 W per channel into 4 Ω, 40 Hz to 20 000 Hz at no more than 0.8% total harmonic distortion. Load Impedance: 4 Ω (4 Ω to 8 Ω allowance) Tone Control Range: Bass: ±12 dB (60 Hz, 80 Hz, 100 Hz, 200 Hz) Mid-range: ±12 dB (500 Hz, 1.0 kHz, 1.5 kHz, 2.5 kHz) Treble: ±12 dB (10.0 kHz, 12.5 kHz, 15.0 kHz, 17.5 kHz) Q: Bass: Q1.0, Q1.25, Q1.5, Q2.0 Mid-range: Q0.5, Q0.75, Q1.
Having TROUBLE with operation? Please reset your unit Refer to page of How to reset your unit Vous avez des PROBLÈMES de fonctionnement? Réinitialisez votre appareil Référez-vous à la page intitulée Comment réinitialiser votre appareil Dear Customer, This apparatus is in conformance with the valid European directives and standards regarding electromagnetic compatibility and electrical safety.