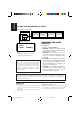
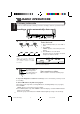
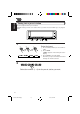
ENGLISH DEUTSCH CD RECEIVER FRANÇAIS CD-RECEIVER RECEPTEUR CD CD-RECEIVER NEDERLANDS KD-LX3R SEL FUNC SOUND 1 7 RPT 2 8 RND INT/LO 9 10 3 4 MONO 5 11 SSM BAND 6 12 MODE DISP RDS KD-LX3R TP PTY OFF/0 For installation and connections, refer to the separate manual. Angaben zu Einbau und Verkabelung entnehmen Sie bitte der gesonderten Anleitung. Pour l’installation et les raccordements, se référer au manuel séparé.
ENGLISH Position and reproduction of labels Bottom panel of the main unit DANGER: Invisible laser radiation when open and interlock failed or defeated. AVOID DIRECT EXPOSURE TO BEAM. (e) ADVARSEL: Usynlig laserstråling ved åbning, når sikkerhedsafbrydere erude af funktion. Undgåudsættelse for stråling. (d) Name/Rating plate CLASS LASER VARNING:Osynlig laserstrålning när denna del är öppnadoch spärren är urkopplad. Betrakta ej strålen.
ENGLISH Thank you for purchasing a JVC product. Please read all instructions carefully before operation, to ensure your complete understanding and to obtain the best possible performance from the unit. CONTENTS BASIC OPERATIONS .................................................... 5 RADIO OPERATIONS ................................................... 6 Listening to the radio ............................................................................ 6 Searching a station automatically: Auto search .......
ENGLISH SOUND ADJUSTMENTS ............................................. 24 Adjusting the sound ............................................................................ 24 Selecting preset sound modes ............................................................ 26 Storing your own sound adjustments ............................................... 27 OTHER MAIN FUNCTIONS ......................................... 28 Setting the clock ........................................................................
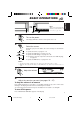
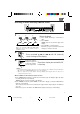
ENGLISH BASIC OPERATIONS Note: When you use this unit for the first time, set the built-in clock correctly, see page 28. 1 1 3 2 Turn on the power. The display illuminates and the control panel comes out. 2 Select the source. Each time you press the button, the source changes as described to the left: * CD LINE FM or CD ** AM changer ** DAB To operate the tuner, see pages 6 – 18. To operate the CD player, see pages 19 – 23. To operate the CD changer, see pages 43 – 46.
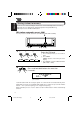
ENGLISH RADIO OPERATIONS Listening to the radio You can use either automatic searching or manual searching to tune into a particular station. Searching a station automatically: Auto search 1- 1 1 1 2 INT/LO 1- 3 1- 2 MODE 2 3 Select the band. FM1 FM2 FM3 AM 1 Press FUNC (Function) to select “FM” or “AM.” 2 Press MODE. “MODE” appears on the lower part of the display. 3 Press BAND to select the band.
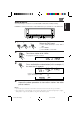
1- 1 1 1 MONO 2 3 ENGLISH Searching a station manually: Manual search 1- 3 1- 2 MODE 2, 3 Select the band. 1 Press FUNC (Function) to select “FM” or “AM.” 2 Press MODE. “MODE” appears on the lower part of the FM1 FM2 FM3 AM display. 3 Press BAND to select the band. Note: Each time you press the button, the band This receiver has three FM bands (FM1, FM2, changes as shown to the left: FM3). You can use any one of them to listen to an FM broadcast.
ENGLISH Storing stations in memory You can use one of the following two methods to store broadcasting stations in memory. • Automatic preset of FM stations: SSM (Strong-station Sequential Memory) • Manual preset of both FM and AM stations FM station automatic preset: SSM You can preset 6 local FM stations in each FM band (FM1, FM2 and FM3). 2 1- 3 1- 2 1- 1 1 1 2 FM1 2 3 FM2 FM3 Select the FM band. AM 1 Press FUNC (Function) to select “FM” or “AM.” 2 Press MODE.
ENGLISH Manual preset You can preset up to 6 stations in each band (FM1, FM2, FM3 and AM) manually. EXAMPLE: Storing an FM station of 88.3 MHz into the preset number 1 of the FM1 band 1- 1 3 1 1 2 3 1- 3 1- 2 2 Select the FM1 band. 1 Press FUNC (Function) to select “FM” or “AM.” 2 Press MODE. 3 Press BAND to select “FM1.” 2 Tune into a station of 88.3 MHz. See page 6 to tune into a station. 3 Press and hold the number button (in this example, 1) for more than 2 seconds.
ENGLISH Tuning into a preset station You can easily tune into a preset station. Remember that you must store stations first. If you have not stored them yet, see pages 8 and 9. 1- 1 1 1 FM1 2 FM2 2 Select the band. 3 FM3 1- 3 1- 2 AM 1 Press FUNC (Function) to select “FM” or “AM.” 2 Press MODE. “MODE” appears on the lower part of the display. 3 Press BAND to select the band.
What you can do with RDS EON RDS (Radio Data System) allows FM stations to send an additional signal along with their regular program signals. For example, the stations send their station names, as well as information about what type of program they broadcast, such as sports or music, etc. Another advantage of RDS function is called “EON (Enhanced Other Networks).” The EON indicator lights up while receiving an FM station with the EON data.
ENGLISH Mode 1 (AF:on / REG:off) Network-Tracking is activated with Regionalization set to “off.” Switches to another station within the same network when the received signals from the current station become weak. Note: In this mode, the program may differ from the one currently received. Mode 2 (AF:on / REG:on) Network-Tracking is activated with Regionalization set to “on.
Standby Reception allows the unit to switch temporarily to your favorite program (PTY: Program TYpe) and Traffic Announcement (TA) from the current source (another FM RDS station, CD, and other connected components). Note: Standby Reception will not work if you are listening to an AM station. ENGLISH Using Standby Reception TA Standby Reception Press TP/RDS briefly to activate TA Standby Reception. The TP indicator either lights up or flashes on the display.
ENGLISH PTY Standby Reception Press PTY to activate PTY Standby Reception. The PTY indicator either lights up or flashes on the display. (See below) • If you press the button while listening to an FM RDS station supporting PTY signals, the PTY indicator lights up, and the PTY code name (see “To select your favorite program for PTY Standby Reception” below) flashes for 5 seconds. This receiver now stands by for the selected PTY signal reception.
You can search one of your 6 favorite program types stored in memory. When shipped from the factory, the following 6 program types have been stored in the number buttons (1 to 6). 1 2 3 4 5 6 POP M ROCK M EASY M CLASSICS AFFAIRS VARIED ENGLISH Searching your favorite programme (PTY Search) To store your favorite program types 3 1, 5 1 4 2 Press and hold SEL (Select) for more than 2 seconds so one of the PSM items appears on the display. (PSM: see page 31.
ENGLISH 5 Finish the setting. To search your favorite program type 2 1 PTY 1 Press and hold PTY (Program TYpe) for more than 1 second while listening to an FM station. The last selected PTY code and preset number appear. DISC CRUISE 2 Select one of PTY codes stored in preset number buttons (1 to 6). PTY search for your favorite program starts after 5 seconds. • If there is a station broadcasting a program of the same PTY code you selected, that station is tuned in.
Automatic selection of the station when using the number buttons ENGLISH Other convenient RDS functions and adjustments Usually when you press the number button, the preset station is tuned in. However, when the preset station is an RDS station, something different will happen.
ENGLISH Automatic clock adjustment When shipped from the factory, the clock built in this unit is set to be readjusted automatically using the CT (Clock Time) data in the RDS signal. If you do not want to use automatic clock adjustment, follow the procedure below. • See also “Changing the general settings (PSM)” on page 31. 1 Press and hold SEL (Select) for more than 2 seconds so one of the PSM items appears on the display. 2 Press ¢ or 4 until “AUTO ADJUST” appears on the display.
CD OPERATIONS ENGLISH Playing a CD FUNC 1 1 Open the loading slot. The display panel moves down, and the loading slot appears. 2 Insert a disc into the loading slot. The unit draws a CD, the display panel moves up, and CD play starts automatically. Total track number Total playing time of of the inserted disc the inserted disc Current track Elapsed playing time Notes: • When a CD is in the loading slot, selecting “CD” as the source by pressing FUNC starts CD play.
ENGLISH Playing a CD Text In a CD Text, some information about the disc (its disc title, performer and track title) is recorded. You can show these disc information on the display. DISP Select text display mode while playing a CD Text. Each time you press the button, the display changes as follows: Disc Title / Performer Track Title Current track no. and Elapsed playing time Notes: • The display shows up to 12 characters at one time and scrolls if there are more than 12 characters.
Number buttons ENGLISH Locating a track or a particular portion on a CD ¢ 4 To fast-forward or reverse the track Press and hold ¢, while playing a CD, to fast-forward the track. Press and hold 4 , while playing a CD, to reverse the track. To go to the next tracks or the previous tracks Press ¢ briefly, while playing a CD, to go ahead to the beginning of the next track. Each time you press the button consecutively, the beginning of the next tracks is located and played back.
ENGLISH Selecting CD playback modes RND INT/LO MODE RPT To play back tracks at random (Random Play) You can play back all tracks on the CD at random. 1 Press MODE while playing a CD. “MODE” appears on the lower part of the display, and the number buttons can work as different function buttons. 2 Press RND (Random), while “MODE” is still on the display, so that the RND indicator lights up on the display. Each time you press the button, CD random play mode turns on and off alternately.
You can play back the first 15 seconds of each track sequentially. 1 Press MODE while playing a CD. “MODE” appears on the lower part of the display, and the number buttons can work as different function buttons. 2 Press INT/LO (Intro/local), while “MODE” is still on the display. Each time you press the button, CD intro scan mode turns on and off alternately. When the intro scan mode is turned on, “INTRO” appears on the display for 5 seconds and the track number flashes.
ENGLISH SOUND ADJUSTMENTS Adjusting the sound You can adjust the sound characteristics to your preference. 2 1 1 Select the item you want to adjust. BASS TREBLE VOLUME Indication FADER BALANCE WOOFER BBE To do: Range BASS Adjust the bass. –06 (min.) — +06 (max.) TREBLE Adjust the treble. –06 (min.) — +06 (max.) FADER* Adjust the front and rear speaker balance. R06 (Rear only) — F06 (Front only) BALANCE Adjust the left and right speaker balance.
The BBE* function restores the brilliance and clarity of the original live sound in recording, broadcasts, etc. When a speaker reproduces sound, it introduces frequency-dependent phase shifting, causing high-frequency sounds to take longer to reach the ear than low frequency sounds.
ENGLISH Selecting preset sound modes You can select a preset sound adjustment suitable to the music genre. 2 1 1 Light “MODE” on the lower part of the display. The number buttons can work as different function buttons. 2 Within 5 seconds Select the sound control mode (SCM) you want. Each time you press SOUND, the sound control mode (SCM) changes as follows.
You can adjust the sound control modes (BEAT, SOFT, POP: see page 26) to your preference and store your own adjustments in memory. 4, 5 1 3, 5 2, 6 ENGLISH Storing your own sound adjustments 1 Light “MODE” on the lower part of the display. The number buttons can work as different function buttons. REMEMBER you must finish the following steps while “MODE” is still on the display. Otherwise, the setting will be canceled. 2 Select the sound control mode (SCM) you want. For details, see page 26.
ENGLISH OTHER MAIN FUNCTIONS Setting the clock You can also set the clock system either to 24 hours or 12 hours. 1, 5 1 2 2, 3, 4 2, 3, 4 Press and hold SEL (Select) for more than 2 seconds so that one of the PSM items appears on the display. 1 2 Set the hour. 1 Select “CLOCK HOUR” if not shown on the display. 2 Adjust the hour. 3 1 2 Set the minute. 1 Select “CLOCK MINUTE.” 2 Adjust the minute. 4 1 2 Set the clock system. 1 Select “CLOCK24H/12H.” 2 Select “24HOUR” or “12HOUR.
You can select the proper cruise mode for your car. This unit change the volume level automatically (at 3 possible levels) based on the driving speed of your car by detecting the alternator’s generating frequency (Audio Cruise). If you want to use this mode, follow the procedures below. When shipped from the factory, this mode is set to “CRUISE OFF.” • CRUISE 1: Select this if your car is relatively quiet. • CRUISE 2: Select this if your car is relatively loud.
ENGLISH When this function is turned on (the CRUISE indicator lights up on the display), the proper volume level is automatically selected among the 3 possible levels according to the driving speed, and the selected level is shown on the display. When the driving speed increases. CRUISE CRUISE CRUISE CRUISE When the driving speed decreases.
You can change the items listed on the next page by using the PSM (Preferred Setting Mode) control. ENGLISH Changing the general settings (PSM) Basic Procedure 1, 4 1 2 3 4 3 2 Press and hold SEL (Select) for more than 2 seconds so that one of the PSM items appears on the display. Select the PSM item you want to adjust. (See page 32.) Adjust the PSM item selected above. Finish the setting. 31 EN28-34.KD-LX3R[E]/f 31 99.3.
ENGLISH 3 2 1 Factory-preset settings See page 0:00 28 Set. Select.
You can select either the clock or the source name to be shown on the lower part of the display. When shipped from the factory, the clock is selected. • CLK DISP ON: Clock • CLK DISP OFF:Source name (or station band) ENGLISH To select the clock display To check the other information during play Press DISP (Display). Each time you press the button, the other information (either the clock or the source name) will be shown on the lower part of the display for a while.
ENGLISH To turn on/off the key-touch tone You can deactivate the key-touch tone if you do not want to make it beep when you press a button. When shipped from the factory, the key-touch tone is activated. • BEEP ON: Activates the key-touch tone. • BEEP OFF: Deactivates the key-touch tone. To turn on/off the power amplifier switch You can switch off the built-in amplifier and send the audio signals only to the external amplifier(s) to get clear sounds and to prevent internal heat buildup inside this unit.
You can assign names to CDs and the external component connected to the LINE IN plugs. After assigning a name, it will appear on the display when you select the source. Sources CDs* External component 7 1 Maximum number of the characters up to 32 characters (up to 40 discs) up to 12 characters 3 1 4 ENGLISH Assigning names to the sources 2 5 Select a source you want to assign a name to. 2 Press and hold SEL (Select) for more than 2 seconds while pressing DISP.
ENGLISH 3 Select the character set you want while “ ” is flashing. Each time you press the button, the character set changes as follows: Small letters Capital letters Numerals and Symbols 4 Select a character. About the available characters, see page 37. 5 6 Move the cursor to the next (or previous) character position. Repeat steps 3 to 5 until you finish inputting the name. 7 Press the button while the last selected character is flashing. The input name is stored in memory.
Capital letters A B C D E F G H I J K L M N O P Q R S T U V W X Y Z Space ENGLISH Available characters Small letters a b c d e f g h i j k l m n o p q r s t u v w x y z Space Numbers and symbols 0 1 2 3 4 5 6 7 8 9 ! ” # $ % & ’ ( ) + , – . / : ; < = * > ? @ _ ` Space Notes: • When you assign a name to the 41st disc, “NAME FULL” appears on the display. (In this case, delete unwanted names before assignment.
ENGLISH Using the security lock You can prohibit the unauthorized use of this unit by the others. To use the security lock, you need to set the password first. Once you set the password, the unit will ask you to enter the password when you turn on the unit for the first time after reinstallation (or after recovering the car battery exhaustion). CAUTION: Be careful not to forget the password you have entered; otherwise, you cannot use this unit.
Select a letter. 4 5 ENGLISH 3 Move the character entry position to the next. Repeat steps 2 to 4 until you enter all 4 characters. 6 Finish the setting. The password flashes on the display for a while, then the unit returns to the normal operation mode. How to Use the Provided CODE Sticker Attach the provided CODE sticker in a conspicuous position on your car to notify would-be unauthorized users that the security lock function is provided for this unit and, therefore, will foil their efforts.
ENGLISH When Security Lock works? Once you register the password, “ ” appears on the display, and the unit will ask you to enter the password in the following cases: • When you turn on the unit for the first time after re-installing the unit. • When you turn on the unit for the first time after replacing the car battery – because it is completely used up. To use this unit, you must enter the correct password by following the procedure below. 1 2 3 4 Press DISP to select the character set you want.
Before using the remote controller: • Aim the remote controller directly at the remote sensor on the main unit. Make sure there is no obstacle in between. • Do not expose the remote sensor to strong light (direct sunlight or artificial lighting). Remote sensor ENGLISH REMOTE OPERATIONS Installing the battery When the controllable range or effectiveness of the remote controller decreases, replace the battery. 1. Remove the battery case.
ENGLISH Using the remote controller 1 1 • Turns on the unit if pressed briefly. • Turns off the unit if pressed and held until “SEE YOU” appears on the display. • Drops the volume level in a moment if pressed briefly. Press it again to resume the volume. 2 • Functions as the BAND button while listening to the radio (or the DAB tuner). Each time you press the button, the band changes. • Functions as the DISC + button while listening to the CD changer.
We recommend that you use one of the CH-X series (ex: CH-X1200) with your unit. If you have another CD automatic changer, consult your JVC IN-CAR ENTERTAINMENT dealer for connections. • For example, if your CD automatic changer is one of the KD-MK series, you need a cord (KS-U15K) for connecting it to this unit. ENGLISH CD CHANGER OPERATIONS Before operating your CD automatic changer: • Refer also to the Instructions supplied with your CD changer.
ENGLISH To fast-forward or reverse the track Press and hold ¢, while playing a CD, to fast-forward the track. Press and hold 4 , while playing a CD, to reverse the track. To go to the next tracks or the previous tracks Press ¢ briefly, while playing a CD, to go ahead to the beginning of the next track. Each time you press the button consecutively, the beginning of the next tracks is located and played back. Press 4 briefly, while playing a CD, to go back to the beginning of the current track.
RPT ENGLISH Selecting CD playback modes RND INT/LO MODE To play back tracks at random (Random Play) 1 Press MODE while playing a CD. “MODE” appears on the lower part of the display, and the number buttons can work as different function buttons. 2 Press RND (Random), while “MODE” is still on the display, so that the RND indicator lights up on the display.
ENGLISH To play back only intros (Intro Scan) 1 Press MODE while playing a CD. “MODE” appears on the lower part of the display, and the number buttons can work as different function buttons. 2 Press INT/LO (Intro/local), while “MODE” is still on the display. Each time you press the button, CD intro scan mode changes as follows: INTRO 1 INTRO 2 Canceled Mode Indication Plays the beginnings (15 seconds) INTRO 1 Track number flashes Of all tracks on all inserted discs.
Playing an external component When connecting an external component to the LINE IN plugs on the rear, you can select the component as the sound source. ENGLISH EXTERNAL COMPONENT OPERATIONS 1 1 Select the external component. Each time you press the button, the source changes as described on page 5. 2 Operate the external component. • Refer to the instructions supplied with your external component.
ENGLISH DAB TUNER OPERATIONS We recommend that you use DAB (Digital Audio Broadcasting) tuner KT-DB1500 with your unit. If you have another DAB tuner, consult your JVC IN-CAR ENTERTAINMENT dealer. • Refer also to the Instructions supplied with your DAB tuner. What is DAB system? DAB is one of the digital radio broadcasting systems available today. It can deliver CD quality sound without any annoying interference and signal distortion. Furthermore, it can carry text, pictures and data.
To search ensembles of higher frequencies To search ensembles of lower frequencies 4 1 2 Start searching an ensemble. When an ensemble is received, searching stops. ENGLISH 3 To stop searching before an ensemble is received, press the same button you have pressed for searching. Select a service you want to listen to. 1 Press MODE. “MODE” appears on the lower part of the display. 2 Press ¢ or 4 to select a service you want, while “MODE” is still on the display.
ENGLISH Storing DAB services in memory You can preset up to 6 DAB services in each DAB band (DAB1, DAB2 and DAB3) manually. 1 1 5 2- 2 2- 1 4- 1 3 4- 2 Select the DAB tuner. Each time you press the button, the source changes as described on page 5. 2 1 2 3 4 Select the DAB band (DAB1, DAB2, or DAB3). 1 Press MODE. “MODE” appears on the lower part of the display. 2 Press BAND to select the band number, while “MODE” is still on the display.
Press and hold the number button you want to store the selected service into for more than 2 seconds. ENGLISH 5 Preset number “MEMO” and preset number flash alternately for a while. 6 Repeat the above procedure to store other DAB services into other preset numbers. Notes: • A previously preset DAB service is erased when a new DAB service is stored in the same preset number.
ENGLISH Tuning into a preset DAB service You can easily tune into a preset DAB service. Remember that you must store services first. If you have not stored them yet, see page 50. 1 1 3 2- 2 2- 1 Select the DAB tuner. Each time you press the button, the source changes as described on page 5. 2 1 2 If you want to select the DAB band (DAB1, DAB2, or DAB3), follow the steps below. 1 Press MODE.
Handling CDs This unit has been designed only to reproduce the CDs bearing the Other discs cannot be played back. COMPACT and marks. DIGITAL AUDIO ENGLISH MAINTENANCE How to handle CDs When removing a CD from its case, press down the center holder of the case and lift the CD out, holding it by the edges. • Always hold the CD by the edges. Do not touch its recording surface.
ENGLISH TROUBLESHOOTING What appears to be trouble is not always serious. Check the following points before calling a service centre. Symptoms Causes Remedies • CD cannot be played back. CD is inserted upside down. Insert the CD correctly. • CD sound is sometimes interrupted. You are driving on rough roads. Stop CD play while driving on rough roads. CD is scratched. Change the CD. Connections are incorrect. Check the cords and connections. The volume level is set to the minimum level.
AUDIO AMPLIFIER SECTION CD PLAYER SECTION Maximum Power Output: Front: 40 watts per channel Rear: 40 watts per channel Continuous Power Output (RMS): Front: 16 watts per channel into 4 Ω, 40 to 20,000 Hz at no more than 0.8 % total harmonic distortion. Rear: 16 watts per channel into 4 Ω, 40 to 20,000 Hz at no more than 0.8 % total harmonic distortion.
VICTOR COMPANY OF JAPAN, LIMITED Printed in Japan 0399MNMMDWOZK EN, GE, FR, NL COVER.KD-LX3R[E].E/G/F/N 2 99.3.