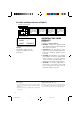
ENGLISH DEUTSCH CD RECEIVER KD-S636 KD-S636 /I/ATT MO RND 35WX4 SOUND SEL LOUD SSM DISP 7 1 8 9 2 3 10 4 11 5 RPT SCAN 12 6 AM FM CD NEDERLANDS FRANÇAIS CD-RECEIVER RECEPTEUR CD CD-RECEIVER COMPACT DIGITAL AUDIO For installation and connections, refer to the separate manual. Für den Einbau und die Anschlüsse siehe das eigenständige Handbuch. Pour l’installation et les raccordements, se référer au manuel séparé.
Position and Reproduction of Labels Bottom of the main unit DANGER: Invisible laser radiation when open and interlock failed or defeated. AVOID DIRECT EXPOSURE TO BEAM. (e) VARNING: Osynlig laserstrålning när denna del är öppnad och spärren är urkopplad. Betrakta ej strålen. (s) ADVARSEL: Usynlig laserstråling ved åbning, når sikkerhedsafbrydere er ude af funktion. Undgå udsættelse for stråling (d) VARO: Avattaessa ja suojalukitus ohitettaessa olet alttiina näkymättömälle lasersäteilylle.
ENGLISH Thank you for purchasing a JVC product. Please read all instructions carefully before operation, to ensure your complete understanding and to obtain the best possible performance from the unit. CONTENTS BASIC OPERATIONS .................................................... 4 RADIO OPERATIONS ................................................... 5 Listening to the radio ..................................................................... 5 Storing stations in memory ..................................
BASIC OPERATIONS 1 Note: When you use this unit for the first time, set the built-in clock correctly, see page 16. 3 2 1 Turn on the power. / I /ATT Note on One-Touch Operation: When you select a source in step 2 below, the power automatically comes on. You do not have to press this button to turn on the power. 2 Select the source. AM FM CD To operate the tuner, see pages 5 – 9. To operate the CD player, see pages 10 – 12. 3 Adjust the volume. Volume level indicator LOUD Volume level appears.
RADIO OPERATIONS 2 1 ENGLISH Listening to the radio 1 Select the band (FM1, FM2, FM3 or AM). AM You can select any one of FM1, FM2, and FM3 to listen to an FM station. FM FM1 FM2 FM3 AM 2 SSM To search stations of higher frequencies. Start searching a station. When a station is received, searching stops. To search stations of lower frequencies. To stop searching before a station is received, press the same button you have pressed for searching.
Storing stations in memory You can use one of the following two methods to store broadcasting stations in memory. • Automatic preset of FM stations: SSM (Strong-station Sequential Memory) • Manual preset of both FM and AM stations FM station automatic preset: SSM You can preset 6 local FM stations in each FM band (FM1, FM2, and FM3). 2 1 1 Select the FM band number (FM1, FM2 or FM3) you want to store FM stations into. FM FM1 2 FM2 FM3 Press and hold the both buttons for more than 3 seconds.
ENGLISH Manual preset You can preset up to 6 stations in each band (FM1, FM2, FM3 and AM) manually. EXAMPLE: Storing an FM station of 88.3 MHz into the preset number 1 of the FM1 band 2 3 1 FM 1 Select the FM1 band. 2 Tune into a station of 88.3 MHz. See page 5 to tune into a station. SSM 3 1 2 Press and hold the button for more than 1 second. Preset number “1” starts flashing for a while. 4 Repeat the above procedure to store other stations into other preset numbers.
Tuning into a preset station You can easily tune into a preset station. Remember that you must store stations first. If you have not stored them yet, see pages 6 and 7. 2 1 1 Select the band (FM1, FM2, FM3 or AM) you want. AM FM FM1 FM2 FM3 AM 2 1 2 3 4 5 6 Select the number (1 – 6) for the preset station you want. 8 05-09.KD-S636.E 8 98.9.
ENGLISH Other convenient tuner functions MO RND SCAN Scanning broadcast stations When you press SCAN while listening to the radio, station scanning starts. Each time a broadcast is tuned in, scanning stops for about 5 seconds (tuned frequency number flashes on the display), and you can check what program is now being broadcast. If you want to listen to that program, press the same button again to stop scanning.
CD OPERATIONS Playing a CD 1 1 Insert a disc into the loading slot. The unit turns on, draws a CD and starts playback automatically. • When a CD is inserted upside down, “EJECT” appears on the display and the CD automatically ejects. Total playing time of the inserted disc Total track number of the inserted disc Elapsed playing time Current track Note on One-Touch Operation: When a CD is already in the loading slot, pressing CD turns on the unit and starts playback automatically.
SSM ¢ SSM 4 ENGLISH Locating a track or particular portion on a CD Number buttons To fast forward or reverse the track Press and hold SSM ¢ , while playing a CD, to fast forward the track. Press and hold SSM 4 , while playing a CD, to reverse the track. SSM To go to the next track or the previous track SSM Press SSM ¢ briefly, while playing a CD, to go ahead to the beginning of the next track.
Selecting CD playback modes MO RND RPT To play back tracks at random (Random Play) You can play back all tracks on the CD at random. MO RND Each time you press MO RND (Mono/Random) while playing a CD, CD random play mode turns on and off alternatively. When the random mode is turned on, the RND indicator lights up on the display and a track randomly selected starts playing. RND To play back tracks repeatedly (Repeat Play) You can play back the current track repeatedly.
Turning on/off the loudness function The human ear is less sensitive to low and high frequencies at low volumes. The loudness function can boost these frequencies to produce a well-balanced sound at low volume levels. Each time you press LOUD, the loudness function turns on and off alternatively. LOUD ENGLISH SOUND ADJUSTMENTS LOUD Selecting preset sound modes You can select a preset sound adjustment suitable to the music genre. Each time you press SOUND, the sound mode changes as follows.
Adjusting the sound You can adjust the treble/bass sound and the speaker balance. 1 2 1 Select the item you want to adjust. SEL Indication To do: Range BAS (bass) Adjust the bass –6 (min.) — +6 (max.) TRE (treble) Adjust the treble –6 (min.) — +6 (max.) FAD (Fader)* Adjust the front and rear speaker balance R6 (rear only) — F6 (front only) BAL (Balance) Adjust the left and right speaker balance L6 (left only) — R6 (right only) VOL (Volume) Adjust the volume 00 (min.) — 50 (max.
You can adjust the sound modes (BEAT, SOFT, POP: see page 13) to your preference and store your own adjustments in memory. 2 3 1 SOUND 1, 4 ENGLISH Storing your own sound adjustments 2 Call up the sound mode you want to adjust. See page 13 for details. Within 5 seconds 2 To adjust the bass or treble sound level SEL Select “BAS” or “TRE.” To turn on or off the loudness function LOUD Each time you press LOUD, the loudness function turns on and off alternatively.
OTHER MAIN FUNCTIONS Setting the clock 1 2, 3 1 4 Press and hold the button for more than 2 seconds. SEL “CLOCK H” or “CLOCK M” appears on the display. 2 Set the hour. 1. Select “CLOCK H” if not shown on the display. 1. SSM 2. 2. Adjust the hour. 3 Set the minute. 1. Select “CLOCK M.” 1. SSM 2. 2. Adjust the minute. 4 Start the clock. DISP 16 16-18.KD-S636.E 16 98.9.
Press DISP repeatedly. Each time you press the button, the display mode changes as follows. During tuner operation: Frequency During CD operation: Clock Elapsed playing time Clock ENGLISH To check the current clock time (changing the display mode) • If the unit is not in use when you press DISP, the power turns on, the clock time is shown for 5 seconds, then the power turns off. 17 16-18.KD-S636.E 17 98.9.
Detaching the control panel You can detach the control panel when leaving the car. When detaching or attaching the control panel, be careful not to damage the connectors on the back of the control panel and on the panel holder. How to detach the control panel Before detaching the control panel, be sure to turn off the power. 1 2 3 How to attach the control panel 1 Unlock the control panel. Lift and pull the control panel out of the unit. Put the detached control panel into the provided case.
Handling CDs COMPACT This unit has been designed only to play back the CDs bearing the Other discs cannot be played back. mark. DIGITAL AUDIO ENGLISH MAINTENANCE How to handle CDs When removing a CD from its case, press down the center holder of the case and lift the CD out, holding it by the edges. • Always hold the CD by the edges. Do not touch its recording surface. Center holder When storing a CD into its case, gently insert the CD around the center holder (with the printed surface facing up).
TROUBLESHOOTING What appears to be trouble is not always serious. Check the following points before calling a service center. Symptoms Remedies Causes • CD cannot be played back. CD is inserted upside down. Insert the CD correctly. • CD sound is sometimes interrupted. You are driving on rough roads. Stop CD play while driving on rough roads. CD is scratched. Change the CD. Connections are incorrect. Check the cords and connections. No CD is in the loading slot.
AUDIO AMPLIFIER SECTION CD PLAYER SECTION Maximum Power Output: Front: 35 watts per channel Rear: 35 watts per channel Continuous Power Output (RMS): Front: 15 watts per channel into 4 Ω, 40 to 20,000 Hz at no more than 0.8% total harmonic distortion. Rear: 15 watts per channel into 4 Ω, 40 to 20,000 Hz at no more than 0.8% total harmonic distortion.
KD-S636 CD RECEIVER VICTOR COMPANY OF JAPAN, LIMITED V EN, GE, FR, NL 00.COVER.KD-S636.E/G/F/D J 2 C 98.9.