ENGLISH РЕСИВЕР С ПРОИГРЫВАТЕЛЕМ КОМПАКТ-ДИСКОВ РУССКИЙ CD RECEIVER KD-S717 В соответствии с Законом Российской Федерации “О защите прав потребителей” срок службы (годности) данного товара “по истечении которого он может представлять опасность для жизни, здоровья потребителя, причинять вред его имуществу или окружающей среде” составляет семь (7) лет со дня производства.
РУССКИЙ ENGLISH Position And Reproduction Of Labels / Расположение и внешний вид маркировок Bottom panel of the main unit Дно основного устройства DANGER: Invisible laser radiation when open and interlock failed ordefeated. AVOID DIRECTEXPOSURE TO BEAM. (e) ADVARSEL:Usynlig laserstråling ved åbning, når sikkerhedsafbrydere erude af funktion. Undgåudsættelse for stråling. (d) VARNING:Osynliglaserstrålning när denna del är öppnadoch spärren är urkopplad. Betrakta ej strålen.
ENGLISH How to reset your unit / Перезагрузка Вашего устройства РУССКИЙ Press and hold both the SEL (select) and (standby/on/attenuator) buttons at the same time for several seconds. This will reset the built-in microcomputer. (ожидание/включено/приглушение) Одновременно нажмите кнопки SEL (выбор) и и удерживайте нажатыми в течение нескольких секунд. Это приведет к перезагрузке встроенного микрокомпьютера.
ENGLISH Thank you for purchasing a JVC product. Please read all instructions carefully before operation, to ensure your complete understanding and to obtain the best possible performance from the unit. CONTENTS 3 LOCATION OF THE BUTTONS ............ 5 Control panel ............................................ 5 BASIC OPERATIONS ...................... 6 Turning on the power ................................ 6 OTHER MAIN FUNCTIONS ............... 14 RADIO BASIC OPERATIONS .............
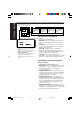
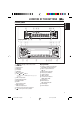
LOCATION OF THE BUTTONS u io y Display window d 1 9 p q w e r t ;a s h g 2 3 9 1 2 3 4 5 6 7 8 f ENGLISH Control panel 45 6 7 8 p q (standby/on/attenuator) button Control dial LOUD button AM button CD button FM button 0 (eject) button 4 /¢ buttons • Also functions as SSM buttons when pressed together.
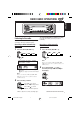
ENGLISH BASIC OPERATIONS Turning on the power 1 4 Adjust the sound as you want (see page 13.) Turn on the power. To drop the volume in a moment Note on One-Touch Operation: When you select a source in step 2 below, the power automatically comes on. You do not have to press this button to turn on the power. 2 Select the source. To operate the tuner (AM or FM), see pages 7 – 9. To operate the CD player, see pages 10 – 12. 3 Press briefly while listening to any source.
ENGLISH RADIO BASIC OPERATIONS Listening to the radio You can use either automatic searching or manual searching to tune into a particular station. To stop searching before a station is received, press the same button you have pressed for searching. Searching a station automatically: Auto search Searching a station manually: Manual search 1 1 Select the band (AM, FM1 – 3). FM1 FM2 Select the band (AM, FM1 – 3). FM1 FM3 FM2 FM3 AM AM Note: This receiver has three FM bands (FM1, FM2, FM3).
ENGLISH 3 Tune into a station you want while “M” is flashing. Press ¢ to search stations of higher frequencies. Press 4 to search stations of lower frequencies. • If you release your finger from the button, the manual mode will automatically turn off after 5 seconds. • If you hold down the button, the frequency keeps changing (in 50 kHz intervals (87.5 MHz - 108 MHz), in 30 kHz intervals (65 MHz - 74 MHz) for FM and 9 kHz intervals for AM — MW/LW) until you release the button.
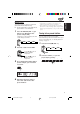
You can preset up to 6 stations in each band (FM1, FM2, FM3 and AM) manually. Ex: Storing an FM station of 88.3 MHz into the preset number 1 of the FM1 band 1 Select the FM band (FM1 – 3) you want to store FM stations into (in this example, FM1). • Each time you press the button, the FM band changes as follows: FM1 FM2 FM3 Notes: • A previously preset station is erased when a new station is stored in the same preset number.
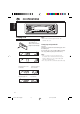
ENGLISH CD OPERATIONS Playing a CD 1 Insert a disc into the loading slot. The unit turns on, draws a CD and starts playback automatically. Notes: • When a CD is inserted upside down, the CD automatically ejects. To stop play and eject the CD Press 0. CD play stops and the CD automatically ejects from the loading slot. If you change the source to FM or AM, the CD play also stops (without ejecting the CD this time).
To fast-forward or reverse the track Press and hold ¢ , while playing a CD, to fast-forward the track. You can play back all tracks on the CD at random. Each time you press MO RND (monaural/random) while playing a CD, CD random play mode turns on and off alternately. ENGLISH Locating a track or a particular Selecting CD playback modes portion on a CD To play back tracks at random (Random Play) Press and hold 4 , while playing a CD, to reverse the track.
ENGLISH SOUND ADJUSTMENTS Turning on/off the loudness function 2 Adjust the level. To increase the level. The human ear is less sensitive to low and high frequencies at low volumes. The loudness function can boost these frequencies to produce a well-balanced sound at low volume levels. Each time you press LOUD, the loudness function turns on/off alternatively. To decrease the level. Equalization pattern changes as you adjust the bass or treble.
Indication BEAT For: Rock or disco music SOFT Quiet background music POP Light music SCM OFF (Flat sound) Preset values BAS TRE LOUD +02 00 ON Storing your own sound adjustments You can adjust the sound modes (BEAT, SOFT, POP) to your preference and store your own adjustments in memory. • There is a time limit in doing the following procedure. If the setting is canceled before you finish, start from step 1 again.
ENGLISH OTHER MAIN FUNCTIONS Setting the clock 1 Press and hold SEL (select) for more than 2 seconds so that one of the PSM items appears on the display. (See page 15.) Changing the general settings (PSM) You can change the items listed on the next page by using the PSM (Preferred Setting Mode) control. Basic Procedure 1 2 Set the hour. 1 Select “CLOCK H” if not shown on the display. 2 Adjust the hour.
1 2 3 Set. Counterclockwise Hold. Select. CLOCK H Hour adjustment Back Advance CLOCK M Minute adjustment Back Advance SCM LINK Sound control memory linkage LINK OFF LINK ON LEVEL Level display AUDIO 1 Telephone muting See page 0:00 14 LINK ON 12,13, 15 AUDIO 2 15 OFF 15 Clockwise AUDIO 2 OFF TEL Factorypreset settings ENGLISH Preferred Setting Mode (PSM) items MUTING 2 MUTING 1 OFF • Press SEL (select) to finish the setting.
ENGLISH Detaching the control panel You can detach the control panel when leaving the car. When detaching or attaching the control panel, be careful not to damage the connectors on the back of the control panel and on the panel holder. Attaching the control panel 1 Insert the left side of the control panel into the groove on the panel holder. Detaching the control panel Before detaching the control panel, be sure to turn off the power. 1 Unlock the control panel.
What appears to be trouble is not always serious. Check the following points before calling a service center. Symptoms Causes Remedies • CD cannot be played back. CD is inserted upside down. Insert the CD correctly. • CD sound is sometimes interrupted. You are driving on rough roads. Stop playing CD while driving on rough roads. The disc is scratched. Change the disc. Connections are incorrect. Check the cords and connections. • Sound is sometimes interrupted. Connections are incorrect.
ENGLISH MAINTENANCE Handling CDs Moisture condensation This unit has been designed only to reproduce the CDs bearing the following marks. COMPACT DIGITAL AUDIO • Other discs cannot be played back. How to handle CDs Moisture may condense on the lens inside the CD player in the following cases: • After starting the heater in the car. • If it becomes very humid inside the car. Should this occur, the CD player may malfunction.
SPECIFICATIONS Maximum Power Output: Front: 40 W per channel Rear: 40 W per channel Continuous Power Output (RMS): Front: 16 W per channel into 4 Ω, 40 Hz to 20 000 Hz at no more than 0.8% total harmonic distortion. Rear: 16 W per channel into 4 Ω, 40 Hz to 20 000 Hz at no more than 0.8% total harmonic distortion.
Having TROUBLE with operation? Please reset your unit Refer to page of How to reset your unit Затруднения при эксплуатации? Пожалуйста, перезагрузите Ваше устройство Для получения информации о перезагрузке Вашего устройства обратитесь на соответствующую страницу VICTOR COMPANY OF JAPAN, LIMITED EN, RU KD-S717 COVER [RUS] V J 2 C 0101AOMCAPJES 18.10.
KD-S717 Installation/Connection Manual Руководство по установке/ подключению GET0014-002A [EE] V J ENGLISH 0101AOMCAPJES EN, RU РУССКИЙ • This unit is designed to operate on 12 V DC, NEGATIVE ground electrical systems. • Это устройство разработано для эксплуатации на 12 В постоянного напряжения с минусом на массе. INSTALLATION (IN-DASH MOUNTING) • The following illustration shows a typical installation. However, you should make adjustments corresponding to your specific car.
• When using the optional stay • При использовании дополнительной стойки • When installing the unit without using the sleeve • При установке устройства без использования муфты In a Toyota for example, first remove the car radio and install the unit in its place. В Тойоте, например, сначала удалите автомобильную магнитолу, затем установите на ее место это устройство. Fire wall Стена * Not included with this unit.
РУССКИЙ ENGLISH ELECTRICAL CONNECTIONS ЭЛЕКТРИЧЕСКИЕ ПОДКЛЮЧЕНИЯ To prevent short circuits, we recommend that you disconnect the battery’s negative terminal and make all electrical connections before installing the unit. If you are not sure how to install this unit correctly, have it installed by a qualified technician. Для предотвращения коротких замыканий мы рекомендуем Вам отсоединить отрицательный разъем аккумулятора и осуществить все подключения перед установкой устройства.
PRECAUTIONS on power supply and speaker connections: ПРЕДОСТЕРЕЖЕНИЯ по питанию и подключению громкоговорителей: • DO NOT connect the speaker leads of the power cord to the car battery; otherwise, the unit will be seriously damaged. • Connect the black lead (ground), yellow lead (to car battery, constant 12 V), and red lead (to an accessory terminal) correctly. • BEFORE connecting the speaker leads of the power cord to the speakers, check the speaker wiring in your car.