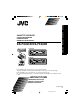
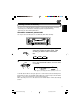
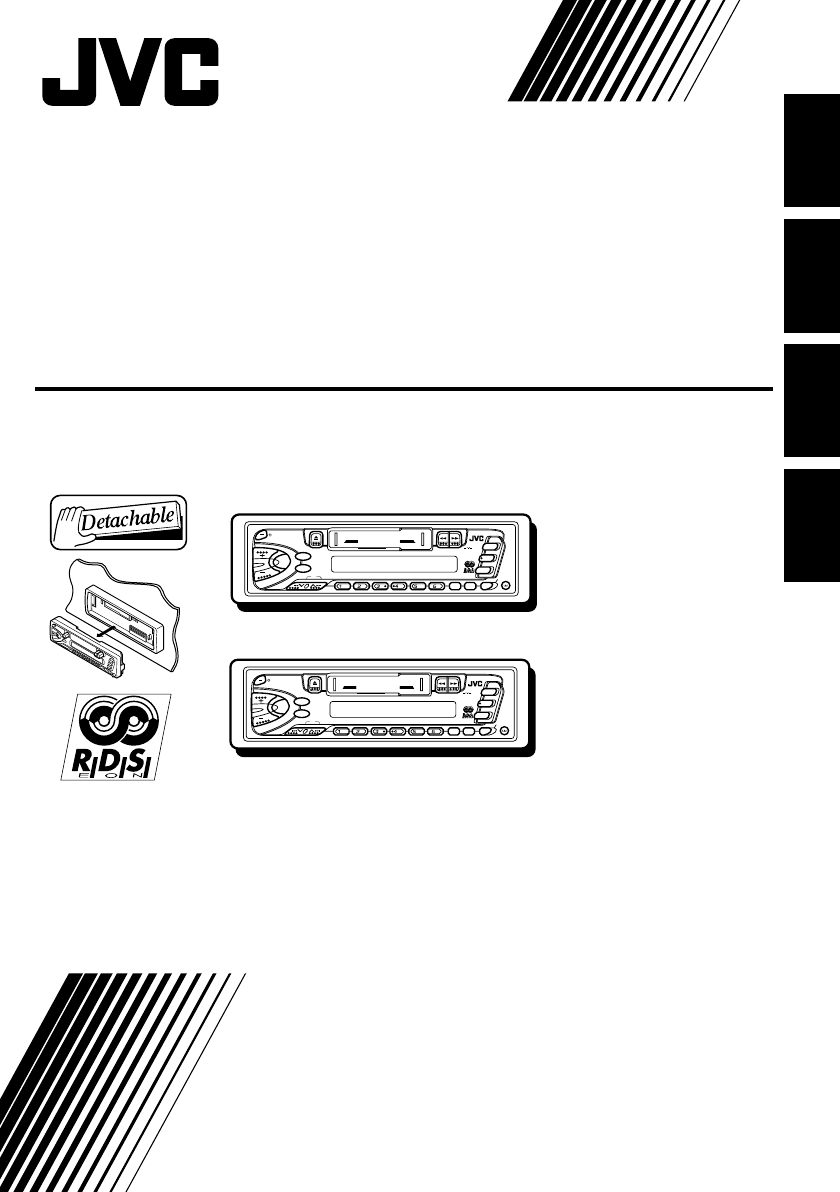
ENGLISH DEUTSCH CASSETTE RECEIVER FRANÇAIS CASSETTEN-RECEIVER RADIOCASSETTE RADIO/CASSETTESPELER NEDERLANDS KS-FX463R/KS-FX460R KS-FX463R /I ATT 40Wx4 CD CHANGER CONTROL FM PROG KS-FX463R DISP AM SEL MO/FIND CD-CH SSM 7 8 9 10 11 12 TP RDS SOUND PTY KS-FX460R /I ATT 40Wx4 CD CHANGER CONTROL FM PROG KS-FX460R DISP AM SEL MO/FIND CD-CH SSM 7 8 9 10 11 12 TP RDS PTY SOUND For installation and connections, refer to the separate manual.
ENGLISH Thank you for purchasing a JVC product. Please read all instructions carefully before operation, to ensure your complete understanding and to obtain the best possible performance from the unit. CONTENTS BASIC OPERATIONS .................................................... 3 RADIO BASIC OPERATIONS ......................................... 4 Listening to the radio ..................................................................... 4 Storing stations in memory ......................................
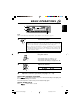
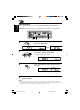
ENGLISH BASIC OPERATIONS 1 3 2 Note: When you use this unit for the first time, set the built-in clock correctly, see page 20. 1 Turn on the power. / I /ATT Note on One-Touch Operation: • When you select tuner as a source in step 2 below, the power automatically comes on. You do not have to press this button to turn on the power. • If the cassette is already in the cassette compartment, tape play starts automatically.
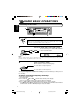
ENGLISH RADIO BASIC OPERATIONS Listening to the radio 1 2 3 1 Turn on the power. / I /ATT Note on One-Touch Operation: When you select a band in step 2 below, the power automatically comes on. You do not have to press this button to turn on the power. 2 Select the band (FM1, FM2, FM3 or AM). FM FM1 FM2 FM3 You can select any one of FM1, FM2, and FM3 to listen to an FM station. AM AM Note: When a cassette is in the cassette compartment, you cannot select the tuner.
ENGLISH Storing stations in memory You can use one of the following two methods to store broadcasting stations in memory. • Automatic preset of FM stations: SSM (Strong-station Sequential Memory) • Manual preset of both FM and AM stations FM station automatic preset: SSM You can preset 6 local FM stations in each FM band (FM1, FM2, and FM3). 2 1 1 Select the FM band number (FM1, FM2 or FM3) you want to store FM stations into. FM FM1 2 FM2 FM3 Press and hold both buttons for more than 2 seconds.
ENGLISH Manual preset You can preset up to 6 stations in each band (FM1, FM2, FM3 and AM) manually. EXAMPLE: Storing an FM station of 88.3 MHz into preset number 1 of the FM1 band 2 1 FM 2 3 1 Select the FM1 band. Tune into a station of 88.3 MHz. SSM See page 4 to tune into a station. 3 Press and hold the button for more than 2 seconds. “P1” flashes for a few seconds. 4 Repeat the above procedure to store other stations into other preset numbers.
ENGLISH Tuning into a preset station You can easily tune into a preset station. Remember that you must store stations first. If you have not stored them yet, see pages 5 and 6. DISP MO/RND 1 FM1 FM2 FM3 FM 2 1 Select the band (FM1, FM2, FM3 or AM) you want. AM AM 2 Select the number (1 – 6) for the preset station you want. To change the display information while receiving an FM RDS station Press DISP.
ENGLISH RDS OPERATIONS What you can do with RDS EON RDS (Radio Data System) allows FM stations to send an additional signal along with their regular programme signals. For example, the station send their station names, as well as information about what type of programme they broadcast, such as sports or music, etc. Another advantage of RDS function is called “EON (Enhanced Other Networks).” The EON indicator lights up while receiving an FM station with the EON data.
ENGLISH Mode 1 The AF indicator lights up but the REG indicator does not. Network-Tracking is activated with Regionalization set to “off.” Switches to another station within the same network when the receiving signals from the current station become weak. Note: In this mode, the programme may differ from the one currently received. Mode 2 Both the AF indicator and the REG indicator light up. Network-Tracking is activated with Regionalization set to “on.
ENGLISH Using Standby Reception Standby Reception allows the unit to switch temporarily to your favorite programme (PTY: Programme Type) and Traffic Announcement (TA) from the current source — another FM station and Tape or CD changer. Note: Standby Reception will not work if you are listening to an AM station.
You can select your favorite programme for PTY Standby Reception to store in memory. When shipped from the factory, “NEWS” is stored as the programme type for PTY Standby Reception. 1, 4 ENGLISH Selecting Your Favorite Programme for PTY Standby Reception 3 2 1 Press and hold SEL (select) for more than 2 seconds to enter the general setting mode (see page 22). SEL 2 SSM Select “PTY STBY (standby)” if not shown on the display. 3 Select one of twenty-nine PTY codes. (See page 15.
ENGLISH To store your favorite programme types 1, 5 3 2 1 4 Press and hold SEL (select) for more than 2 seconds to enter the general setting mode (see page 22). SEL 2 Select “PTY SRCH (search)” if not shown on the display. SSM o 3 Select one of twenty-nine PTY codes. (See page 15.) Selected code name appears on the display. • If the code already stored in memory is selected, it will flash on the display.
2 1 ENGLISH To search your favorite programme type 1 Press and hold PTY (programme type) for more than 1 second while listening to an FM station. PTY The last selected PTY code appears. 2 Select one of PTY codes stored in preset number buttons (1 to 6). Ex. When “ROCK M” is stored in preset number button 2. PTY search for your favorite programme starts after 5 seconds. • If there is a station broadcasting a programme of the same PTY code you selected, that station is tuned in.
ENGLISH Other convenient RDS functions and adjustments Changing the display mode while listening to an FM station You can change the initial indication on the display to station name (PS NAME), station frequency (FREQ), or clock time (CLOCK) while listening to an FM RDS station. • See also “Changing the general settings” on page 22. 1. Press and hold SEL (select) for more than 2 seconds to call up the general setting mode. ¢ or 4 to select “DISPMODE (display mode).” 2. Press 3.
When shipped from the factory, the clock built in this unit is set to be readjust automatically using the CT (Clock Time) data in the RDS signal. If you do not want to use automatic clock adjustment, follow the procedure below. • See also “Changing the general settings” on page 22. ENGLISH Automatic clock adjustment 1. Press and hold SEL (select) for more than 2 seconds to call up the general setting mode. ¢ or 4 to select “AUTO ADJ (adjust).” 2. Press 3. Press – to select “ADJ OFF.
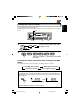
ENGLISH TAPE OPERATIONS Listening to a tape 2 3 1 1 / I /ATT Turn on the power. 2 Insert a cassette. When one side of the tape reaches its end during play, the other side of the tape automatically starts playing. (Auto Reverse) 3 Select the tape direction. 1 • Press both buttons at the same time. Each time you press both buttons, the tape direction changes ¡ alternatively – forward ( ) and reverse ( ). To stop play and eject the cassette Press 0.
SOUND ADJUSTMENTS ENGLISH Selecting preset sound modes You can select a preset sound adjustment suitable to the music genre. SOUND Each time you press SOUND, the sound mode changes as follows. SOUND Indication For: Preset values Bass Treble Loudness SCM OFF (Flat sound) 00 00 On BEAT Rock or disco music +2 00 On POP Light music +4 +1 Off SOFT Quiet background music +1 –3 Off Notes: • You can adjust the preset sound mode to your preference, and store it in memory.
ENGLISH Adjusting the sound You can adjust the sound characteristics to your preference. 1 2 1 SEL Select the item you want to adjust. Indication To do: Range BAS (Bass) Adjust the bass –6 (min.) — +6 (max.) TRE (Treble) Adjust the treble –6 (min.) — +6 (max.
You can adjust the sound modes (BEAT, POP, SOFT: see page 17) to your preference and store your own adjustments in memory. ENGLISH Storing your own sound adjustments 3 1, 4 2 1 SOUND Call up the sound mode you want to adjust. See page 17 for details. 2 Within 5 seconds SEL Select “BAS”, “TRE” or “LOUD.” 3 Within 5 seconds Adjust the bass or treble level or turn the loudness function ON/OFF. See page 18 for details.
ENGLISH OTHER MAIN FUNCTIONS Setting the clock You can also set the clock system either to 24 hours or 12 hours. 1, 5 2, 3, 4 2, 3, 4 1 2 SEL Press and hold SEL (select) for more than 2 seconds to enter the general setting mode. 1 2 SSM 1 Select “CLOCK H (Hour)” if not shown on the display. 2 Adjust the hour. or 3 Set the hour. 1 2 Set the minute. 1 Select “CLOCK M (Minute).” 2 Adjust the minute.
1 2 Set the clock system. 1 Select “24H/12H.” 2 Select “24H” or “12H.” SSM ENGLISH 4 or 5 Start the clock. SEL To check the current clock time (changing the display mode) Press DISP repeatedly. Each time you press the button, the display mode changes as follows. During tuner operation: During tape operation: • For FM RDS stations See page 14.
ENGLISH Changing the general settings You can change the items listed on the next page to your preference. Basic Procedure 1, 4 3 2 1 2 Press and hold SEL (select) for more than 2 seconds to enter the general setting mode. SEL SSM Select the item you want to adjust. (See page 23.) or 3 4 Select or adjust the item selected above. Finish setting.
4 3 2 ENGLISH 1 SEL SSM SEL Finish the setting or Select. Factorypreset settings Set. CLOCK H Hour adjustment Back Advance CLOCK M Minute adjustment Back Advance 24H/12H 24/12-hour time display 12H AUTO ADJ Automatic setting of the clock ADJ OFF DISPMODE Display mode PS NAME See page 0:00 20 24H 24H 20 ADJ ON ADJ ON 15 PS NAME 14 24 29 programme types (See page 15.) DISC NEWS 11 (See page 11.
ENGLISH Selecting the initial CD information display You can select what type of the CD playback information to be initially shown on the display when you start playing a CD. When shipped from the factory, the disc number and track number information is selected to be shown. • DISC: Disc number and track number appear on the display. • TIME: Elapsed playing time appears on the display. 1. Press and hold SEL (select) for more than 2 seconds to call up the general setting mode.
You can detach the control panel when leaving the car. When detaching or attaching the control panel, be careful not to damage the connectors on the back of the control panel and on the panel holder. How to detach the control panel Before detaching the control panel, be sure to turn off the power. 1 2 3 How to attach the control panel 1 Unlock the control panel. Lift and pull the control panel out of the unit. Put the detached control panel into the provided case.
ENGLISH CD CHANGER OPERATIONS When used with a JVC CD automatic changer (separately purchased). We recommend that you use one of the CH-X series with your unit. If you have another CD automatic changer, consult your JVC IN-CAR ENTERTAINMENT dealer for connections. • For example, if your CD automatic changer is one of the KD-MK series, you need a cord (KS-U15K) for connecting it to this unit. Before operating your CD automatic changer: • Refer also to the Instructions supplied with your CD changer.
¢, while playing a CD, to fast-forward the Press and hold track. SSM Press and hold 4 track. ENGLISH To fast-forward or reverse the track , while playing a CD, to reverse the To go to the next tracks or the previous tracks Press ¢ briefly, while playing a CD, to go ahead to the beginning of the next track. Each time you press the button consecutively, the beginning of the next tracks is located and played back. briefly, while playing a CD, to go back to the Press 4 beginning of the current track.
ENGLISH Selecting CD playback modes MO/RND To play back tracks at random (Random Play) Each time you press MO/RND (mono/random) while playing a CD, CD random play mode changes as follows: MO/RND RND1 RND2 (Random1) (Random2) Cancelled Mode RND Indicator Plays at random RND1 Lights All tracks of the current disc, then the tracks of the next disc, and so on. RND2 Flashes All tracks of all discs inserted in the magazine.
To extend the lifetime of the unit This unit requires very little attention, but you will be able to extend the life of the unit if you follow the instructions below. To clean the heads ENGLISH MAINTENANCE • Clean the heads after every 10 hours of use using a wet-type head cleaning tape (available at an audio store). When the head becomes dirty, you may realize the following symptoms: – Sound quality is reduced. – Sound level decreases. – Sound drops out. • Do not play dirty or dusty tapes.
ENGLISH TROUBLESHOOTING What appears to be trouble is not always serious. Check the following points before calling a service center. Causes Symptoms Remedies Insert the cassette with the exposed tape facing right. • A cassette tape cannot be inserted. You have tried to insert a cassette in the wrong way. • Cassette tapes become hot. This is not a malfunction. • Tape sound is at very low level and sound quality is degraded. The tape head is dirty. Clean it with a head cleaning tape.
AUDIO AMPLIFIER SECTION CASSETTE DECK SECTION Maximum Power Output: Front: 40 W per channel Rear: 40 W per channel Continuous Power Output (RMS): Front: 16 W per channel into 4 Ω, 40 Hz to 20 000 Hz at no more than 0.8% total harmonic distortion. Rear: 16 W per channel into 4 Ω, 40 Hz to 20 000 Hz at no more than 0.8% total harmonic distortion.
VICTOR COMPANY OF JAPAN, LIMITED V EN, GE, FR, NL COVER J 2 C 0800HISFLEJES 03/10/2000, 06:35 PM
KS-FX463R/KS-FX460R Installation/Connection Manual Einbau/Anschlußanleitung Manuel d’installation/raccordement V GET0039-003A [E] J ENGLISH DEUTSCH C 0800HISFLEJES EN, GE, FR FRANÇAIS • This unit is designed to operate on 12 volts DC, NEGATIVE ground electrical systems. • Dieses Gerät ist nur für einen Betrieb in elektrischen Anlagen mit 12 V Gleichstrom und (–) Erdung ausgelegt. • Cet appareil est conçu pour fonctionner sur des sources de courant continu de 12 volts à masse NEGATIVE.
• When using the optional stay • Beim Verwenden der Anker-Option • Lors de l'utilisation du hauban en option • When installing the unit without using the sleeve • Beim Einbau des Geräts ohne Halterung • Lors de l'installation de l’appareil sans utiliser de manchon In a Toyota for example, first remove the car radio and install the unit in its place. Zum Beispiel in einem Toyota zuerst das Autoradio ausbauen und dann das Gerät an seinem Platz einbauen.
ENGLISH DEUTSCH FRANÇAIS ELECTRICAL CONNECTIONS ELEKTRISCHE ANSCHLÜSSE RACCORDEMENTS ELECTRIQUES To prevent short circuits, we recommend that you disconnect the battery’s negative terminal and make all electrical connections before installing the unit. If you are not sure how to install this unit correctly, have it installed by a qualified technician.
PRECAUTIONS on power supply and speaker connections: VORSICHTSMASSREGELN beim Anschließen der Stromversorgung und Lautsprecher: PRECAUTIONS sur l’alimentation et la connexion des enceintes: • DO NOT connect the speaker leads of the power cord to the car battery; otherwise, the unit will be seriously damaged. • Connect the black lead (ground), yellow lead (to car battery, constant 12V), and red lead (to an accessory terminal) correctly.