JVC KW-V430B T KW-V630B T ·KW-V230BT KW-V330B T MONITOR WITH DVD RECEIVER INSTRUCTION MANUAL JVC KENWOOD Corporation This instruction manual is used to describe models listed below. Model availability and features (functions) may differ depending on the country and sales area.
BEFORE USE ............................................................ 2 How to reset your unit .................................................... 3 INITIAL SETTINGS .................................................. 4 Initial setup ......................................................................... 4 Clock settings .................................................................... 4 BASICS .................................................................... 5 Component names and functions ......
For KW-V330BT Region 1/KW-V430BT: &CAUTION Use of controls or adjustments or performance of procedures other than those specified herein may result in hazardous radiation exposure. In compliance with Federal Regulations, the following are reproductions of labels on, or inside the product relating to laser product safety. JVC KENWOOD Corporation 2967-3, ISHIKAWA-MACHI, HACHIOJI-SHI, TOKYO, JAPAN THIS PRODUCT COMPLIES WITH DHHS RULES 21 CFR [ SUBCHAPTER J IN EFFECT AT DATE OF MANUFACTURE.
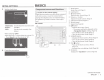
(Page 72) Initial setup When you power on the unit for the first time or reset the unit, the initial setting screen appears. • You can also change the settings on the screen. (Page 71) 1 2 Select the viewing angle in relation to the monitor panel to make the panel easier to see. 3 Display the setting screen. Finish the procedure. Perform the initial settings. 4 Display the screen. The Home screen is displayed.
INITIAL SETTINGS 5 Set the clock time. BASICS Component names and functions & Caution on the volume setting: Digital devices produce very little noise compared with other sources. Lower the volume before playing these digital sources to avoid damaging the speakers by sudden increase of the output level. KW-V230BT Synchronizes the clock time with FM RBDS. Sets the clock manually. (See below.) When selecting : Adjust the hour (G)), then adjust the minute (@).
W Volume+/- button KW-V330BT 3 <:ommon Qp~ra~ign~ Adjusts the audio volume. (Page 7) [ZJ Monitor panel* [[] Screen (touch panel) OTurning on the power KW-V230BT KW-V330BT * You can change the color of the buttons on the monitor panel. (Page 66) KW-V430BT/KW-V630BT !EJg:JffiJ,- · D OTurning off the power KW-V230BT KW-V330BT ITl C) button • Turns on the power. (Press) (See the far right column.) • Turns off the power. (Hold) (See the far right column.) • Pops up the short-cut menu.
BASICS--::------============ ===-0 Adjusting the volume 0 Turning off the screen OTurning on/off the AV source To adjust the volume (00 to 35) KW-V230BT KW-V330BT KW-V430BT KW-V630BT On the monitor panel (only for KW-V230BT/ KW-V330BD: KW-V330BT KW-V230BT You can activate the AV function by selecting a source on the Home screen. I @JHold) Press+ to increase, and press- to decrease. • Holding+ increases the volume continuously to level15.
To select a source not displayed on the Home screen: For KW-V230BT: Press [All]. (Page 10) For KW-V330BT/KW-V430BT/KW-V630BT: Press (Page 10) £555J. To turn off the AV source: Common screen operations KW-V430BT/KW-V630BT USB 0 Common screen descriptions You can display other screens any time to change the source, show the information, or change the settings, etc. ;) KW-V330BT ;,M10:28 ~ ·;' Title Name 1 Artist Name D 0 Album Title 00:00:00 ...
BASICS Gesture control on the source control screen: You can also control playback by moving your finger on the touch panel as follows (for some sources, the gesture control is not available). • Sliding the finger towards up/down: Functions same as pressing ll:l1 lbJ/[~] [(!]]*. • Sliding the finger towards left/right: Functions same as pressing [~]/[~]. • Moving your finger clockwise or counterclockwise: Increases/decreases the volume. Home screen Displays the source control screen and settings screen.
BASI.C~ screen Changes the detailed settings. (Page 71) ITJ Displays the video control menu while playing a video.*1 Selecting the playback source 1 Display all playback sources and items. On the Home screen: KW-V230BT KW-V330BT ~ [1] Displays the source control screen while playing 2 KW-V430BT KW-V630BT ~ KW-V230BT a video. Common operating buttons: [I] Selects the menu category. [1] Changes the page.
BASICS KW-V430BT/KW-V630BT • You can change the icon design on the screen. (Page 66) " Horo.~ I t*t Turwor ' ........-; .-.:~ Pil;:~l'~trc [Tuner] 0 0 Powt>roff ".,.. o.~ .o "' \. -· [Disc] [USB] [iPod] [Android ....] [BT Audio] [AV-IN]* 1 [Apps] [Spotify] [HDMI/MHL]*2 ~ •., (.~m~ra 'A-t~;' I "" ~pollfy • •...o .... m 1-'A"'I.JOA~ .........,. .....,..... .... N¢wl'la,1nll .,', STA!ldta ~~ ,::::;. S11uo~XM AVOO' I Switches to the radio broadcast.
KW-V430BT/KW-V630BT 2 Select an item to jump to. KW-V430BT/KW-V630BT KW-V230BT J D Phon~ - Screen AdJUstme~t ~'l) ·I ISJ , 01splay ' C OFF , amera n , .:" • , SETUP l Curren 1 Source [Phone] • You can also select the playback source on the pop-up short-cut menu. (See the far right column.) 00:00·00 • 10 F1101yp~ Aud10 F0009 TOOOO ~~~= Using the pop-up short-cut menu While displaying the source control screen, you can jump to another screen from the pop-up short-cut menu.
Playing a disc • If a disc does not have a disc menu, all tracks on it will be played repeatedly until you change the source or eject the disc. • For playable disc types/file types, see page 86. 0 Inserting a disc Insert a disc with the label side facing up. KW-V230BT 0 Ejecting a disc KW-V230BT KW-V430BT/KW-V630BT On the Home screen: iPod Tuner ...
DISCS~=================== KW-V330BT Playback operations When the operation buttons are not displayed on the screen, touch the area shown on the illustration. • To change settings for video playback, see page 65. For audio playback KW-V230BT ~ • The information and available operation buttons on screen differ depending on the type of disc/file being played back.
DISCS ITJ Media type [1] Track/file information • Pressing [..._]scrolls the text if not all of the text is shown. W Playing time [}] IN indicator W Playback status []] Playback mode (Page 17) [I] File type liD Current playback item information (folder no./file no./track no.) 0 Operation buttons on the source control screen • To display all available operation buttons, press [~ ]![(8]*1• All the other available buttons are shown. -To hide the window, press [ ~11[13])* 1 • Displays the screen.
DISCS~-------=========------= 0 Video menu operations [0 MENU] You can display the video control menu during video playback. • The operation buttons disappear when the screen is touched or when no operation is done for about 5 seconds. [T MENU] [ ... ] =:::::::::::::: For video playback except VCD [eli~ I [ ...... ] u~:~I [Cll)J [.] [.] • Available buttons on the screen and operations differ depending on the type of disc/file being played back. 16 Displays the disc menu (DVD).
DISC.S To select a track directly on a VCD • When playing a VCD with PBC activated, stop playback to deactivate the PBC function, then use the direct selection buttons to select a track number. • The locations of the buttons differ depending on the type of disc/file being played back. - When [Q]/[QJ* is not displayed, display the other operation button window by pressing [~ ]/[(1]]*.
0 Setting items
USB KW-V430BT/KW-V630BT Playback operations When the operation buttons are not displayed on the screen, touch the area shown on the illustration. • To change settings for video playback, see page 65. ~ [... 111 lX11 • The information and available operation buttons on screen differ depending on the type of file being played back.
us~~~==~~~~--==~~==~~~ 0 Settings for USB playback-< USB Mode> 0 Selecting a folder/track on the list 1 1 2 Display the folder/track list during playback. Select the folder ((D), then the item in the selected folder (@). Repeat the procedure until you select the desired track. 2 / AM10:28 USB Mode ~ v ~---------~ Screen RallO Dnve Selnct '4 •f, ~ ,,, 20 ~ Select the monitor type to watch a wide screen picture on the external monitor.
Android ---~~~~~~==== 0 Starting playback KW-V430BT/KW-V630BT control screen 1 Start JVC Music Play on your Android device. 2 Select "Android™" as the source. (Page 10) Playback operations 0 Playback information on the source control screen KW-V230BT 0 Operation buttons on the source OJ Artwork (Shown if the song contains artwork) • To display all available operation buttons, press [~ ]![[I)]*1• All the other available buttons are shown.
iP-od/iP-hone Android 0 Selecting a track from the menu 1 Display the audio menu. 0 Settings for playback on the Android device- 1 - Connect your iPod/iPhone according to your purpose or the type of iPod/iPhone. 2 t t:. v 22 D PI.Jyi•sl' • Artist 1 1 Arl~:;l II Artrst 2 0 AltJon· II Artrst 3 •' ~unqs 11Artt 5 t:. • "::) 0 Connecting iPod/iPhone • For details about connecting iPod/iPhone, see page 81.
iP.odliPhone. Bluetooth connection Pair the iPod/iPhone through Bluetooth. (Page 52) o For Lightning connector models connected to KW-V630BT: To watch video, connect your iPod/ iPhone to the HDMI/MHL input terminal using KS-U60 (optional accessory). (Page 81) o For Lightning connector models connected to KW-V230BT/KW-V330BT/KW-V430BT and 30-pin connector models: You cannot watch video with a Bluetooth connection. 3 .Q. Setting:.
iPod/i~hone 0 Displaying/hiding artwork of iPod/ iPhone Playback operations 1 When the operation buttons are not displayed on the screen, touch the area shown on the illustration. • To change settings for video playback, see page 65. KW-V430BT/KW-V630BT ;.
.il!od/i ~hone 0 Operation buttons on the source control screen • To display all available operation buttons, press [~ ]/[[1]*1. All the other available buttons are shown. -To hide the window, press [ ~]/[[i]]* 1 . [:hii1*2 Displays the screen. (Page 62) [FNC •1*3 Displays the pop-up short-cut menu. (Page 12) • To close the menu, press [T]. Displays the Home screen. [~][~] [... II] [)¢]! [}¢]*1 Displays the audio/video file menu. (See the right column.) • Selects a track.
Using an App You can use an App of the connected iPod touch/ iPhone/Android on this unit. • For Apps you can use on this unit, visit . 0 Preparation 1 Connect the iPod touch/iPhone/Android. • For Android: Connect the Android device via Bluetooth. (Page 52) • For iPod touch/iPhone: Connect iPod touch/ iPhone with a cable. (Page 81) - Be sure to select the appropriate connection method of iPod touch/iPhone on .
0 Switching to the Apps screen while listening to another source (when using iPod/iPhone) • Select [iPhone] for beforehand. (Page 72) KW-V330BT KW-V230BT KW-V430BT/KW-V630BT M~~~:g~~,~:~1~~~,. ~1@rtPtt~"~·.~~t8eri (Or1ly for ~\I..V630BT) You can use an App of the connected iPod touch*/ iPhone*/Android on this unit. • For Apps you can use on this unit, visit . • For Android devices, you can use more functions with the JVC Smartphone Control application.
You can stream Pandora from iPod touch/iPhone or Android devices. • Install the latest version of the Pandora application on your iPod touch/iPhone/Android. Requirements for Pandora® iPhone or iPod touch • Install the latest version of the Pandora application on your iPhone or iPod touch. (Search for "Pandora" in the Apple iTunes App Store to find and install the most recent version.
Pandora® KW-V430BT [ Jj+] Skips the current track. • Not available when the Pandora skip reaches its limit. Adds the current artist to the Station List. Adds the current track to the Station List. Bookmarks the current track. Switches the device on the screen. (Page 61) * 1 The appearance of the buttons/indicators differs depending on the [I] Playing time [I] Playback status []] Track information • Pressing[..._] scrolls the text if not all ofthe text is shown.
iHeartRadio is a free, all-in-one digital radio service that lets you listen to your favorite Live Stations or create commercial-free, all-music Custom Stations featuring songs from the artists you select and similar music. You can stream iHeartRadio from iPod touch/ iPhone or Android devices. • Install the latest version of the iHeartRadio application on your iPod touch/iPhone/Android.
iHeartRad~io~============::====== Playback operations You can operate iHeartRadio using the remote controller* 1• Only playing, pausing, and skipping are available. 0 Playback information on the source control screen Displays the Home screen. KW-V430BT Live station screen: ., ~ •HeartRad•o SIMllon IJ .. D KW-V330BT Live station screen: " Station Name Clty City Name ...... - Arist Name •• •• 0. •''10:28 ~ f.J Title Name "iHC.w'tr·~'- . ..... (lil>.
itle-.r~t~pdiQ 0 Selecting the variety level for your custom station 1 Display the variety type selection screen. 0 Searching for a station 0 Editing the list 1 1 Display the screen. Q~ • .... SCAN (,. On the custom station screen: 2 Select on the screen. (See the left column.) Display the screen. My Stations AM10:28 '#JIKwrtH.t..OIO 2 Select a station. Station 01 L;,.
SDA,tif.J~·iM!H1m·;;M;·Hw:;;;;c;;rw;wmM1MHiMM!MMiiEltMtim;\ii:MwaHwtm&;;;;w;wawnwtnmmnMJ:twzmmm:N!Wmw;am;www;wmn%1t''FH!NW\W\1tP!¥1MWHMinmtmm;;;na;m;qm;;wtzwrmmqmnffi¥i1Wtl!ilt.tliJW%1fi!iWWk\FH%HM\W!itWiMKNN1HiliHW&tM%1i&mmwmn;rwtlttWKMMrWE1MttH¥1MM¥Mii¥MFMWl'!H!M With Spotify, your music is everywhere. Working out, partying or relaxing, the right music is always at your fingertips. There are millions of songs on Spotifyfrom old favorites to the latest hits.
Spotify Playback operations KW-V430BT/KW-V630BT You can operate Spotify using the remote controller*. Only playing, pausing, and skipping are available. [fl1*4 [=1 0 Playback information on the source control screen [~1 [~1 l® 1*5 [@1*5 [+1 KW-V230BT OJ Picture data [I] Track information • Pressing [ <41111 scrolls the text if not all of the text is shown. [l] Playing time [!] Playback status [[] Progress bar * For KW-V330BT Region 1/KW-V430BT: Purchase RM-RK258 separately.
~RSl~~-~~==~--~~- ;; 0 Creating your station (Start Radio) 0 Selecting a track 1 1 Display the Spotify menu screen. 2 Select the list type (/ /), then select a desired item. t· · :.UII::L:?tf:ZF•p:fft*tM§%§:::91.~ • The list types displayed differ depending on the information sent from Spotify. 2 Enter a track!artist/playlist in the search box, then select the desired track. The playback of your station starts with the selected track.
Listening to the radio KW-V430BT/KW-V630BT [ ~]/[~]*1 0 Playback information on the source [~]*1. control screen [P1]- [PS] KW-V230BT [ .:.1: ]*2 ===== KW-V330BT Displays the preset station window. (Page 37) • To hide the window, press[~]/ []] Text information • Pressing [ ~] scrolls the text if not all of the text is shown. • Pressing [Radio Text] switches the information between Radio Text, Radio Text Plus, and PTY code.
JUNER Presetting stations 0 Storing stations in the memory You can preset 5 stations for each band. Automatic presetting-SSM (Strong-station Sequential Memory) (for FM only) Manual presetting 0 Selecting a preset station 1 Tune in to a station you want to preset. KW-V230BT/KW-V430BT/KW-V630BT (Page 36) 2 Select a preset number. KW-V230BT/KW-V430BT/KW-V630BT 1 Select the band (G)), then display the preset station window (@ ). ~-. TUNER !E8 r• 10 28 87.9MH7 ~-Jame ·,, .,,,.
TUNER KW-V330BT: 1 Select the band (G)), then display the preset station window (@ ). FM RBDS features 0 Searching for FM RBDS programs-PTY Search 0 Activating/deactivating Tl Standby Reception You can search for your favorite programs being broadcast by selecting the PTY code. 1 2 Select a PTY code. • You can also select a preset station by pressing [P1]- [PS]. 2 Select a preset station. • Pressing[<] scrolls the text if not all ofthe text is shown. • To close the window list, press[~].
SiriusXM® Satellite Radio {onlyforKw-v33oerRegion 1tKw-v43oer) Only SiriusXM® brings you more of what you love to listen to, all in one place. Get over 140 channels, including commercial-free music plus the best sports, news, talk, comedy and entertainment. Welcome to the world of satellite radio. A SiriusXM Vehicle Tuner and Subscription are required. For more information, visit www.siriusxm.com .
~ir.lYJXM® SateUi&e..RaA\o----::::::.::::"'~~ 0 Operation buttons on the source control screen • To display all available operation buttons, press [~ ]/[(8]*1• All the other available buttons are shown. - To hide the window, press [ ~]1[[3]]* 1 • [SXM1]Selects the band. [SXM4] SXM 1_.. SXM2 _.. SXM3 _.. SXM4 J L [~] [Song Title]/ [Info]/ [Category] [FNC .._]*2 [... /11]/[ ... 111*1 [CHT]/[CH.._] [MODE] 40 Displays the preset channel window. (See the far right column.
Sirilt$lM® SaJ@!l1~Jt Rad!njfl:kg::; ; ; :;;;;;;.;;;;;;;;;;:;;;;;;;;;;;;::::=::== Selecting a channel 0 Selecting a channel on the list • Pressing the info change button above the list displays information in the following order: Channel, Artist, Song Title, Content Info KW-V430BT You can obtain information on channels or select a category and then a channel. 1 Display the screen. ; -,;' Q ~~ . . . CH l' CH & (. fu 2 Select a category (G)), and then select a channel (0 ).
~iriusl(M,® S.atellite Radi~o============== 0 Replaying content 1 Display operations buttons for replay. • To start/pause the playback, press [IJI./111/ [IJI.II]*. • To skip the current track/segment, press [~]/[~]. Pressing[~] within 2 seconds of the beginning of the current track/segment returns to the previous track. - Pressing [~] after 2 seconds or more of the track have been replayed returns to the beginning of the current track/segment. • To rewind/fast forward, press and hold [I.,..
SiriusXM ® Satellite Rad~io~=================---=============:=============--·---~-======:::::=============:.:::J TuneScanTM When you activate TuneScanTM, you will hear 6 seconds of the songs, which have not been listened to from each of the music channel presets on the c~rrent Band and the currently tuned channel. Receiving alerts for desired content- Content Alert For teams 1 Display the screen.
Siriu_sXpt ® Satellit e . Radi0------.........------~-----------~-----.~-------------------------0 Selecting the content for the content alert For artists/son gs/teams 1 To delete the registered items: Press and hold the item you want to delete((})) ([a] and a checkmark is shown beside the selected item), then press [iiJ (@ ). Display the screen. (Page 43) 0 Activatin g content alert For artists/son gs/teams 1 Disp the screen.
For traffic and weather information Setting reception restrictions 3 Enter a four-digit code ((D), and then confirm (@). 0 Setting the parental control You can limit access to SiriusXM channels, such as those with mature content. Setting/changing the parental code • The initial setting is "0000." • Changing the code does not change the / settings. 1 Display the screen. • To clear the entry, press [Clear].
SiriusXM® Sate.lli~~-Radio ---Activating/deactivating the parental control You can set the parental control feature to lock any SiriusXM channel(s) or automatically lock all channels classified as "mature" by SiriusXM®. 1 Display the screen. (Page 45) 2 Select a parental control mode. Selecting the channels to lock-Parental Lock Channel Selection This parental control option allows you to pick the channels to be locked by the parental control feature.
$i tiusXM ® Si~lfdi~J~ Rildio ~::-:::-----.:-:::::::.::""""':0 Skipping unwanted channels If you do not want to receive some channels, you can skip them. To clear the channel skipping for all skipped channels: Press and hold [All Clear :1 in on the screen. Activating the channel skipping 1 Display the screen. (Page 45) 0 Resetting the SiriusXM Satellite Radio settings 2 Display the screen.
Using the rear view camera o o 4 To connect a rear view camera, see page 82. To use a rear view camera, a REVERSE lead connection is required. (Pages 79- 80) .1) Rear Camera g=:;===~x Rear Camera lnterrup11o ° ~I 1 UN Parking Guidelines Guidelines Setup ! ~=;o;;:N=====;o;::,:="= • KW-V330BT Display the screen. On the Home screen: KW-V230BT KW-V330BT r:L -o 2 KW-V430BT KW-V630BT [ON] ~ Display the setting screen.
OTHEREXTER~ALCQM~ONEN7$ To adjust the picture While the camera screen is displayed ... 3 1 Display the screen. (See the far left column.) 2 Display the parking guidelines adjustment screen. 4 • The video control menu is displayed. (Page 65) To close the picture adjustment menu, touch the same area again. 0 Using the parking guidelines on the rear view screen You can display parking guidelines to enable easier parking when you shift the gear to the reverse (R) position.
OTHER EXTERNAL COMPONENTS Using external audio/video players-AV-IN When the operation buttons are not displayed on the screen, touch the area shown on the illustration. • To change settings for video playback, see page 65. 0 Changing the AV-IN name You can change the AV-IN name displayed on the "AV-IN" source control screen. 1 Display the
OTHER EXTERNA\L COMP.ONENJ.S<,---~- Using a smartphone-HDMI/MHL (Only for KW-V630BT/KW-v630BTM) When the operation buttons are not displayed on the screen, touch the area shown on the illustration. • To change settings for video playback, see page 65. OWhat is HDMI/MHL? HDMI stands for High Definition Multi-media Interface. HDMI connections can transfer digital video source signals (such as from a DVD player) without converting them to analog.
Information for using Bluetooth® devices 0 Bluetooth® Bluetooth is a short-range wireless radio communication technology for mobile devices such as mobile phones, portable PCs, and other devices. Bluetooth devices can be connected without cables and communicate with each other. Notes • While driving, do not perform complicated operations such as dialing numbers, using the phone book, etc. When you perform these operations, stop your car in a safe place.
(ILJ.l§TO.PIH Pairing a Bluetooth device using a PIN code (for Bluetooth 2.0) 1 4 Display the screen. On the Home screen: KW-V230BT KW-V330BT Change the PIN code. • If you wish to skip changing the PIN code, go to step 3. • The PIN code is initially set to "0000". • The maximum number of digits in the PIN code is 15. KW-V430BT KW-V630BT 6 Select the unit ("JVC KW-V") on your Bluetooth device. • If a PIN code is required, enter "0000" (initial).
0 Connecting/disconnecting a registered Bluetooth device 4 Two devices can be connected simultaneously. 1 Select [ON] (to connect) or [OFF] (to disconnect) for the target (G)), then display the screen ((?)). Display the screen. (Page 53) • When a Bluetooth mobile phone is connected, the signal strength and battery level are displayed when the information is acquired from the device.
BLUEJ.OOTH Using a Bluetooth mobile phone 0 Receiving a call 0 Ending a call While talking ... 0 Switching between handsfree mode and phone mode While talking ... When a call comes in ... • Call information is displayed if acquired. • Phone operation is not available while the picture from the rear view camera is displayed. (Page 48) 0 Adjusting the volume of calls/earpiece/ microphone While talking ...
ILU~100tH~ ,~~~~~====~ 0 Sending text during a call You can send text during a call using the DTMF (Dual Tone Multi Frequency) function. While talking ... 0 Switching between two connected devices 2 Select a method to make a call. You can change the device to use in the following situations: • When 2 devices are connected • While in phone control screen [I] From the call history* [1] From the phone book* []] @] From the preset list • To preset, see page 58.
BLUETOOTH From the call history/phone book/preset list • To use the A to Z search in the phone book: 1 1 o 1 [\o 1 [ lil 1 [* 1 From the call history (missed calls/ received calls/dialed calls) From the phone book 2 To display other phone numbers: When the phone book list is displayed, you can switch between phone numbers if several phone numbers are registered for the same contact (up to 10 phone numbers per contact). Switch the phone number. Select the initial.
2 Say the name of the person you want to Direct number entry You can enter up to 31 numbers. 4 Select a preset number to store into. call. • If the unit cannot find the target, the following screen appears. Press [Start], then say the name again. 81 to delete the last entry. • Press [ • Press and hold [0/+] to add"+" to the phone number. To cancel voice dialing: Press [Cancel]. Voice dialing • Available only when the connected mobile phone has a voice recognition system.
H~~~=-==~=== BLU.t):QO'::!I~!! 0 Operation buttons on the source control screen KW-V330BT JJ Title Name ~ 6 Artist Name 4 Q e ,e;.. Album nue • To display all available operation buttons, press [~ ]/[[8]*2. All the other available buttons are shown. - To hide the window, press [ ~]/[(3]]*2 • Displays the screen. [eiill1*3 (Page 62) Displays the pop-up short-cut menu. (Page 12) • To close the menu, press [T]. Displays the Home screen.
~LUET~O~~O~ Tetlm·~======-===:::::::::::::=:::=:::::---Settings for Bluetooth devices You can change various settings for using Bluetooth devices on the screen. 1 • ON: The unit answers the incoming calls automatically after 5 seconds. • OFF (Initial): The unit does not answer the calls automatically. Answer the calls manually.
Settings for using applications of iPod touch/iPhone/Android 3 Before using applications of iPod touch /iPhone/ Android, select the device to use. When connecting the device for the first time, the setup screen (for connection, etc.) appears. Follow the procedure on the setup screen to configure the settings. Preparation: For Android: Connect the Android device via o Bluetooth. (Page 52) For iPod touch/iPhone: o - Connect iPod touch/iPhone with a cable (Page 81) or via Bluetooth (Page 52).
S&ttiNI~G~S================~ Sound adjustment 0 Using the sound equalization • The adjustments are memorized for each source until you adjust the sound again. If the source is a disc, the adjustments are stored for each of the following categories. - DVDNCD -CD - DivX*/MPEG 1/MPEG2/MP3/WMA/WAVI AAC/ FLAC • You cannot adjust the sound when the unit is in standby. • You can also display the screen as follows: - For KW-V230BT: Press [ehlil on the source control screen.
SETllfli~S 0 Setting the speakers-car type, speaker size and crossover frequency Preparation: Select the appropriate crossover network mode beforehand. (Page 62) 1 / Adjusts the output volume of the tweeter (left/right).* 2* 3 Adjusts the crossover frequency for the tweeter.*2*3 Adjusts the output volume of the selected speaker. Adjusts the crossover frequency for the front or rear speakers (high pass filter).
SETT.IN~G~S~========================= Adjusts the color. (-1 0 to+ 10) Adjusts the tint. (-1 0 to+ 10) Adjusts the sharpness. (-2 to +2) Adjustment for video playback 0 Adjusting the picture You can adjust the picture quality. 1 Display the picture adjustment screen. • You can also display the screen as follows: - For KW-V230BT: Select [Screen Adjustment] on the pop-up short-cut menu (Page 12).
SE:t::tiNGS OZooming the picture Changing the display design You can zoom the picture (, to ). • When < > is set to or (Page 65), the picture is zoomed with the aspect ratio of the setting. 1•-1 1 You can change the background and panel color. 1 Display the screen. On the Home screen: KW-V230BT KW-V330BT Display the magnification level selecting screen. KW-V430BT KW-V630BT 4 Select an item to change, then select the design or color.
SElTIN.GS Only for KW-V330BT: To change the panel color Display the panel color selection screen (G)t select the dimmer setting ([ ..J ]: dimmer on or dimmer off) (@),then select the panel color (G)). [·*· ]: KW-V330BT Display the background design selection screen (G)), select the dimmer setting ([..j ]: dimmer on or [ ·*]:dimmer off) (@),then select the background design (G)). Display the background color selection screen (G)), then select the background color(@).
0 Storing your own scene for the background image While playing a video or picture, you can capture an image and use the captured image as a background. • You cannot capture copyrighted content and images from iPod/iPhone. • When using a JPEG file as the background, make sure that the resolution is 800 x 480 pixels. • The color of the captured image may look different from that of the actual scene. 1 Play a video or picture. 2 Display the screen.
SETTINGS KW-V330BT/KW-V430BT/KW-V630BT 1 • Only selectable sources are shown. • You cannot locate [Camera] on the Home screen. Select an item to replace. On the Home screen: Press and hold the icon you want to replace. KW-V330BT 3 Display the screen. • You can change the page to display more items by pressing [_6.11lVJ. • Repeat the procedure to place icons for other items.
SETTINGS----~====================================~ 0 Adjusting the touch position 5 0 Updating the system You can adjust the touch position on the touch panel if the position touched and the operation performed do not match. You can update the system by connecting a USB device containing an update file. • To update the system, visit . 1 Create an update file and copy it to a USB device. 2 Display the screen.
SETTINGS 0
GS Adjust and store the auto-adjustment volume level for each source. (For discs, the adjustment is stored for each of the following categories: DVDNCD, CD, and DivX/MPEG 1/MPEG2/MP3/WMA/WAVI AAC/ FLAC.) The volume level will automatically increase or decrease when you change the source. • -15 to +6 (Initial: 00) 0 setting screen • Auto (Initial): Dims the screen and button illumination when you turn on the headlights. - The ILLUMIIead connection is required.
0 setting screen 1 * Select the text language used for on-screen information. • English (lnitiai)/Espalioi/Fran~ais/Deutsch/ ltaliano/Nederlands/Portugues/Tiirk~e/ PyccKMM/Z'l",:l:/IJ""'.J\j/~~~/fl1M-11Yiu/ ~f*t:Jl3t/~R tP 3t/Bahasa Malaysia/Bahasa Indonesia - For external monitors, only English/Spanish/ French/German/Italian/Dutch/Russian/ Portuguese are available. If another language has been selected, the text language for external monitors will be set to English.
~Warning: For KW-V330BT Region 1/KW-V430BT: To use the remote controller, purchase RM-RK258 separately. For KW-V230BT/KW-V330BT Region 4/KW-V630BT: The unit is equipped with a steering wheel remote control function. (Page 76) • See page 82 for connection. • Operations may differ depending on the type of steering wheel remote control. 0 Changing the battery of the remote controller You can also operate this unit from Smartphone using JVC Remote APP. For details, visit .
RE Q.para~ion•s• · lJ.sin•g • · •the.• .•re.mott 1-5 Enters a preset station number. 0 Searching for an item directly contr.o ller··(RM-RK258) ANGLE Not used for this unit. Tuner frequency ASPECT Changes the aspect ratio. • To check the current aspect ratio setting, operate on the touch panel. (Page 65) ENT Confirms selection. • To exit the search mode, press DIRECT. DIRECT Enters direct search mode. (See the right column.
Using the steering remote controller (Only for KW-V230BT/KW-V330BT 3 V] • Press [ repeatedly to change the page on the menu screen. Region 4/KW-V630BT) You can assign functions to the keys ofthe remote controller on the steering wheel. • This function is available only when your vehicle is equipped with the electrical steering remote controller. • You can only register/change the functions while you are parked.
Before installing the unit &WARNING • If you connect the ignition wire (red) and the battery wire (yellow) to the car chassis (ground), you may cause a short circuit, that in turn may start a fire. Always connect those wires to the power source running through the fuse box. • Do not cut out the fuse from the ignition wire (red) and the battery wire (yellow). The power supply must be connected to the wires via the fuse.
0 Installation procedure 1 To prevent a short circuit, remove the key from the ignition and disconnect the battery. 8 2 Make the proper input and output wire connections for each unit. 3 Connect the speaker wires of the wiring harness. 4 Connect the wiring harness wires in the following order: ground, battery, ignition. 5 Connect the wiring harness connector to the unit. 6 Install the unit in your car. • Make sure that the unit is installed securely in place.
.C Connection OConnecting wires to terminals for KW-V230BT/KW-V330BT/KW-V430BT IDatallnkiiF I!E]© rtF lOAf use REMO,:!I!© *1 F ~if ,',',',,",Soo .I ~UI - l ,@ ~ :'!~~~~--, Ill@ i EXTI/F 1 •- - © -~1 ~ ~ rr ~ I See page 82. ·~. rr01ill.:.- ----.J) Connect the antenna cord ~< totheantennaterminal. (@s® ®~~~c::::J ' ~I :1= IQ'\~,@ ~MIC ,::.___., 11 l ~ 1 ·~ r: *2 0 Seepage82.* 1 USB terminal (1.0 m): See page 81.* 3 See page 82.
0 Connecting wires to terminals for KW-V630BT ~ nnnn~D ..____..rr=...~Fl1 ~U 10 Afuse i ,~ @@l LJ EJ use OOUT See page 82. See page 82. I L Ill 1 I I '5' '6' 1 i8l Mrc REMO IN ! \i::f/ ~~ Seepage82. I ==•-[t Connect the antenna cord ~ ~ lFo)) Fcf~l'~~.o1 sv::o:900mA'Y' ¥'"" ~ to the antenna terminal. connect tot heve h.1c1e,s reverse 1amp harness HDMI/MHL [fniTI '@ ~ @~ Ill Purple with white stripe (Reverse sensor wire) REVERSE w W ..
.,Qr:LII,,!rJaQI,~·II,l\I~;L!&*G!,I:r!=5\&!lcl.,;I6!!&J&ir£mr&tMw£1i&ttHiif£1ff.
OConnecting a smartphone Android, etc. (with MHL) (commercially available) Android, etc. (with HDMI) (commercially available) Micro USB D D t Micro USB to-r USB cable (commercially available) Q.......,.
,.Q,,~~E,J:I.Q,~l!IDI~!J;.,.,f!:.,.l:,.f=,.!!,.!;;.!.~hl%£tiiit N i !itt!!! M liM ;;;• iNi'\M11Wiiiiit;itiiif! MHtlii!i!MMiiiiMHilM;;JttMHii& lMMiHW1Mfm!Mi!;MMMHiitMiiiiMiHMiiiiMMJ!iiMiiWMitfMWMIM fiiF !WW111?Hlttti!WMiM%iMM!il!\1!MilM!ft:MMiMi!}ttltMHMSHiiMMiMM!I!\WMflW!!I!JJMtii [I] iDatalink input for connecting ADS adapter 1 (commercially available)* [1] Steering wheel remote controller input (REMO IN I REM0-1 N) * 2 • Connect to the vehicle's steering remote harness using the Steering Remote cable (
0 Removing the unit 1 Remove the trim plate. (See the left column.) 2 Insert the two extraction keys (@),then pull them as illustrated so that the unit can be removed. 0 Removing the trim plate 1 Engage the catch pins on the extraction key (@) and remove the two locks on the lower part. Lower the frame and pull it forward. _, 2 Remove from the upper two catches. • The frame can be removed from the top side in the same manner.
Maintanance 0 Caution on cleaning the unit Do not use any solvent (for example, thinner, benzine, etc.), detergent, or insecticide. This may damage the monitor or the unit. OTo keep discs clean Dirty discs may not play correctly. If a disc does become dirty, wipe it with a soft cloth in a straight line from the center to the edge. Recommended cleaning method: Gently wipe the panel with a soft, dry cloth.
Playing audio files (MP3/WMA/WAVI AAC/FLAC) • This unit can play back files with the extension code: - For disc: <.mp3>, <.wma>, <.wav>, <.m4a> - For USB mass storage class device: <.mp3>, <.wma>, <.wav>, <.aac>, , <.flac> • This unit can play back files that meet the conditions below: - Bit rate: MP3: 8 kbps- 320 kbps WMA: For disc: 5 kbps- 320 kbps For USB : 32 kbps- 192 kbps AAC: 16 kbps - 320 kbps - Sampling frequency: MP3/WMA: 8 kHz- 48 kHz WAV:44.
Playing Recordable/Rewritable discs • This unit can recognize a total of 5 000 files and 250 folders (a maximum of 999 files per folder). • Use only "finalized" discs. • This unit can play back multi-session discs; however, unclosed sessions will be skipped while playing. • Some discs or files may not be played back due to their characteristics or recording conditions.
• When operating an iPod/iPhone, some operations may not be performed correctly or as intended. In this case, visit the following JVC web site: • For some iPod/iPhone models, the performance may be abnormal or unstable during operation. In this case, disconnect the iPod/iPhone device, then check its condition. If the performance is not improved or slow, reset your iPod/iPhone. • When you turn on this unit, the iPod/iPhone is charged through the unit.
If an error occurs while using the unit, a message appears. Take appropriate action according to the following message/remedy/cause list. "No Signal" /"No Video Signal": • Start playback on the external component connected to the iPod/AV-IN input terminal. • Check the cords and connections. • Signal input is too weak. ''Miswiring DC Offset Error''r'Warning DC Offset Error": • A speaker cord has shorted or it has come into contact with the car chassis.
11 Pandora not available": • You cannot use the Pandora application from the area where you are currently trying to access Pandora. 11 Try again later": • The Pandora server is under maintenance. 11 Station does not exist": • The selected station has been deleted by another device or has expired. ''SXM Check Tuner": • Make sure the SiriusXM Connect Vehicle Tuner is connected to the unit.
ODiscs OUSB Recordable/Rewritable discs cannot be played back. Insert a finalized disc. • Finalize the discs with the component which you used for recording. "Reading" does not disappear from the screen. • Turn the power off and on again. Tracks on the Recordable/Rewritable discs cannot be skipped. • Insert a finalized disc. • Finalize the discs with the component which you used for recording. Playback does not start. • The format of files is not supported by the unit.
ES No sound of videos comes out. • Connect with USB Audio and Video cable KS-U59 (optional accessory) to iPod/iPhone 30-pin connector model. Other cables cannot be used. • Select [USB+ AV-IN] for . (Page 23) OTuner SSM automatic presetting does not work. • Store stations manually. (Page 37) Static noise while listening to the radio. • Connect the antenna firmly. DAV-IN II AV-IN" cannot be selected on the Home screen. • Select connection method other than [USB+ AV-IN] for .
0 DVD player section 0 USB interface section D/A Converter 24 USB Standard Audio Decoder Linear PCM/Dolby Digitai/MP3/ WMA/WAV/AAC (.m4a) Compatible Device DivX*/MPEG1/MPEG2/JPEG File System Video Decoder :«•»W..:«««'Jo»>»:«-".«o-Y.<-~''"«<'N>}:->;·»Ao:.;.>M•:--..:,_.;.;.-,»»:o>>".«o:.;.;.:.o.;.»:.»>o".M<'..:,:.C.,:.:.»Y.-»".->»>.-.;."""""*"><-:>;'.
CES Equalizer 13 Band Band Frequency (Hz) (BAND1-13): 62.5/100/160/250/400/630/1 k/ 1.6k/2.5k/4k/6.3k/1 Ok/16k Level: -09 to +09 (-9 dB to +9 dB) Q: 1.35/1.5/2.0 ~~~~~~ HPF (High Pass Filter) Frequency (Hz): Through/30/40/50/60/70/80/90/ 100/120/150/180/220/250 Slope: - Gain: -6/-12/-18/-24 dB/Oct. -8/-7/-6/-5/-4/-3/-2/-1/0 dB ~ OGeneral Selectivity (±400 kHz) ~ 80dB 0 DSP section Operating Voltage Stereo Separation 40 dB (1 kHz) 14.4 V (1 0.
0 Trademarks and licenses • Dolby, Dolby Audio and the double-D symbol are trademarks of Dolby Laboratories. • "DVD Logo" is a trademark of DVD Format/Logo Licensing Corporation registered in the US, Japan and other countries. The II AAC" logo is a trademark of Dolby Laboratories. • Microsoft and Windows Media are either registered trademarks or trademarks of Microsoft Corporation in the United States and/or other countries.
JVC 0916DTSMDTJEIN
U.S.A. JVCKENWOOD USA Corporation TO OUR VALUED CUSTOMER THANK YOU FOR PURCHASING THIS JVC PRODUCT. WE WANT TO HELP YOU ACHIEVE A PERFECT EXPERIENCE. NEED HELP ON HOW TO HOOK UP? NEED ASSISTANCE ON HOW TO OPERATE? NEED TO LOCATE A JVC SERVICE CENTER? LIKE TO PURCHASE ACCESSORIES? .JVC LIMITED WARRANTY ONLY FOR PRODUCT PURCHASED IN U.S.A.
CANADA JVC JVCKENWDDD CANADA INC. Warranty applies only to PRO!'c~~s~i!~~;Canada GARANTIE by JVCKENWOOD CANADA INC. JVCKENWOOD CANADA INC. (hereafter called "JVC") gives the following express warranty for each new JVC product distributed in Canada by JVC and sold by an authorized JVC dealer. JVC warrants that this JVC product is free, under normal use and maintenance, from any defects in material and workmanship subject to the following terms and conditions: 1. To Obtain Warranty Service: 3.