
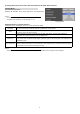
Additional manual


【Starting Auto Tracking in Area】
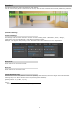
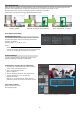
1. Click the 【Area】 tab on the tracking page of the
View Remote Screen.
2. Set the PTZ position from A1 to A4.
・Set the PTZ position and press the 【Set】 button
from A1 to A4. The current PTZ position is
registered from A1 to A4.
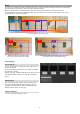
・Set the area in the order of A1, A2, A3 and A4
from the left as seen from the camera.
Exam
p
le: Do not
p
lace A2 to the left of A1.
・As shown in this chart, set each area to overlap
the s
p
ace for one
p
erson with the ad
j
acent area.
・Register more than one area.
・CAUTION: Do not set an unregistered area as
the 【Starting Area】.
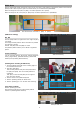
3. Set 【Starting Area】 and 【Target Retention Time】.
4. Set the 【Tracking Mode】 to "Area".
5. Set the 【Tracking】 to "on" to start Auto Tracking.
Auto tracking starts after the camera PTZ position
is moved to 【Starting Area】.
If the trackin
g
tar
g
et cannot be detected after
【Target Retention Time】 is exceeded, the display
returns to 【Starting Area】.
【Stop Auto Tracking】
Set the 【Tracking】 to "off".
to fixed position of 【Starting Area】.
Auto Tracking stops and the camera PTZ position returns
4
5
3
1
2
Starting Auto Tracking in Area
set the area to overlap the space
for one person with the adjacent area.
Example Area
7