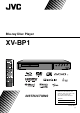
Blu-ray Disc Player XV-BP1 For customer use: INSTRUCTIONS Enter below the Model No. and Serial No. which are located on the rear of cabinet. Retain this information for future reference. Model No. Serial No.
CAUTION RISK OF ELECTRIC SHOCK DO NOT OPEN CAUTION: TO REDUCE THE RISK OF ELECTRIC SHOCK DO NOT REMOVE COVER (OR BACK) NO USER-SERVICEABLE PARTS INSIDE REFER SERVICING TO QUALIFIED SERVICE PERSONNEL. This lightning flash with arrowhead symbol within an equilateral triangle is intended to alert the user to the presence of uninsulated dangerous voltage within the product’s enclosure that may be of sufficient magnitude to constitute a risk of electric shock to persons.
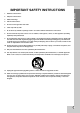
1. Read these instructions. 2. Keep these instructions. 3. Heed all warnings. 4. Follow all instructions. 5. Do not use this apparatus near water. 6. Clean only with dry cloth. 7. Do not block any ventilation openings. Install in accordance with the manufacturer’s instructions. 8. Do not install near any heat sources such as radiators, heat registers, stoves, or other apparatus (including amplifiers) that produce heat. 9.
Notes on Copyrights Because AACS (Advanced Access Content System) is approved as content protection system for BD format, similar to use of CSS (Content Scramble System) for DVD format, certain restrictions are imposed on playback, analog signal output, etc., of AACS protected contents. The operation of this product and restrictions on this product may vary depending on your time of purchase as those restrictions may be adopted and/or changed by AACS after the production of this product.
Contents About the Operations . . . . . . . . . . . . . . . . . .24-32 Symbol Display . . . . . . . . . . . . .6 General playback features . . . . . . . . . . .24-25 Symbols Used in this Manual . . . . . . . . . . . . .6 If a disc menu screen is displayed . . . . . . . .26 Notes on Discs . . . . . . . . . . . . . . . . . . . . . . .6 Enlarge the playback image . . . . . . . . . . . . .26 Moisture Condensation . . . . . . . . . . . . . . . . .6 Time Search . . . . . . . . . . . . . . . . . . . . . .
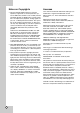
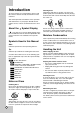
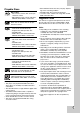
Introduction To ensure proper use of this product, please read this owner’s manual carefully and retain for future reference. Cleaning Discs Fingerprints and dust on the disc can cause poor picture quality and sound distortion. Before playing, clean the disc with a clean cloth. Wipe the disc from the center out. This manual provides information on the operation and maintenance of your player. Should the unit require service, contact an authorized service location.
Blu-ray Disc - Discs such as movies that can be purchased or rented - BD-R/RE discs that contain audio titles, MPEG4, MP3, WMA, or Photo files. DVD-VIDEO Discs such as movies that can be purchased or rented • Some AVCHD format discs may not play, depending on the recording condition. • AVCHD format discs need to be finalized. • “x.v.Color” offers a wider color range than normal DVD camcorder discs. Regional Code This unit has a regional code printed on the rear of the unit.
BD-ROM Disc Features BD-ROM Discs can store 25 GB (single layer) or 50 GB (dual layer) on a single sided disc - about 5 to 10 times the capacity of a DVD. BD-ROM Discs also support the highest quality HD video available in the industry (up to 1920 x 1080) Large capacity means no compromise on video quality. Furthermore, a BD-ROM disc has the same familiar size and look as DVD. • The following BD-ROM disc features are disc dependent and will vary.
Because BD-ROM are a new format, certain disc, digital connection and other compatibility issues are possible. If you experience compatibility problems, please contact an authorized Customer Service Center. Viewing high-definition content and up-converting standard DVD content may require an HDMIcapable input or HDCP-capable DVI input on your display device. Some BD-ROM and DVD discs may restrict the use of some operation commands or features.
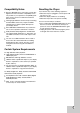
Using a USB Flash Drive This unit can play the movie, music and photo files contained on the USB Flash Drive. Insert/Remove a USB Flash Drive 4. Select [USB] then press ENTER. [MOVIE], [MUSIC] or [PHOTO] menu appears. Details for the menu are on pages 30-32. Using the Home Menu From the Home Menu screen you can access all the Media for playback and setting of the unit. 1. Press HOME and the [Home Menu] appears. USB Flash Drive Inserting a USB Flash Drive Insert straight-in until it fits into place.
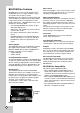
a b c d e f g h i a 1/' (STANDBY/ON) Button Switches the unit ON or OFF. f x (STOP) Stops playback. b Disc Tray Insert a disc here. g N / X (PLAY / PAUSE) Starts playback. Pause playback temporarily, press again to exit pause mode. c Display Window Shows the current status of the player. Introduction Front Panel h . / > (SKIP) Go to next or previous file/track/chapter. d Remote Sensor Point the Remote Control here. i USB Port Connect a USB Flash Drive.
♠ Remote Control a Depending on a disc type or the pre-recorded contents of the BD-ROM disc, different functions may be executed than other media or there are no responses when pressing some buttons (depending on media used). OPEN/CLOSE (Z): Opens and closes the disc tray. 0-9 numerical buttons: Select numbered options in a menu. CLEAR: Removes a mark on the search menu or a number when setting the password. b c JVC TV Control Buttons: • TV STANDBY/ON (1/'): Turn the TV on or off.
Installation and Setup HDMI connection HDMI compatible TV HDMI If you have a HDMI TV or monitor, you can connect it to this player using a HDMI cable. 1. Connect the HDMI jack on the player to the HDMI jack on a HDMI compatible TV or monitor (H). 2. Set the TV’s source to HDMI (refer to TV’s Owner’s manual). Notes: You must select a HDMI audio output and a maximum sampling frequency that your TV accepts using [HDMI] and [Sampling Freq.] options on the setup menu (see page 20).
Connections to Your TV Make one of the following connections, depending on the capabilities of your existing equipment. Rear of TV L Tips: Depending on your TV and other equipment you wish to connect, there are various ways you could connect the player. Use only one of the connections described below. Please refer to the manuals of your TV, Stereo System or other devices as necessary to make the best connections. Caution – Make sure the player is connected directly to the TV.
Make one of the following connections, depending on the capabilities of your existing equipment. Note: Since many factors affect the type of audio output, see “The unit’s Audio Output Specifications” on page 36 for details. Connecting to an Amplifier via 2 Channel Audio Output Connect the Left and Right 2CH AUDIO OUT jacks on the player to the audio left and right in jacks on your amplifier, receiver, or stereo system, using audio cables (A).
Internet connection • This player can be connected to a local area network (LAN) via the LAN port on the rear panel. After making the physical connection the player needs to be set up for network communication. This is done from the [Setup] menu — see “[NETWORK] Menu” on page 22 for detailed instructions. Connect the player’s LAN port to the corresponding port on your Modem or Router using a LAN cable. Use a commercially available straight LAN cable (Category 5/CAT5 or better with RJ45 connector).
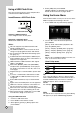
Resolution Setting 5. Use v / V to select the desired resolution then press ENTER to confirm your selection. The player provides several output resolutions for HDMI OUT and COMPONENT VIDEO OUT jacks. You can change the resolution using [Setup] menu or pressing the RESOLUTION button in stop mode. Available resolution according to connection and media format Since several factors affect the resolution of video output, see “Video output according to the Resolution setting” on next page.
Available resolution according to the resolution setting • When the non-copy protected media is playing back Video Output HDMI OUT COMPONENT VIDEO OUT 480i 480i 480i 480p 480p 480p 720p 720p 720p 1080i 1080i 1080i 1080p / 24Hz 1080p / 24Hz 1080i / 60Hz * 1080p / 60Hz 1080p / 60Hz 1080i / 60Hz Resolution Setting • When the copy protected media is playing back Video Output HDMI OUT COMPONENT VIDEO OUT Resolution Setting 480i 480i 480i 480p 480p 480p 720p 720p 480p 1080i 1080
By using the Setup menu, you can make various adjustments to items such as picture and sound. You can also set a language for the subtitles and the Setup menu, among other things. For details on each Setup menu item, see pages 19 to 23. TV Aspect Ratio [4:3 Letter Box] – Select when a standard 4:3 TV is connected. Displays theatrical images with masking bars above and below the picture. [4:3 Pan Scan] – Select when a standard 4:3 TV is connected. Displays pictures cropped to fill your TV screen.
[LANGUAGE] Menu [PCM Stereo] – Select if you connect this unit’s HDMI OUT or DIGITAL AUDIO OUT jack to a device with two-channel digital stereo decoder. [PCM Multi-Ch] (HDMI only) – Select if you connect this unit’s HDMI OUT jack to a device with multi-channel digital decoder. [DTS Re-Encode] – Select if you connect this unit’s HDMI OUT or DIGITAL AUDIO OUT jack to a device with DTS decoder. Display Menu Select a language for the [Setup] menu and onscreen display.
[LOCK] Menu (Parental Control) Rating DVD Use the v / V / b / B buttons to select [LOCK] settings in the [Setup] menu. The [LOCK] settings affect only BD and DVD playback. Set the password and have to input it to validate the [LOCK] settings. Blocks playback of rated disc based on their content. (Not all discs are rated.) 2. To access this option, you must input the password you have created. If you have not yet entered password, you will be prompted to do so. Input a password and press ENTER.
[NETWORK] Menu IP Setting The [NETWORK] settings are needed to use the BD-Live features. Some BD-ROM discs may enable you to access special BD-ROM sites, if you connect the player to the Internet. For example, if an BD-ROM site includes content such as links to future movie trailers, you can watch the downloaded on-line content on the player. You do not need to connect to a PC to use this function. This option is available only if [IP Mode] option is set to [Static IP].
[OTHERS] Menu Changes the background of the initial screen. Java Font Size BD You can adjust the default text size displayed for the BD-J contents during BD-ROM playback. This setting is only valid when BD-J contents do not set the size of text. Please select a font size bigger than 24 when the player is connected with an HD TV. Installation and Setup Skin Initialize You can reset the player to its original factory settings or initialize the BD storage. 1. Select [Initialize] option then press B. 2.
Operations General playback features 1. Load your chosen disc in the tray, with the playback side down. 2. Start playback using the HOME menu (see page 10). Buttons Operations OPEN / CLOSE (Z) Opens or closes the disc tray. ALL N (PLAY) Starts the playback. ALL ENTER Acknowledges the selection on the menu screen (Disc menu, Title menu, POP-UP menu, etc.). BD x (STOP) Stops the playback. ALL The unit records the stopped point, depending on the disc. “Xx” appears on the screen briefly.
General playback features (Continued) Buttons Operations REPEAT Playing repeatedly: During playback, press REPEAT repeatedly to select a desired repeat mode. DVD, BD, AVCHD: Chapter/Title/Off Audio CD, MP3, WMA, MPEG4: Track/All/Off Note: If you press > once during Repeat Chapter/Track playback, the repeat playback cancels.
If a disc menu screen is displayed DVD BD AVCHD MPEG4 Use b / B / v / V buttons to select the title/chapter you want to view, then press ENTER to start playback. Enlarge the playback image AVCHD MPEG4 1. During playback or pause mode, press ZOOM to display the [Zoom] menu. 2. Use b / B to select zoom mode (16 steps). Press RETURN to exit the [Zoom] menu. 3. To return to the normal picture size, select [Off] on the [Zoom] menu. Note: This function may not work on some disc or titles.
Using Color (R, G, B, Y) Buttons BD These buttons are available only during BD-J contents playback. Use the appropriate buttons as indicated by the display. Depending on the disc contents, the functions of each button may differ. Screen Saver The screen saver appears when you leave the player in Stop mode for about five minutes. If the Screen Saver is displayed for five minutes, the unit automatically turns itself off.
Enjoying BD-LIVE™ or BONUS VIEW™ in BD-Video BD This unit allows you to enjoy functions such as picture-in-picture, secondary audio and Virtual packages, etc., with BD-Video supporting BONUSVIEW (BD-ROM version 2 Profile 1 version 1.1/ Final Standard Profile). In addition to the BONUSVIEW function, BD-Video supporting BD-Live (BD-ROM version 2 Profile 2) that has a network extension function allows you to enjoy more functions such as online games by connecting this unit to the Internet.
Playing a DVD VR Format Disc MOVIE menu options This unit will play DVD-RW disc that is recorded using the Video Recording (VR) format. 1. Use v / V to select a title on the [MOVIE] menu then press ENTER. The menu options appear. 1. Insert a disc and close the tray. The [MOVIE] menu appears on the TV screen. 2. Use v / V to select an option, then press ENTER. 2. Press v / V to select a title then press N (PLAY) and playback starts. You can use variable playback functions. Refer to pages 24-27. 3.
Playing a MPEG4 Movie File • [Play] Starts playback the selected file. • [Resume Play] Starts playback from where The player can play MPEG4 files. Before playing MPEG4 files, read “MPEG4 file requirement” on right. 1. Insert a disc containing MPEG4 files, or connect the USB Flash Drive containing MPEG4 files. 2. Press HOME and Home Menu appears. 3. Select [Movie] then press ENTER. The [MOVIE] menu appears on the TV screen.
Playing an Audio CD or MP3/WMA files ACD MP3 2. Use v / V to select an option, then press ENTER. WMA The player can play Audio CDs and MP3/WMA files. Before playing MP3/WMA files, read “MP3/WMA audio file requirement” on right. 1. Insert Audio CD or a disc containing MP3/WMA files, or connect the USB Flash Drive containing MP3/WMA files 2. Press HOME and Home Menu appears. 3. Select [Music] then press ENTER. The [MUSIC] menu appears on the TV screen.
Viewing a Photo file PHOTO This unit can play photo files. Before playing photo files, read “Photo file requirement” on below. 1. Insert a disc containing photo files, or connect the USB Flash Drive containing photo files. 2. Press HOME and Home Menu appears. 3. Select [Photo] then press ENTER. The PHOTO menu appears on the TV screen. Note: When the USB Flash Drive is connected and a disc is inserted simultaneously, the menu for selecting a media will appear. Select a media then press ENTER.
Reference Language Codes Use this list to input your desired language for the following initial settings: [Disc Audio], [Disc Subtitle] and [Disc Menu].
Troubleshooting Symptom Possible Cause No power. • The power cord is disconnected. • Plug the power cord into the wall outlet securely. The power is on, but the player does not work. • No disc is inserted. • Insert a disc. No picture. • The TV is not set to receive video signal output. • Select the appropriate video input mode on the TV. • The video cable is not connected securely. • Connect the video cable securely. • The selected resolution is not capable with your TV.
Specifications General Power requirements: AC 120 V~, 60 Hz Power consumption: 18W Dimensions (W x H x D): Approx. 16.9 x 2.1 x 9.7 inches (430 x 54 x 245 mm) without foot Net Weight (Approx.): 6.2 lbs (2.8 kg) Operating temperature: 41 °F to 95 °F (5 °C to 35 °C) Operating humidity: 5 % to 90 % Outputs VIDEO OUT: 1.0 V (p-p), 75 Ω, sync negative, RCA jack x 1 COMPONENT VIDEO OUT: (Y) 1.0 V (p-p), 75 Ω, sync negative, RCA jack x 1 (Pb)/(Pr) 0.
The unit’s Audio Output Specifications Jack/ Setting Source Analog Output Stereo SPDIF (DIGITAL AUDIO OUT) PCM Stereo DTS Re-encode *3 Primary Pass-Thru *1 Dolby Digital PCM 2ch PCM 2ch DTS Dolby Digital Dolby Digital Plus PCM 2ch PCM 2ch DTS Dolby Digital Dolby TrueHD PCM 2ch PCM 2ch DTS Dolby Digital DTS PCM 2ch PCM 2ch DTS DTS DTS-HD PCM 2ch PCM 2ch DTS DTS Linear PCM 2ch PCM 2ch PCM 2ch DTS PCM 2ch Linear PCM 5.1ch PCM 2ch PCM 2ch DTS PCM 2ch Linear PCM 7.
Open source software notice This product includes • Freetype library : copyright © 2003 The FreeType Project (www.freetype.org). • Zlib compression library: Copyright © 1995-2002 Jean-loup Gailly and Mark Adler. • Expat library : copyright © 2006 expat maintainers. • OpenSSL library : - cryptographic software written by Eric Young (eay@cryptsoft.com). - software written by Tim Hudson (tjh@cryptsoft.com). - software developed by the OpenSSL Project for use in the OpenSSL Toolkit. (http://www.openssl.
Reference MEMO 39
XV-BP1 EN 0609SKMLGEEGL P/N: MFL62026457