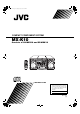
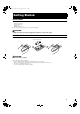
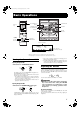
Cover.fm Page 1 Wednesday, July 3, 2002 3:12 PM COMPACT COMPONENT SYSTEM MX-K10 Consists of CA-MXK10 and SP-MXK10 3-CD SOUND MODE CONVERTER PROGRAM PANDOM AUX STANDBY FM /AM STANDBY/ON SET CANCEL / DEMO FM / AM AUX PHONES CD1 CD2 CD3 CD TAPE A/B TAPE DIS TAPE CD REC START CD 3 TUNING DUBBING TAPE A/B ECHO CD 2 ACTIVE BASS EX. CD 1 COMPU PLAY CONTROL VOLUME EJECT ACTIVE BASS EX.
MX-K10(A).book Page 2 Wednesday, July 3, 2002 9:44 AM Warnings, Cautions and Others CAUTION To reduce the risk of electrical shocks, fire, etc.: 1. Do not remove screws, covers or cabinet. 2. Do not expose this appliance to rain or moisture. 3. To prevent electric shock, match wide blade of plug to wide slot, fully insert. Caution –– switch! Disconnect the mains plug to shut the power off completely. The switch in any position does not disconnect the mains line. The power can be remote controlled.
MX-K10(A).book Page 1 Wednesday, July 3, 2002 9:44 AM Introduction Thank you for purchasing the JVC Compact Component System. We hope it will be a valued addition to your home, giving you years of enjoyment. Be sure to read this instruction manual carefully before operating your new stereo system. In it you will find all the information you need to set up and use the system. If you have a query that is not answered by the manual, please contact your dealer.
MX-K10(A).book Page 2 Wednesday, July 3, 2002 9:44 AM Table of Contents Introduction....................................................................................................................1 Features.................................................................................................................................................... 1 How This Manual Is Organized ..............................................................................................................
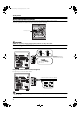
MX-K10(A).book Page 3 Wednesday, July 3, 2002 9:44 AM English Getting Started Accessories Make sure that you have all of the following items, which are supplied with the System. AM Loop Antenna (1) Remote Control (1) Batteries (2) FM Wire Antenna (1) If any of these items are missing, contact your dealer immediately. CAUTION: • Make all connections before plugging the System into an AC power outlet.
Getting Started Using the Remote Control The Remote Control makes it easy to use many of the functions of the System from a distance of up to 7m away. You need to point the Remote Control at the remote sensor on the System’s fron panel. 3-CD PLAY & EXCHANGE SOUND MODE CONVERTER RO C REPEAT 1 BIT DUAL D/A K CD-R/RW PLAYBACK MX-K10 P PO COMPACT COMPONENT SYSTEM UM PROGRAM PANDOM STANDBY CLA E S SIC VO L English MX-K10(A).
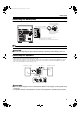
Getting Started Connecting the AM Antenna Rear Panel of the Unit Turn the loop until you have the best reception. AM loop antenna (Supplied) Attach the AM loop to its base by snapping the tabs on the loop into the slot in the base. AM antenna wire (not supplied) If reception is poor, connect the outside antenna. • Even when connecting an outside AM antenna, keep the indoor AM loop connected. CAUTION: • To avoid noise, keep antennas away from the System, the connecting cord and the AC power cord.
English MX-K10(A).book Page 6 Wednesday, July 3, 2002 9:44 AM Getting Started Connecting External Equipment Connect a signal cord (not supplied) between the System’s AUX-IN terminals and the output terminals of the external MD recorder, tape deck, etc. You can then listen to the external source through the System. Signal cord (not supplied) Pin-plug x 2 MD recorder, tape deck, etc. (not supplied) Pin-plug x 2 Connecting to the Wall Outlet Plug the AC power cord into the wall outlet.
MX-K10(A).
English MX-K10(A).book Page 8 Wednesday, July 3, 2002 9:44 AM Basic Operations Fade-out Muting (FADE MUTING) You can mute the output with one touch operation. To muting the output, press the FADE MUTING button on the Remote Control. The output is faded out. To release muting, press the FADE MUTING button once again. The output is faded in to the previous level.
MX-K10(A).
English MX-K10(A).book Page 10 Wednesday, July 3, 2002 9:44 AM Using the Tuner • Manual Tuning Briefly press the 22 or ¡ button on the Unit to move from frequency to frequency until you find the station you want. OR • Auto Tuning If you hold down the 22 or ¡ button on the Unit for 1 second or more and then release it, the frequency changes down, or up, automatically until a station is found.
MX-K10(A).book Page 11 Wednesday, July 3, 2002 9:44 AM English Using the CD Player 3-CD MX-K10 PROGRAM CANCEL AUX PANDOM STANDBY STANDBY/ON SET CANCEL / DEMO ¢ 4 7 CD1 REPEAT CD2 CD3 CD CD 6 CD 6 22 ¡ FM / AM AUX PHONES REC START / STOP ACTIVE BASS EXTENSION TAPE CD REC START CD 3 TUNING CLOCK /TIMER CD 2 ACTIVE BASS EX.
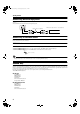
English MX-K10(A).book Page 12 Wednesday, July 3, 2002 9:44 AM Using the CD Player Example of indication: When CD door has ejected once and then CD-1 is pressed. (DISC1 is selected) Shows that this disc number is selected. 1 2 3 ❏ When you use an 8 cm CD, place it on the inner circle of the tray. ❏ You can load CDs while listening to the other source. ❏ When power is turned off with the tray opened, the tray is automatically closed.
Using the CD Player Basics of Using the CD PlayerNormal Play To Play CDs 1 2 • Removing/changing the CDs during playback While playing back a CD (e.g. CD-1), you can remove or change the other CDs (e.g. CD-2 and CD-3) by pressing the CD Open/ Close 0 button. After removing or changing, press the same button to close the tray. To Select a Track Load CDs. Press one of the Disc button (CD1-CD3) you want to play. The selected disc number (e.g. “CD-1” ) appears on the display.
English MX-K10(A).book Page 14 Wednesday, July 3, 2002 9:44 AM Using the CD Player Programming the Playing Order of the Tracks You can program the playing order of the tracks on all the CDs. Note that you can only make a program when the CD Player is stopped. ❏ You can program up to 32 tracks in any desired order including the same tracks. To Make a Program 1 2 Load CDs In Stop mode, set the CD Player in Program Play mode.
Using the CD Player Random Play Tray Lock Function The tracks of all the CDs will play in no special order when you use this mode. • To use Repeat Play for Random Play, press the REPEAT button to select “ALL” or “1” before starting playback. For details, see “Repeating Tracks”mentioned below. In order to safely keep the CD in the CD Player, the tray can be electronically locked. When the electronic lock is on, the tray cannot be opened even if the CD Open/Close 0 button on the Unit is pressed.
Using the Cassette Deck (Listening to a Tape) 3-CD MX-K10 REPEAT 1 BIT DUAL D/A SOUND MODE CONVERTER ROC COMPACT COMPONENT SYSTEM PROGRAM UM SLEEP PANDOM AUX FM MODE STANDBY STANDBY/ON 7 / DEMO FM / AM AUX PHONES CD REC START / STOP 4 ¢ CD1 CD2 CD3 CD TAPE A/B TAPE 22 DIS TAPE CD REC START KIP CS PRESET CD 3 TUNING DUBBING CLOCK /TIMER ACTIVE BASS EXTENSION C L AS SIC E SET CANCEL TAPE 3 FM /AM 7 POP STANDBY/ON K CD-R/RW PLAYBACK PLAY & EXCHANGE VOL English
MX-K10(A).book Page 17 Wednesday, July 3, 2002 9:44 AM 3-CD English Using the Cassette Deck (Recording) CD-R/RW PLAYBACK PLAY & EXCHANGE REPEAT 1 BIT DUAL D/A SOUND MODE CONVERTER ROC MX-K10 AUX PANDOM FM MODE STANDBY/ON STANDBY FM /AM 7 TAPE 3 4 ¢ CD REC START REC START/STOP FM / AM AUX CD1 CD2 CD3 CD ACTIVE BASS EXTENSION DIS TAPE CD REC START /RANDOM PROGRAM CD 3 TUNING DUBBING CLOCK /TIMER KIP CS PRESET TAPE A/B CD 2 ACTIVE BASS EX.
English MX-K10(A).book Page 18 Wednesday, July 3, 2002 9:44 AM Using the Cassette Deck (Recording) Standard Recording This is the basic method for recording any source. The System also has special ways for recording CD to tape, and tape to tape, which save you time and effort, as well as give you some special effects.
MX-K10(A).
Using the Timers 3-CD MX-K10 REPEAT 1 BIT DUAL D/A SOUND MODE CONVERTER PROGRAM SLEEP UM SLEEP PANDOM AUX FM MODE FM /AM STANDBY STANDBY/ON / DEMO FM / AM AUX PHONES CD REC START / STOP CD2 REPEAT PROGRAM /RANDOM CD3 CD TAPE A/B TAPE KARAOKE ACTIVE BASS EX. ECHO DIS CD 3 TUNING CD 2 ACTIVE BASS EX.
Using the Timers 2. Press the 4 or ¢ button to set the minute, then press the SET button. Setting the Daily Timer Once you have set the Daily Timer, the timer will be activated at the same time every day. The Timer indicator ( ) on the display shows that the Daily Timer you have set is in effect. You can set the Daily Timer whether the System is turned on or off. • Perform each setting within 30 seconds. Otherwise, setting will be cleared and the procedure must be repeated from the beginning.
English MX-K10(A).book Page 22 Wednesday, July 3, 2002 9:44 AM Using the Timers Preparation for each music source: Perform the following operation according to the music source you have selected. Then, the System enters Volume Setting mode. When selecting TUNER FM or TUNER AM: Press the 4 or ¢ button to select the preset station number, then press the SET button. When selecting – CD – – –: 1. Press the 4 or ¢ button to select the disc number, then press the SET button.
Using the Timers Using the Unit You can set the time in the same way as for setting the Daily Timer. 1 Insert a blank or erasable tape into the Deck B and wind past the tape leader. 2 Press the CLOCK/TIMER button until “ON TIME” immediately after “REC” appears on the display. Then, the "REC" indicator blinks on the display.
English MX-K10(A).book Page 24 Wednesday, July 3, 2002 9:44 AM Using the Timers Setting the SLEEP Timer Timer Priority Use the Sleep Timer to turn the System off after a certain number of minutes when it is playing. By setting the Sleep Timer, you can fall asleep to music and know that your System will turn off by itself rather than play all night. • You can only set the Sleep Timer when the System is on. Since each timer can be set independently, you may wonder what happens if the settings overlap.
Care And Maintenance Handle your CDs and tapes carefully, and they will last a long time. Cassette Tapes • If the tape is loose in its cassette, take up the slack by inserting a pencil in one of the reels and rotating. • If the tape is loose, it may get stretched, cut, or caught in the cassette. Compact Discs Recordable • Only CDs bearing these marks can be used with this System. However, continued use of irregular shape CDs (heartshape, octagonal, etc.) can damage the System.
English MX-K10(A).book Page 26 Wednesday, July 3, 2002 9:44 AM Troubleshooting • If you are having a problem with your System, check this list for a possible solution before calling for service. • If you cannot solve the problem from the hints given here, or the System has been physically damaged, call a qualified person, such as your dealer, for service. Symptom No sound is heard. Poor radio reception The disc tray does not open. The CD skips. The CD does not play. The cassette holder cannot be opened.