ENGLISH DLA-HD950/DLA-HD990 Basic Operation NEED HELP ON HOW TO HOOK UP? NEED ASSISTANCE ON HOW TO OPERATE? NEED TO LOCATE A JVC SERVICE CENTER? LIKE TO PURCHACE ACCESSORIES? D-ILA PROJECTOR Preparation THANK YOU FOR PURCHASING THIS JVC PRODUCT. WE WANT TO HELP YOU ACHINEVE A PERFECT EXPERINCE. D-ILA PROJECTOR TO OUR VALUED CUSTOMER DLA-HD950/DLA-HD990 DLA-HD950 DLA-HD990 FOR SERVICING(Only in U.S.A) Getting Started INSTRUCTIONS IS HERE TO HELP! TOLL FREE: 1(800)252-5722 http://www.jvc.
Getting started 1 Safety Precautions Safety Precautions IMPORTANT INFORMATION This product has a High Intensity Discharge (HID) lamp that contains mercury. Disposal of these materials may be regulated in your community due to environmental considerations. For disposal or recycling information, please contact your local authorities or for USA, the Electronic Industries Alliance: http://www.eiae.org. WARNING: TO PREVENT FIRE OR SHOCK HAZARDS, DO NOT EXPOSE THIS APPLIANCE TO RAIN OR MOISTURE.
ENGLISH 300 mm and above 300 mm and above SYNC 200 mm and above Others - When replacement parts are required, be sure the service technician has used replacement parts specified by the manufacturer or with same characteristics as the original part. Unauthorized substitutions may result in fire, electric shock, or other hazards. Troubleshooting When the power supply cord or plug is damaged. If liquid has been spilled, or objects have fallen on the product.
Getting started 1 Safety Precautions (Continued) POWER CONNECTION For USA and Canada only Use only the following power cord. Power cord The power supply voltage rating of this product is AC110V – AC240V. Use only the power cord designated by our dealer to ensure Safety and EMC. Ensure that the power cable used for the projector is the correct type for the AC outlet in your country. Consult your product dealer.
ENGLISH Information for Users on Disposal of Old Equipment and Batteries [European Union only] These symbols indicate that equipment with these symbols should not be disposed of as general household waste. If you want to dispose of the product or battery, please consider the collection systems or facilities for appropriate recycling. Notice: The sign Pb below the symbol for batteries indicates that this battery contains lead.
Getting started 1 ESPAÑOL / CASTELLANO Información para los usuarios sobre la eliminación de baterías/pilas usadas [Sólo Unión Europea] Estos símbolos indican que el equipo con estos símbolos no debe desecharse con la basura doméstica. Si desea desechar el producto o batería/pila, acuda a los sistemas o centros de recogida para que los reciclen debidamente. Baterías/pilas Atención: La indicación Pb debajo del símbolo de batería/pila indica que ésta contiene plomo.
ENGLISH Brugerinformation om bortskaffelse af gammelt udstyr og batterier [Kun EU] Disse symboler angiver, at udstyr med disse symboler ikke må bortskaffes som almindeligt husholdningsaffald. Hvis du ønsker at smide dette produkt eller batteri ud, bedes du overveje at bruge indsamlingssystemet eller steder, hvor der kan ske korrekt genbrug. Bemærk: Tegnet Pb under symbolet for batterierne angiver, at dette batteri indeholder bly.
Getting started 1 РУССКИЙ Сведения для пользователей по утилизации старого оборудования и батарей [только для Европейского союза] Данные символы указывают на то, что оборудование, на которое они нанесены, не должны утилизироваться, как обычные бытовые отходы. При необходимости утилизировать такое изделие или батарею обратитесь в специальный пункт сбора для их надлежащей переработки. Батарея Уведомление: Надпись Pb под символом батар ей указывает на то, что данная батарея содержит свинец.
ENGLISH The JVC projector also features THX Movie Mode, a pre-calibrated video setting for watching movies on DVD, Blu-ray HD or broadcast television. This playback feature is designed to recreate the cinema experience at home by setting the display’s gamma, luminance, color temperature and other settings to mirror those used by filmmakers in post-production. THX Movie Mode also ensures projector brightness is optimal for large screen viewing.
Getting started 1 Contents Getting started Settings Safety Precautions.............................................2 The structure of the Settings menu................. 28 THX Certification.................................................9 isf information..................................................... 9 Contents...........................................................10 Procedures for Menu Operation....................... 30 How to Read this Manual/Accessories/ Setting Menu.................
ENGLISH About this Manual INPUT HDMI 2 COMP. VIDEO S-VIDEO PC LENS ASPECT HIDE This manual mainly describes the operating method using the remote control. ● Buttons on the remote control are described as [Button Name]. ● Items on the menu are described as “Selection Item”. ■ Conventions in this manual LIGHT TEST Preparation HDMI 1 Getting Started How to Read this Manual/ Accessories/Optional Accessories Describes the limitations of the functions or usage.
Getting started 1 Controls and features ■ Front Side/Left Side CAUTION ● ● Do not place your fingers in the gap at the lens during lens shift adjustment. This may cause injuries if your fingers are caught in between the gap. ( P25) Do not let your fingers or other objects get caught in between the lens cover while closing the cover. This can cause injuries or malfunction.
ENGLISH WARNING LAMP Light on/Blinking (Orange): Lamp warning ( P47) STANDBY/ON To turn on/off the power To switch input ( INPUT P24) To hide the image temporarily ( P25) HIDE Preparation Light on (Red): Standby mode Light on (Green): During projection Blinking (Green): Image is temporarily hidden ( P25) Blinking (Red): Cool Down mode ( P25) Getting Started Light on (Red): Warning mode ( P47) Up button Right button OK Down button To display the menu ( P30) MENU To return to the previous men
1 Getting started Controls and features (continued) ■ Remote Control To turn off the power STAND BY ON To turn on the power INPUT To select input mode ( P24) To control lens ( P24) To set the screen size ( P26) To display test pattern HDMI 1 HDMI 2 COMP.
ENGLISH Getting Started How to Use the Remote control Loading Batteries 1 2 3 Preparation ● If the remote control has to be brought closer to the projector to operate, it means that the batteries are wearing out. When this happens, replace the batteries. Insert the batteries according to the marks. and operate the remote control. Effective Range of Remote Control Unit ■ When directing the remote control Basic Operation ● Be sure to insert the end first.
Preparation 2 Selecting Connecting Devices ● Do not turn on the power until connection is complete. ● The connection procedures differ according to the device used. For details, refer to the instruction manual of the device to be connected. ● This device is used for image projection. Connect to an audio output device such as amplifier and speaker for audio output from the connected device. ● The images may not be displayed depending on the devices and cables to be connected.
ENGLISH Getting Started Connecting Connecting via Video Cable and S-Video Cable video cable (sold separately) To video input terminal Video output VCR and camcorder Preparation This unit SYNC To S-video input terminal S-video output Connecting via Component Video Cable Basic Operation S-video cable (sold separately) This unit Settings BD/DVD player SYNC Component video output terminals Component video cable (sold separately) CR/PR (red) CB/PB (blue) Y (green) P36 - 12 ) Others ● Set “C
Preparation 2 Connecting(Continued) Connecting via HDMI Cable This unit Notebook PC BD/DVD recorder To HDMI 1 or HDMI 2 input terminal HDMI cable (sold separately) HDMI output terminal ● If noise is produced, take PCs (Notebook PC) away from this unit. ● Use only HDMI-approved equipment. ● Reducing the length of the cable is recommended if there is no picture.
ENGLISH Getting Started Connecting via SCART-RCA Cable This unit Preparation RS-232C BD/DVD player for European market SCART-RCA cable (sold separately) SCART terminal ● Set “COMP.” in the setting menu to “SCART”.
Preparation 2 Connecting(Continued) Connecting via PC Cable This unit Notebook PC To PC input terminal PC cable(sold separately) ● For information on supported input signals, please refer to “Specifications” . ( VGA output terminal P58) Connecting via Trigger Cable This unit Screen SYNC To Trigger output terminal CAUTION Trigger cable (sold separately) ● Do not supply the power to the other devices. ● Do not connect audio terminals of the other devices such as headphones etc.
ENGLISH While installing, please place this unit and the screen perpendicular to each other. Failing to do so may increase trapezoidal distortion. Please refer to “Keystone”. ( P39 - 25 ) Set Angle Getting Started Installing the Projector and Screen 10° 10° Preparation 10° 10° ● The angle range which can be set for this unit is ±10°. ● Malfunctions may occur if the angle is not set within the above-mentioned range.
2 Preparation Installing the Projector and Screen(Continued) Screen Size and Projection Distance Determine the distance from the lens to the screen to achieve your desired screen size. This unit uses a 2.0x power zoom lens for projection.
ENGLISH Getting Started MEMO Preparation Basic Operation Settings Troubleshooting Others 23
Basic Operation 3 Projecting Image This section describes the basic operations to project input images on the screen. Preparation 1 STAND BY ON Insert the power plug to the power outlet INPUT HDMI 1 HDMI 2 COMP.
ENGLISH Getting Started 3 Adjust image position (shift). Lens control TIPS LENS Shift You can hide the image temporarily Select Back BACK Operate You can hide the image temporarily. ● After adjusting the image position, it may be necessary to select HIDE “Pixel Adjust” from the Settings menu “Installation”. ( P38 - 23 ) ● Every time the button is pressed, the adjustment item will be switched among “Focus”, “Zoom” and “Shift”.
Basic Operation 3 Convenient Features during Projection You can change the screen size of the projected image or hide the surrounding area of an image for which quality at the outer area has deteriorated. Setting the Screen Size The projected image can be set to a most appropriate screen size (aspect ratio). 4:3 ASPECT STAND BY ON zoom ● The screen size can also be set from “Aspect(Video)” of the setting menu.
ENGLISH Mask the image MEMO 1 Display the setting menu Getting Started 2 ● Masking is available only when high Picture Adjust MENU Color Tint Color Temp. Gamma Advanced Lens Aperture 0 0 0 0 Preparation Contrast Brightness definition images are input. Natural Picture Mode 6500K Normal 0 Reset Operate Exit MENU 2 Select “Input Signal” Back BACK Select “Mask” 2 Confirm HDMI COMP.
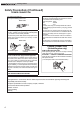
Settings 4 The structure of the Settings menu The menu for this device is structured as follows: CAUTION ● There are items that cannot be modified without entry. Picture Adjust 01 Picture Mode 02 Contrast 03 Brightness 04 Color 05 Tint 06 Color Temp. 07 Gamma 08 Advanced 09 Lens Aperture 10 Reset Adjusts the pattern of the projected image. Setting: Cinema 1, Cinema 2, Cinema 3, Natural, Stage, Dynamic, User 1, User 2, THX Adjusts the contrast of the projected image.
ENGLISH 22 Lens Control 23 Pixel Adjust 25 Keystone 26 Screen Adjust Setting: Focus, Zoom, shift, Image pattern, Lock Makes fine adjustments of 1 pixel unit for each minor color shift in the horizontal/vertical direction of the image. Setting: horizontal and vertical Flips the image to the left or right, up or down according to the projection state of the projector. Setting: Front, Ceiling Mount (F), Rear Ceiling Mount (R) Compensates for trapezoidal distortion caused by installation.
Settings 4 Setting Menu Projected images can be adjusted to a desired view by changing the initial settings. Procedures for Menu Operation Example: When changing “Aspect(Video)” from “4:3” to “16:9” STAND BY ON INPUT HDMI 1 VIDEO HDMI 2 COMP. S-VIDEO PC 1 Display the setting menu Picture Adjust Contrast Brightness Color Tint Color Temp.
ENGLISH Item values shown in are factory settings. Getting Started Setting Menu ● Items that can be configured differ according to the input signals. ● There are items that cannot be modified without entry. Picture Adjust 01 Picture Mode Preparation CAUTION Selects Picture Mode(Cinema 1, Cinema 2, Cinema 3, Natural, Stage, Dynamic, User 1, User 2 and THX). This is the picture setting closest to film. It is best suited for general movie viewing.
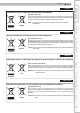
4 Settings Setting Menu (Continued) Picture Adjust > Color Temp. 06 Color Temp. Sets the color temperature of the projected image. (Cannot set when the “Picture Mode” in “THX”.) 5800K Select this to give a reddish tinge to the image. 6500K Select this to have a balanced image. 7500K 9300K High Bright Select this to give a bluish tinge to the image. Select this to give a greater bluish tinge than 7500K. Select this to get the brightest image.
ENGLISH Sets the gradation characteristics of the projected image. (Cannot set when the “Picture Mode” in “THX”.) For normal circumstances, select this setting. A Set gamma to “A”. B Set gamma to “B”. C Set gamma to “C”. D Set gamma to “D”. This is the setting for Standard Tones. This is the setting for expressing rich dark tones. This is the setting for the characteristic tonal qualities of film. This setting provides even richer darker tones than setting B.
Settings 4 Setting Menu (Continued) * Regarding “Copy” and “Paste” 1 Copies the Gamma Adjustment data. Picture Adjust Gamma Normal A B C D Costom1 Costom2 Costom3 Correction Value 1023 White Red Geen Blue 512 1.8 Copy Paste Reset 0 50 100(%) Input: 50% Output: 595 Exit MENU Back Check Back TEST BACK Operate Select After Select copy using the 2 Pastes the copied data. / buttons.
ENGLISH 1 Set the picture mode of the color management. 3 Select color adjustment. 2 Select the color to be adjusted by color management.
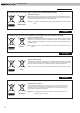
4 Settings Setting Menu (Continued) Input Signal > COMP. 12 COMP. Configures the input signal for the component video input terminals. Color Space Y Pb/Cb Pr/Cr Select this when the component video signals are input. RGB Select this when the RGB video signals are input. Select this when RGB video signals and sync signals are input via the SCART interface for European markets. SCART ● The setting is available only if the component video terminals are selected.
ENGLISH Getting Started Input Signal > Aspect (Video) 16 Aspect (Video) Configures the screen size of the projected image. Sets the screen size of the projected image as 4:3. 16:9 Sets the screen size of the projected image as 16:9. Zoom Zooms the images. (This item cannot be selected in the case of HD signals.) ● This setting can also be configured from the remote control. ( ● The items cannot be set in the case of PC signals.
Settings 4 Setting Menu (Continued) Input Signal > Mask 20 Mask Masks (Hides) the outer area of the projected image. 2.5% Mask 2.5% of the screen. 5% Mask 5% of the screen. Off No masking. ● Masking is available only when high definition images are input. Input Signal > Film Mode 21 Film Mode Selects this to view movies shot on film. After determining if the picture is 24 frame film or 60 frames (50 frames) video, Auto changes the setting to the optimal progressive conversion.
ENGLISH Getting Started Installation > Installation Style 24 Installation Style Flips the image to the left or right, up or down according to the projection state of the projector. Select this for tabletop front projection. Ceiling Mount (F) Select this for ceiling front projection. Rear Select this for tabletop rear projection. Ceiling Mount (R) Select this for ceiling rear projection.
4 Settings Setting Menu (Continued) Display Setup > Line Display 30 Line Display Sets whether to display the input setting when switching the input. 5 sec Display for 5 seconds. Off Do not display. Display Setup > Source Display 31 Source Display Sets whether to display the source of input signals when changing the input. On Display the source of input signals. Off Do not display. Display Setup > Logo 32 Logo Sets whether to display “Logo” during startup. On Display for 5 seconds.
ENGLISH Configures the output of Trigger terminal. Off On(Power) On(V-Stretch) Do not activate. Move the screen UP/DOWN in conjunction with the power. Operate the anamorphic lens in conjunction with the “V-Stretch”. Display 6 types of test patterns. For checking the color condition and tone, and the pixel size. Use whenever necessary. ● This can also be displayed by the remote control. ( P14) Automatically powers off when there is no operation for a certain duration. Off Disables the off timer.
Settings 4 Customizing Projected Images You can adjust the projected image to a desired image quality and register the adjusted value. (Picture Mode) Besides the five default “Cinema 1”, “Cinema 2”, “Cinema 3”, “Natural”, “Stage”, “Dynamic” and “THX” settings, there are 2 more types of user-defined settings for Picture Mode. Changing the Initial Setting of Picture Mode STAND BY ON “Contrast”, “Brightness”, “Color”, “Tint”, “Color Temp.
ENGLISH 1 CAUTION Select the picture mode Getting Started Registering User-defined Picture Mode ● Adjustment settings of image quality Adjust picture quality ● See “Changing the initial setting of picture Mode” for procedures on adjusting the picture quality. ( 3 P42) To end Preparation 2 will not be registered if other picture mode is selected before registering these settings.
5 Troubleshooting Troubleshooting Before sending the unit to your authorized dealer for repair, please check the following points. The following situations are not malfunctions. ■ You do not need to worry about the following situations if there is no abnormality on the screen. ● Part of the top surface or front of the unit is hot. ● A creaking sound is heard from the unit. ● An operating sound is heard from the inside of the unit. ● Color smear occurs on some screens.
ENGLISH Is the setup of “Control with HDMI” function “Off”? Set up the “Control with HDMI” function to “Off”. P35 - 11 ● Even if the “Control with HDMI” function is “On”, there are still some devices cannot reveal image normally. Color does not appear or looks strange Is the image correctly adjusted? P31 - 04 05 Adjust the focus. P24 Video image is fuzzy Is the focus correctly adjusted? Is the unit placed too near or too far away Set the unit at a correct distance from the screen.
5 Troubleshooting What to Do When these Messages Are Displayed Message Cause (Details) No device is connected to the input terminal. The input terminal is connected but there is no signal. COMP. No Input Input the video signals. A video signal that cannot be used in this unit has been input. Input video signals that can be used. COMP. * The names of input terminals such as COMP. will be displayed in yellow. This message is displayed when the accumulated lamp time has exceeded 2900 hours.
ENGLISH The accumulated lamp time or warning mode of this unit is displayed by the indicators. For information on indicator display during normal operation, see “Controls and Features”. ( No.
Troubleshooting 5 Replacing the Lamp The lamp is a consumable item. If the image is dark or the lamp is turned off, replace the lamp unit. ● When the lamp replacement time approaches, a message is displayed on the screen and the condition is indicated by the indicator. ( P46, 47) CAUTION ● Pull the power plug from the power ● ● ● outlet. Failure to do so may cause injuries or electric shocks.
ENGLISH Install the new lamp unit CAUTION ● Use only genuine replacement parts ● MEMO 5 Tighten the screws of the new lamp unit ● Tighten the screws with a After Replacing the Lamp ● Do not place the removed lamp unit at screwdriver. ● Insert the top part (with 2 claws) of the lamp cover into the unit. ● Fasten the screws with a Settings Attach the lamp cover locations that is reachable by children or near combustible items. Dispose used lamp units in the same way as fluorescent lamps.
Troubleshooting 5 Replacing the Lamp (Continued) STAND BY ON Resetting Lamp Time After replacing the lamp, reset the lamp time. INPUT HDMI 1 HDMI 2 COMP. VIDEO S-VIDEO PC LENS ASPECT HIDE 1 Insert the power plug to the power outlet Light on (Red) LIGHT TEST 2 Must operate with the remote control in the standby mode (the projector is powered, but is not turned on). ● Press in the order as shown.
ENGLISH Clean the filter regularly or air intake efficiency may deteriorate and malfunction may occur. 1 Remove the inner filter CAUTION ● Pull the power plug from the power outlet. 2 Clean the filter If the filter is damaged or too dirty to be cleaned ● Replace with a new filter. A dirty filter ● ■ Inner Filter Part No.: ● Wash the filter with water and dry it in a shaded area. ● In extremely soiled cases, using a neutral detergent is recommended.
6 Others RS-232C Interface Control of this unit via a computer is possible by connecting the computer to this unit with a RS-232C cross cable (D-Sub 9 pin). RS-232C Specifications This unit Pin No. Signal Function Signal Direction 2 RxD Receive data PC→This unit 3 TxD Transmit data This unit→PC 5 GND Signal ground - 1,4,6 - 9 N/C - - ● PC refers to the controller such as a personal computer.
ENGLISH Operating command and data (Binary code) 0000 Connection check 5057 Power supply 4950 Input 5243 Remote Control Data description Check whether communication is available between this unit and the PC during standby. During standby 31: Turn on the power. During power on 30: Turn off the power. (Standby mode) During power on 30: S-VIDEO 31: VIDEO 32: COMP. 33: VGA 36: HDMI 1 37: HDMI 2 Sends the same code as the supplied remote control.
6 Others RS-232C Interface (Continued) ■ Remote control code ● Binary code is sent during communication. Remote control button name 54 Binary code Remote control button name Binary code 37 33 30 31 TEST 37 33 35 39 37 33 30 32 CINEMA 3 37 33 36 36 BACK 37 33 30 33 STAGE 37 33 36 37 ON 37 33 30 35 CINEMA 2 37 33 36 38 STAND BY 37 33 30 36 CINEMA 1 37 33 36 39 HIDE 37 33 31 44 NATURAL 37 33 36 41 LENS.AP.
ENGLISH Getting Started RS-232C Communication Examples This section shows the communication examples of RS-232C. ■ Operating command Type Connection check Power (Off) Input (COMP.
6 Others Copyright and Caution About Trademarks and Copyright ● HDMI, HDMI logo and high definition multimedia interface are trademarks or registered trademarks of HDMI Licensing LCC. Caution D-ILA Device Characteristics Do not project still pictures or pictures that have still segments for a long period of time. The still parts of the picture may remain on the screen. Take special notice of images on the screens of video games and computer programs.
ENGLISH Measures to prevent the unit from toppling or dropping should be taken for safety reasons and accident prevention during emergencies including earthquakes. When mounting this unit on a pedestal or ceiling, remove the 4 feet on the bottom surface and use all the 4 screw holes (M5 screws) to mount.
6 Others Specifications Product Name D-ILA Projector Model Name DLA-HD950 / DLA-HD990 Display Panel/Size D-ILA device*1 *2 / 0.7" (1920pixels x 1080pixels) x 3 (Total no. of pixels: Approx. 6.22million) Projection Lens 2.0 x power zoom lens (1.4:1 to 2.8:1)(Zoom/Focus: Power) Light-source Lamp 200 W Ultra-high pressure mercury lamp [Part No. : BHL5010-S] Average lifespan: 3000 hours (normal mode) Screen Size Approx. 60" to 200" (Aspect ratio: 16:9) objection Distance Approx. 1.
ENGLISH No. Designation Resolution fh [kHz] fv [Hz] Dot CLK [MHz] Polarity Total No. Total No. of dots of lines H V [dot] [line] No. of No. of effective effective dots lines [dot] [line] 640 X 480 31.500 60.000 25.200 - - 800 525 640 480 2 VGA 59.94 640 X 480 31.469 59.940 25.175 - - 800 525 640 480 3 SVGA 60 800 X 600 37.879 60.317 40.000 + + 1,056 628 800 600 4 XGA 60 1024 X 768 48.363 60.004 65.000 - - 1,344 806 1,024 768 5 WXGA 60 1280 X 768 47.
6 Others Specifications(Continued) Dimensions ■ Top Surface 90.6 297 477.5 ■ Bottom Surface 64.5 365 ■ Back Surface 60 Φ42 42.5 Lens center 12 95 105 225.
ENGLISH HDMI Standard.............................................Page 58 Connecting........................................... Page 18 Settings......................................... Page 35 Getting Started Index LED Warning...............................................Page 47 Mask Settings...............................................Page 27 Batteries Types.................................................. Page 11 Shift Shift Amount........................................Page 21 Adjustment.. .....
6 Others MEMO 62